1. Introdución
Thank you for choosing the STRICH 37-Key Kids Mini Digital Piano Keyboard. This manual provides essential information for the safe and effective use of your new musical instrument. Please read it thoroughly before operation and retain it for future reference.

Figure 1.1: STRICH 37-Key Kids Mini Digital Piano Keyboard (Pink)
2. Información de seguridade
- Supervise sempre os nenos durante o uso.
- Keep the piano away from water and moisture.
- Non expoña a temperaturas extremas nin a luz solar directa.
- Empregue só o adaptador de corrente fornecido ou as baterías recomendadas.
- Evite deixar caer o instrumento ou sometelo a impactos fortes.
- Garantir unha ventilación adecuada ao redor da unidade.
3. Contido do paquete
Verifica que todos os elementos estean presentes no paquete:
- STRICH 37-Key Mini Digital Piano Keyboard
- Adaptador de alimentación (DC 6V)
- Kid's Piano Course Music Book
- Key Stickers for learning
- Manual de instrucións

Figure 3.1: Included accessories with the STRICH piano.
4. Configuración
4.1 Powering the Piano
The piano can be powered by either the included DC 6V power adapter or 4 AA batteries (not included).
4.1.1 Instalación da batería
- Locate the battery compartment on the underside of the piano.
- Use un desaparafusador para abrir a tapa do compartimento da batería.
- Insira 4 pilas AA, asegurándose de polaridade correcta (+/-).
- Coloque a tapa e fíxaa co parafuso.

Figura 4.1: Compartimento para 4 pilas AA.
4.1.2 Power Adapter Connection
Insert the DC 6V power adapter into the 'DC: 6V' port on the rear panel of the piano, then plug the adapter into a standard wall outlet.
4.2 Applying Key Stickers
The included key stickers are designed to assist with learning. Refer to the 'Kid's Piano Course' music book for guidance on proper placement.

Figure 4.2: Key stickers applied to the piano keys.
4.3 Music Stand Placement
The detachable music stand can be inserted into the slot on the top panel of the piano to hold your music book or tablet.
5. Instrucións de funcionamento
5.1 Acendido/apagado e control de volume
Locate the 'VOL' knob on the rear panel. Turn the knob clockwise to power on the piano and increase the volume. Turn it counter-clockwise to decrease the volume and power off the piano.

Figure 5.1: Volume and power control knob.
5.2 Conexión de dispositivos externos
The rear panel features various ports for enhanced functionality:
- MIDI Port: Connect to MIDI-compatible devices for advanced musical applications.
- Porto USB: Connect to a computer or other USB devices.
- PHONE Port: Conecta auriculares para practicar en privado.
- INPUT Port: Conecta fontes de son externas (por exemplo, un reprodutor de MP3) para reproducir con el.
- SUSTAIN PEDAL Port: Conecta un pedal de sustain opcional para unha duración de nota máis longa.

Figura 5.2: Conexións do panel traseiro.
5.3 Conectividade sen fíos
The piano supports wireless connection, allowing playback of songs and music from compatible mobile phones and tablets. Refer to your device's instructions for pairing with a Bluetooth audio device.
5.4 Learning with the Music Book and Stickers
The included 'Kid's Piano Course' music book provides simple tutorials and songs that correspond to the key stickers. Follow the color and shape codes to play basic melodies.
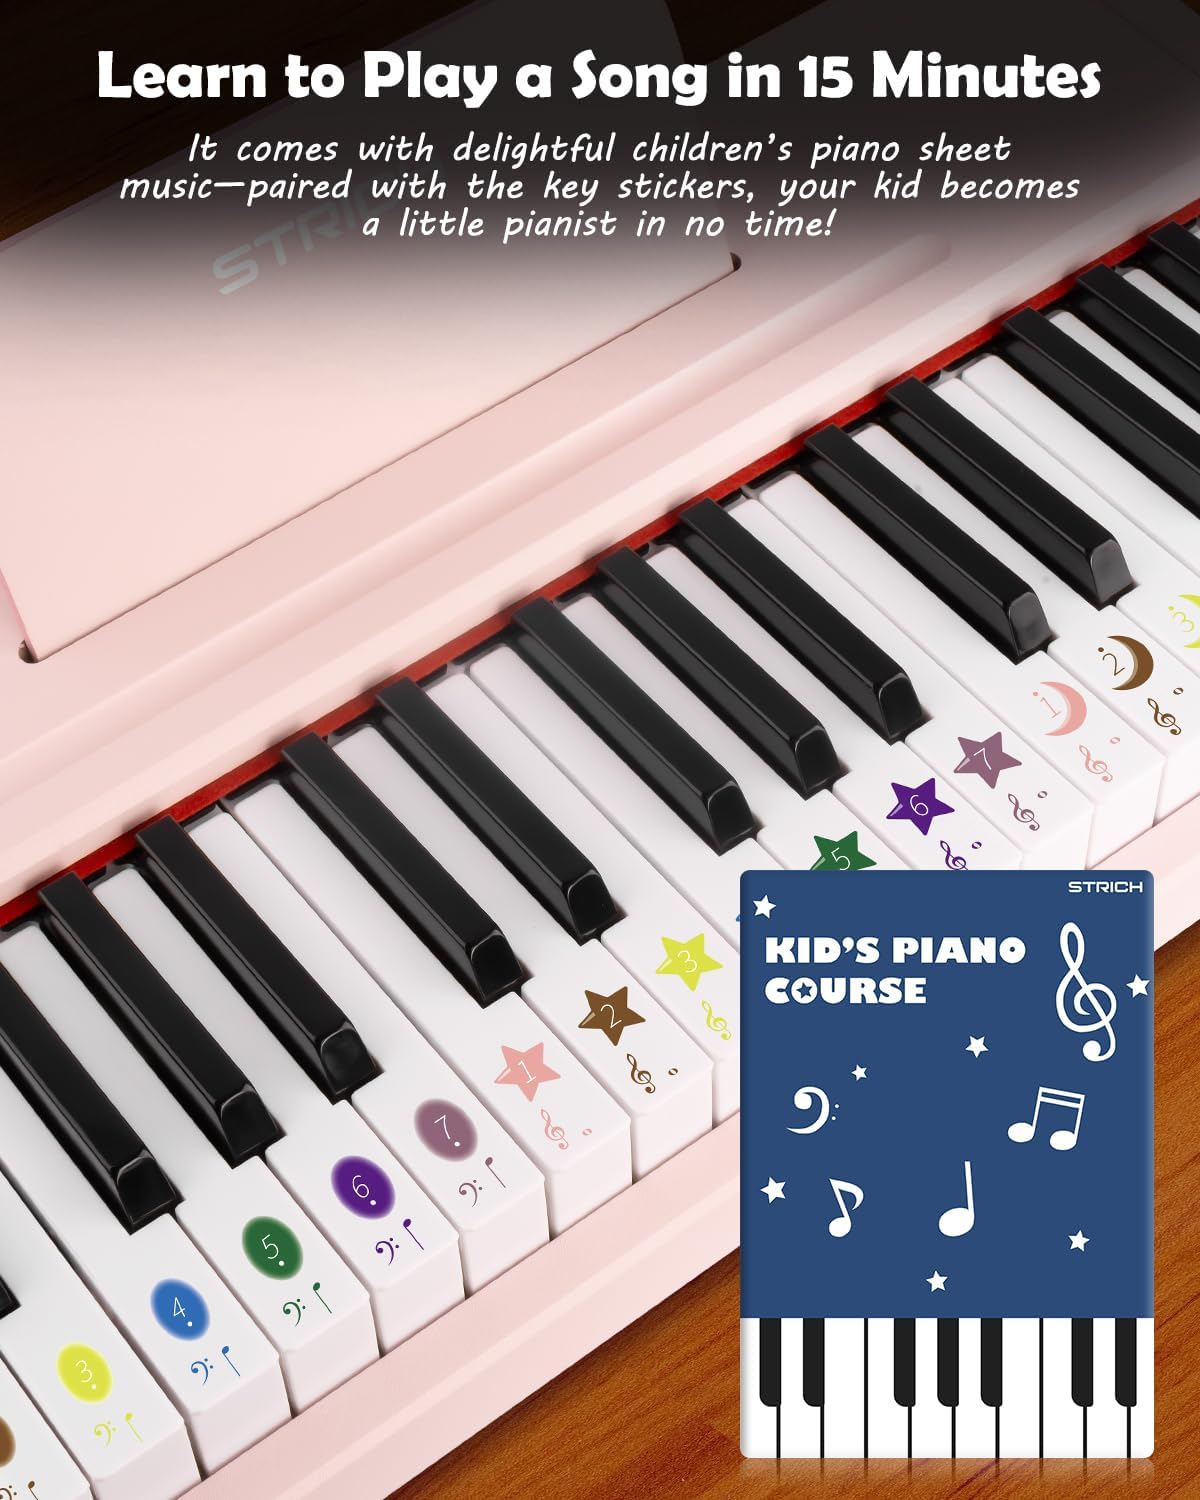
Figure 5.3: Learning to play using the music book and key stickers.
6. Mantemento
- Clean the piano surface with a soft, dry cloth. Avoid abrasive cleaners or solvents.
- Se non se usa durante un período prolongado, retire as pilas para evitar fugas.
- Store the piano in a cool, dry place, away from direct sunlight and extreme temperatures.
7 Solución de problemas
- Sen son: Ensure the piano is powered on and the volume is turned up. Check battery installation or power adapter connection. Verify external devices (headphones, speakers) are correctly connected and powered.
- As teclas non responden: Ensure the piano is powered on. If using batteries, check battery level.
- Problemas de conexión sen fíos: Ensure the piano's wireless function is active and your external device's Bluetooth is enabled. Try re-pairing the devices.
8. Especificacións
| Característica | Especificación |
|---|---|
| Número de modelo | SEK-37 |
| Dimensións do produto | 21.65 x 11.02 x 3.54 polgadas |
| Peso do elemento | 9.9 libras |
| Chaves | 37 |
| Fonte de enerxía | DC 6V Adapter or 4 AA Batteries |
| Idade recomendada | 36 meses - 8 anos |

Figura 8.1: Dimensións do produto.
9. Garantía e soporte
For warranty information or technical support, please refer to the contact details provided with your purchase or visit the official STRICH websitio. Garda o comprobante de compra para reclamacións de garantía.