
ATTACK SHARK X820 Ultra Wireless Mechanical Keyboard User Manual
Model: X820Ultra
1. Introdución
This manual provides detailed instructions for the setup, operation, maintenance, and troubleshooting of your ATTACK SHARK X820 Ultra Wireless Mechanical Keyboard. Please read this manual thoroughly before using the product to ensure optimal performance and longevity.
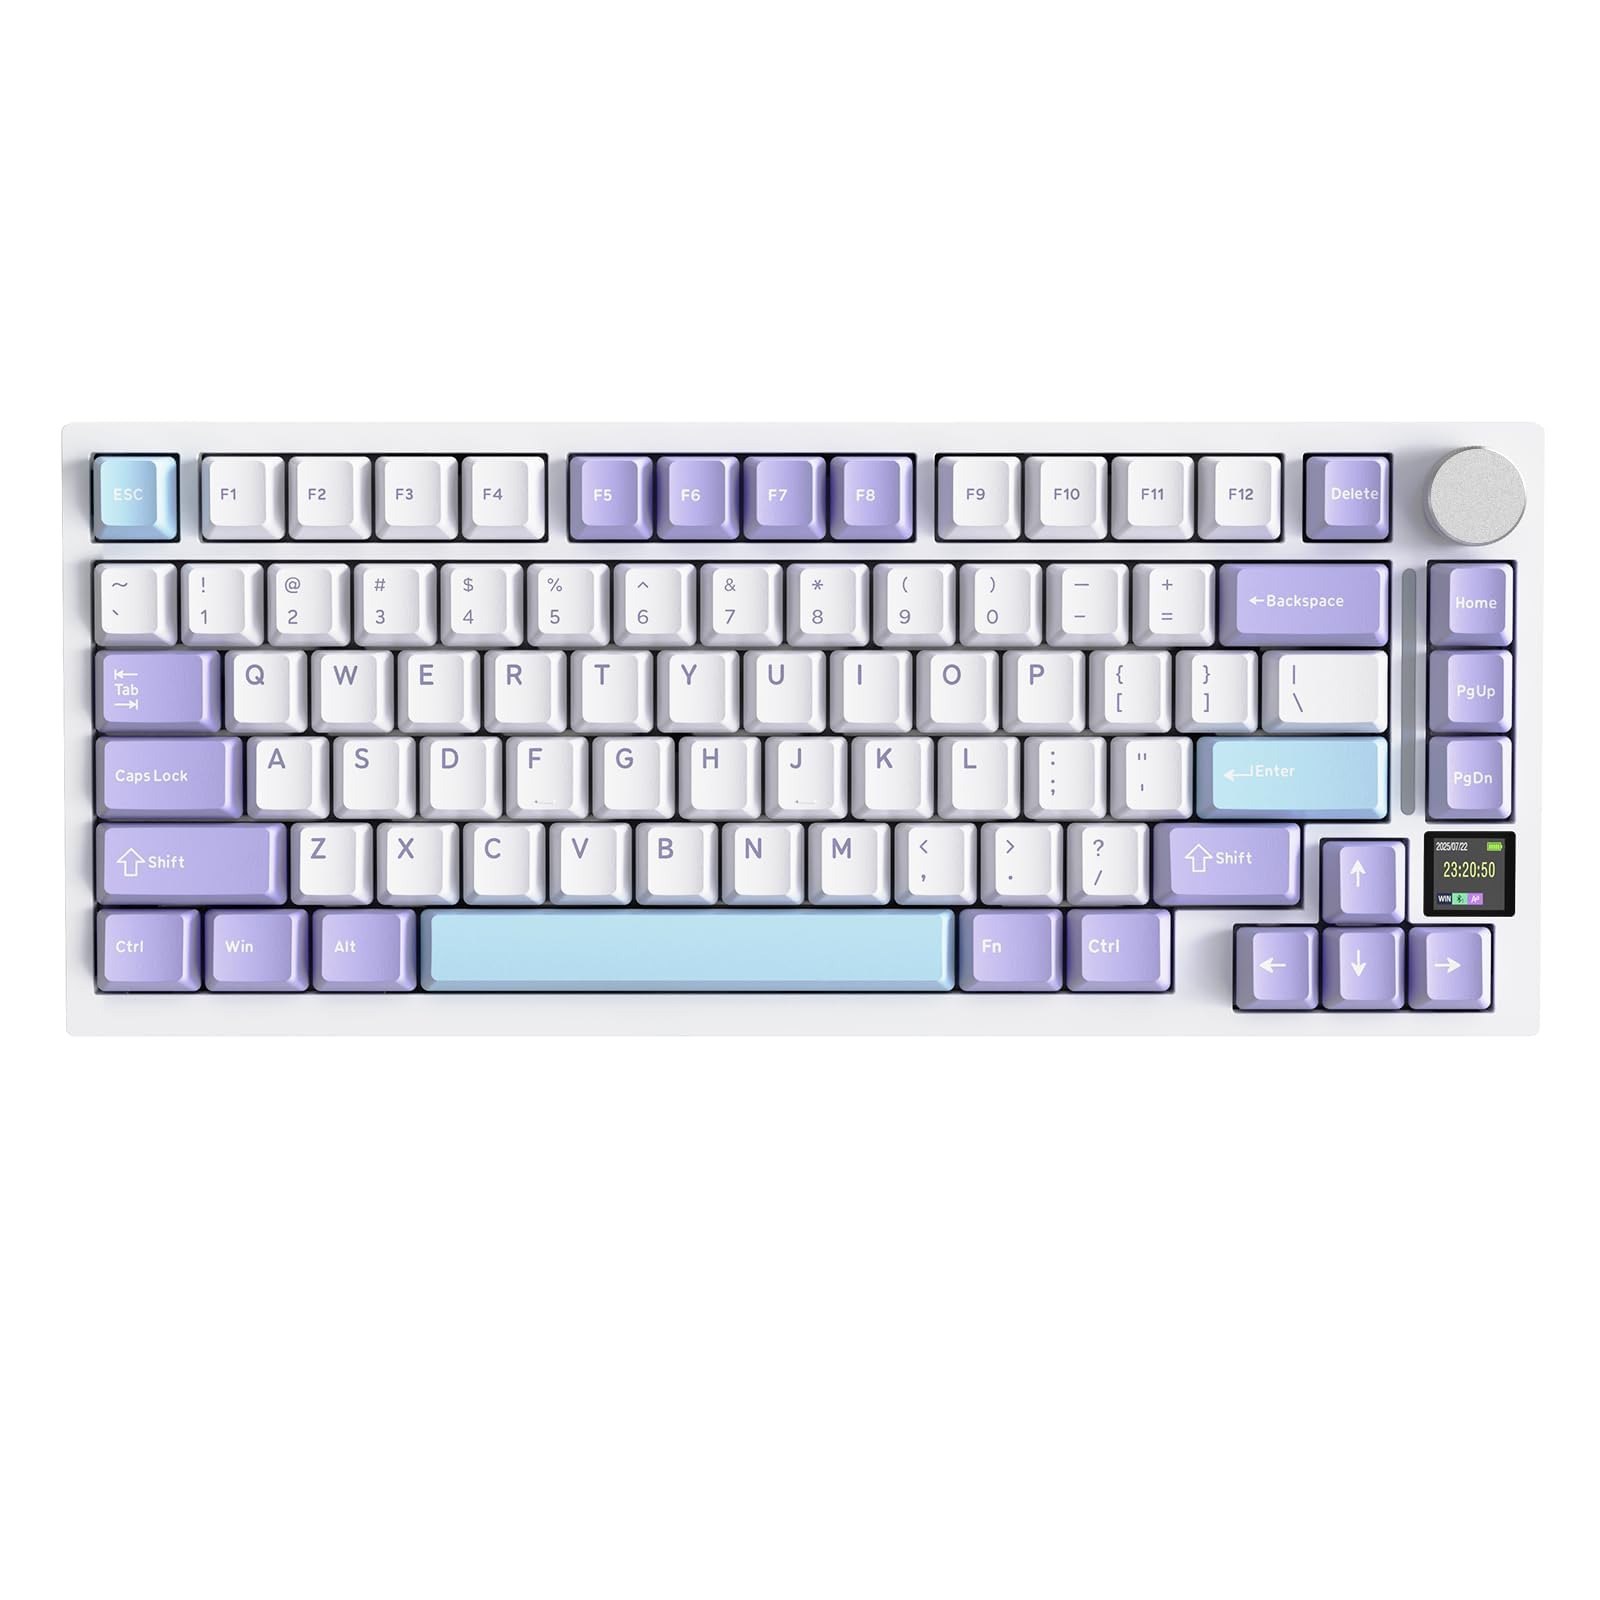
Image 1.1: ATTACK SHARK X820 Ultra Wireless Mechanical Keyboard in white with purple and light blue keycaps.
2. Contido do paquete
Verifique que todos os elementos que se indican a continuación estean incluídos no seu paquete. Se falta algún elemento ou está danado, póñase en contacto co servizo de atención ao cliente.
- X820 Ultra Keyboard x1
- Cable USB-C x1
- 2-in-1 Keycap/Switch Puller x1
- Manual de usuario x1
- Interruptores de reposto x2
- ATTACK SHARK Mascot Stickers x2

Image 2.1: All items included in the ATTACK SHARK X820 Ultra package, including the keyboard, USB-C cable, keycap puller, user manual, spare switches, and stickers.

Image 2.2: A visual representation of the package contents, including the keyboard, keyboard cover, spare switches, 2-in-1 key puller, manual, and 2.4GHz wireless receiver.
3. Produto rematadoview
The ATTACK SHARK X820 Ultra is a 75% layout mechanical keyboard designed for versatility and performance. Key features include:
- Deseño do 75%: Compact design with 80 keys and a multi-function knob.
- Full RGB Backlight: Customizable lighting with 16.8 million colors and 19 preset effects.
- Batería de 4000 mAh: Long-lasting rechargeable battery for extended use.
- Conectividade de modo triplo: Admite conexións Bluetooth, sen fíos de 2.4 GHz e con cable USB-C.
- Five-Layer Padding: Enhanced gasket structure for improved typing feel and reduced noise.
- Teclas PBT: Durable double-shot PBT keycaps for longevity and comfort.
- Web Condutor: Innovador web-based software for customization.
- Intercambiable en quente: Supports 3/5-pin mechanical switches for easy customization without soldering.
- TFT Custom Screen: Intelligent color TFT screen displaying time, battery level, connection status, and RGB effects.
- Metal Knob Design: Precision CNC metallic knob for menu navigation and settings adjustment.

Imaxe 3.1: Acabadoview of the keyboard's main features, including its 75% layout, RGB lighting, 4000mAh battery, triple connectivity modes, five-layer padding, PBT keycaps, web driver, hot-swappable switches, TFT custom screen, and metal knob design.

Image 3.2: Dimensions of the 75% layout keyboard, showing its length of 32.7cm, width of 13.6cm, and height of 4cm, along with the QWERTY layout and 80 keys plus one knob.

Image 3.3: Illustration of the OEM keycap profile, MX structure compatibility, and double-shot PBT keycaps.
4. Configuración
4.1 Configuración física
- Unpack the keyboard and all accessories from the box.
- Coloque o teclado sobre unha superficie estable e plana.
- Adjust the 2-level feet at the back of the keyboard for your preferred typing angle.
- Ensure the anti-slip pads on the bottom of the keyboard are clean and provide good grip.
4.2 Carga inicial
Before first use, it is recommended to fully charge the keyboard. Connect the supplied USB-C cable to the keyboard's USB-C port and the other end to a power source (e.g., computer USB port, USB wall adapter).
4.3 Cambio de modo
Locate the 3-mode switch on the back of the keyboard. This switch allows you to select between Windows (Win) and Mac operating system layouts, and also between 2.4G wireless, USB wired, and Bluetooth modes. Ensure the switch is set to the correct operating system and connection mode before pairing or connecting.

Image 4.1: Details of the keyboard's physical features, including the 2.4G receiver storage compartment, the 3-mode switch for Win/Mac and connectivity, anti-slip pads, and 2-level height adjustable feet.
5. Instrucións de funcionamento
5.1 Modos de conectividade
The X820 Ultra keyboard supports three connection modes: Bluetooth, 2.4GHz Wireless, and USB-C Wired.
5.1.1 Conexión con cable USB-C
- Ensure the mode switch on the back of the keyboard is set to 'USB'.
- Conecta o cable USB-C ao teclado e ao ordenador.
- O teclado recoñecerase automaticamente e estará listo para o seu uso.
Conexión sen fíos de 5.1.2 a 2.4 GHz
- Locate the 2.4G wireless receiver, usually stored in a compartment on the keyboard.
- Ensure the mode switch on the back of the keyboard is set to '2.4G'.
- Conecta o receptor 2.4G a un porto USB dispoñible do teu ordenador.
- O teclado debería conectarse automaticamente. Se non, preme FN + 4 para iniciar o emparellamento.
5.1.3 Conexión Bluetooth
- Ensure the mode switch on the back of the keyboard is set to 'BT'.
- Preme FN + 1, FN + 2, ou FN + 3 para seleccionar unha canle Bluetooth. A tecla correspondente parpadeará, indicando o modo de emparellamento.
- On your device (PC, smartphone, tablet), search for Bluetooth devices and select "ATTACK SHARK X820 Ultra".
- Once paired, the key will stop flashing and remain lit. You can switch between up to 3 paired Bluetooth devices using FN + 1/2/3.

Image 5.1: Illustration of the keyboard's triple mode connectivity options: USB-C wired, Bluetooth, and 2.4GHz wireless, compatible with various devices and systems.

Image 5.2: Visual guide for switching between Bluetooth, 2.4G, and USB-C wired modes using the physical switch on the back of the keyboard, and the corresponding key combinations.
5.2 TFT Smart Screen & Knob Functions
The integrated TFT smart screen displays useful information and allows for quick adjustments using the CNC metallic knob.
5.2.1 Axuste do volume
- Preme FN + Knob to activate volume control.
- Scroll the knob to adjust volume up or down.
5.2.2 Navegación polos menús
- Rotate the knob to scroll through menu options on the TFT screen.
- Short press the knob to select an option or confirm.
The screen can display time, battery level, connection status, and RGB backlight effects. Custom GIF animations can also be uploaded via the driver software.

Imaxe 5.3: Detallada view of the multi-function knob and TFT screen, showing how to adjust volume and navigate menus for settings like connection mode, lighting effect, light intensity, light speed, light color, and language choice. Also displays custom GIF/image functionality.

Image 5.4: Explains how to use the CNC knob for volume control (FN + Press, then Scroll) and menu navigation (Rotate to select, Press to confirm), with examples of screen displays for light speed, lighting effect, and connect mode.

Image 5.5: Highlights the 0.85-inch TFT Smart Screen's capabilities, including displaying the home page with time and battery, custom GIF/image support, and settings for connection mode, lighting effect, light intensity, light speed, light color, and language.
5.3 Personalización da retroiluminación RGB
The keyboard features south-facing RGB LEDs with 16.8 million colors and 19 predefined effects.
- Toggle RGB: Preme FN + { to turn RGB on/off.
- Efecto do cambio: Preme FN + | to cycle through preset lighting effects.
- Cambiar cor: Preme FN + Intro to change the color of the current effect.
- Custom Light Effect: Use the software for advanced customization.

Image 5.6: Demonstrates RGB backlight features, including 16 million colors, turning RGB on/off with FN+{, changing color with FN+Enter, and custom light effects.
5.4 Software Customization (QMK/VIA)
The keyboard is fully programmable via QMK (qmk.top) and supports VIA software for advanced customization. This allows you to:
- Remapear teclas.
- Crear e editar macros.
- Customize RGB lighting per key.
- Synchronize screen content.
- Upload custom GIFs to the TFT screen.
O web driver can be accessed directly in a browser, eliminating the need for downloads. For detailed instructions on using QMK/VIA, refer to the official QMK website or the provided software documentation.

Image 5.7: Screenshot of the innovative web driver interface, showing options for macro editing, key remapping, screen sync, and GIF upload, accessible directly in a browser.

Image 5.8: Highlights the programmable web software features, including remapping keys, macro editing, and RGB design, with a note to download the web driver from qmk.top or bit.ly/X820SOFTWARE.
5.5 Comprobación do estado da batería
To check the current battery level, long press FN + Retroceso. The TFT screen will display the battery percentage.

Image 5.9: Instructions on how to check the keyboard's battery level by long-pressing FN + Backspace, with visual indicators for 25%, 50%, 75%, and 100% charge.
6. Maintenance and Customization
6.1 Interruptores intercambiables en quente
The X820 Ultra features hot-swappable sockets compatible with 3-pin and 5-pin mechanical switches, allowing you to change switches without soldering.
6.1.1 Changing Switches
- Use the included 2-in-1 keycap/switch puller to carefully remove the keycap from the desired switch.
- Use the switch puller to gently grip the switch from the top and pull it straight up to remove it from the PCB.
- Aliña os pines do novo interruptor cos orificios da placa de circuíto impreso. Asegúrate de que os pines estean rectos para evitar que se dobren.
- Prema o novo interruptor firmemente no seu lugar ata que faga clic.
- Volva colocar a tapa das teclas.
The keyboard comes with pre-lubricated linear switches for a smooth and responsive typing experience. Plate-mounted stabilizers are also used for larger keys.

Image 6.1: Demonstrates the hot-swappable PCB, supporting 3/5-pin mechanical switches, with views of pre-lubed linear switches, hot-swap sockets, and plate-mounted stabilizers.

Image 6.2: Illustrates the full key hot-swappable feature, compatible with 3 or 5-pin mechanical switches, showing pre-lubed linear switches, hot-swap sockets, and south-facing LEDs.

Image 6.3: Table comparing specifications for 'Gift Switch' and 'Shark Switch', including actuation travel, total travel, actuation force, and bottom force, both being linear type switches.
6.2 Estrutura da xunta
The keyboard incorporates an enhanced gasket mount design with multiple layers of sound-dampening materials. This structure improves typing feel, reduces noise and vibration, and provides a soft touch and premium sound experience.
- PCB Plant
- PORON Dampening Espuma
- Junta
- IXPE Switch Pad
- PET Acoustic Pad
- DEPDM Slot Foam
- Silicone Base Pad

Imaxe 6.4: Explosión view diagram illustrating the multi-layered gasket structure of the keyboard, detailing components like the PCB, PORON foam, gasket, IXPE switch pad, PET acoustic pad, DEPDM slot foam, and silicone base pad.

Image 6.5: Highlights the benefits of the gasket structure, including improved typing feel, reduced noise and vibration, and a soft touch with premium sound experience, showing 80% more stable layers and 60% noise reduction.
7. Especificacións
| Característica | Detalle |
|---|---|
| Marca | ATAQUE A TIBURÓN |
| Número de modelo | X820Ultra |
| Tecnoloxía de conectividade | Bluetooth, sen fíos 2.4G, USB-C con cable |
| Dispositivos compatibles | Portátil, PC, teléfono intelixente, tableta |
| Descrición do teclado | Xogos |
| Usos recomendados | Gaming, Multimedia, Personal, Programming, Education |
| Características especiais | 4000mAh Battery, QMK Compatibility, CNC Knob, Enhanced Gasket Mount, TFT Smart Screen |
| Cor | Branco |
| Xestión da cor da retroiluminación do teclado | RGB |
| Dimensións do produto (L x W x H) | 32.7 L x 13.6 W x 4 H centímetros |
| Material | Plástico |
| Fonte de enerxía | Alimentado por batería |
| Tipo de cambio | Lineal |
| Disposición do teclado | QWERTY |
| Número de chaves | 80 |
| Familia de sistemas operativos compatibles | Windows |
| Material interno | Plástico |
| Keyboard Plate Material | FR4 |
| GTIN | 752010424092 |
8 Solución de problemas
8.1 Problemas de conectividade
- Keyboard not connecting via Bluetooth/2.4G: Ensure the mode switch on the back of the keyboard is set to the correct mode (BT or 2.4G). For Bluetooth, try selecting a different channel (FN+1/2/3) and re-pairing. For 2.4G, ensure the receiver is securely plugged in and try pressing FN+4 to re-establish connection.
- Conexión intermitente: Ensure the keyboard is within range of your device (for wireless modes) and there are no major obstructions. Check for interference from other wireless devices.
- A conexión por cable non funciona: Ensure the USB-C cable is fully inserted into both the keyboard and the computer. Try a different USB port or cable.
8.2 Problemas clave de funcionalidade
- As teclas non responden: Check if the keyboard is powered on and connected. If a specific key is not working, it might be a faulty switch. Utilize the hot-swappable feature to replace the switch.
- Incorrect key output (e.g., QWERTY vs. AZERTY): Ensure the Win/Mac switch on the back of the keyboard is set correctly for your operating system. If using QMK/VIA software, verify key mappings.
8.3 Problemas de iluminación RGB
- RGB non se ilumina: Ensure RGB is enabled (FN+{). Check brightness settings via the knob or software.
- Cores/efectos incorrectos: Cycle through effects (FN+|) or colors (FN+Enter). Use the software for advanced customization if needed.
8.4 TFT Screen Issues
- Screen blank or unresponsive: Ensure the keyboard is powered on. Try restarting the keyboard. If the issue persists, a firmware update via the web driver might be necessary.
9. Garantía e soporte
9.1 Información da garantía
The ATTACK SHARK X820 Ultra keyboard comes with a 6 meses de garantía desde a data de compra. Esta garantía cobre defectos de fabricación e avarías en condicións de uso normal. Non cobre danos causados por mal uso, accidentes, modificacións non autorizadas ou desgaste normal.
9.2 Atención ao cliente
For technical assistance, warranty claims, or any other inquiries, please contact ATTACK SHARK customer support through the retailer where you purchased the product or visit the official ATTACK SHARK websitio para información de contacto.
Conserve o comprobante de compra para o servizo de garantía.


