
Introdución
Thank you for choosing the GMBACK Wireless Pro Controller. This manual provides detailed instructions for setting up, operating, and maintaining your controller to ensure optimal performance and an enhanced gaming experience. Please read this manual thoroughly before use.
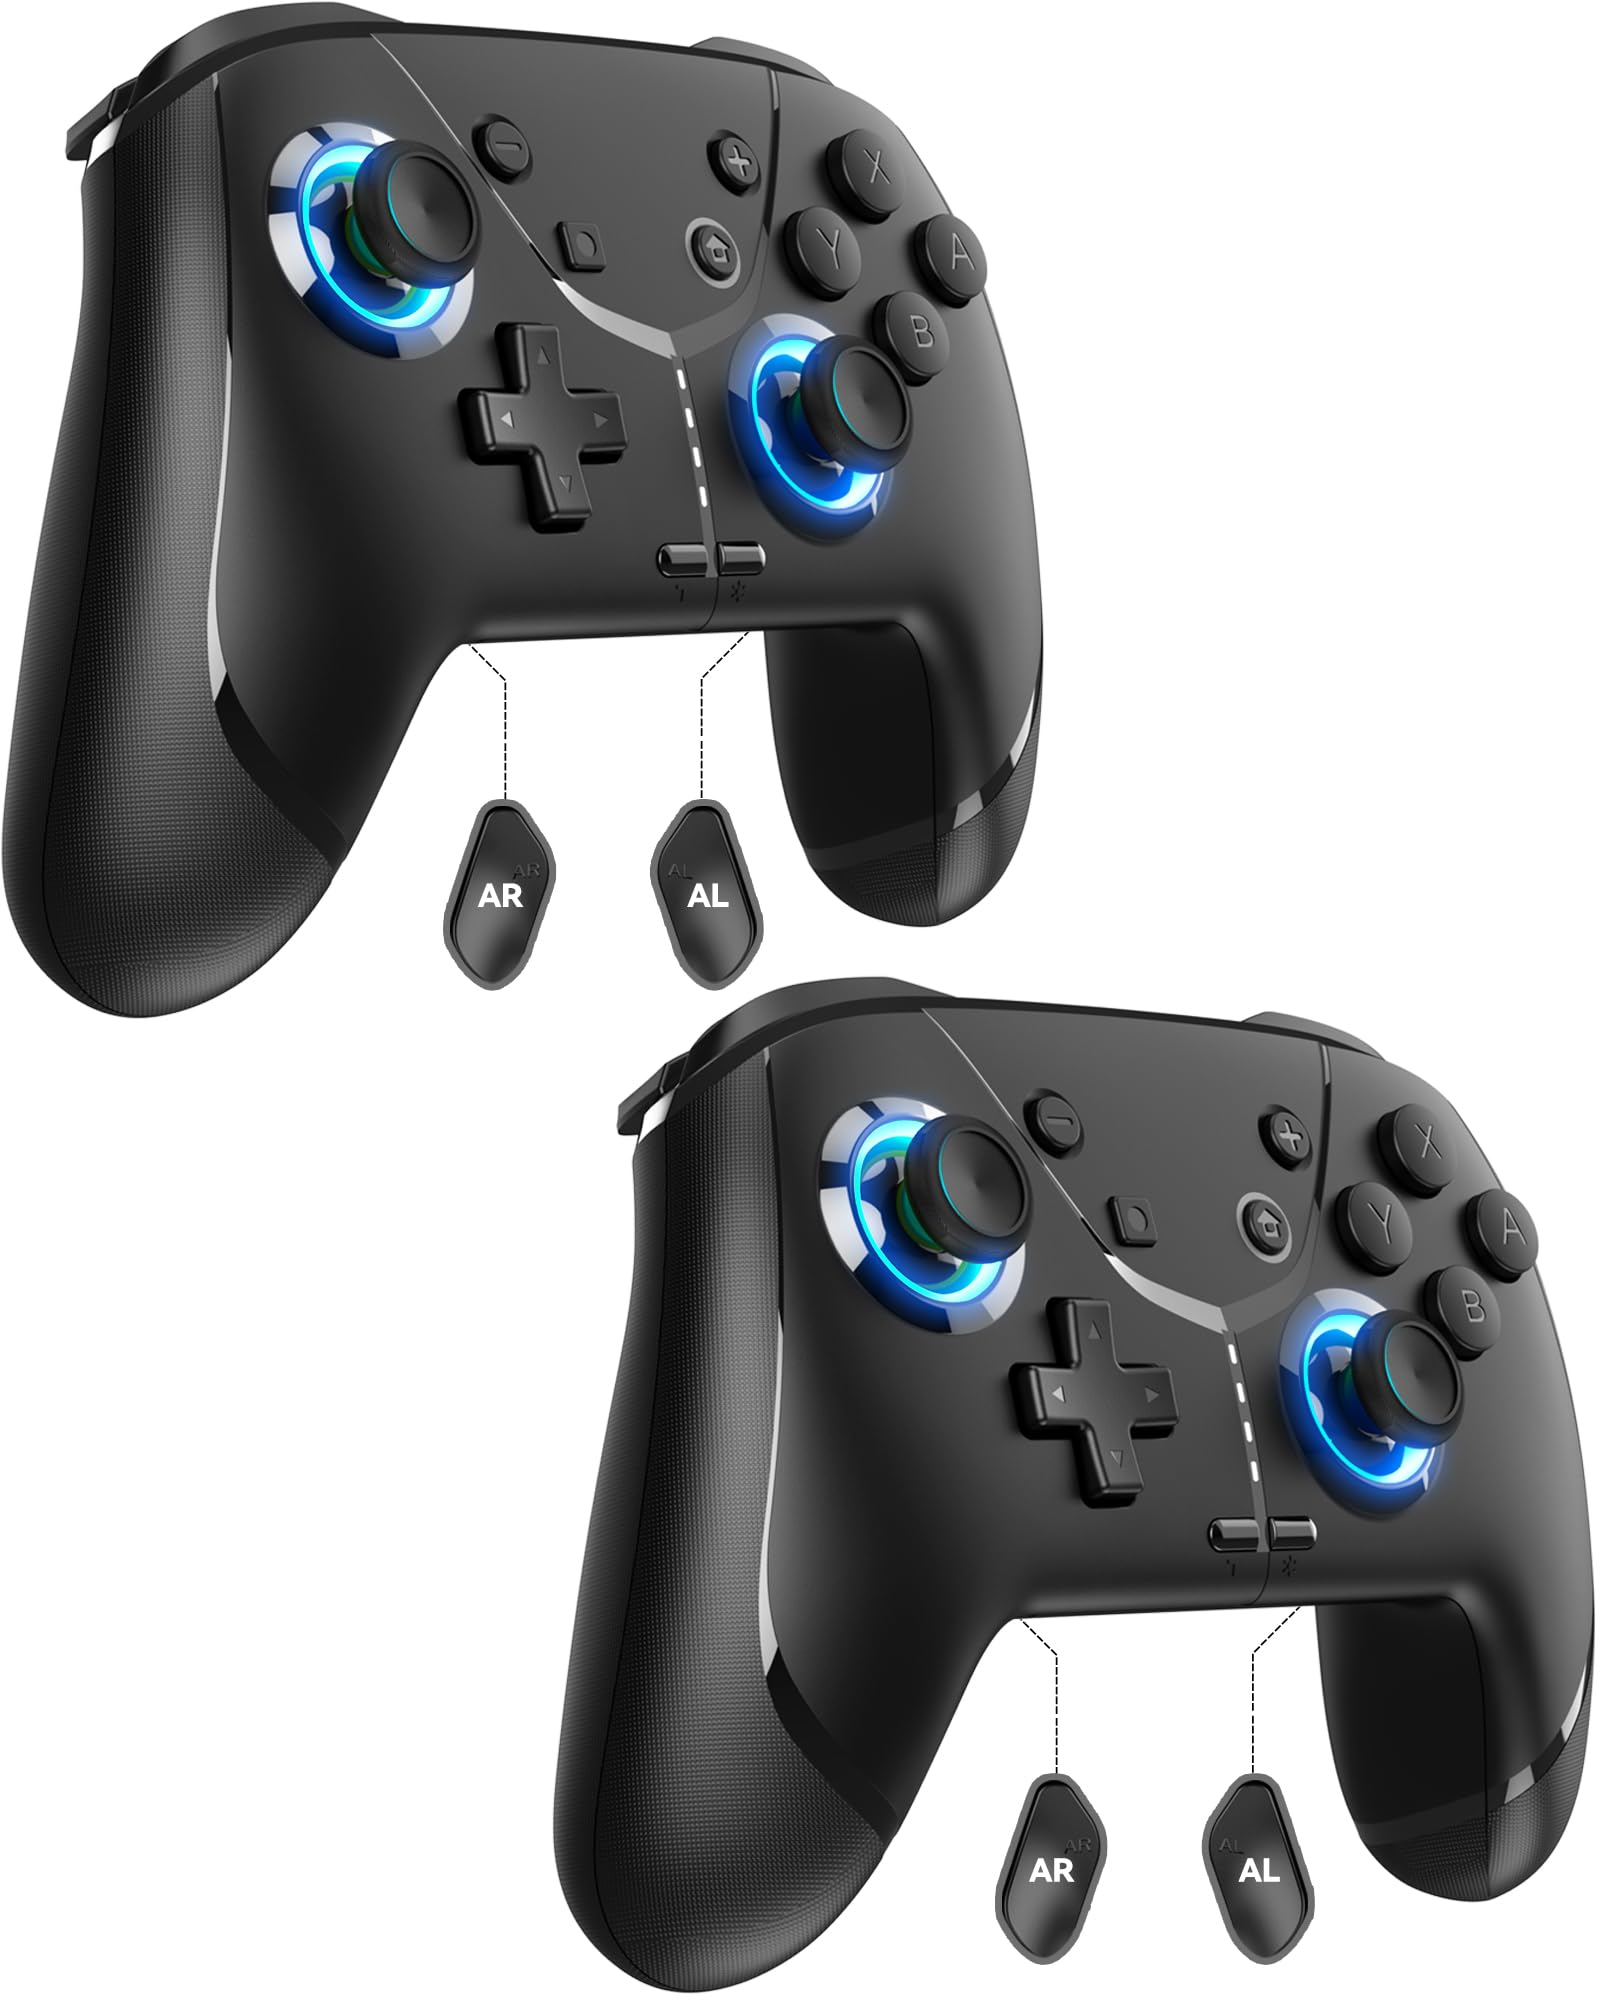
Image: GMBACK Wireless Pro Controller, front view.
Contido do paquete
- 2 x GMBACK Wireless Pro Controllers
- 2 cables de carga USB-C
- 1 x Manual de usuario
Comezando
1. Emparellar con Nintendo Switch
- Asegúrate de que a túa consola Nintendo Switch estea acendida e actualizada co software do sistema máis recente.
- No menú HOME, seleccione 'Controllers', entón 'Change Grip/Order'.
- On the GMBACK controller, press and hold the Botón de sincronización (located on the top edge near the USB-C port) for 3-5 seconds until the LED indicators begin to flash rapidly.
- The controller will automatically pair with the Switch. Once paired, the player LED(s) on the bottom of the controller will light up solid.

Image: GMBACK Wireless Pro Controller connected to a Nintendo Switch console.
2. Connecting to PC (Wired)
- Connect the GMBACK controller to your PC using the provided USB-C cable.
- The controller will be recognized as a standard gamepad. Drivers may install automatically.
- For optimal compatibility, ensure your PC's operating system is up to date.
3. Carga do controlador
- Connect the controller to a USB power source (e.g., Switch dock, PC, USB wall adapter) using the provided USB-C cable.
- The LED indicators will show charging status. A full charge typically takes 2-3 hours.
- The controller features an 800mAh battery, providing approximately 15-20 hours of playtime on a full charge.

Image: Visual representation of the 800mAh battery, 15-20 hours playtime, and 2-3 hours charging time.
Key Features & Functions
1. Loop Macro Function
The controller supports a loop macro function, allowing you to record and replay a sequence of up to 30 seconds of button presses and joystick movements. This includes joysticks, triggers, D-pad, ABXY, and +/- buttons.
- Para gravar: Refer to the detailed instructions in the included user manual for specific recording steps.
- To Start/Stop Loop: Manteña o Botón Turbo e o Botón macro simultaneously. The controller will automatically replay your recorded actions in a continuous loop.

Imaxe: Traseira view of the controller highlighting the AR and AL programmable buttons and the text 'Loop Macro Function'.
2. 6-Axis Gyro Sensor
The integrated 6-axis gyro sensor provides precise motion detection, allowing for intuitive control in compatible games that utilize motion sensing. This enhances immersion and gameplay accuracy.

Image: Controller being used for a racing game, illustrating the 6-Axis Gyro Sensor feature.
3. Customizable Turbo Function
The controller offers three adjustable turbo speeds for rapid-fire actions. This feature can be set to either auto-fire or manual-fire mode.
- Para axustar a velocidade do turbo: Refer to the included user manual for specific button combinations to cycle through the three turbo speeds.
- To Activate/Deactivate Turbo: Preme o Botón Turbo along with the desired action button.

Image: Controller displaying the 'Auto & Manual Turbo' feature with a gaming background.
4. Axuste de dobre vibración
Experience immersive feedback with four levels of dual vibration intensity: None, Weak, Medium, and Strong. Adjust the vibration to your preference for different games.
- To Adjust Vibration: Consult the user manual for the specific button combination to cycle through vibration levels.

Image: Controller illustrating the four levels of dual vibration: None, Weak, Medium, Strong.
5. Iluminación RGB
The controller features dynamic RGB lighting around the joysticks, enhancing the visual appeal during gameplay. The lighting can be adjusted or turned off.
- To Adjust RGB Lighting: Refer to the user manual for instructions on changing lighting modes or turning off the lights.

Image: Controller showcasing its RGB lighting feature around the joysticks.
6. Remappable ABXY Buttons
The ABXY buttons can be remapped to switch between Nintendo Switch and Xbox layouts, providing flexibility for different gaming preferences without needing to physically remove any buttons.
- To Remap ABXY: Follow the instructions in the user manual for the specific button sequence to switch layouts.

Image: Controller illustrating the ABXY button function switching between Nintendo Switch and Xbox layouts.
7. Screenshot and Home Wake-up
- The controller includes a dedicated Botón de captura de pantalla for capturing in-game moments.
- O Botón de inicio can be used to wake up your Nintendo Switch console from sleep mode.
Mantemento
- Limpeza: Usa un pano suave e seco para limpar o controlador. Evita o uso de produtos químicos agresivos ou materiais abrasivos.
- Almacenamento: Garde o controlador nun lugar fresco e seco, lonxe da luz solar directa e de temperaturas extremas.
- Coidado da batería: Para prolongar a duración da batería, evita descargar completamente o controlador con frecuencia. Cárgao regularmente, mesmo se non o usas de forma constante.
Resolución de problemas
- O controlador non se conecta:
- Asegúrese de que o controlador estea cargado.
- Verify the Switch is in 'Change Grip/Order' mode.
- Try restarting both the Switch and the controller.
- Asegúrate de que ningún outro dispositivo sen fíos estea a causar interferencias.
- Botóns que non responden:
- Check if the controller is properly paired.
- Test button functionality in Switch system settings.
- Ensure the controller's firmware is up to date (if applicable, check GMBACK support websitio).
- Problemas de carga:
- Use the provided USB-C cable.
- Proba cunha fonte de alimentación USB diferente.
- Asegúrate de que o porto de carga do controlador estea limpo e libre de residuos.
Especificacións
| Característica | Detalle |
|---|---|
| Modelo | HD6900 |
| Compatibilidade | Nintendo Switch 2, Switch, Switch Lite, Switch OLED, Windows PC (wired) |
| Capacidade da batería | 800 mAh |
| Hora de xogo | 15-20 horas |
| Tempo de carga | 2-3 horas |
| Conectividade | Sen fíos (Bluetooth), con cable (USB-C) |
| Características especiais | Loop Macro, 6-Axis Gyro Sensor, Dual Vibration (4 levels), Adjustable Turbo (3 speeds), RGB Lighting, Remappable ABXY, Screenshot, Home Wake-up |
| Peso do elemento | 8.5 onzas |
| Dimensións do paquete | 6.54 x 5.31 x 5.28 polgadas |
Vídeo oficial do produto
Vídeo: Rematadoview of the GMBACK Wireless Switch Controller, demonstrating its features and compatibility with Nintendo Switch, Switch Lite, and Switch OLED consoles.
Garantía e soporte
GMBACK products come with a standard manufacturer's warranty. For detailed warranty information, technical support, or any inquiries regarding your controller, please refer to the contact information provided on the product packaging or visit the official GMBACK websitio.

Image: Icon representing customer support.