1. Introdución
This manual provides essential information for the safe and effective use of your Brightown 100FT Solar String Lights. Please read all instructions carefully before installation and operation. These lights are designed for outdoor use, featuring durable, shatterproof LED bulbs and dual charging capabilities.
2. Contido do paquete
- 1 x Solar String Lights (100FT with 31+2 LED Shatterproof Bulbs)
- 1 x Detachable Solar Panel
- 2 lámpadas LED de reposto
- 1 x mando a distancia
- 1 cable USB tipo C
- Mounting Accessories (Cable Ties, Spring Clip, Ground Stake, Screws)
- 1 x Manual de usuario
3. Instrucións de seguridade importantes
- Non monte nin coloque preto de quentadores de gas ou eléctricos, lareiras, velas ou outras fontes de calor similares.
- Do not secure the wiring of the product with staples or nails, or place on sharp hooks or nails. Install only using the mounting kits provided.
- Do not let the product rest on the power supply cord or on any electric cord.
- Non use este produto para outros usos que non sexan os previstos.
- Do not hang other decoration or objects on cord, wire, or light string.
- Do not close doors or windows if clamping ou danar os produtos ou o cable.
- Non cubra o produto con pano, papel ou calquera material que non forme parte do produto cando estea en uso.
- Read and follow all instructions on this product.
- AVISO: Este produto pode expoñelo a produtos químicos, incluído o chumbo, que o Estado de California sabe que causa cancro e defectos de nacemento ou outros danos reprodutivos. Para máis información, vai a www.P65Warnings.ca.gov.
4. Configuración e instalación
The Brightown Solar String Lights offer flexible installation options to suit your outdoor space. Ensure the solar panel is placed where it receives 7-8 hours of direct sunlight daily for optimal charging.
4.1. Conexión das luces
Connect the string lights to the solar panel. The connection is designed for easy plug-and-play setup without requiring special tools or outlets.
4.2. Opcións de montaxe
Choose the most suitable method for your installation:
- Instalación en parede:
- On brick or concrete walls, mark the installation position, use an electric drill to create three holes. Hammer the plastic plugs into the holes. Use a screwdriver to drive screws firmly.
- On wooden walls, use screws directly without plastic plugs.
- Plug in the Ground: Insert the provided stake firmly into the ground.
- Clip on Deck: Use the provided spring clip to attach the solar panel to a deck railing or similar surface.
Adjust the joint bolt to fix the solar panel direction, allowing for a 180° adjustment to maximize sun exposure.

Image: Solar panel with battery life indicators and a tip to ensure the panel is turned on before use.

Imaxe: Detallada view of the light string construction and bulb dimensions (3.2 inches long, 1.5 inches wide).
Video: Unboxing and initial setup of the Brightown 100FT Solar String Lights, demonstrating the components and basic installation steps.
5. Funcionamento
The string lights are equipped with a dusk-to-dawn sensor, automatically turning on at night and off at dawn. For manual control and advanced settings, use the included remote.
5.1. Activación inicial
Press the button on the back of the solar panel to switch it on. The indicator light will turn blue when active.
5.2. Funcións de control remoto
The remote control allows for customization of your lighting experience:
- ON/OFF: Acende ou apaga as luces.
- Niveis de brillo: Adjusts brightness to 25%, 50%, 75%, or 100%.
- Modos de iluminación: Choose from 3 modes: Steady On, Breath, or Flash.
- Axuste de velocidade: Increase or decrease the speed of the Breath and Flash modes.
- Configuración do temporizador: Set the lights to operate for 6 hours or 8 hours. The lights will flash once when the timer is set.

Image: Remote control with various settings for brightness, modes, and timers.
6. Cargando
Your Brightown Solar String Lights feature dual charging options to ensure continuous illumination.
6.1. Carga solar
The 180° adjustable solar panel maximizes sun exposure. Under 7-8 hours of direct sunlight, the internal battery will fully charge, providing 10+ hours of lighting.
6.2. Type-C USB Charging
For cloudy days or when solar charging is insufficient, use the Type-C USB port for fast charging. A full charge takes approximately 4 hours. The indicator on the panel will turn red during charging or in low power, and green when the battery is fully charged.
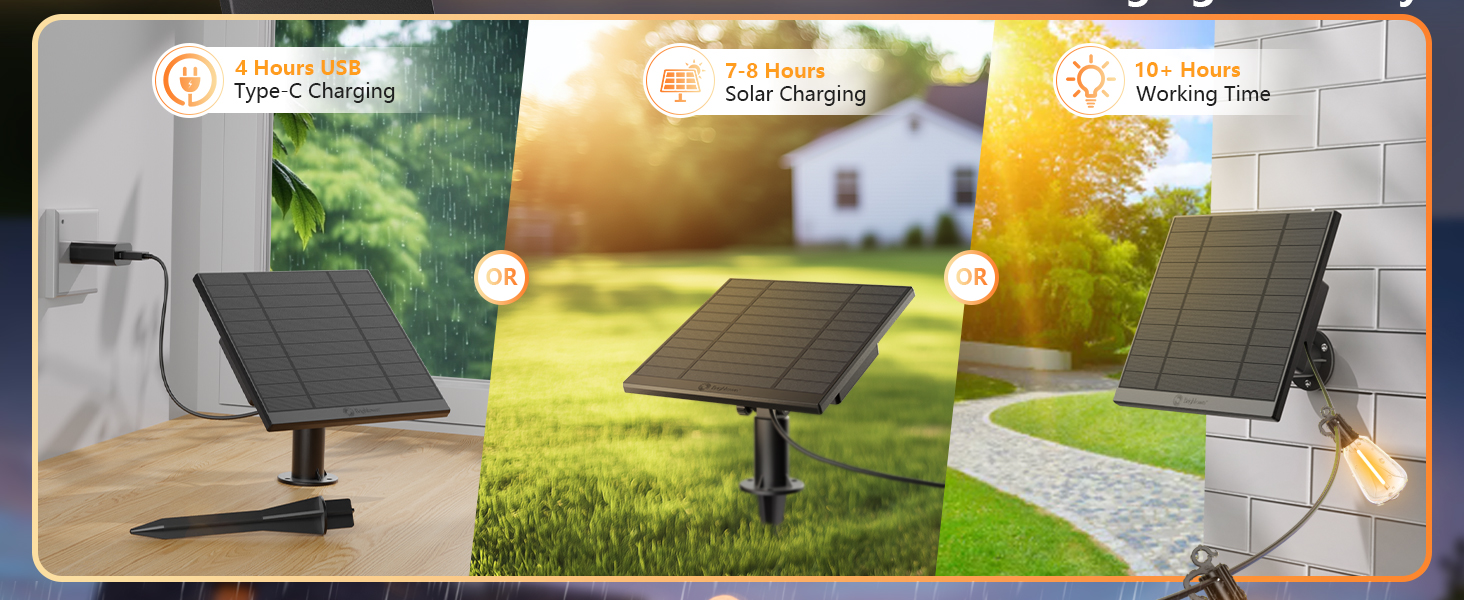
Image: Visual representation of the dual charging options: 4 hours via USB-C or 7-8 hours via solar power.
7. Mantemento e durabilidade
These string lights are built to withstand various outdoor conditions, requiring minimal maintenance.
- Lámpadas irrompibles: The PET plastic bulbs are designed to resist drops, wind, rain, and snow, ensuring long-lasting performance.
- Clasificación de impermeabilidade IP65: The lights are rigorously tested to be waterproof, making them suitable for year-round outdoor use without needing to be taken down during bad weather.
- Resistencia á intemperie: Engineered to resist rain, snow, and winds up to 50 MPH.
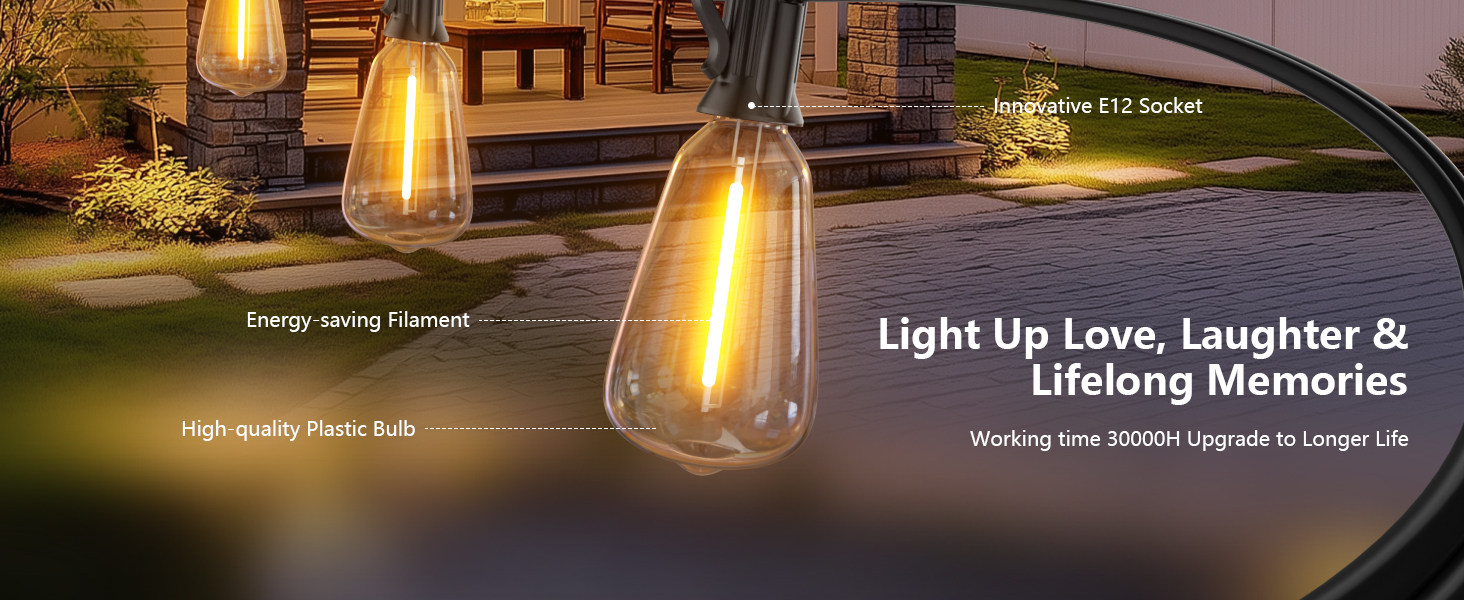
Image: The lights are shown operating effectively during rainfall, demonstrating their IP65 waterproof design.
8. Substitución da lámpada
If a bulb needs replacement, follow these steps:
- Screw out the old bulb from the holder counter-clockwise.
- Screw in a new bulb clockwise until secure.
- Ensure the replacement bulb is an LED ST38 24V bulb with an E12 base.
9 Solución de problemas
Consulta os seguintes problemas e solucións comúns:
| Problema | Solución |
|---|---|
| String lights do not work. | Make sure the solar panel is switched on. Ensure the solar panel is not covered by other objects. Recharge the solar panel or place it in direct sunlight. |
| Light flashes. | The battery may be exhausted. Replace with a new battery. |
| O control remoto non funciona. | Replace the remote battery (2 x AAA 1.5V batteries, not included). |
| Outras cuestións. | If the above cases do not work, consult a professional electrician or contact customer support. |
10. Especificacións
| Característica | Detalle |
|---|---|
| Número de modelo | GY-S-C31 |
| Lonxitude | 100 pés |
| Número de lámpadas | 31 + 2 Spare LED Bulbs |
| Tipo de bulbo | LED ST38, Shatterproof PET Plastic |
| Base de bulbo | E12 |
| Cor clara | Branco cálido (2700 Kelvin) |
| Fonte de enerxía | Solar Powered & Type-C USB |
| Tempo de carga solar | 7-8 horas (luz solar directa) |
| Tempo de carga USB | 4 horas |
| Tempo de traballo | 10+ hours (fully charged) |
| Clasificación impermeable | IP65 |
| Características especiais | Adjustable, Remote Controlled, Shatterproof, Timer, Waterproof, Dusk-to-Dawn Sensor |
| Baterías | 2 x 12V batteries required (included) |
| Peso do elemento | 2.2 libras (1 quilogramo) |
11. Garantía e atención ao cliente
The Brightown team is committed to providing excellent customer service. We offer 24-hour professional customer support to assist with any inquiries or issues regarding your solar string lights.
Please feel free to contact us if you need support. Contact details are typically found on the product packaging or our official websitio.