
1. Introdución
This manual provides essential instructions for the safe and efficient operation of your ASHATA Portable Multiband AM/FM/WB Radio. Please read this manual thoroughly before using the device and retain it for future reference. This radio is designed for reliable reception across multiple frequency bands, making it suitable for everyday listening and emergency situations.
2. Información de seguridade
- Non expoña a radio a temperaturas extremas, á luz solar directa nin a alta humidade.
- Evite deixar caer o dispositivo ou sometelo a fortes impactos.
- Non intente desmontar nin modificar a radio. Isto anulará a garantía e pode causar danos.
- Use only specified battery types (2 x AA dry batteries). Ensure correct polarity when inserting batteries.
- Retire as pilas se non vai usar a radio durante un período prolongado para evitar fugas.
- Manteña o dispositivo lonxe da auga e doutros líquidos.
- Desfágase das baterías e do dispositivo segundo a normativa local.
3. Contido do paquete
Comprobe se o paquete contén os seguintes elementos:
- 1 x ASHATA Portable Multiband Radio
- 1 x Manual de usuario (este documento)
Nota: As pilas AA non están incluídas e deben mercarse por separado.
4. Produto rematadoview
The ASHATA Portable Multiband Radio features a compact design with a clear display and intuitive controls. It supports FM, AM, and Weather Band (WB) frequencies, equipped with a 16.5-inch telescopic antenna for enhanced signal reception and a 3.5mm headphone jack for private listening.

Figura 4.1: Fronte View of the Radio. This image displays the front of the ASHATA portable radio, highlighting the digital display, control buttons for power, band selection, time setting, alert/scan, and volume, as well as the integrated speaker grille. A wrist strap is visible on the left side, and the telescopic antenna is extended upwards.

Figura 4.2: Fronte View with Retracted Antenna. This image shows the ASHATA portable radio from the front, similar to Figure 4.1, but with the telescopic antenna fully retracted. The display shows 'PM 1:43', and the control buttons and speaker are clearly visible.
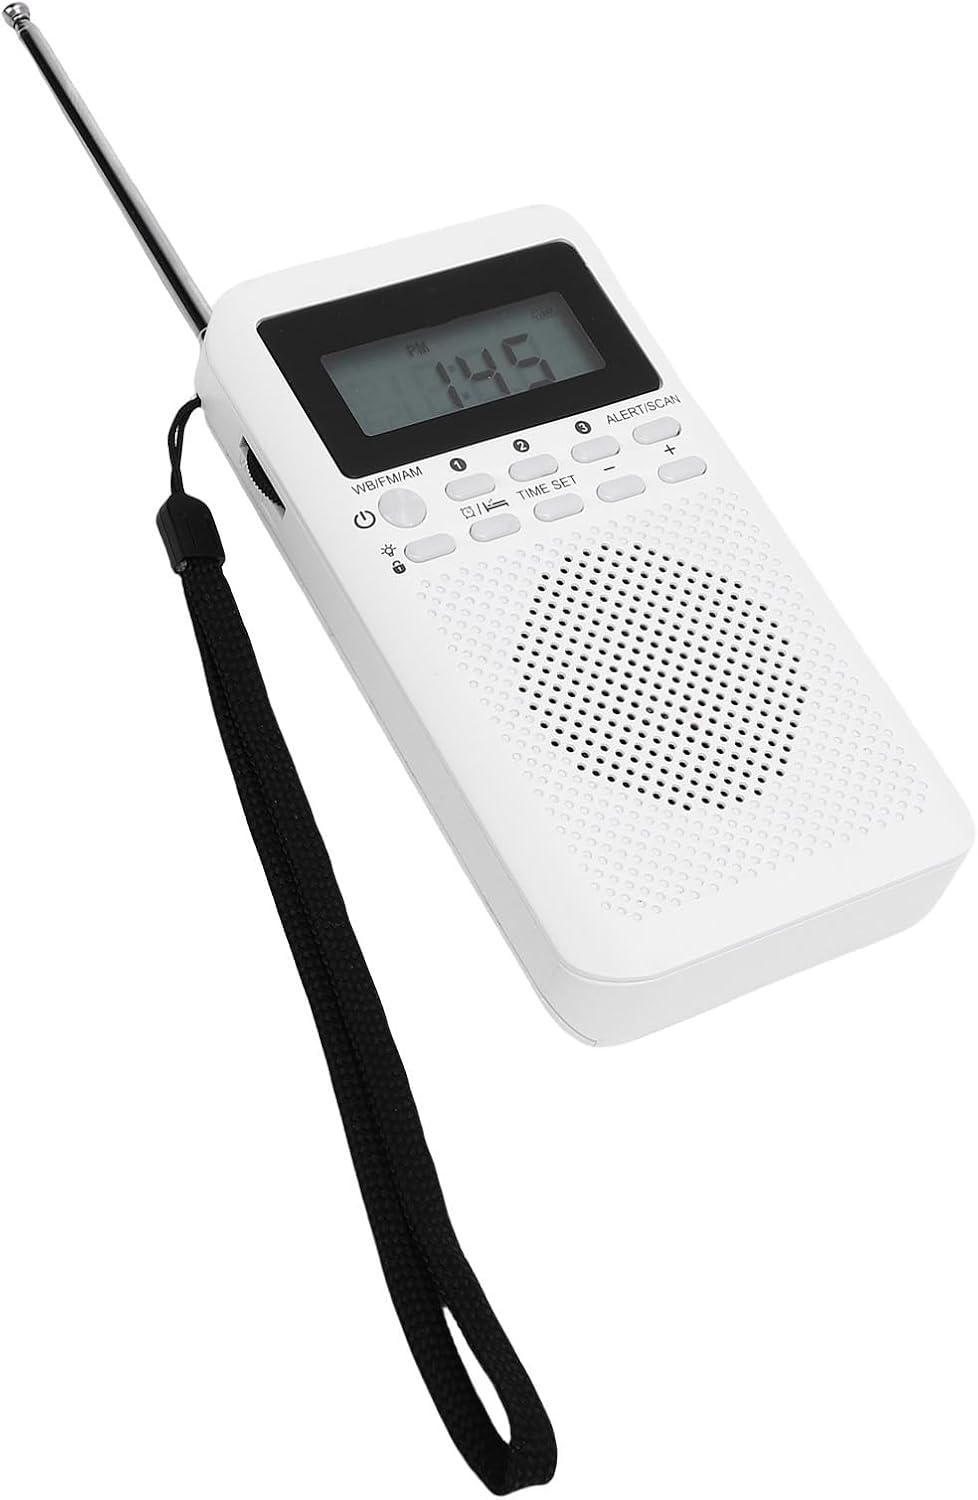
Figura 4.3: Atrás View of the Radio. This image presents the rear side of the ASHATA portable radio. It clearly shows the battery compartment cover at the bottom and a product label near the top, detailing model information, frequency ranges, sensitivity, output, battery type, and manufacturing origin.

Figura 4.4: Lateral View with Extended Antenna. Esta imaxe captura un lado view of the ASHATA portable radio, with its telescopic antenna fully extended. The 3.5mm headphone jack is visible on the side, indicating connectivity options for private listening.
Características principais:
- Recepción multibanda: Supports FM (87-108MHz), AM (520-1710KHz), and WB (162.400-162.550MHz) frequencies.
- Son claro: Equipped with built-in magnetic stereo speakers for bright and clear audio.
- Jack para auriculares: Includes a 3.5mm audio interface for private listening.
- Antena telescópica: A 16.5-inch, 6-section, 360-degree rotatable telescopic antenna ensures strong signal reception.
- Fácil operación: Features dedicated AM, FM, WB switch and a large channel tuner for simple use.
- Deseño portátil: Compact and lightweight, ideal for outdoor use and emergency kits.
5. Configuración
5.1 Instalación da batería
- Locate the battery compartment cover on the back of the radio (refer to Figure 4.3).
- Deslice ou levante a tapa para abrir o compartimento.
- Insert two (2) AA dry batteries, ensuring the correct polarity (+/-) as indicated inside the compartment.
- Pecha a tapa do compartimento da batería de forma segura.
Importante: Empregue sempre pilas novas e substitúaas á vez. Non mesture pilas vellas e novas nin pilas de diferentes tipos.
5.2 Extensión da antena
For optimal reception, especially for FM and WB bands, fully extend the telescopic antenna. The antenna can be rotated 360 degrees to find the best signal direction.
- Gently pull the telescopic antenna upwards until it is fully extended.
- Rotate the antenna to achieve the clearest reception.
- When not in use, retract the antenna to prevent damage.
6. Instrucións de funcionamento
6.1 Encendido/apagado
- Para acender a radio ON, press the power button (usually marked with a circle and a vertical line).
- Para acender a radio DESACTIVADO, preme de novo o botón de acendido.
6.2 Selecting a Frequency Band
The radio supports three frequency bands: FM, AM, and WB (Weather Band).
- Localiza o WB/FM/AM switch on the radio's control panel.
- Slide the switch to select your desired band:
- FM: For local music and talk radio stations (87-108MHz).
- AM: For long-distance broadcasts and news (520-1710KHz).
- WB: For weather alerts and information (162.400-162.550MHz).
6.3 Sintonización dunha emisora
Use the large channel tuner knob to scan for stations within the selected band.
- Once a band is selected, slowly rotate the tuning knob to search for stations.
- The frequency will be displayed on the screen.
- Adjust the antenna position for better reception if needed.
6.4 Control de volume
Adjust the volume using the dedicated volume control buttons, typically marked with '+' and '-' symbols.
- Prema a tecla '+' button to increase the volume.
- Prema a tecla '-' button to decrease the volume.
6.5 Uso de auriculares
For private listening, connect standard 3.5mm headphones to the headphone jack located on the side of the radio.
- Insert the 3.5mm plug of your headphones into the headphone jack.
- O altofalante interno silenciarase automaticamente cando se conecten uns auriculares.
- Adjust the volume to a comfortable level to protect your hearing.
6.6 Time Setting and Alert Function
The radio may include functions for setting the time and an alert/scan feature. Refer to the specific buttons labeled "TIME SET" and "ALERT/SCAN" on your device.
- Tempo establecido: Press the "TIME SET" button to enter time adjustment mode. Use the '+' and '-' buttons to set the hour and minute, then press "TIME SET" again to confirm.
- Alert/Scan: This button may initiate an automatic scan for available stations or activate a weather alert function. Consult the on-screen indicators for specific functionality.
7. Mantemento
7.1 Limpeza
- Limpe a radio cun pano suave e seco.
- Non empregues produtos de limpeza abrasivos, solventes ou produtos químicos fortes, xa que poden danar a superficie.
- Evite a entrada de humidade en calquera abertura.
7.2 Coidado coa batería
- Se non se vai usar a radio durante un período prolongado, retire as baterías para evitar fugas e corrosión.
- Replace batteries promptly when the low battery indicator appears on the display or when performance degrades.
8 Solución de problemas
| Problema | Causa posible | Solución |
|---|---|---|
| Sen alimentación / A radio non se acende. |
|
|
| Poor reception / Static sound. |
|
|
| Non se escoita son do altofalante. |
|
|
Se o problema persiste despois de probar estas solucións, consulte a sección de Soporte.
9. Especificacións
| Característica | Detalle |
|---|---|
| Número de modelo | ASHATA2tiwy8zqgg |
| Frecuencia de recepción |
|
| Interface de son | Conector para auriculares de 3.5 mm |
| Tipo de batería | 2 x AA Dry Batteries (500mAh) |
| Tamaño da antena | 41.9 cm (16.5 polgadas) |
| Dimensións do produto (L x W x H) | 14 x 11 x 3 cm |
| Peso do produto | 158 g |
| Fabricante | ASHATA |
10. Información da garantía
This ASHATA product is covered by a manufacturer's warranty for 90 days from the date of sale. This warranty covers defects in materials and workmanship under normal use. It does not cover damage caused by misuse, accident, unauthorized modification, or improper installation.
Conserve o comprobante de compra para reclamacións de garantía.
11. Apoio
If you encounter any issues or have questions regarding your ASHATA Portable Multiband Radio that are not addressed in this manual, please contact ASHATA customer support.
For the most up-to-date support information, please visit the official ASHATA websitio web ou consulte os datos de contacto proporcionados coa súa compra.