Instrucións de seguridade importantes
Please read these instructions carefully before using the Avtech DGM5907SVSGAT IP Dome Camera. Keep this manual for future reference.
- Ensure proper power supply (PoE or compatible adapter) to prevent damage.
- Do not expose the camera to extreme temperatures, humidity, or direct sunlight beyond its operating specifications.
- Manexa a cámara con coidado. Evita deixala caer ou someterla a fortes vibracións.
- Installation should be performed by qualified personnel and comply with local electrical codes.
- Non intente desmontar nin modificar a cámara. Isto anulará a garantía.
- Clean the camera lens and housing with a soft, dry cloth. Avoid harsh chemicals.
Produto rematadoview
The Avtech DGM5907SVSGAT is a 5MP AI IP Dome Camera designed for advanced surveillance. It features AI-based human and vehicle detection to minimize false alarms, ONVIF support for system integration, and Power-over-Ethernet (PoE) for simplified installation. The camera provides clear images with Starlight visibility, an integrated microphone for audio recording, and an effective IR range of up to 50 meters for night surveillance. Its WDR (Wide Dynamic Range) function enhances image clarity in challenging lighting conditions, and the IP66 housing ensures durability in various environments.
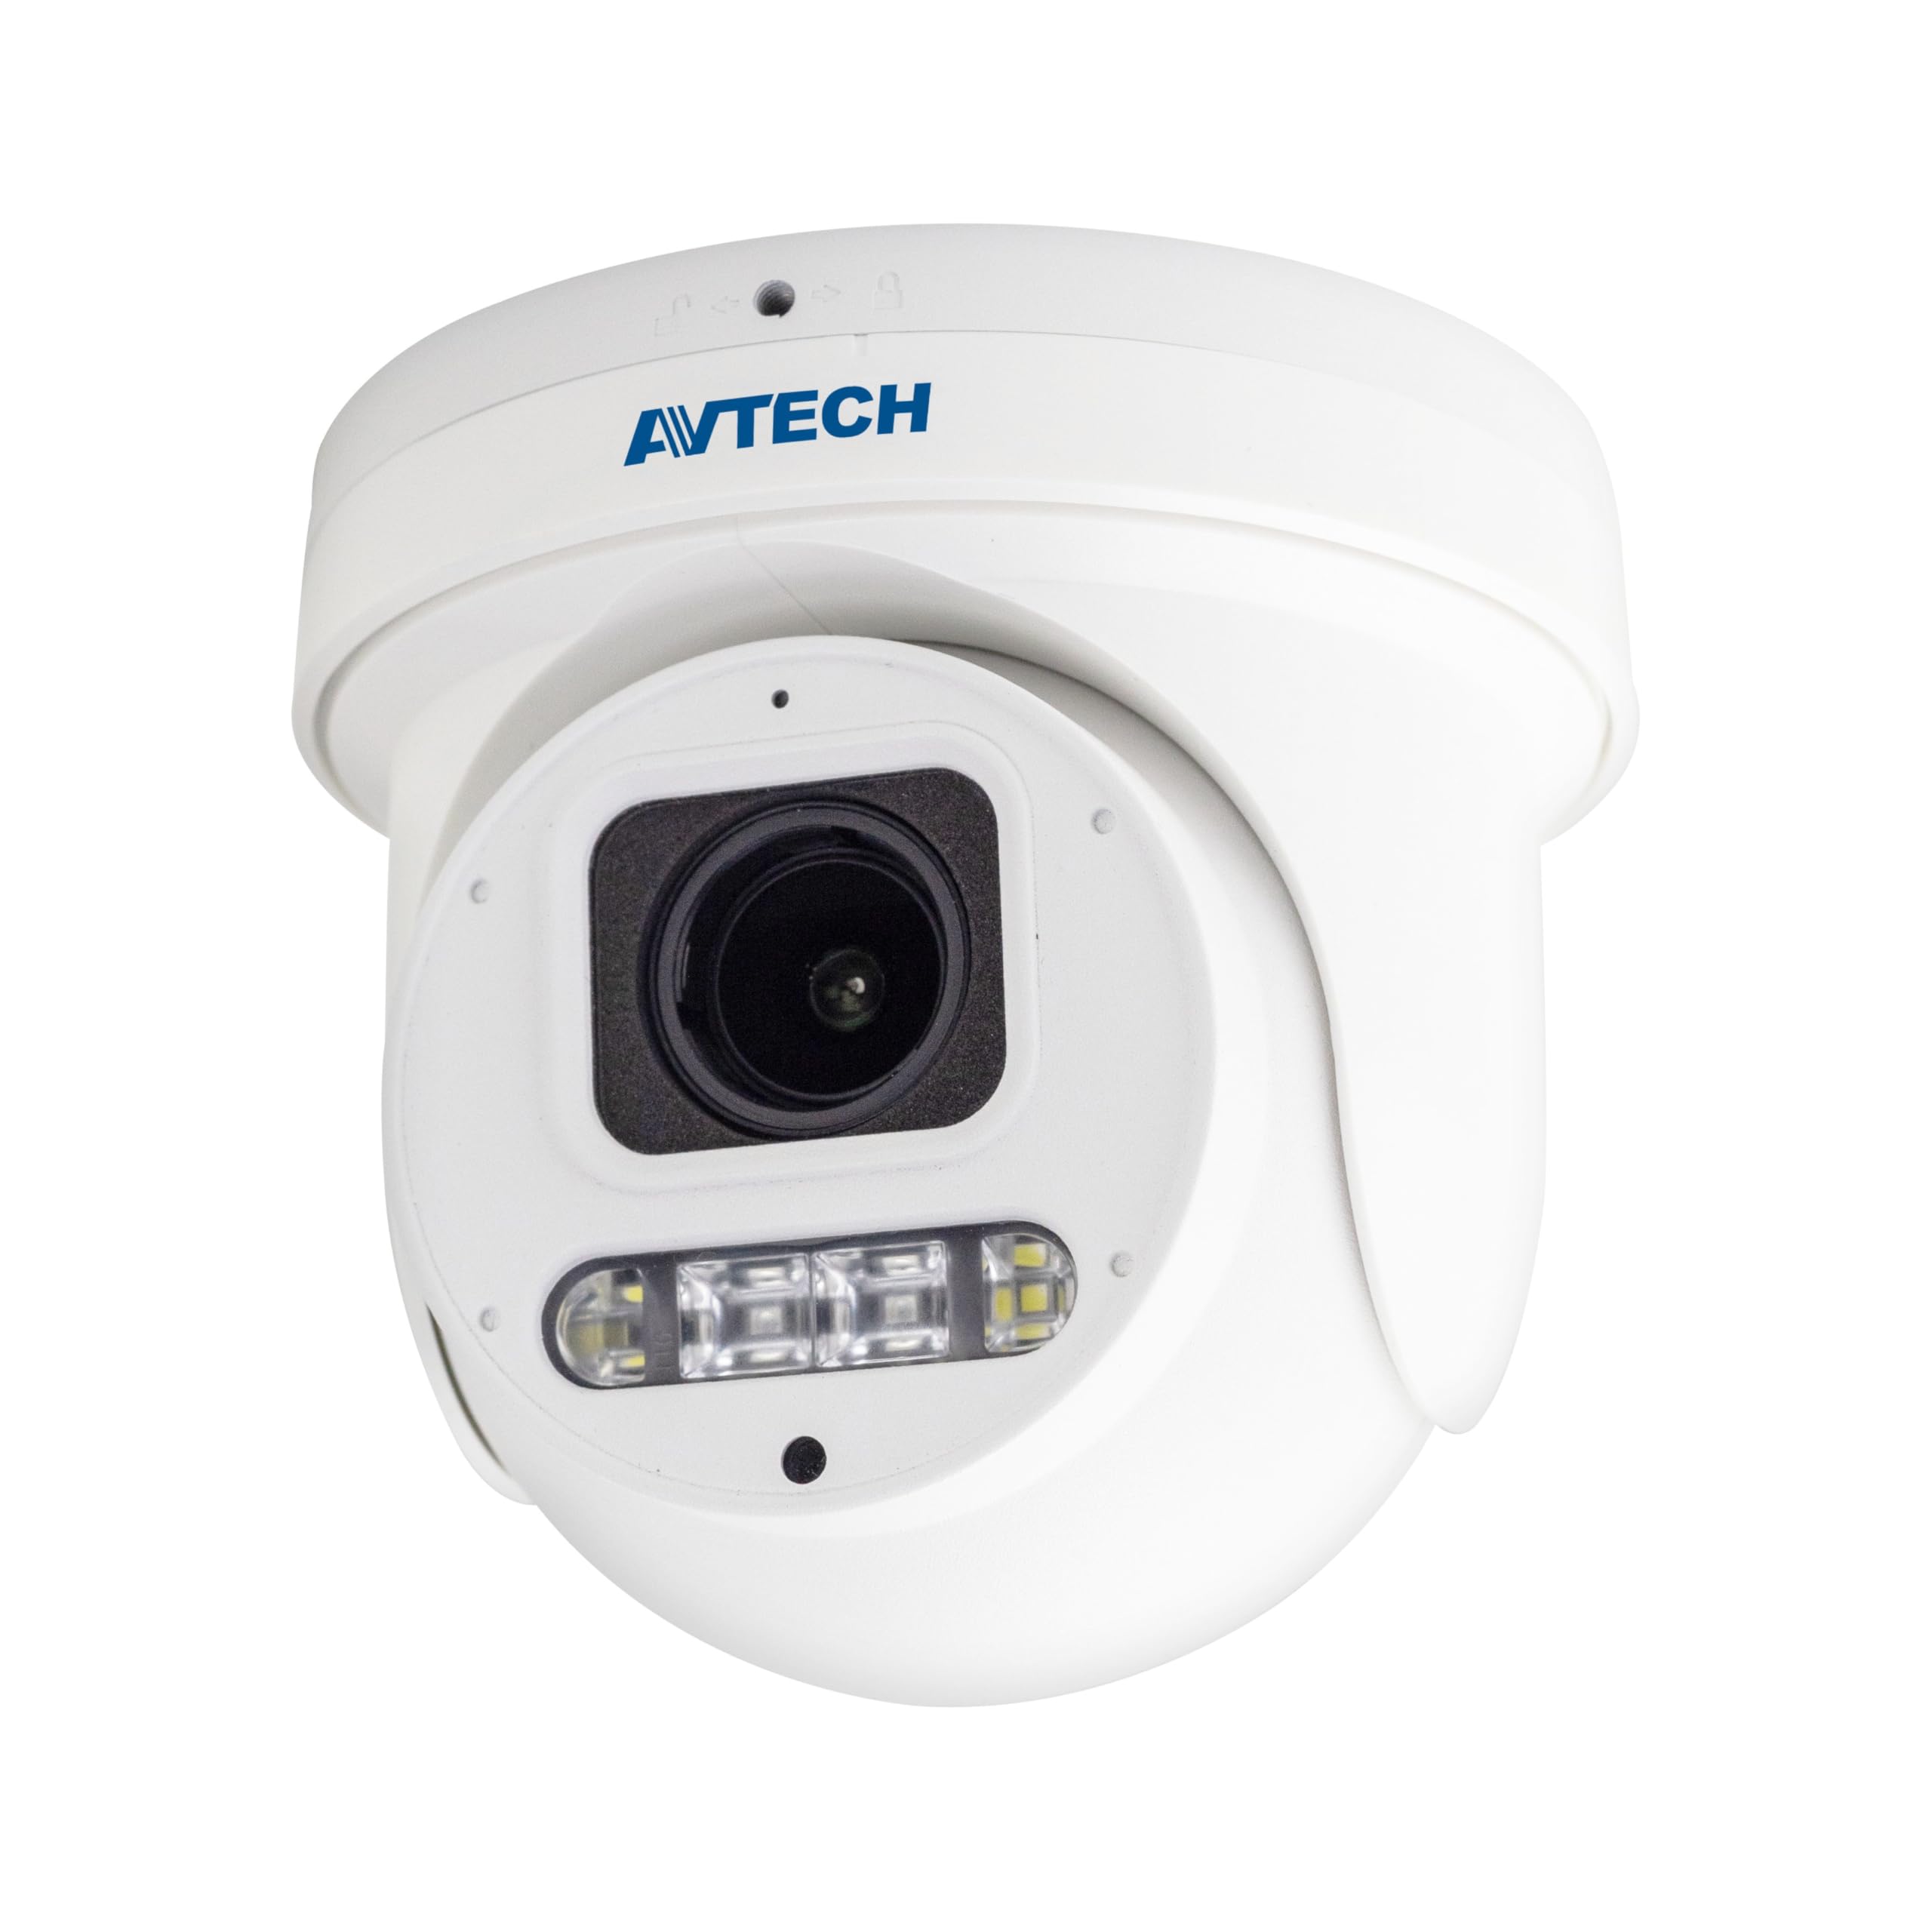
Figura 1: Fronte view of the Avtech DGM5907SVSGAT 5MP AI IP Dome Camera. This image shows the dome-shaped camera housing, the lens assembly, and the IR LEDs visible around the lens.
Contido do paquete
Verifique que todos os elementos estean presentes no paquete. Se falta algún elemento ou está danado, póñase en contacto co seu distribuidor inmediatamente.
- Avtech DGM5907SVSGAT 5MP AI IP Dome Camera
- Mounting Screw Kit (screws, wall anchors)
- Conector impermeable para cable Ethernet
- Guía de inicio rápido
- Modelo de perforación
Configuración
1. Instalación física
Before mounting, ensure the installation location provides a clear field of view and is within range of your network infrastructure (PoE switch/injector).
- Prepare a superficie de montaxe: Use the provided drilling template to mark the screw holes on the wall or ceiling.
- Perforación: Perfore buratos guía nas posicións marcadas. Insira ancoraxes de parede se monta en cartón xeso ou albanelería.
- Fixar a base da cámara: Fixe a base de montaxe da cámara á superficie cos parafusos subministrados.
- Conectar o cable de rede: Connect an Ethernet cable (RJ-45) from your PoE switch/injector to the camera's network port. Ensure the waterproof connector is properly sealed if installing outdoors.
- Axustar o ángulo da cámara: Loosen the adjustment screws on the dome to position the camera lens for the desired viewángulo de inglete. Aperte os parafusos unha vez axustados.
Figura 2: Illustrative diagram of the Avtech DGM5907SVSGAT camera mounting process. This image depicts the camera base being secured to a surface, with an Ethernet cable connected.
2. Configuración de rede
The camera typically obtains an IP address automatically via DHCP. If your network does not use DHCP, you may need to use a discovery tool provided by Avtech or manually configure the IP address.
- Conectarse á rede: Ensure the camera is powered via PoE and connected to your local network.
- Descubrir enderezo IP: Use the Avtech IP Camera Utility software (available on the Avtech website) to discover the camera's IP address on your network.
- Acceso Web Interface: Abrir a web browser (Internet Explorer 6+, Microsoft Edge, or Google Chrome) and enter the camera's IP address in the address bar.
- Iniciar sesión: Enter the default username and password (refer to the Quick Start Guide for default credentials). It is highly recommended to change the default password immediately for security.
- Asistente de configuración inicial: Follow the on-screen wizard to configure basic network settings, date/time, and user accounts.
Instrucións de funcionamento
1. En directo View e Gravación
Unha vez iniciado sesión no web interface, you can access the live video feed and manage recording settings.
- En directo View: Navigate to the 'Live View' section to see the real-time video feed from the camera.
- Recording to MicroSD: The camera supports a MicroSD card up to 256 GB. Insert the card into the designated slot (usually accessible by opening the dome cover). Configure recording schedules and event-triggered recording (e.g., motion detection, AI detection) in the 'Storage' or 'Recording' settings.
- Compresión de vídeo: The camera supports H.265 and H.264 compression. H.265 offers better compression efficiency, reducing storage and bandwidth requirements. Adjust this in the 'Video Settings'.
2. AI Detection (Human and Vehicle)
The AI detection feature helps reduce false alarms by distinguishing between humans/vehicles and other moving objects.
- Activar a detección de IA: Go to 'Event' or 'AI Settings' in the web interface. Enable 'Human Detection' and/or 'Vehicle Detection'.
- Configurar as zonas de detección: Draw specific areas on the live view where you want AI detection to be active.
- Definir sensibilidade: Adjust the sensitivity levels to optimize detection performance and minimize false positives.
- Configure Actions: Specify actions to be taken upon detection, such as recording, sending notifications, or triggering alarms.
3. Image Enhancement Features
- Visión nocturna IR: The camera automatically switches to IR mode in low light conditions, providing clear black and white images up to 50 meters. Ensure the IR LEDs are not obstructed.
- WDR (amplo rango dinámico): Enable WDR in 'Image Settings' to improve image quality in scenes with both very bright and very dark areas, such as entrances or windows.
- Starlight Visibility: This feature enhances low-light performance, allowing the camera to capture color images in very dim conditions before switching to IR mode.
Mantemento
Un mantemento regular garante un rendemento óptimo e unha maior duración da túa cámara.
- Limpeza: Periodically clean the camera lens and housing with a soft, lint-free cloth. For stubborn dirt, use a mild cleaning solution specifically designed for optical lenses. Do not use abrasive cleaners.
- Actualizacións de firmware: Check the Avtech official website regularly for firmware updates. Firmware updates can improve performance, add new features, and enhance security. Follow the instructions provided with the firmware update package carefully.
- Xestión de almacenamento: If using a MicroSD card for recording, periodically review gravado footage and manage storage space. Format the MicroSD card occasionally to maintain performance.
- Inspección de cables: For outdoor installations, inspect network cables and waterproof connectors for any signs of wear or damage.
Resolución de problemas
Esta sección aborda problemas comúns que podes atopar coa túa cámara.
| Problema | Causa posible | Solución |
|---|---|---|
| Sen fonte de imaxes/vídeos | No power; Network connection issue; Incorrect IP address | Check PoE connection; Verify network cable; Use IP utility to find camera IP; Ensure firewall is not blocking access. |
| Cámara sen conexión | Network cable disconnected; Router/switch issue; IP address conflict | Check physical network connections; Restart network equipment; Verify unique IP address. |
| Mala calidade de imaxe | Dirty lens; Incorrect resolution settings; Insufficient lighting; WDR not enabled | Clean the lens; Adjust resolution in settings; Ensure adequate lighting or enable IR; Enable WDR for high contrast scenes. |
| Falsas alarmas frecuentes | Sensitivity too high; Detection zone too wide; Environmental factors (e.g., moving branches) | Adjust AI detection sensitivity; Refine detection zones; Ensure AI detection is enabled for human/vehicle only. |
| Non se pode acceder web interface | Incorrect IP address; Browser compatibility; Firewall blocking | Verify IP address; Use recommended browsers (IE, Edge, Chrome); Temporarily disable firewall for testing. |
Especificacións
Detailed technical specifications for the Avtech DGM5907SVSGAT IP Dome Camera.
- Sensor de imaxe: CMOS de 1/2.8".
- Resolución máxima: 2592 x 1944 (5 MP)
- Lente: f2.7 ~ 13.5mm / F1.6 ~ F2.2
- Viewing Angle (Diagonal): Tele 40° ~ Wide 117°
- Iluminación mínima: 0.001 Lux (IR off), 0 Lux (IR on)
- Velocidade de obturación: AUTOMÁTICO, 1/25 s ~ 1/100000 XNUMX s
- LEDs IR: 4 unidades
- Effective IR Distance: Ata 50 metros
- Modo día/noite: Automático
- WDR: Si (120 dB)
- RTC (Reloxo en tempo real): Si
- Ranura MicroSD: Ata 256 GB
- Compresión de vídeo: H.265 / H.264
- Main Stream Resolution: 5MP (2592x1944) / 4MP (2560x1440) / 3MP (2304x1296) / 2MP (1080P) / 720P
- Frecuencia de fotogramas: 5MP @ 25FPS
- Multiple Video Streams: 2 correntes
- Control de taxa de bits: 512Kbps - 12Mbps, VBR/CBR
- Mellora da imaxe: WDR / BLC / HLC / 2D DNR / 3D DNR
- Audio: Micrófono integrado
- Protocolos de rede: ONVIF supported
- Potencia: PoE (Power-over-Ethernet)
- Vivenda: IP66 resistente ao lume
- Compatibilidade: Internet Explorer 6+, Microsoft Edge, Google Chrome, Windows 10/8/7, DirectX 9.0+
Garantía e Soporte
Avtech products are designed for reliability and performance. This product comes with a standard manufacturer's warranty against defects in materials and workmanship.
- Período de garantía: Please refer to your purchase documentation or the Avtech official websitio web para coñecer os termos e a duración específicos da garantía aplicables na súa rexión.
- Soporte técnico: For technical assistance, troubleshooting, or warranty claims, please contact Avtech customer support.
- Recursos en liña: Visit the official Avtech website for FAQs, driver downloads, firmware updates, and additional product information.
Información de contacto:
Websitio: www.avtech.com.tw
Correo electrónico: support@avtech.com
Teléfono: +1-XXX-XXX-XXXX