JONR T5 Pro Gen 2 Robot Vacuum Cleaner and Mop User Manual
Model: T5 Pro Gen2
1. Introdución
This manual provides essential instructions for the safe and efficient operation of your JONR T5 Pro Gen 2 Robot Vacuum Cleaner and Mop. Please read this manual thoroughly before using the product and retain it for future reference. The JONR T5 Pro Gen 2 is designed to provide comprehensive floor cleaning with powerful suction, mopping capabilities, automatic dust collection, and hot air mop drying.
2. Información de seguridade
Before using the JONR T5 Pro Gen 2, please observe the following safety precautions:
Asegúrese de que o robot estea completamente cargado antes do primeiro uso.
Non empregues o robot en superficies molladas nin en zonas con auga estancada.
Manteña os cables soltos, as cortinas e outros obxectos que poidan enredar o robot fóra do seu camiño.
Non permita que os nenos nin as mascotas xoguen co robot.
Do not use the robot to pick up large or sharp objects, liquids, or burning materials.
Regularly clean the brushes and sensors to maintain optimal performance.
Only use the original charging base and power adapter.
Se o cable de alimentación está danado, debe substituílo o fabricante ou un axente de servizo cualificado para evitar riscos.
3. Contido do paquete
Verifica que todos os compoñentes estean presentes no paquete:
JONR T5 Pro Gen 2 Robot Vacuum Cleaner and Mop
Estación base todo en un
2 almofadas para fregar
Ramp Placa de extensión
Cepillo lateral
Adaptador de alimentación
Manual de usuario (este documento)
Image: JONR T5 Pro Gen 2 Robot Vacuum Cleaner and Mop with its All-in-One Base Station.
4. Produto rematadoview
4.1 Compoñentes do robot aspirador
Lidar Sensor: For precise navigation and mapping.
Botón de encendido/limpo: To start/pause cleaning or power on/off.
Botón de recarga: To send the robot back to the base station.
Basura: Collects dry debris.
Cepillo principal: For deep cleaning carpets and hard floors.
Cepillo lateral: Retira os residuos das beiras e das esquinas.
Almofadas de fregar: For wet cleaning and scrubbing.
Imaxe: Arriba view of the JONR T5 Pro Gen 2 robot vacuum, showing the Lidar sensor and control buttons.
4.2 Base Station Components
Depósito de auga limpa: Holds fresh water for mopping and mop cleaning. (4.0 L capacity)
Depósito de auga sucia: Collects used water from mop cleaning. (3.5 L capacity)
Compartimento da bolsa de po: Houses the disposable dust bag for automatic dust collection. (2.5 L capacity)
Contactos de carga: Para a carga de robots.
Mop Washing Tray: Area where mopping pads are cleaned and dried.
Image: The JONR T5 Pro Gen 2 base station with its clean and dirty water tanks visible.
5. Configuración
Siga estes pasos para a configuración inicial:
Desempaquetar os compoñentes: Retire con coidado todos os elementos da embalaxe.
Posicionar a estación base: Place the base station against a wall with at least 0.26ft (8cm) clear space on both sides and 3.94ft (1.2m) in front. Ensure it is near a power outlet.
Adxunta Ramp Extension Plate: Asegure o ramp extension plate to the front of the base station.
Instalar tanques de auga: Insert the clean and dirty water tanks into their respective slots in the base station.
Instalar o cepillo lateral: Snap the side brush onto the designated post on the underside of the robot.
Attach Mopping Pads: Securely attach the mopping pads to the bottom of the robot.
Encher o depósito de auga limpa: Open the clean water tank and fill it with clean tap water.
Conectar enerxía: Plug the base station into a power outlet.
Encendido e carga:
Prema e manteña premido o botón de acendido do robot durante 3 segundos para acendelo.
Place the robot onto the base station to begin charging. The robot will automatically power on and start charging when docked.
Conexión da aplicación:
Download the "Xiaomi Home" app by scanning the QR code on the robot's panel or searching in your app store.
Open the app and tap the "+" icon to add a device.
Select "Scan" to scan the QR code on the robot or search for "JONR T5 Pro Gen2".
To pair, press and hold both the power and recharge buttons on the robot for 3 seconds until you hear a voice prompt.
Selecciona a túa rede wifi de 2.4 GHz e introduce o contrasinal.
Follow the in-app instructions to complete the connection.
Video: Step-by-step guide on unboxing, assembling, and connecting the JONR T5 Pro Gen 2 robot vacuum to the mobile application.
6. Instrucións de funcionamento
6.1 Inicio dun ciclo de limpeza
A través da aplicación: Open the Xiaomi Home app, select your JONR T5 Pro Gen 2, and tap "Clean" to start a cleaning cycle. You can choose between different cleaning modes (e.g., whole home, room, zone).
Mediante o botón do robot: Press the Power/Clean button on the robot once to start a full cleaning cycle.
Control de voz: The robot supports voice commands via Alexa and Google Home. For example, say "Alexa, start cleaning" (if integrated).
Image: The JONR T5 Pro Gen 2 robot vacuum being controlled via the mobile application, showing mapping and zone selection.
6.2 Funcións intelixentes
Navegación LiDAR: The robot uses LiDAR to create a precise map of your home, ensuring efficient and thorough cleaning without repetition. It can map up to 4 floors.
Evitación de obstáculos: Advanced sensors allow the robot to recognize and bypass obstacles like furniture, cables, and pet bowls.
Zonas prohibidas: Use the app to define specific areas the robot should avoid, such as pet feeding areas or delicate zones.
Detección de alfombras: The robot automatically detects carpets and adjusts suction power. During mopping, it intelligently lifts the mop pads by 10mm to avoid wetting carpets.
Limpeza de bordes: An extendable side mop ensures thorough cleaning along walls and into corners.
Image: Illustration of the JONR T5 Pro Gen 2 using LiDAR navigation to map a home environment.
Image: The JONR T5 Pro Gen 2 robot vacuum demonstrating its obstacle avoidance capabilities.
7. Mantemento
Un mantemento regular garante un rendemento óptimo e prolonga a vida útil do teu robot aspirador.
Limpar o depósito de auga sucia: Regularly empty and clean the dirty water tank to prevent odors and bacterial growth.
Clean Dustbin and Filter: Remove the robot's dustbin, empty it, and clean the HEPA filter under running water. Allow the filter to dry completely before reinserting.
Cepillo lateral limpo: Remove any tangled hair or debris from the side brush.
Limpar o cepillo principal: Remove the main brush and clear any tangled hair or debris. The anti-tangle design minimizes hair entanglement.
Sensores limpos: Wipe all sensors (cliff sensors, obstacle avoidance sensors, charging contacts) with a clean, dry cloth.
Substituír a bolsa de po: When the dust bag in the base station is full (indicated by the app or indicator light), replace it with a new one.
Limpar as almofadas da mopa: The base station automatically cleans and hot-air dries the mop pads after each cleaning cycle. Periodically remove and hand-wash the mop pads for deeper cleaning.
Video: Demonstrates routine maintenance tasks including cleaning the dirty water tank, dustbin, filter, side brush, and replacing the dust bag.
8 Solución de problemas
Problema
Causa posible
Solución
O robot non se acende.
Batería baixa; non está ben conectado.
Ensure the robot is fully charged on the base station. Press and hold the power button for 3 seconds.
O robot non pode conectarse á wifi.
Contrasinal wifi incorrecto; rede de 5 GHz; robot demasiado lonxe do router.
Ensure correct 2.4GHz Wi-Fi password. Move robot closer to router. Reset Wi-Fi on robot (hold power and recharge buttons for 3s).
Mal rendemento de limpeza.
Full dustbin; dirty filters/brushes; clogged sensors.
Empty dustbin, clean/replace filters, clean main/side brushes, wipe all sensors.
O robot quédase atascado con frecuencia.
Obstacles; loose cables; narrow spaces.
Clear obstacles. Use the app to set no-go zones for problematic areas.
Mop pads are not cleaning effectively.
Dirty water tank full; clean water tank empty; worn mop pads.
Empty dirty water tank, refill clean water tank. Replace worn mop pads.
9. Especificacións
Característica
Detalle
Marca
JONR
Número de modelo
T5 Pro Gen2
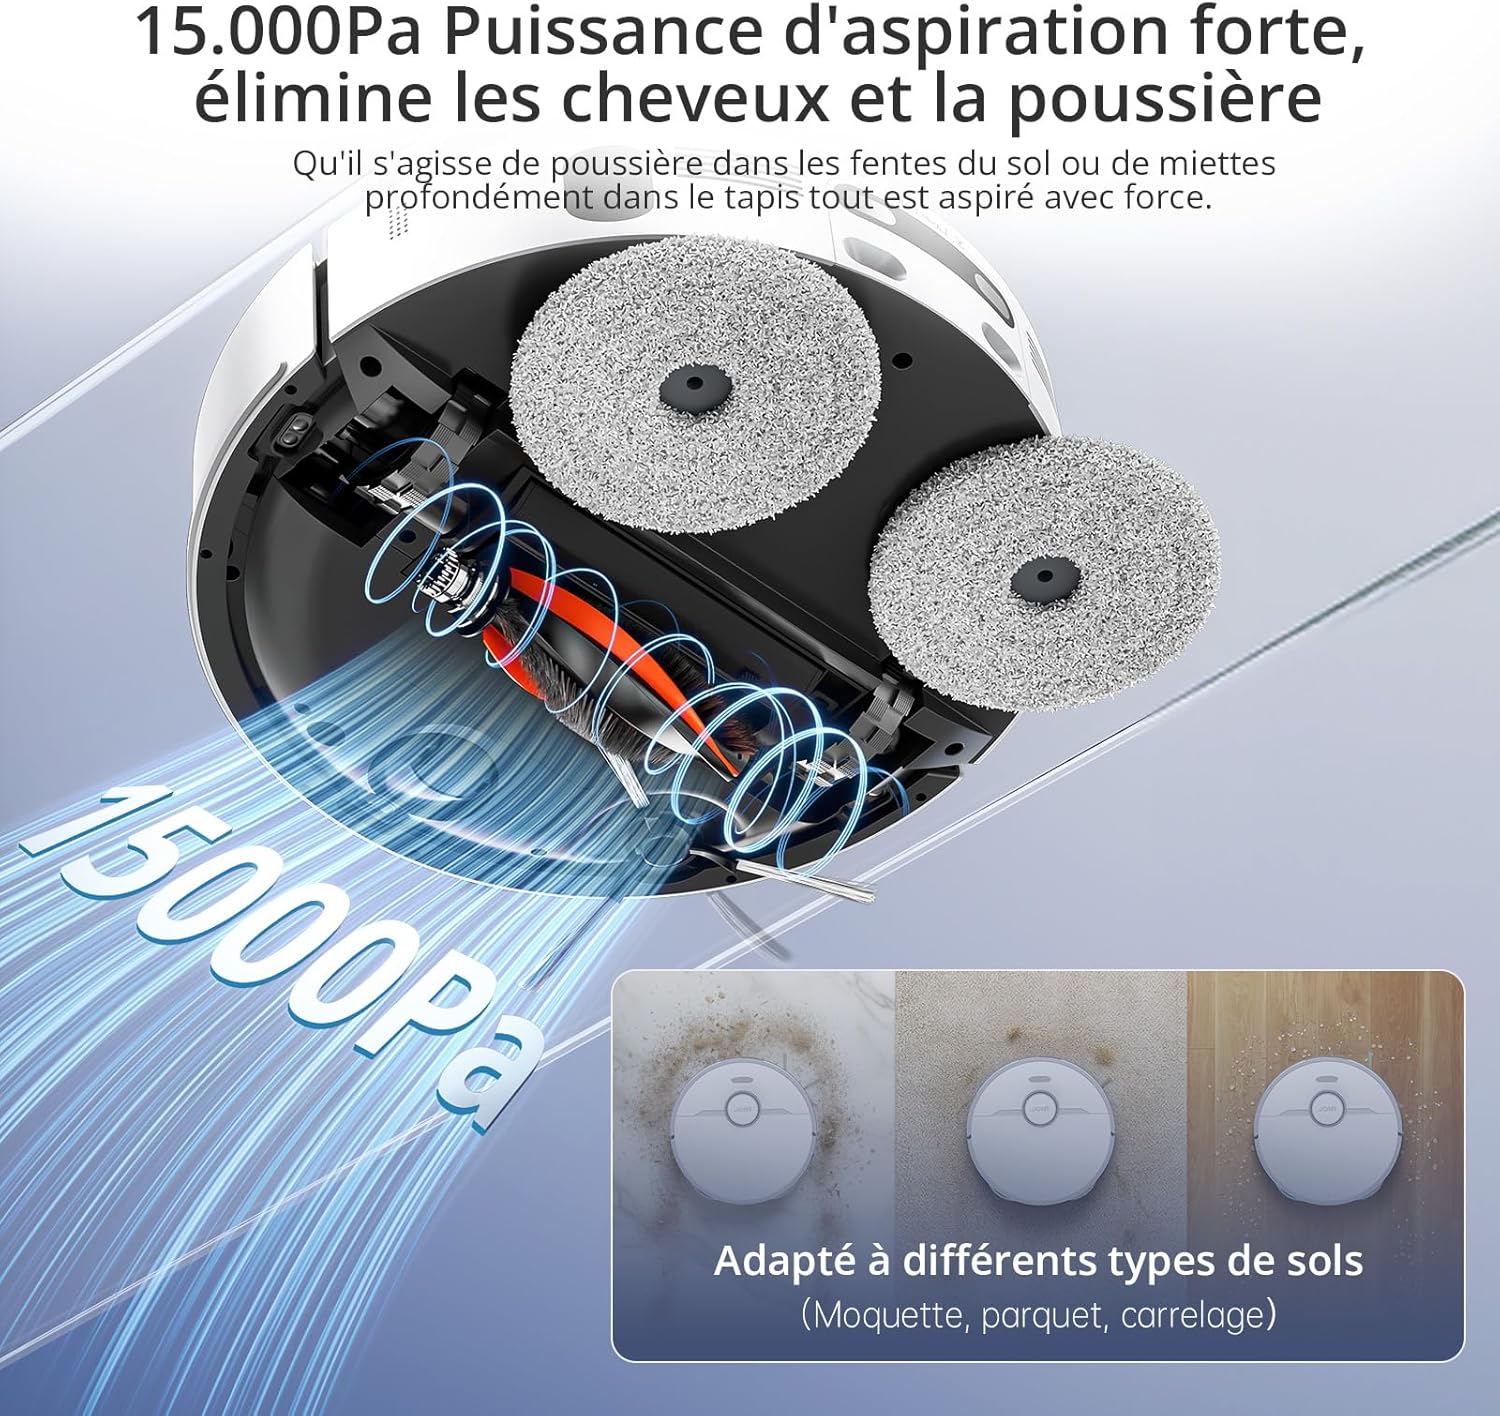
Potencia de succión
15000 Pa
Duración da batería
Ata 2.5 horas
Capacidade do depósito de auga limpa
4.0 litros
Capacidade do depósito de auga sucia
3.5 litros
Capacidade da bolsa de po
2.5 Liters (up to 75 days maintenance-free)
Tipo de navegación
LiDAR
Altura de elevación da fregona
10 mm (for carpets)
Altura de paso de obstáculos
Ata 20 mm
Nivel de ruído
<60 dB
Tipo de filtro
HEPA
Conectividade
Wi-Fi (2.4GHz), Mobile App (Xiaomi Home), Voice Control (Alexa, Google Home)
Dimensións (Robot)
33 L x 33 W x 10 H cm
Dimensions (Base Station)
40L x 34W x 56H cm (approximate, derived from product dimensions)
Peso
12 Kilograms (total item weight)
10. Garantía e soporte
JONR provides 365-day support for the T5 Pro Gen 2 Robot Vacuum Cleaner and Mop. For any issues or inquiries, please contact JONR customer service. We aim to resolve all problems within 24 hours.
For spare parts availability, please refer to the product's official website or authorized retailers. Spare parts are generally available for 5 years.
Documentos relacionados - T5 Pro Gen2
JONR P20 Pro Robot Aspiradora: Guía de Usuario Completa Guía detallada para el robot aspirador JONR P20 Pro con estación de limpieza todo en uno. Incluye instrucciones de instalación, operación, mantenimiento, solución de problemas y especificaciones técnicas para un uso óptimo.
JONR H2 Pro Wet and Dry Vacuum Cleaner User Manual Comprehensive user manual for the JONR H2 Pro Wet and Dry Vacuum Cleaner, a vertical floor washer designed for efficient cleaning of hard surfaces. Learn about setup, operation, maintenance, and troubleshooting.
JONR T5 Pro Gen 2 Robot Vacuum Cleaner User Manual Comprehensive user manual for the JONR T5 Pro Gen 2 robot vacuum cleaner with an all-in-one base station. Covers installation, operation, app connectivity, maintenance, and specifications for optimal performance.
JONR Robot Vacuum Cleaner Quick Start Guide This guide provides essential steps for setting up and operating your JONR robot vacuum cleaner. Learn about environmental preparation, robot and station setup, power and charging, network configuration, button functions, and safety instructions.
Ask about setup, troubleshooting, compatibility, parts, safety, or missing instructions. Manuals+ will review the question and use this page’s manual context to help answer it.