
1. Introdución
This manual provides detailed instructions for the installation, operation, and maintenance of your SILENTWARE VIEWWHITE A-RGB Mid-Tower PC Case. Please read this manual thoroughly before beginning assembly to ensure proper setup and to maximize the performance and longevity of your system components.
The SILENTWARE VIEWWHITE is a high-performance mid-tower PC case designed for optimal airflow and aesthetic appeal. It features tempered glass panels, four pre-installed 120mm A-RGB fans, and comprehensive compatibility for various PC components.
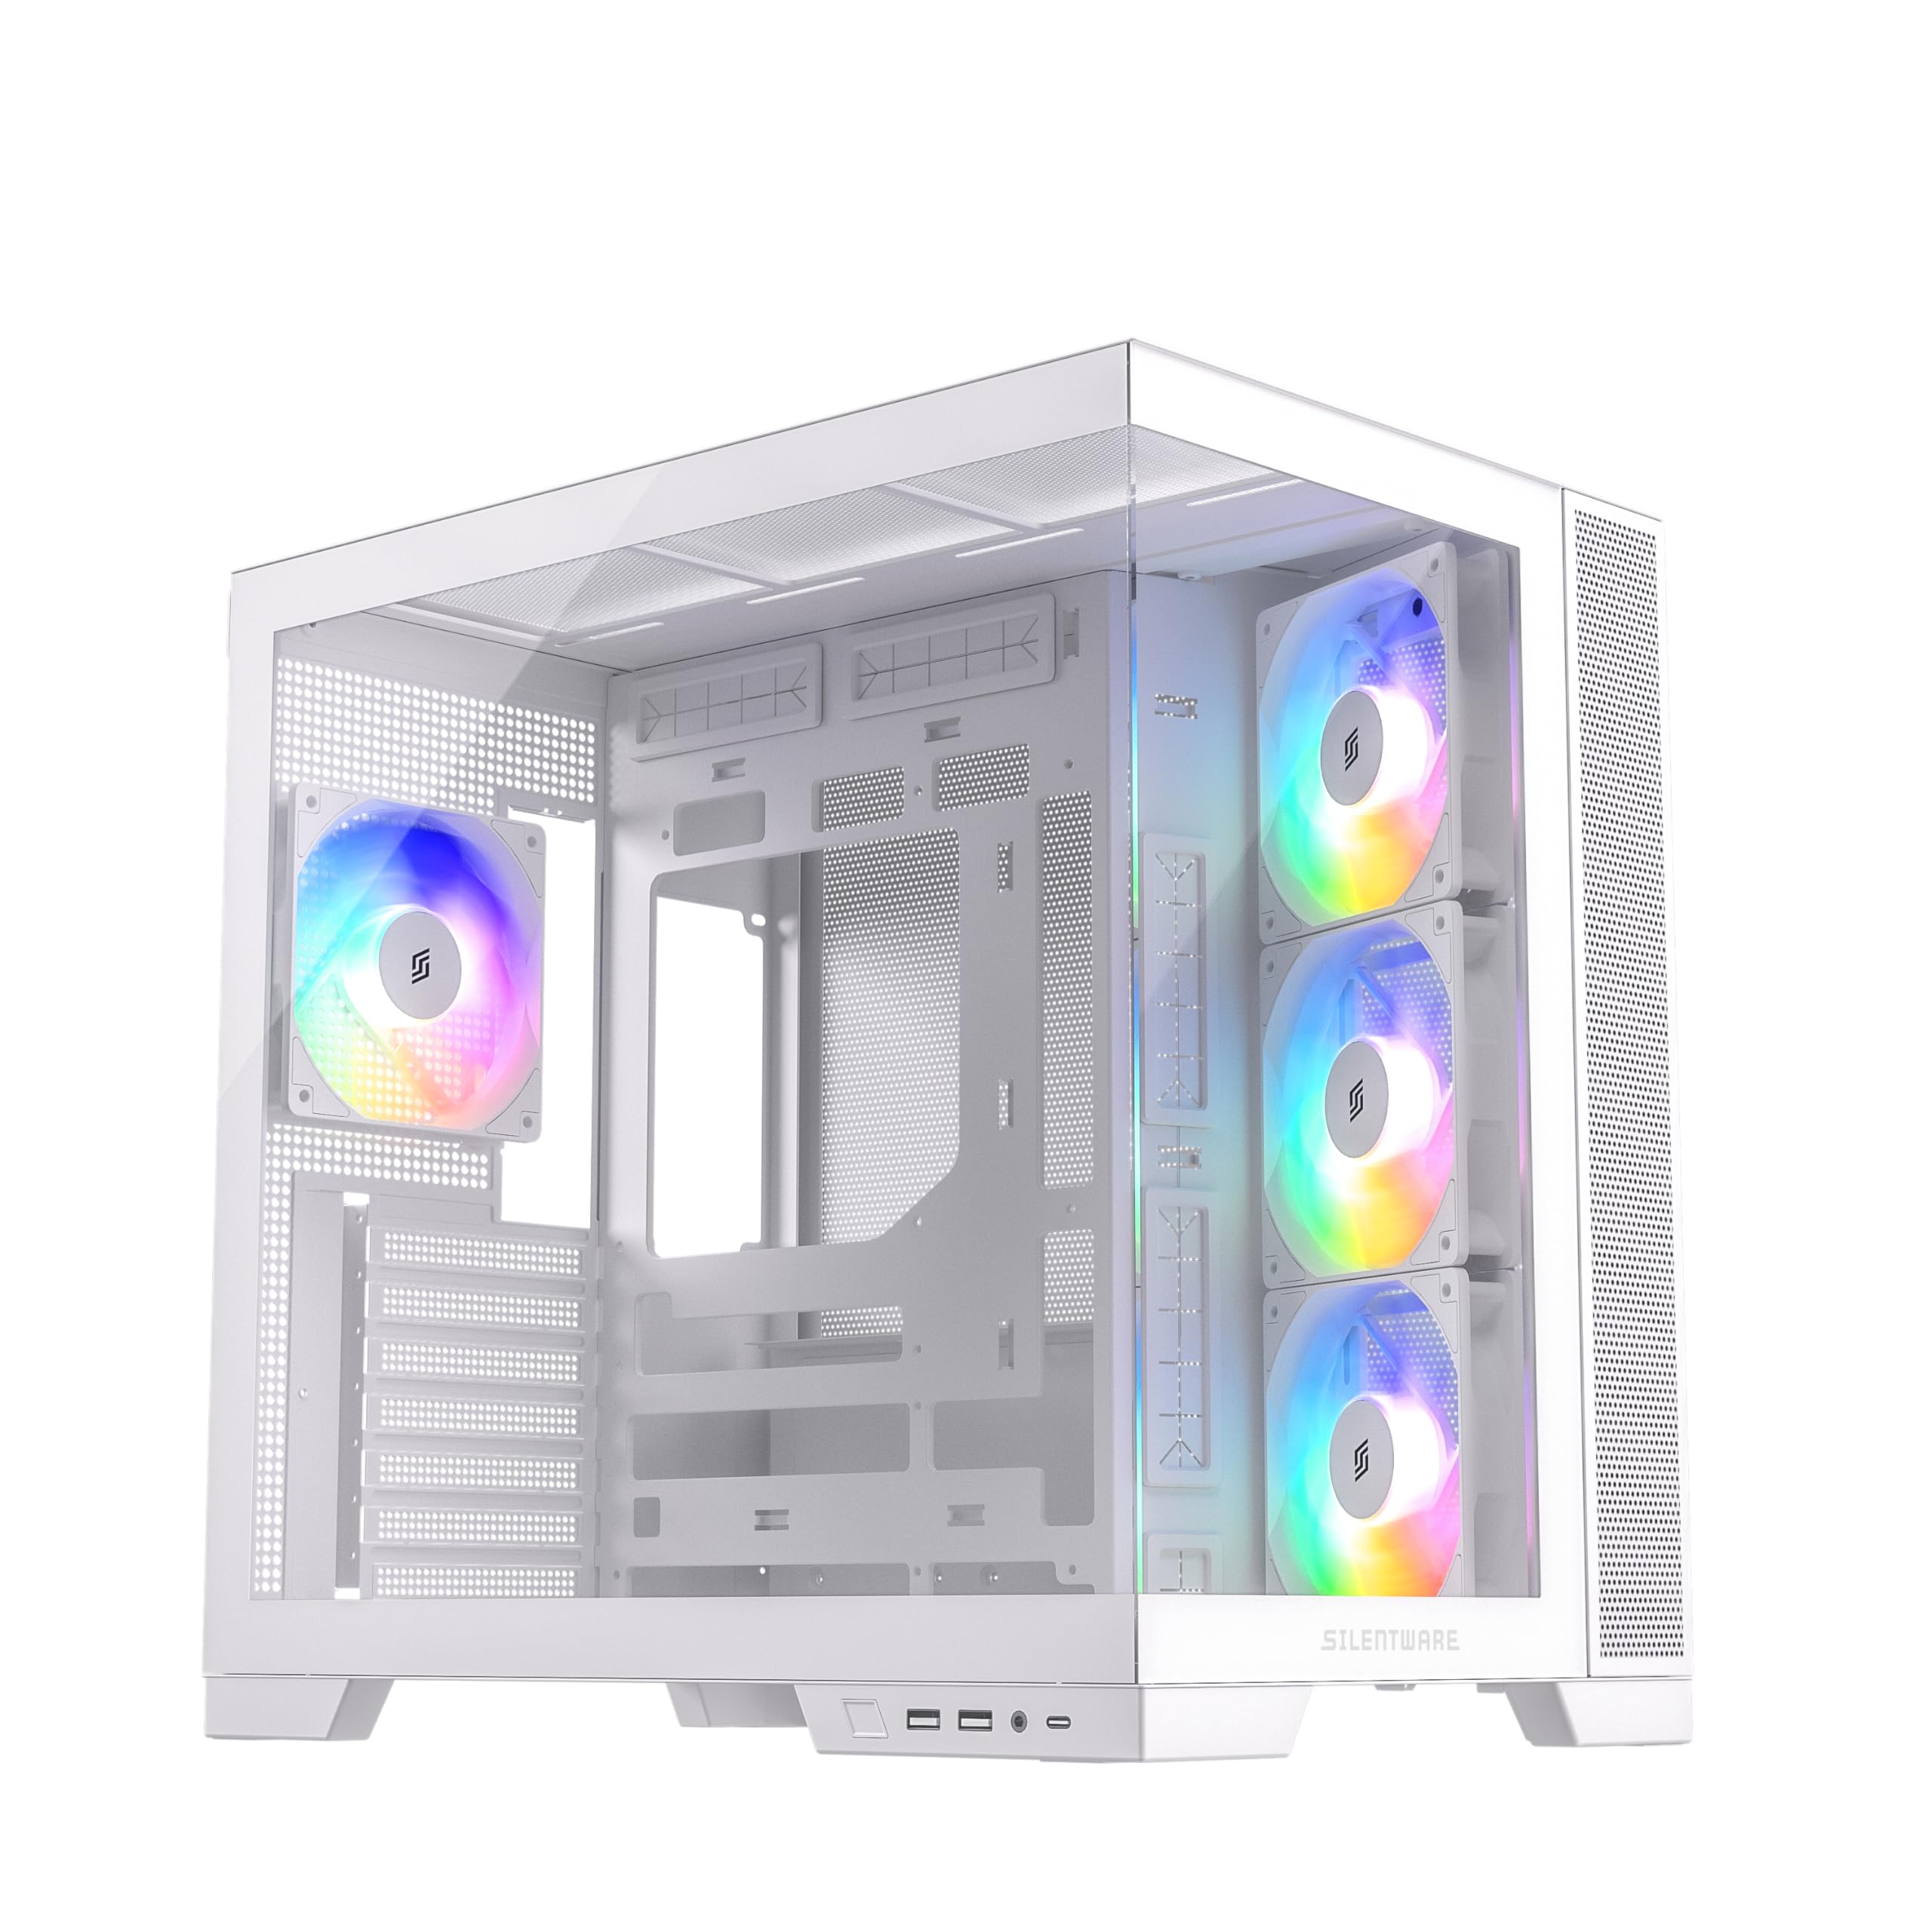
Figura 1.1: Máisview of the SILENTWARE VIEWWHITE A-RGB Mid-Tower PC Case.
2. Configuración e instalación
Before starting, ensure you have all necessary components and tools. It is recommended to work on a clean, flat surface and to use anti-static precautions.
2.1 Unpacking the Case
Carefully remove the PC case from its packaging. Inspect for any damage that may have occurred during shipping. Retain the packaging for future transport or warranty claims.
2.2 Eliminación de paneis
The SILENTWARE VIEWWHITE features tempered glass panels on the front and side. To access the interior for component installation:
- Locate the thumbscrews or latches securing the side tempered glass panel.
- Carefully remove the screws/release the latches and gently slide or lift the panel off. Place it on a soft, flat surface to prevent scratches.
- The top panel can also be removed for easier access and radiator installation.

Figure 2.1: Top panel removed for access to the interior.
2.3 Instalación da placa base
The case supports ATX, mATX, and ITX motherboards.
- Install the necessary motherboard standoffs if they are not pre-installed for your motherboard size.
- Align your motherboard with the standoffs and the I/O shield opening at the rear of the case.
- Asegure a placa base con parafusos.
2.4 Instalación da fonte de alimentación
The power supply unit (PSU) is mounted at the bottom of the case.
- Slide the PSU into its designated compartment from the rear of the case.
- Fixe a fonte de alimentación con parafusos desde a parte traseira exterior da caixa.
- Utilize the integrated cable management system for a clean build. The case supports PSUs up to 200mm in length.
2.5 Instalación da unidade de almacenamento
The case provides space for 2x SSDs and 1x HDD.
- Locate the SSD mounting points (typically behind the motherboard tray).
- Secure SSDs with screws.
- Install HDDs in the designated drive cage, usually located near the PSU shroud.
2.6 Instalación da tarxeta gráfica (GPU)
The case supports GPUs up to 410mm in length.
- Remove the necessary expansion slot covers at the rear of the case.
- Insert your GPU into the PCIe slot on the motherboard.
- Fixa a GPU con parafusos.
2.7 Cooling System (Fans & Radiators)
The case comes with four pre-installed 120mm A-RGB fans: three inverted airflow fans at the front and one at the rear. It supports various radiator configurations:
- Arriba: Up to 360mm radiator
- Lateral: Up to 280mm radiator
- Traseira: Up to 120mm radiator
Ensure all fans are connected to the motherboard or a fan controller for power and RGB control.
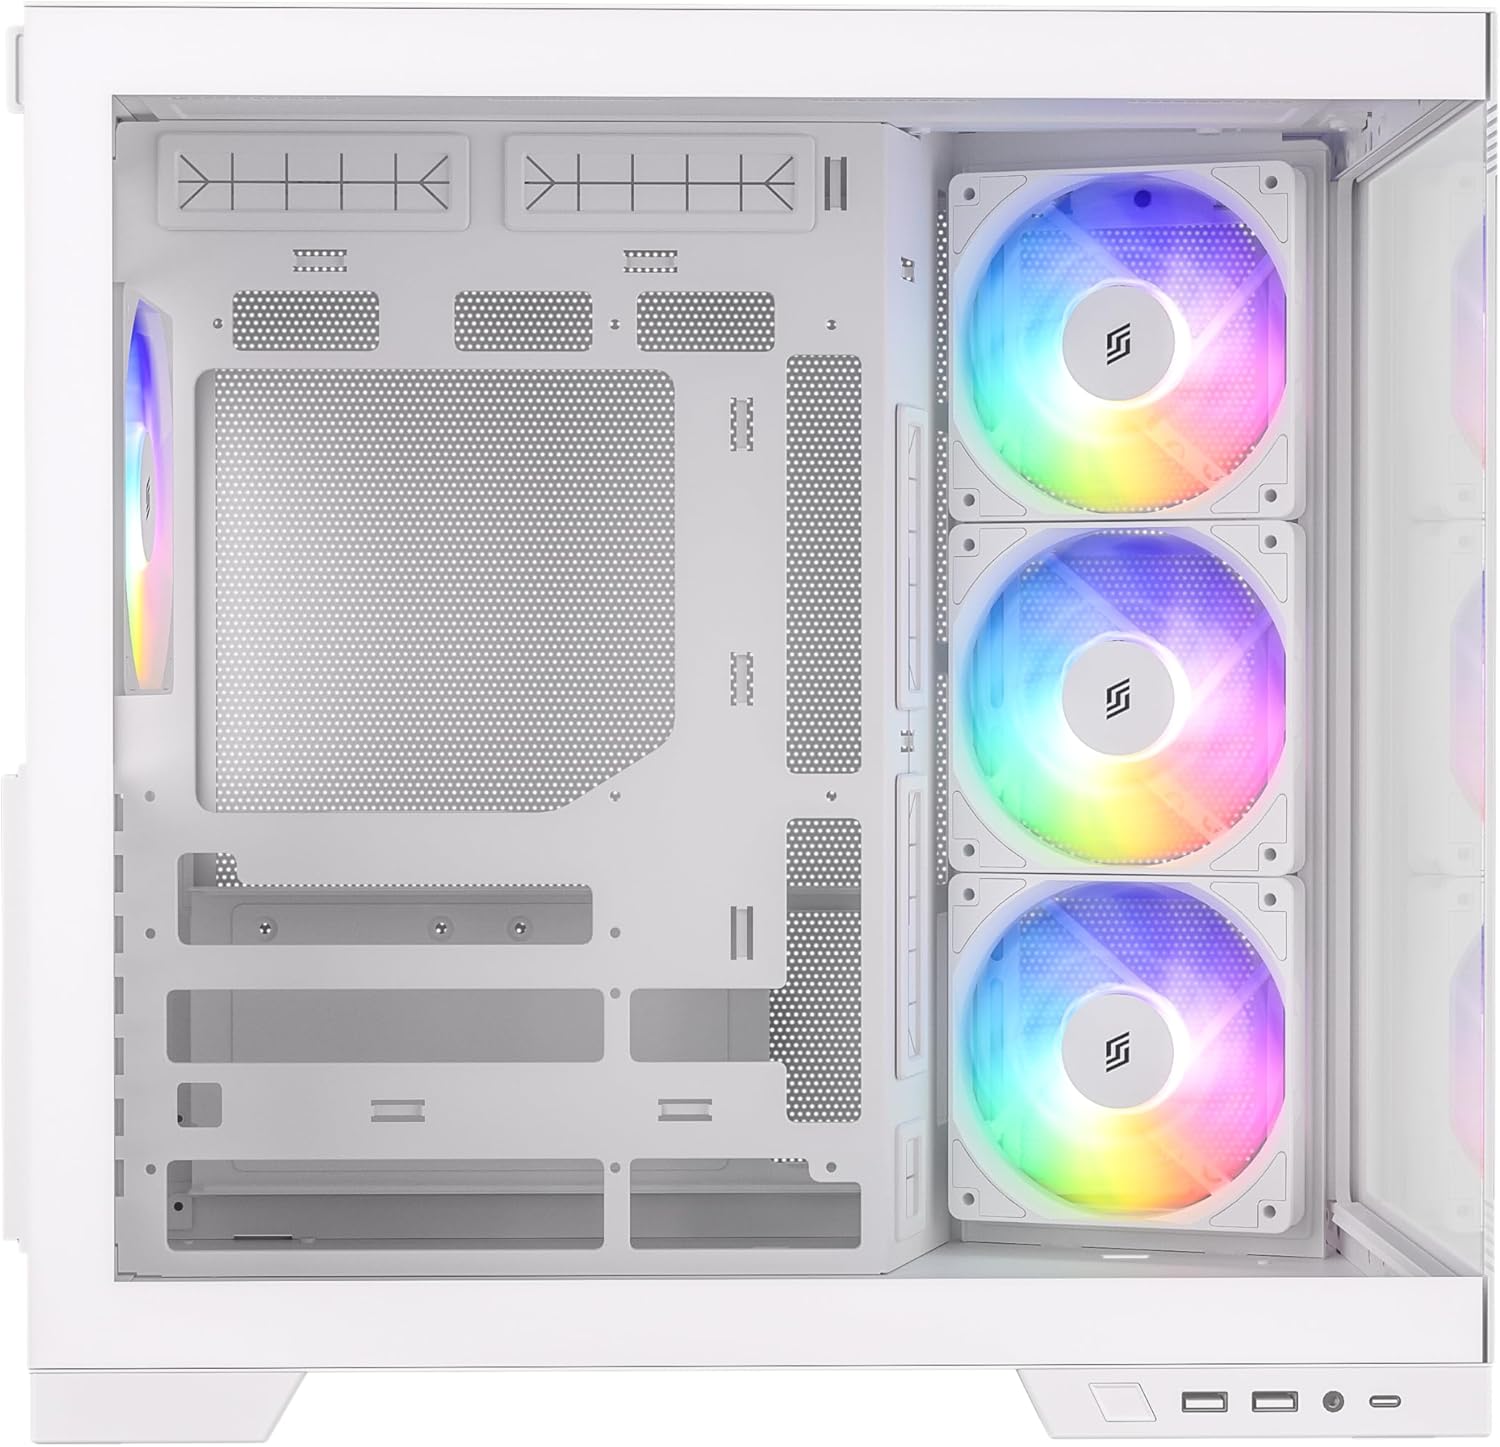
Figura 2.2: Interno view highlighting fan placement and component space.
2.8 Front I/O Panel Connections
Connect the front I/O panel cables to your motherboard. These include:
- USB 3.0 (x2)
- USB-C (x1)
- HD Audio (for headphone and microphone jacks)
- Power Button, Reset Button, Power LED, HDD LED
Refer to your motherboard manual for specific header locations.
3. Operating the A-RGB Fans
The pre-installed A-RGB fans offer flexible lighting and speed control.
3.1 Fan Connections
Each fan has two connectors:
- 4-pin PWM connector: For fan speed control. Connect this to a 4-pin fan header on your motherboard.
- 3-pin A-RGB connector: For addressable RGB lighting control. Connect this to a 3-pin 5V A-RGB header on your motherboard. Do not connect to a 4-pin 12V RGB header, as this may damage the LEDs.
3.2 Control do software
Once connected, you can control the fan speed and A-RGB lighting effects through your motherboard's proprietary software (e.g., ASUS Aura Sync, MSI Mystic Light, Gigabyte RGB Fusion, ASRock Polychrome Sync). Refer to your motherboard's manual for instructions on using its specific software.

Figure 3.1: A-RGB fans providing illumination and airflow.
4. Mantemento
Regular maintenance helps ensure optimal performance and extends the lifespan of your PC components.
4.1 Limpeza do po
Dust accumulation can impede airflow and cause components to overheat. It is recommended to clean your PC case every 3-6 months, or more frequently in dusty environments.
- Power off your PC and unplug it from the wall outlet.
- Remove the side and top panels.
- Use compressed air to blow dust out of the case, especially from fan blades, radiator fins, and mesh filters. Hold fan blades gently to prevent over-spinning.
- Wipe down interior surfaces with a microfiber cloth.
4.2 Coidado do vidro temperado
The tempered glass panels require careful handling.
- Clean glass panels with a soft, lint-free cloth and a non-abrasive glass cleaner.
- Avoid harsh chemicals or abrasive materials that could scratch the glass.
- Always handle glass panels by their edges to prevent fingerprints and smudges.
5 Solución de problemas
Esta sección aborda problemas comúns cos que podes atoparte.
5.1 Fans Not Spinning or Lighting Up
- Comproba as conexións de alimentación: Ensure the 4-pin PWM fan connectors are securely plugged into the motherboard fan headers.
- Check RGB Connections: Verify that the 3-pin A-RGB connectors are securely plugged into the 5V A-RGB headers on your motherboard. Confirm you are not using a 12V RGB header.
- Software da placa base: Ensure your motherboard's RGB control software is installed and configured correctly. Sometimes, a BIOS update or a fresh installation of the software can resolve issues.
- Fan Controller: If using an external fan controller, ensure it is powered and correctly connected to the fans and motherboard.
5.2 Poor Airflow / High Temperatures
- Acumulación de po: Clean dust filters and fan blades as described in the Maintenance section.
- Orientación do ventilador: Ensure fans are oriented correctly for optimal airflow (front fans typically intake, rear/top fans exhaust). The pre-installed front fans are inverted for intake.
- Xestión de cables Poor cable management can obstruct airflow. Re-route cables to minimize obstruction.
5.3 Front I/O Ports Not Working
- Check Motherboard Connections: Verify that all front I/O cables (USB 3.0, USB-C, HD Audio, power/reset switches) are correctly connected to their respective headers on the motherboard. Refer to your motherboard manual.
- Instalación de controladores: Ensure all necessary motherboard drivers, especially for USB ports, are installed.
6. Especificacións
Below are the technical specifications for the SILENTWARE VIEWWHITE A-RGB Mid-Tower PC Case:
| Característica | Especificación |
|---|---|
| Marca | SILENTWARE |
| Número de modelo | VIEWBRANCO |
| Tipo de caso | Media Torre |
| Cor | Branco |
| Material | Tempered Glass (Front & Side), Steel |
| Compatibilidade da placa base | ATX, mATX, ITX |
| Ventiladores preinstalados | 4x 120mm A-RGB (3x Front, 1x Rear) |
| Lonxitude da GPU | Ata 410 mm |
| Altura libre do refrigerador da CPU | Ata 160 mm |
| Soporte do radiador (superior) | Ata 360 mm |
| Soporte do radiador (lateral) | Ata 280 mm |
| Soporte do radiador (traseiro) | Ata 120 mm |
| Unidade Bays | 2 unidades SSD de 2.5 polgadas, 1 unidades HDD de 3.5 polgadas |
| Portos de E / S dianteiros | 2x USB 3.0, 1x USB-C, Audio In/Out |
| Tipo de fonte de alimentación | ATX (Bottom Mount, up to 200mm) |
| Dimensións (D x W x H) | 28.5 x 42.5 x 41.5 cm |

Figura 6.1: Dimensións do produto.
7. Información da garantía
SILENTWARE products are covered by a limited warranty against defects in materials and workmanship. The specific warranty period and terms may vary by region and retailer. Please retain your proof of purchase for warranty claims.
For detailed warranty information, please refer to the warranty card included with your product or visit the official SILENTWARE websitio.
8. Apoio
If you encounter any issues not covered in this manual or require further assistance, please contact SILENTWARE customer support.
- Websitio: Visit the official SILENTWARE websitio web con preguntas frecuentes, descargas de controladores e recursos de asistencia.
- Correo electrónico: Refer to your product packaging or the SILENTWARE websitio web para enderezos de correo electrónico de atención ao cliente.
- Teléfono: Check the SILENTWARE websitio web para obter números de contacto de asistencia rexional.
Ao contactar co servizo de asistencia, teña á man o número de modelo do seu produto (VIEWWHITE) and proof of purchase ready.


