
Introdución
This manual provides detailed instructions for the GIGABYTE X870E AORUS ELITE X3D ICE AMD AM5 ATX Motherboard. It covers essential information for installation, operation, maintenance, and troubleshooting to ensure optimal performance and longevity of your system. The X870E AORUS ELITE X3D ICE supports AMD Ryzen 9000, 8000, and 7000 Series Processors, features DDR5 memory support, 16+2+2 power phase design, four M.2 slots, PCIe 5.0, WIFI7, and 5 GbE connectivity.
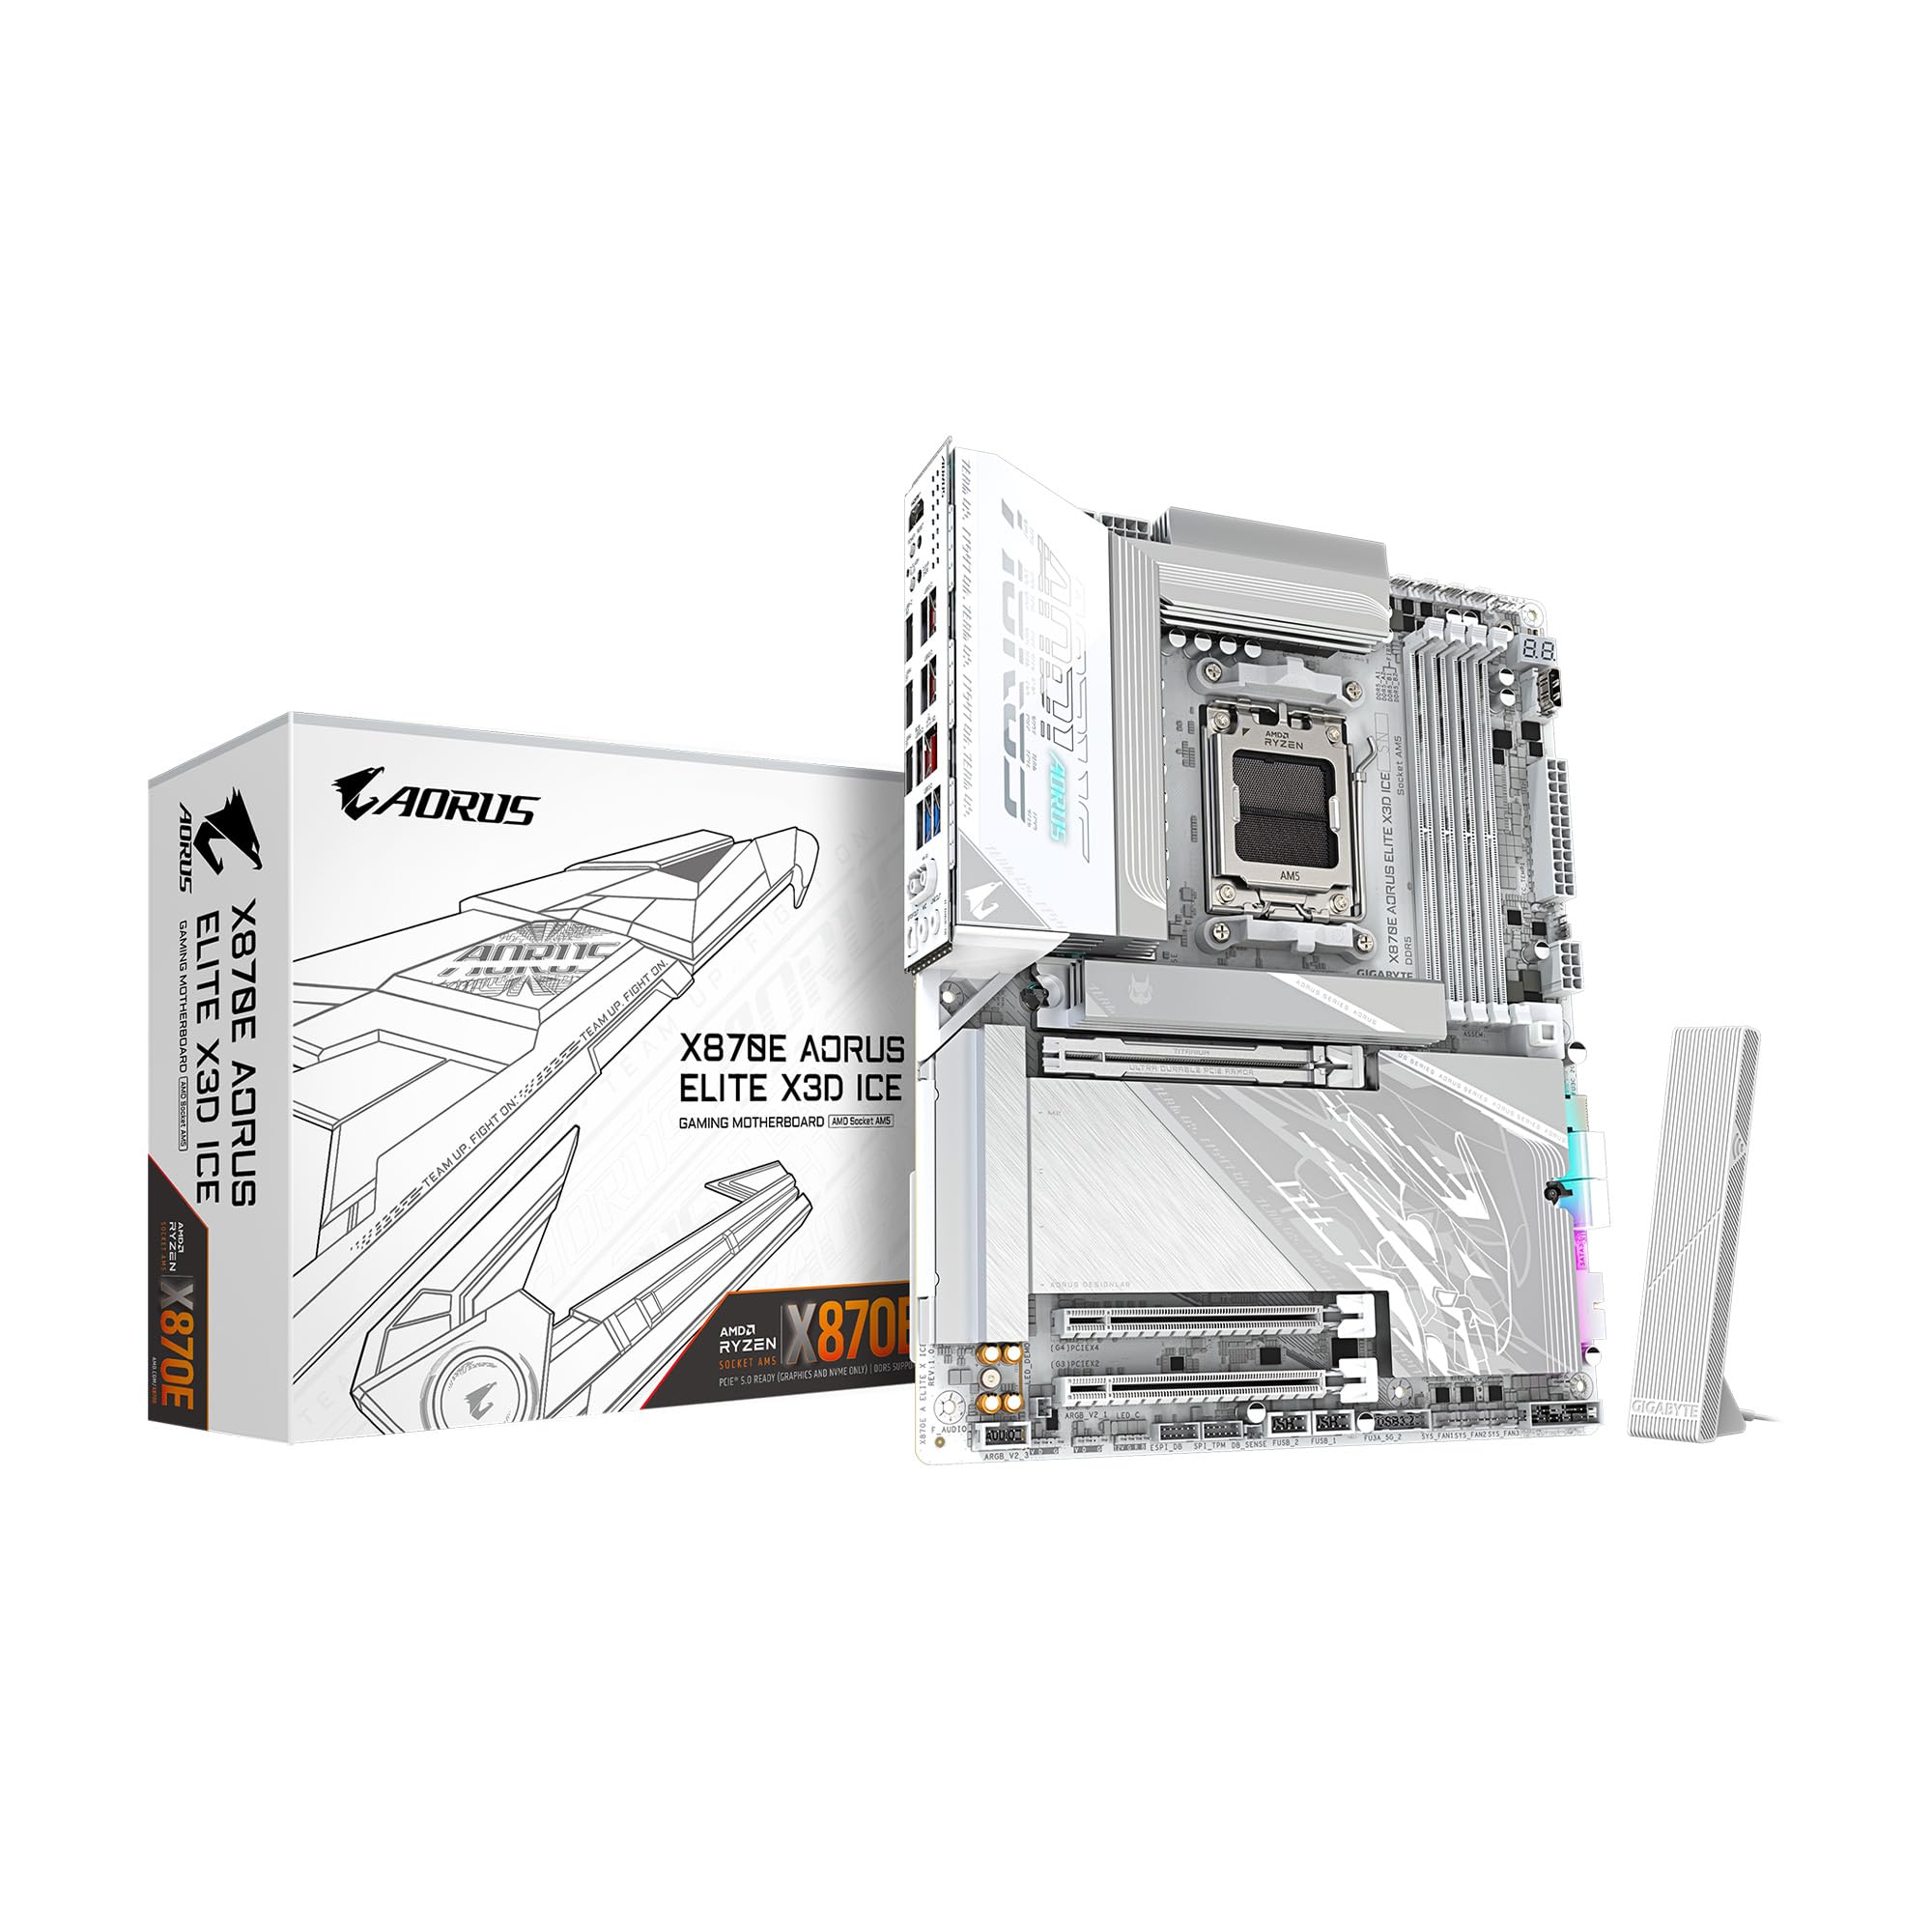
Figure 1: GIGABYTE X870E AORUS ELITE X3D ICE Motherboard, top-down view.
Configuración e instalación
Unha instalación axeitada é crucial para a estabilidade e o rendemento do teu sistema. Sigue estes pasos atentamente.
1. Preparación da placa base
- Unpack the motherboard from its anti-static bag.
- Place the motherboard on a non-conductive surface, such as the anti-static bag itself or a cardboard box.
Video 1: Official unboxing of the X870E AORUS ELITE X3D ICE motherboard, showing the contents and initial handling.
2. Instalación da CPU (socket AMD AM5)
- Localiza o socket da CPU AM5 na placa base.
- Open the CPU retention mechanism by pushing down and away from the socket.
- Aliña coidadosamente a CPU co zócalo, asegurándote de que o triángulo dourado da CPU coincida co triángulo do zócalo. Non forces a CPU para que estea no seu lugar.
- Peche o mecanismo de retención para fixar a CPU.

Imaxe 2: Primeiro plano view of the AMD AM5 CPU socket on the motherboard, ready for processor installation.
3. Instalación da memoria (RAM)
- Abra os clips en ambos extremos das ranuras DIMM DDR5.
- Aliñe a muesca do módulo de memoria DDR5 coa chave da ranura DIMM.
- Insira o módulo de memoria firmemente na ranura ata que os clips encaixen no seu lugar. Asegúrese de que ambos os clips estean pechados.
- For dual-channel configuration, refer to the motherboard manual for specific slot pairing.

Figura 3: View of the DDR5 memory slots on the motherboard, indicating where RAM modules are installed.
4. Instalación dun SSD M.2
- Locate the M.2 slots on the motherboard. The X870E AORUS ELITE X3D ICE features two PCIe 5.0 M.2 slots and two PCIe 4.0 M.2 slots.
- Remove the M.2 heatsink and stand-off screw (if present).
- Insira o SSD M.2 na ranura en ángulo.
- Push down the M.2 SSD and secure it with the stand-off screw or the M.2 EZ-Latch mechanism.
- Volva colocar o disipador de calor M.2 para obter un rendemento térmico óptimo.

Figure 4: Illustration of M.2 SSD installation, highlighting the EZ-Latch mechanism for tool-less setup.
5. Instalación da tarxeta gráfica (GPU)
- Locate the PCIe Gen5 x16 slot.
- Abra o clip de retención ao final da ranura PCIe.
- Aliña a túa tarxeta gráfica coa ranura e preme firmemente ata que encaixe no seu lugar.
- Fixa a tarxeta gráfica á carcasa do teu PC con parafusos.

Figure 5: Close-up of the PCIe EZ-Latch Plus, simplifying graphics card removal and installation.
6. Conexións de alimentación
- Conecta o conector de alimentación principal ATX de 24 pines da fonte de alimentación á placa base.
- Conecte o(s) conector(es) de alimentación da CPU de 8 pines (ou 4+4 pines) á placa base.
7. Panel frontal e conexións periféricas
- Connect the front panel headers (power switch, reset switch, HDD LED, power LED) according to the motherboard manual.
- Conecte os conectores USB 2.0, USB 3.2 Gen 1 e USB 3.2 Gen 2 Type-C do panel frontal.
- Connect SATA drives to the available SATA 6Gb/s ports.
- Attach the WIFI antenna to the rear I/O panel for wireless connectivity.

Figura 6: detallada view of the rear I/O panel, showing USB ports, Ethernet, audio jacks, and Wi-Fi antenna connectors.
Instrucións de funcionamento
1. Arranque inicial e configuración da BIOS/UEFI
- After assembling your PC, connect a monitor, keyboard, and mouse.
- Acenda o seu sistema. Prema o botón DEL tecla durante o inicio para entrar na configuración da BIOS/UEFI.
- Configure boot order, enable XMP/EXPO for memory, and set up any other necessary system parameters.
- Garda os cambios e sae da BIOS/UEFI.
2. Instalación de controladores
- Instala o teu sistema operativo.
- After OS installation, install the latest drivers for your motherboard chipset, graphics card, audio, and network from the GIGABYTE website or the provided support DVD/USB.
3. Utilidades de software de GIGABYTE
GIGABYTE provides various software utilities to enhance your user experience:
- Centro de control de GIGABYTE (GCC): A unified software platform for managing system performance, RGB lighting, fan speeds, and more.
- BIOS Update Utility: For updating the motherboard BIOS from within the operating system.
- App Center: Provides access to various GIGABYTE applications and utilities.
Mantemento
Un mantemento regular axuda a garantir a lonxevidade e o funcionamento estable da túa placa base.
1. Limpeza
- Periodically clean dust from the motherboard and components using compressed air.
- Asegúrese de que o sistema estea apagado e desconectado antes de limpalo.
- Evite usar produtos de limpeza líquidos directamente sobre os compoñentes.
2. Actualizacións da BIOS
- Consulta os GIGABYTE website for the latest BIOS versions.
- As actualizacións da BIOS poden mellorar a compatibilidade, a estabilidade e o rendemento.
- Follow the instructions provided by GIGABYTE carefully when performing a BIOS update to avoid system damage.
3. Actualizacións de controladores
- Comprobe regularmente o GIGABYTE website for updated drivers for your motherboard.
- Keeping drivers up-to-date can resolve issues and improve system performance.
Resolución de problemas
Se tes problemas, consulta os seguintes pasos comúns para a resolución de problemas:
1. Sen alimentación / Sen arranque
- Asegúrate de que todos os cables de alimentación (ATX de 24 pines, CPU de 8 pines) estean conectados correctamente.
- Verify the power supply is switched on and functioning correctly.
- Check front panel connections, especially the power switch.
- Tenta arrincar con compoñentes mínimos (CPU, unha memoria RAM, GPU se non tes gráficos integrados) para illar o problema.
2. POST Code Errors
- The motherboard may display a POST code on its debug LED. Refer to the GIGABYTE manual for the meaning of specific codes.
- Common codes relate to CPU, RAM, or GPU initialization failures.
3. Inestabilidade/fallos do sistema
- Asegúrate de que todos os controladores estean actualizados.
- Comprobe as temperaturas da CPU e da GPU para evitar o sobrequecemento.
- Verify RAM stability using memory diagnostic tools.
- Reset BIOS settings to default if overclocking or custom settings are causing issues.
Especificacións
| Característica | Especificación |
|---|---|
| Marca | GIGABYTE |
| Nome do modelo | X870E AORUS ELITE X3D ICE |
| Socket CPU | LGA 1718 (AMD AM5) |
| Procesadores compatibles | Serie AMD Ryzen 9000/8000/7000 |
| Tipo de chipset | AMD X870E |
| Tecnoloxía de memoria RAM | DDR5 |
| Slots de memoria dispoñibles | 4 |
| Tamaño máximo da memoria RAM | 256 GB |
| Slots PCIe | 1x PCIe Gen5 x16, 2x PCIe 5.0 M.2, 2x PCIe 4.0 M.2 |
| Portos USB | 2x USB4 Type-C with DP Alt, 1x USB 3.2 Gen 2 Type-C, 5x USB 3.2 Gen 2 Type-A, 3x USB 3.2 Gen 1 Type-A, 65W Front USB-C |
| Ethernet | LAN de 5 GbE |
| Conectividade sen fíos | WIFI 7 |
| Power Phase | Digital Twin 16+2+2 |
| Factor de forma | ATX |
| Dimensións (L x W x H) | 12.01 cm de longo x 1.75 cm de ancho x 9.61 cm de alto |
Garantía e Soporte
The GIGABYTE X870E AORUS ELITE X3D ICE Motherboard comes with a 5 ano de garantía do fabricante. For technical support, driver downloads, BIOS updates, and further assistance, please visit the official GIGABYTE website. You can also refer to the multilingual installation guide included in the product packaging for additional details.
Vídeo 2: Unha vista de 360 graos view of the X870E AORUS ELITE X3D ICE motherboard, showcasing o seu deseño e as súas características.