
1. Introdución
This manual provides detailed instructions for the installation, operation, and maintenance of your Streamline Tirso 48" x 76" Semi-Frameless Sliding Shower Door. Please read all instructions carefully before beginning installation to ensure proper function and safety.
Características principais:
- Dimensións: 48 in. W x 76 in. H (Min Installation Width: 46 6/7 in.; Max Installation Width: 48 in.); Walk-through width varies between 20 2/3 - 21 6/7 in. W.
- Vidro: Premium 5/16 in. (8 mm) clear tempered glass.
- CrystalTech Coating: Hydrophobic coating designed to repel water stains, minimize limescale, and reduce maintenance.
- Axustabilidade: Wall profiles adjust up to 1 1/6 in. for out-of-plumb walls.
- Deseño: Reversible for left or right-hand installation.
- Hardware: Stylish matte black finish with stainless steel bar handles.

Figure 1: The Tirso Semi-Frameless Sliding Shower Door, showcasing its matte black hardware and clear glass in an installed bathroom setting.
2. Configuración e instalación
Professional installation is recommended. Ensure all necessary tools and safety equipment are available before starting. This shower door features a reversible design, allowing for left or right-hand opening, and includes adjustability for out-of-plumb walls.
2.1 Lista de verificación previa á instalación:
- Verify all parts are present and undamaged against the packing list.
- Confirm wall studs or solid blocking are present in installation areas.
- Asegúrate de que a base ou o bordo da ducha estea nivelado e a plomada.
- Gather tools: tape measure, level, drill, silicone sealant, screwdriver, pencil, safety glasses.
2.2 Pasos de instalación (Información xeral)view):
- Medir e marcar: Accurately measure the shower opening and mark the positions for wall profiles.
- Instalar Wall Profiles: Secure the vertical wall profiles to the wall, utilizing the 1 1/6 inch adjustability for out-of-plumb conditions.
- Assemble Top and Bottom Tracks: Attach the top and bottom tracks to the wall profiles.
- Install Fixed Glass Panel: Carefully place and secure the fixed glass panel into the frame.
- Install Sliding Door Panel: Mount the sliding door panel onto the rollers and guide it into the tracks.
- Attach Handles and Hardware: Secure the stainless steel bar handles and any other necessary hardware.
- Selo: Apply a high-quality silicone sealant to all exterior joints to prevent water leakage. Allow adequate curing time before use.

Figure 2: Technical drawing illustrating the dimensions and key features of the Tirso shower door, including its reversible design and CrystalTech treated glass.

Figura 3: Detalle view of the matte black top sliding mechanism and rollers, essential components for the door's smooth operation.
3. Instrucións de funcionamento
The Tirso shower door is designed for smooth and effortless operation. After installation and sealant curing, the door is ready for use.
3.1 Opening and Closing:
- Grasp the stainless steel bar handle firmly.
- Gently slide the door along its track to open or close. Avoid forcing the door.
- Ensure the door is fully closed before showering to prevent water leakage.
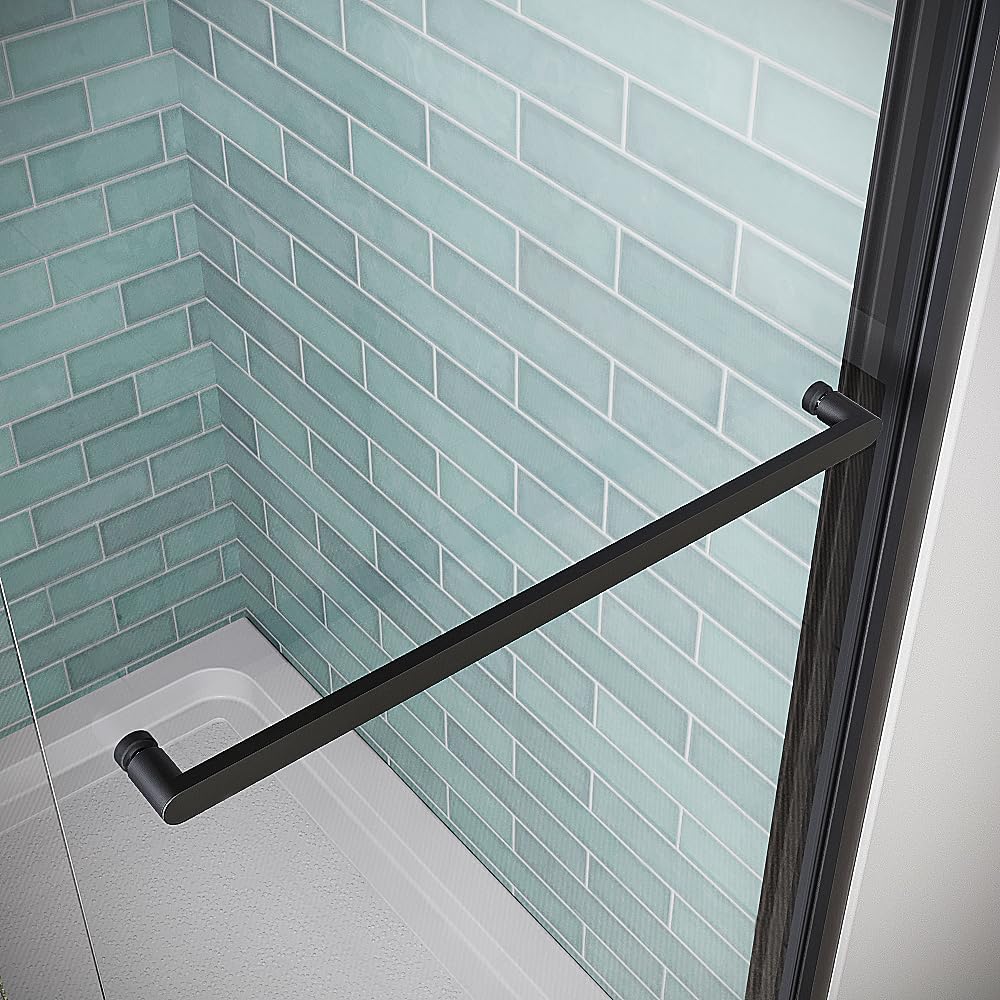
Figure 4: Close-up of the ergonomic matte black stainless steel bar handle, designed for comfortable and easy operation of the sliding door.
4. Mantemento e Limpeza
Regular cleaning and maintenance will preserve the appearance and functionality of your shower door. The CrystalTech coating significantly reduces the effort required for cleaning.
4.1 Cleaning the Glass (CrystalTech Treated):
- After each use, rinse the glass with clean water to remove soap residue.
- For routine cleaning, use a soft cloth or sponge with mild soap and water.
- Avoid abrasive cleaners, scouring pads, or harsh chemicals, as these can damage the CrystalTech coating and glass surface.
- The CrystalTech coating repels water, making it easier to wipe away water spots and limescale.
4.2 Cleaning Hardware:
- Clean matte black hardware with a soft, damp pano e xabón suave.
- Do not use abrasive cleaners, ammonia-based products, or harsh chemicals, as they can damage the finish.
- Regularly check and clean the bottom track to ensure smooth sliding operation.
5 Solución de problemas
Esta sección aborda problemas comúns que podes atopar coa porta da túa ducha.
| Problema | Causa posible | Solución |
|---|---|---|
| Water leakage from door edges | Improper sealing; worn out seals; door not fully closed. | Check silicone sealant and reapply if necessary. Inspect and replace seals if damaged. Ensure door is fully closed before showering. |
| A porta non escorrega con suavidade | Debris in track; rollers need lubrication; misaligned rollers. | Clean debris from bottom track. Apply a silicone-based lubricant to rollers. Check roller alignment and adjust if needed. |
| O vidro aparece turbio ou manchado | Manchas de auga dura; produtos de limpeza inadecuados. | Clean with mild soap and water. For stubborn spots, use a vinegar-water solution (1:1 ratio) and rinse thoroughly. Avoid abrasive cleaners. |
6. Especificacións
| Característica | Detalle |
|---|---|
| Fabricante | Racionalizar |
| Número de modelo | DSD-3404-221-BL |
| Dimensións xerais | 48 in. W x 76 in. H |
| Minimum Installation Width | 46 6/7 in. |
| Maximum Installation Width | 48 polgadas |
| Walk-through Width | 20 2/3 - 21 6/7 in. |
| Espesor de vidro | 5/16 polgadas (8 mm) |
| Tipo de vidro | Clear Tempered Glass with CrystalTech Treatment |
| Acabado Hardware | Negro Mate |
| Material | Tempered Glass, Metal Hardware |
| Peso do elemento | 102.6 libras |
| Dimensións do produto (embalado) | 0.31 x 39.38 x 76 polgadas |
| Compoñentes incluídos | Door Hardware, Mounting Hardware, Frame Hardware |

Figure 5: An overhead perspective of the shower enclosure, providing a view of the door's top profile and its integration with the shower pan.
7. Garantía e soporte
7.1 Manufacturer's Warranty:
This Streamline Tirso Shower Door is covered by a 3 Year Limited Manufacturer's WarrantyEsta garantía cobre defectos de materiais e fabricación en condicións de uso e mantemento normais. Conserve o comprobante de compra para reclamacións de garantía.
7.2 Atención ao cliente:
For technical assistance, replacement parts, or warranty inquiries, please contact Streamline customer support. Refer to the contact information provided with your product packaging or visit the official Streamline websitio.