
1. Introdución
This manual provides detailed instructions for the installation, operation, and maintenance of the Rosewill RSV-Z2006 2U Rackmount Server Chassis. This chassis is designed for high-performance server builds, supporting ATX motherboards, full-size GPUs, and extensive storage options within a compact 2U form factor. Please read this manual thoroughly before beginning assembly to ensure proper setup and safe operation.
2. Información de seguridade
- Desconecte sempre a fonte de alimentación da toma de corrente antes de instalar ou retirar calquera compoñente.
- Use unha pulseira antiestática para evitar danos por descarga electrostática (ESD) en compoñentes sensibles.
- Handle all components with care. Avoid touching circuit board contacts directly.
- Garantir unha ventilación adecuada ao redor do chasis para evitar o sobrequecemento.
- Do not operate the chassis with the cover removed unless performing maintenance or troubleshooting.
- Manteña pezas e ferramentas pequenas lonxe dos nenos.
3. Contido do paquete
Verify that all components listed below are present in your package. If any items are missing or damaged, please contact Rosewill customer support.
- Rosewill RSV-Z2006 2U Rackmount Server Chassis
- 5 x 80mm PWM Fans (pre-installed)
- Accessory kit (screws, standoffs, cable ties)
- Power cable extension (internal for PSU)

Figura 3.1: Explotado view of the RSV-Z2006 chassis and its main components, including the chassis frame, top cover, hard drive cages, fans, and mounting hardware. Motherboard, GPU, and power supply are shown for illustrative purposes.
4. Produto rematadoview
The Rosewill RSV-Z2006 is a 2U rackmount server chassis designed for robust performance and expandability. Key features include:
- 2U Rackmount Form Factor: Standard 19-inch rack compatibility for data centers and server environments.
- ATX Motherboard Support: Accommodates standard ATX motherboards.
- Horizontal Full-Size GPU Support: Designed to house a full-length, full-size graphics card horizontally. Note: A PCIe riser is not included and must be purchased separately.
- Capacidade de almacenamento masiva: Six 3.5-inch HDD bays for substantial data storage.
- Optimized Thermal Management: Five pre-installed 80mm PWM fans ensure efficient cooling.
- Conectividade de alta velocidade: Front-panel USB 3.2 Gen 2 Type-C port for up to 10 Gbps data transfer.
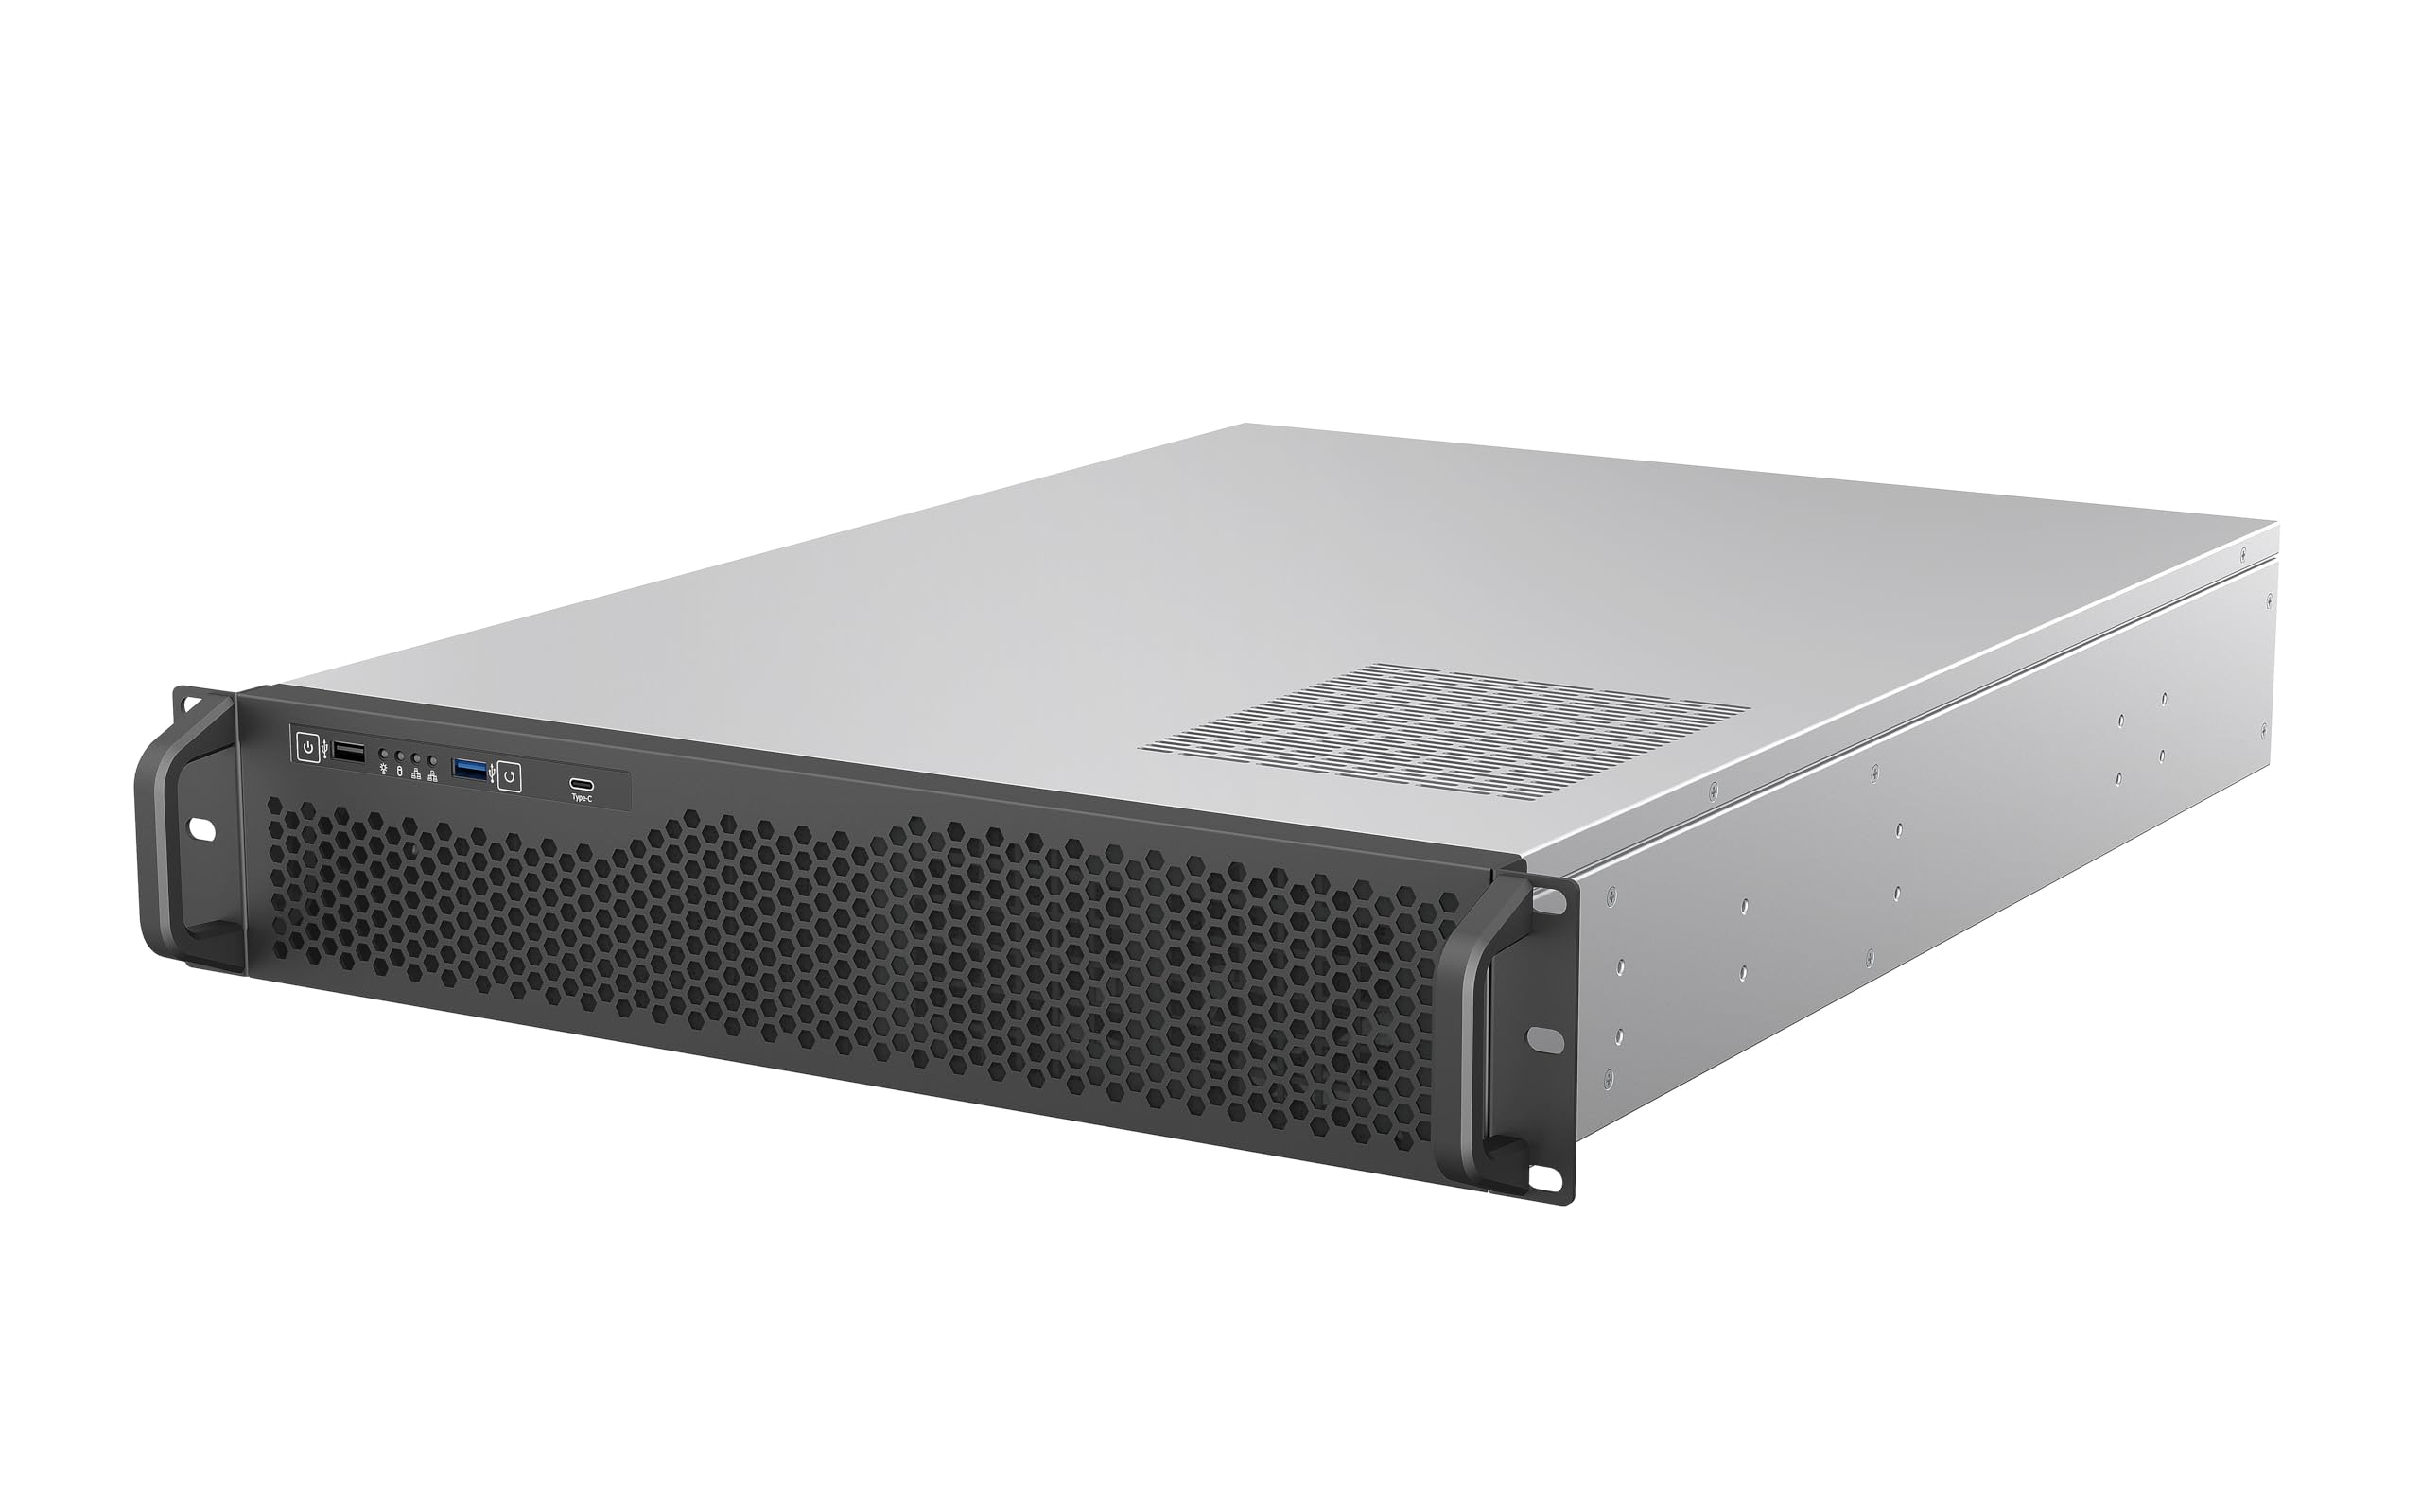
Figura 4.1: Fronte view of the Rosewill RSV-Z2006 chassis, showing the perforated front panel for airflow, front I/O ports, and rackmount handles.

Figure 4.2: Internal layout of the RSV-Z2006 chassis with the top cover removed, revealing the motherboard tray, hard drive bays, and fan mounting locations.

Figure 4.3: Detail of the front panel connectivity, including USB 3.2 Type-C and Type-A ports, along with power and reset buttons.
5. Configuración e instalación
Follow these steps to install your components into the RSV-Z2006 chassis.
5.1 Extracción da tapa superior
- Locate the screws securing the top cover to the chassis.
- Remove these screws and carefully slide the top cover backward, then lift it off.
5.2 Instalación da placa base
- Install the I/O shield into the rear opening of the chassis.
- Align your ATX motherboard with the pre-installed standoffs on the motherboard tray.
- Secure the motherboard using the provided screws. Ensure all standoffs are used for proper support.

Figura 5.1: Interno view of the chassis with a motherboard and a horizontally mounted graphics card installed. Note the space for the PCIe riser (not shown).
5.3 Instalación da tarxeta gráfica (GPU)
The RSV-Z2006 supports a full-length, full-size GPU mounted horizontally. This requires a PCIe riser card (not included).
- Install your PCIe riser card into the appropriate PCIe slot on the motherboard.
- Mount the graphics card onto the PCIe riser and secure it within the chassis using the provided GPU bracket and screws. Ensure the GPU is firmly seated and supported.
5.4 Instalación do disco duro
The chassis features six 3.5-inch HDD bays. These bays are designed for hot-swap or tool-less installation.
- Slide each 3.5-inch HDD into an available drive bay until it clicks into place.
- Connect the SATA data and power cables to each installed HDD.

Figura 5.2: Interno view highlighting the hard drive bays with multiple 3.5-inch HDDs installed, demonstrating the storage capacity.
5.5 Instalación da Unidade de Alimentación (PSU).
- Position your ATX power supply in the designated PSU bay at the rear of the chassis.
- Fixe a fonte de alimentación con parafusos na parte traseira do chasis.
- Connect the internal power cable extension from the chassis to your PSU.
- Connect the necessary power cables from the PSU to the motherboard, GPU, and storage devices.
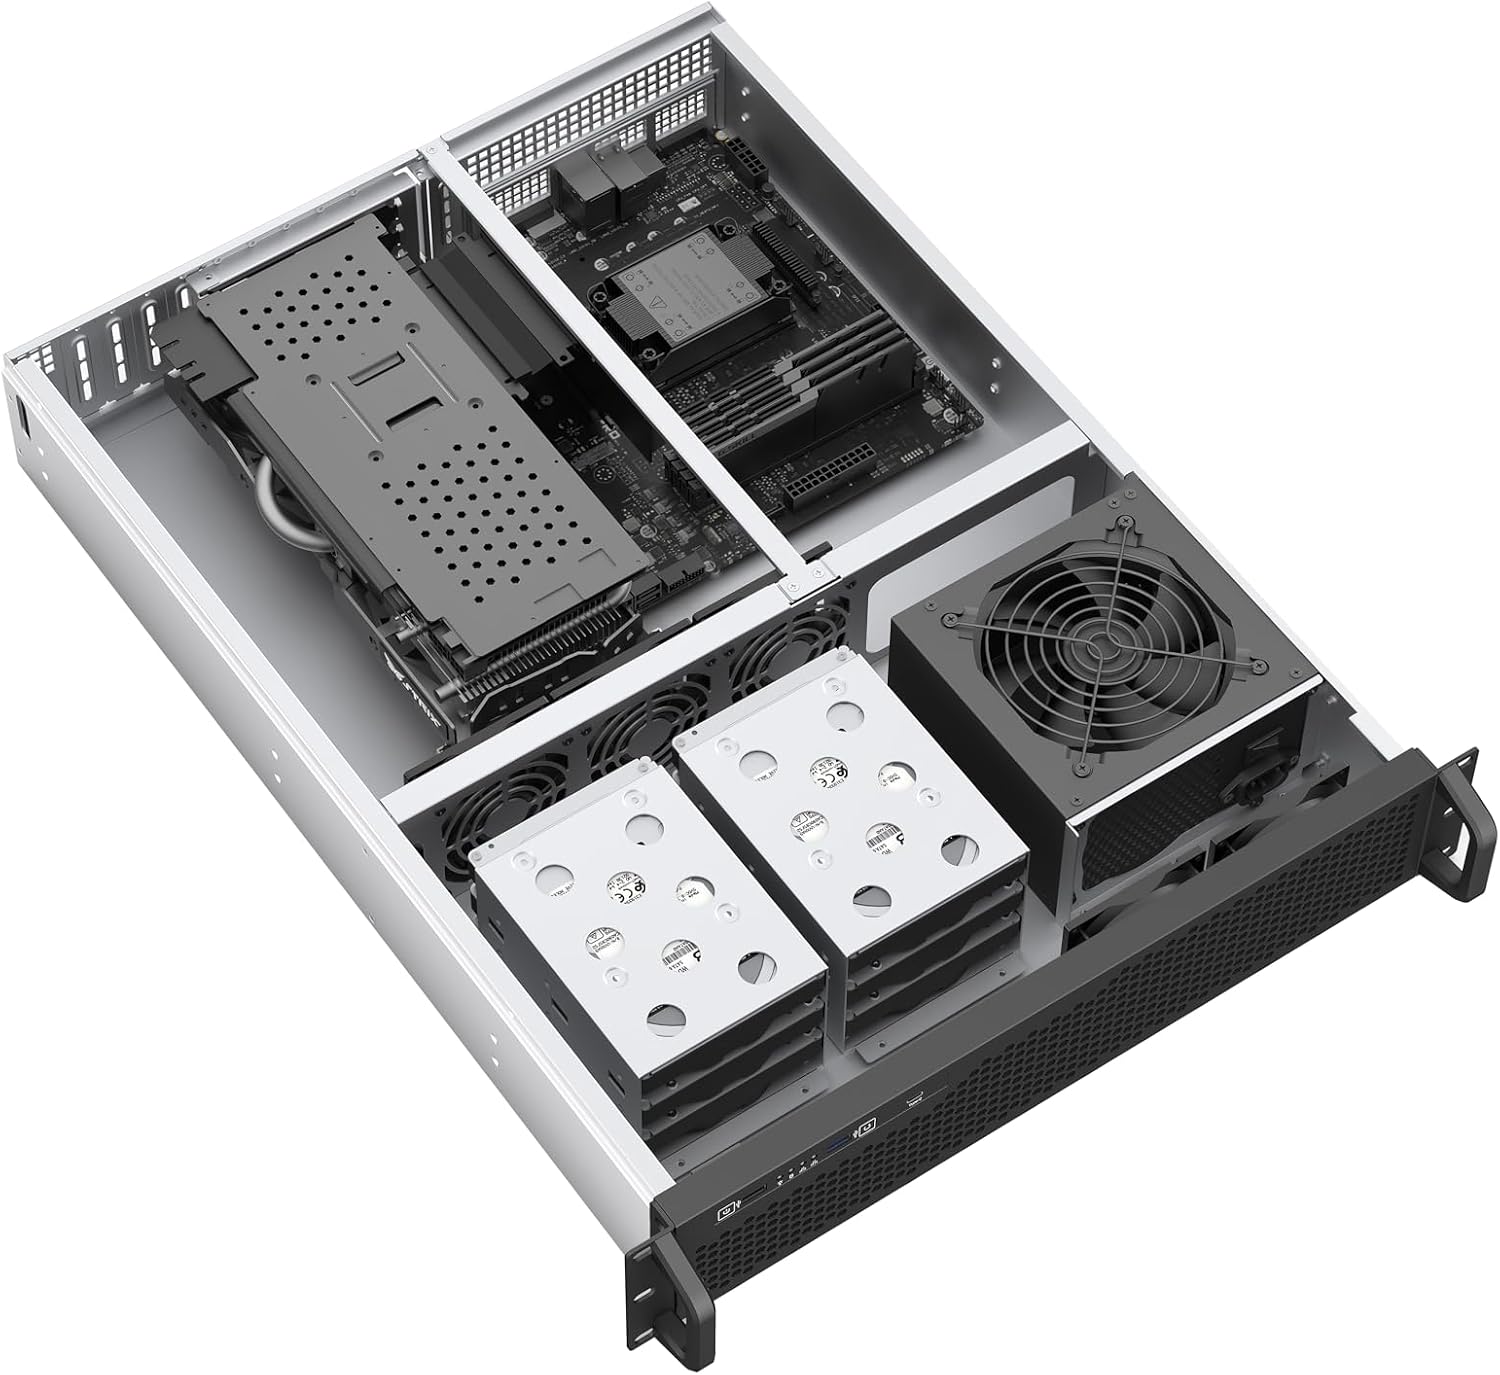
Figura 5.3: Interno view showing the power supply mounting area and its proximity to the hard drive bays and cooling fans.
5.6 Fan and Cable Management
The chassis comes with five 80mm PWM fans pre-installed for optimal airflow.
- Ensure all fan cables are connected to appropriate fan headers on your motherboard.
- Route all internal cables neatly to improve airflow and aesthetics. Use the provided cable ties to secure cables.
5.7 Reattaching the Top Cover
- Carefully place the top cover back onto the chassis, aligning it with the screw holes.
- Secure the top cover with the screws removed in step 5.1.
6. Instrucións de funcionamento
Once all components are installed and secured, connect the power cable to the chassis and a wall outlet. Press the power button on the front panel to turn on the system. The pre-installed PWM fans will automatically adjust their speed based on system temperature, providing efficient cooling.

Figura 6.1: Traseira view of the RSV-Z2006 chassis, showing the power input, expansion slots, and rear fan exhaust.
7. Mantemento
Regular maintenance ensures optimal performance and longevity of your server chassis.
- Limpeza do po: Periodically remove the top cover and use compressed air to clean dust from fans, heatsinks, and internal components. Ensure the system is powered off and unplugged before cleaning.
- Inspección do ventilador: Check fans for any obstructions or signs of wear. Replace any noisy or malfunctioning fans to maintain proper airflow.
- Xestión de cables Re-evaluate cable routing periodically to ensure it does not impede airflow.
8 Solución de problemas
If you encounter issues with your RSV-Z2006 chassis, refer to the following common troubleshooting tips:
- O sistema non se acende:
- Verify all power cables are securely connected to the PSU, motherboard, and wall outlet.
- Ensure the power button cable from the front panel is correctly connected to the motherboard.
- Problemas de sobrequecemento:
- Check that all five 80mm fans are spinning correctly.
- Clean any dust buildup from fans and internal components.
- Ensure the chassis is in a well-ventilated area and not obstructed.
- Component Fit Issues (e.g., HDD, PSU):
- Some components may require careful alignment or minor adjustments. Refer to the specific component's manual for installation guidance.
- Ensure you are using standard-sized 3.5-inch HDDs and an ATX power supply.
- Portos USB non funcionan:
- Verify the front panel USB 3.2 cable is correctly connected to the corresponding header on your motherboard.
9. Especificacións
| Marca | Rosewill |
| Nome do modelo | RSV-Z2006 |
| Tipo de caso | Chasis de servidor de montaxe en rack 2U |
| Compatibilidade da placa base | ATX |
| Soporte GPU | Horizontal Full-Size GPU (PCIe riser not included) |
| Baxas de unidades internas | 6 x 3.5-inch HDD (Hot-swap/Tool-less) |
| Sistema de refrixeración | 5 x 80mm PWM Fans (pre-installed) |
| Portos de E / S dianteiros | 1 x USB 3.2 Gen 2 Type-C, USB 3.0, Power, Reset |
| Material | Aceiro de aliaxe |
| Cor | Prata |
| Peso do elemento | 17.9 libras |
| Dimensións (D x W x H) | 23.62" x 17" x 3.52" (600 mm x 430 mm x 89.5 mm) |
| UPC | 840951136591 |

Figure 9.1: Dimensional diagram of the RSV-Z2006 chassis, indicating its length, width, and height.
10. Garantía
The Rosewill RSV-Z2006 2U Rackmount Server Chassis comes with a Garantía limitada de 1 anos from the date of purchase. This warranty covers defects in materials and workmanship under normal use. It does not cover damage caused by accident, abuse, misuse, natural disaster, or unauthorized modification or repair. For warranty claims, please retain your proof of purchase.
11. Apoio
For technical assistance, troubleshooting, or warranty inquiries, please visit the official Rosewill website or contact their customer support team. You may find additional resources, FAQs, and contact information on their support page.
Rosewill Official Websitio: www.rosewill.com