
1. Introdución
The DEPSTECH DS320 Dual Lens Borescope Camera is an advanced inspection tool designed for examining hard-to-reach areas. It features a 4.3-inch IPS screen for clear viewing, dual lenses for versatile inspection angles, IP67 waterproofing for use in wet environments, and a 16.5ft semi-rigid cable for flexible maneuverability. This manual provides essential information for the safe and effective operation and maintenance of your borescope.
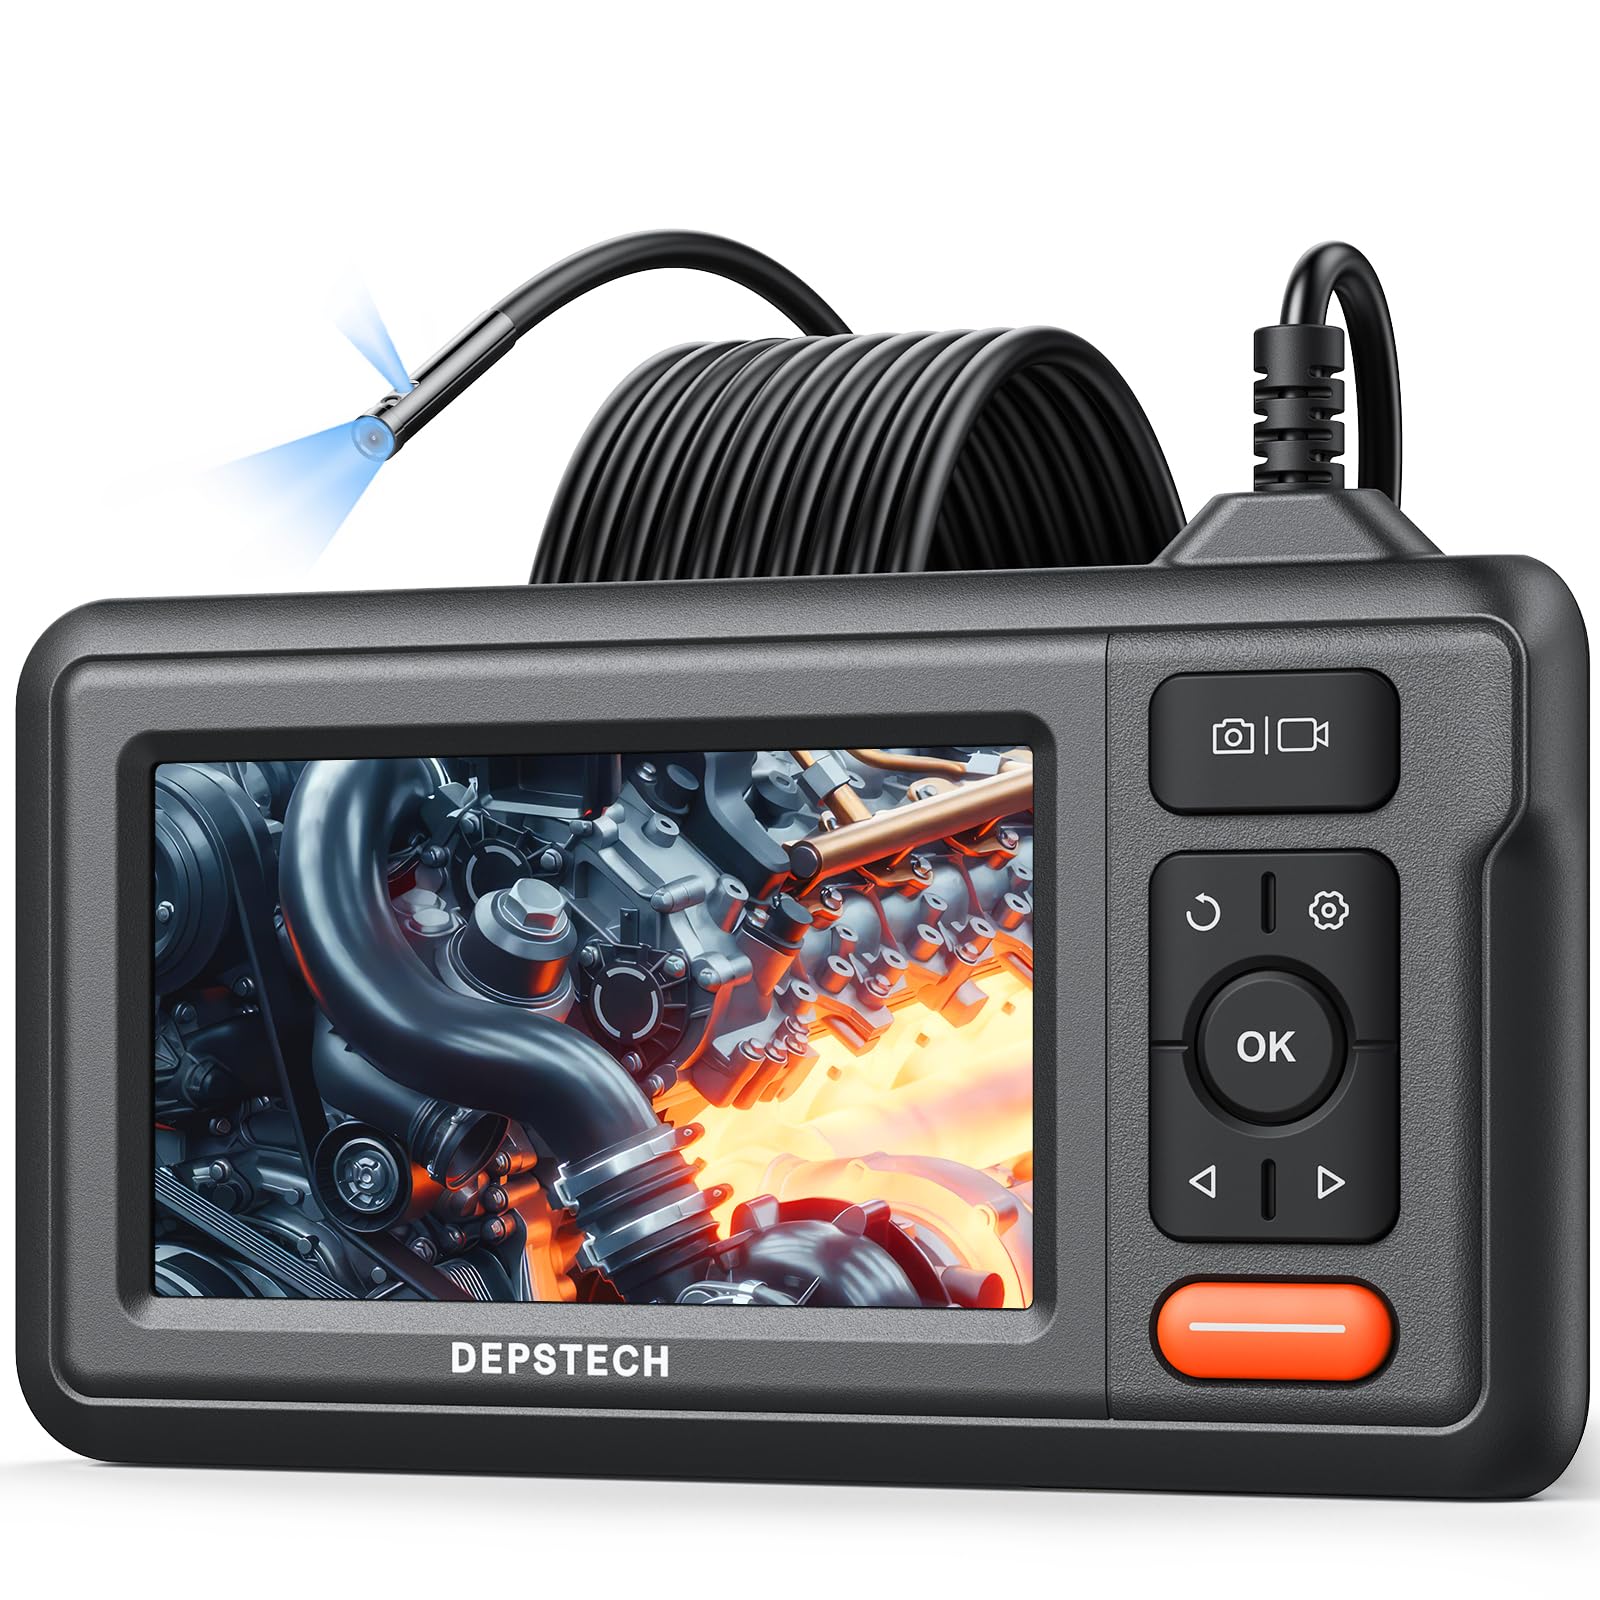
Figure 1: DEPSTECH DS320 Dual Lens Borescope Camera.
2. Información de seguridade
Lea e comprenda todas as instrucións de seguridade antes de usar este produto. O incumprimento destas instrucións pode provocar descargas eléctricas, incendios ou lesións graves.
- Non empregue o dispositivo en atmosferas explosivas, como en presenza de líquidos, gases ou po inflamables.
- Manteña o dispositivo lonxe dos nenos.
- Do not modify or disassemble the device. Repairs should only be performed by authorized personnel.
- Ensure the camera probe is clean and free from debris before and after use.
- Non expoñas o dispositivo a temperaturas extremas nin á luz solar directa durante períodos prolongados.
- The camera probe is IP67 waterproof, but the main unit is not. Avoid immersing the main unit in water.
3. Contido do paquete
Verifica que todos os elementos estean presentes no teu paquete:
- DS320 Endoscope with 16.5ft Semi-Rigid Cable
- Accessory Kit (Hook and Magnet)
- Cable de carga tipo C
- Manual de usuario

Figure 2: Package contents including the borescope, cable, and accessories.
4. Produto rematadoview
The DEPSTECH DS320 is designed for ease of use and high performance in various inspection scenarios.
4.1. Características da unidade principal
- Pantalla IPS de 4.3 polgadas: Provides a clear, high-definition display with a 178° viewing angle for real-time inspection footage.
- Controis intuitivos: Easy-to-use buttons for navigation, image capture, video recording, and light adjustment.
- Deseño ergonómico: Comfortable to hold for extended periods during inspections.
- Batería de longa duración: Equipped with a battery providing approximately 3 hours of continuous operation.

Figure 3: The 4.3-inch IPS color display for clear viewing.
4.2. Camera Probe Features
- Sistema de lente dual: Features a front-facing camera and a side-facing camera, allowing for comprehensive inspection without repositioning the probe.
- Bluart 3.0 Technology: Enhances image clarity, processing speed, and low-light performance for sharp and vivid images.
- Impermeable IP67: The camera probe is resistant to water and dust, making it suitable for wet and dirty environments.
- Luces LED axustables: Seven adjustable LED lights provide optimal illumination in dark areas.
- 16.5ft Semi-Rigid Cable: Offers flexibility to navigate tight spaces while maintaining its shape for precise positioning.

Figure 4: The dual lens system with front and side cameras.

Figura 5: Example of 180° image rotation for easier viewing.
5. Configuración
5.1. Cargando o dispositivo
Before first use, fully charge the borescope. Connect the provided Type-C charging cable to the device's charging port and a suitable USB power adapter (not included). The charging indicator will show the charging status.
5.2. Attaching the Probe
The semi-rigid cable is pre-attached to the main unit. Ensure the connection is secure before use.
5.3. Acendido/apagado
Press and hold the power button (usually marked with a power symbol) for a few seconds to turn the device on or off. The screen will illuminate upon successful power-on.
6. Instrucións de funcionamento
6.1. Funcionamento básico
Once powered on, the live feed from the camera will appear on the IPS screen. Use the navigation buttons (up/down/left/right) and the OK button to interact with the menu and settings.

Figure 6: The borescope ready for immediate use.
6.2. Using Dual Lenses
The DS320 features both a front camera and a side camera. Use the dedicated button (often labeled with a camera icon or 'M' for mode) to switch between the front view, lateral view, or a split-screen display if available. This allows for comprehensive inspection of an area without needing to rotate the probe.
6.3. Adjusting LED Brightness
The camera probe is equipped with adjustable LED lights. Use the brightness adjustment buttons (often marked with '+' and '-' or arrow icons) on the main unit to increase or decrease the illumination level. This helps in achieving optimal visibility in varying light conditions.

Figure 7: IP67 waterproof camera head with adjustable LED lights.
6.4. Captura de fotos e vídeos
To capture an image, press the photo button (usually a camera icon). To record video, press the video button (usually a video camera icon). Ensure a compatible memory card (not included) is inserted for saving media. The device supports recording in 720p resolution.

Figure 8: Screen interface for capturing photos and recording videos.
6.5. Usando accesorios
The accessory kit includes a hook and a magnet. These can be attached to the camera probe to retrieve small objects or to maneuver the probe in difficult areas. Carefully attach them to the camera head as instructed in the accessory guide.

Figure 9: Included hook and magnet accessories.
6.6. Vídeo do produtoview
For a visual guide on the product's features and usage, please watch the official product video below.
Video 1: Official DEPSTECH Borescope Product Video, demonstrating key features and applications.
7. Mantemento
7.1. Limpeza
After each use, especially in dirty or wet environments, clean the camera probe with a soft, damp cloth. For stubborn dirt, a mild detergent can be used. Ensure the probe is completely dry before storage. Do not use abrasive cleaners or solvents. The main unit should be wiped with a dry cloth.
7.2. Almacenamento
Store the borescope in a cool, dry place, away from direct sunlight and extreme temperatures. Use the original packaging or a protective case to prevent damage to the screen and probe cable.
7.3. Coidado da batería
To prolong battery life, avoid fully discharging the battery frequently. If storing the device for an extended period, charge it to approximately 50-70% every few months.
8 Solución de problemas
| Problema | Causa posible | Solución |
|---|---|---|
| O dispositivo non se acende. | Batería baixa. | Cargue o dispositivo co cable tipo C incluído. |
| Sen imaxe na pantalla. | Camera cable not properly connected or damaged. | Ensure the camera cable is securely connected. If still no image, contact support. |
| A imaxe está borrosa ou pouco clara. | A lente está sucia; iluminación insuficiente. | Clean the camera lens. Adjust the LED brightness using the controls on the main unit. |
| Non se poden gardar fotos/vídeos. | No memory card inserted; memory card full or corrupted. | Insert a compatible memory card. Check if the card has sufficient space or try formatting it (this will erase all data). |
9. Especificacións
| Característica | Detalle |
|---|---|
| Número de modelo | DS320DL-5MM |
| Mostrar | Pantalla IPS de 4.3 polgadas |
| Tipo de cámara | Lente dobre (frontal e lateral) |
| Clasificación impermeable | IP67 (só sonda) |
| Lonxitude do cable | 16.5 feet (Semi-Rigid) |
| Iluminación | 7 luces LED regulables |
| Calidade da imaxe | HD (720p for video recording) with Bluart 3.0 Technology |
| Batería | 1 A battery required (included), approx. 3 hours operating time |
| Peso do elemento | 1.46 libras |
| Dimensións do paquete | 8.31 x 6.5 x 3.07 polgadas |
10. Garantía e soporte
This DEPSTECH product comes with a standard manufacturer's warranty. For detailed warranty information, product support, or technical assistance, please refer to the warranty card included in your package or visit the official DEPSTECH website. You may also contact DEPSTECH customer service directly for assistance.
DEPSTECH Authorized Store: Visitar a tenda