
1. Instrucións de seguridade importantes
Lea atentamente todas as instrucións antes de usar o aparello. Garde este manual para futuras consultas.
- Asegúrese de que a fonte de alimentación coincida co voltage especificado na etiqueta de clasificación.
- Non mergulle o aparello, o cable de alimentación nin o enchufe en auga ou outros líquidos.
- Unplug from the outlet when not in use, before cleaning, or during maintenance.
- Non faga funcionar ningún aparello cun cable ou enchufe danados, ou despois de que o aparello funcione mal ou teña dano dalgún xeito.
- Este aparello é só para uso doméstico. Non use ao aire libre.
- Manteña o aparello lonxe de fontes de calor e luz solar directa.
- Ensure proper ventilation around the unit. Maintain at least 15cm clearance on all sides.
- Use só auga potable no depósito de auga.
- Non almacene neste aparello substancias explosivas, como latas de aerosol con propelente inflamable.
2. Produto rematadoview
The EUHOMY IM004-CSI is an automatic ice maker designed for convenient ice production at home or for small business use. It features high-speed ice making, adjustable ice thickness, and an automatic cleaning function.

Image: The EUHOMY IM004-CSI ice maker filled with clear ice cubes, highlighting its capacity and rapid ice production capabilities.
Contido do paquete:
- EUHOMY IM004-CSI Ice Maker
- Cesta de xeo
- Scoop de xeo
- Manual de usuario
3. Configuración
3.1 Desembalaxe e colocación
- Retire todos os materiais de embalaxe e comprobe se hai danos.
- Place the ice maker on a stable, level surface, away from direct sunlight and heat sources.
- Ensure there is at least 15cm of space around the unit for proper ventilation.
- Deixe a unidade en posición vertical durante polo menos 2 horas antes de conectala, especialmente se foi transportada horizontalmente. Isto permite que o refrixerante se asente.
3.2 Limpeza inicial
Before first use, clean the ice maker thoroughly.
- Abra a tapa e retire a cesta do xeo.
- Clean the interior with a soft cloth and warm water with a mild detergent. Rinse thoroughly.
- Drain any remaining water by removing the drain plug at the bottom.
- Limpe o exterior cun anuncioamp pano.
3.3 Water Filling Methods
The ice maker offers two convenient ways to add water to its 3.2L tank:

Image: Illustration showing two ways to fill the water tank: directly pouring water into the tank or using an inverted water bottle (up to 5cm diameter opening).
- Method 1: Direct Fill
Open the lid and directly pour potable water into the water tank until it reaches the MAX fill line. - Method 2: Water Bottle Connection
Place an inverted water bottle (with a mouth diameter of 5cm or less) onto the designated water inlet. The ice maker will automatically draw water as needed.
4. Instrucións de funcionamento
4.1 Panel de control rematadoview

Imaxe: Unha detallada view of the ice maker's control panel, showing buttons for power, timer/clean, ice full indicator, water shortage indicator, and ice size adjustment.
- Botón ON/OFF: Acende ou apaga a unidade.
- TIMER/CLEAN Button: Press once to set the timer. Press and hold for 5 seconds to activate the automatic cleaning function.
- Indicador de xeo cheo: Lights up when the ice basket is full.
- Auga Shortage Indicador: Lights up when the water tank is low.
- Botóns +/-: Adjust ice thickness or timer settings.
4.2 Ice Making Process
- Ensure the water tank is filled with potable water.
- Conecte a máquina de xeo a unha toma de corrente con conexión a terra.
- Preme o ON/OFF button to start the ice making cycle.
- The unit will produce 24 clear ice cubes per cycle, taking approximately 12-18 minutes depending on ambient temperature and selected ice thickness.
- When the ice basket is full, the ice full indicator will light up, and the unit will pause ice production. Remove ice to resume.
- If the water level is low, the water shortage indicator will light up. Add more water to continue ice production.
4.3 Axustar o grosor do xeo
You can adjust the thickness of the ice cubes to suit your preference.
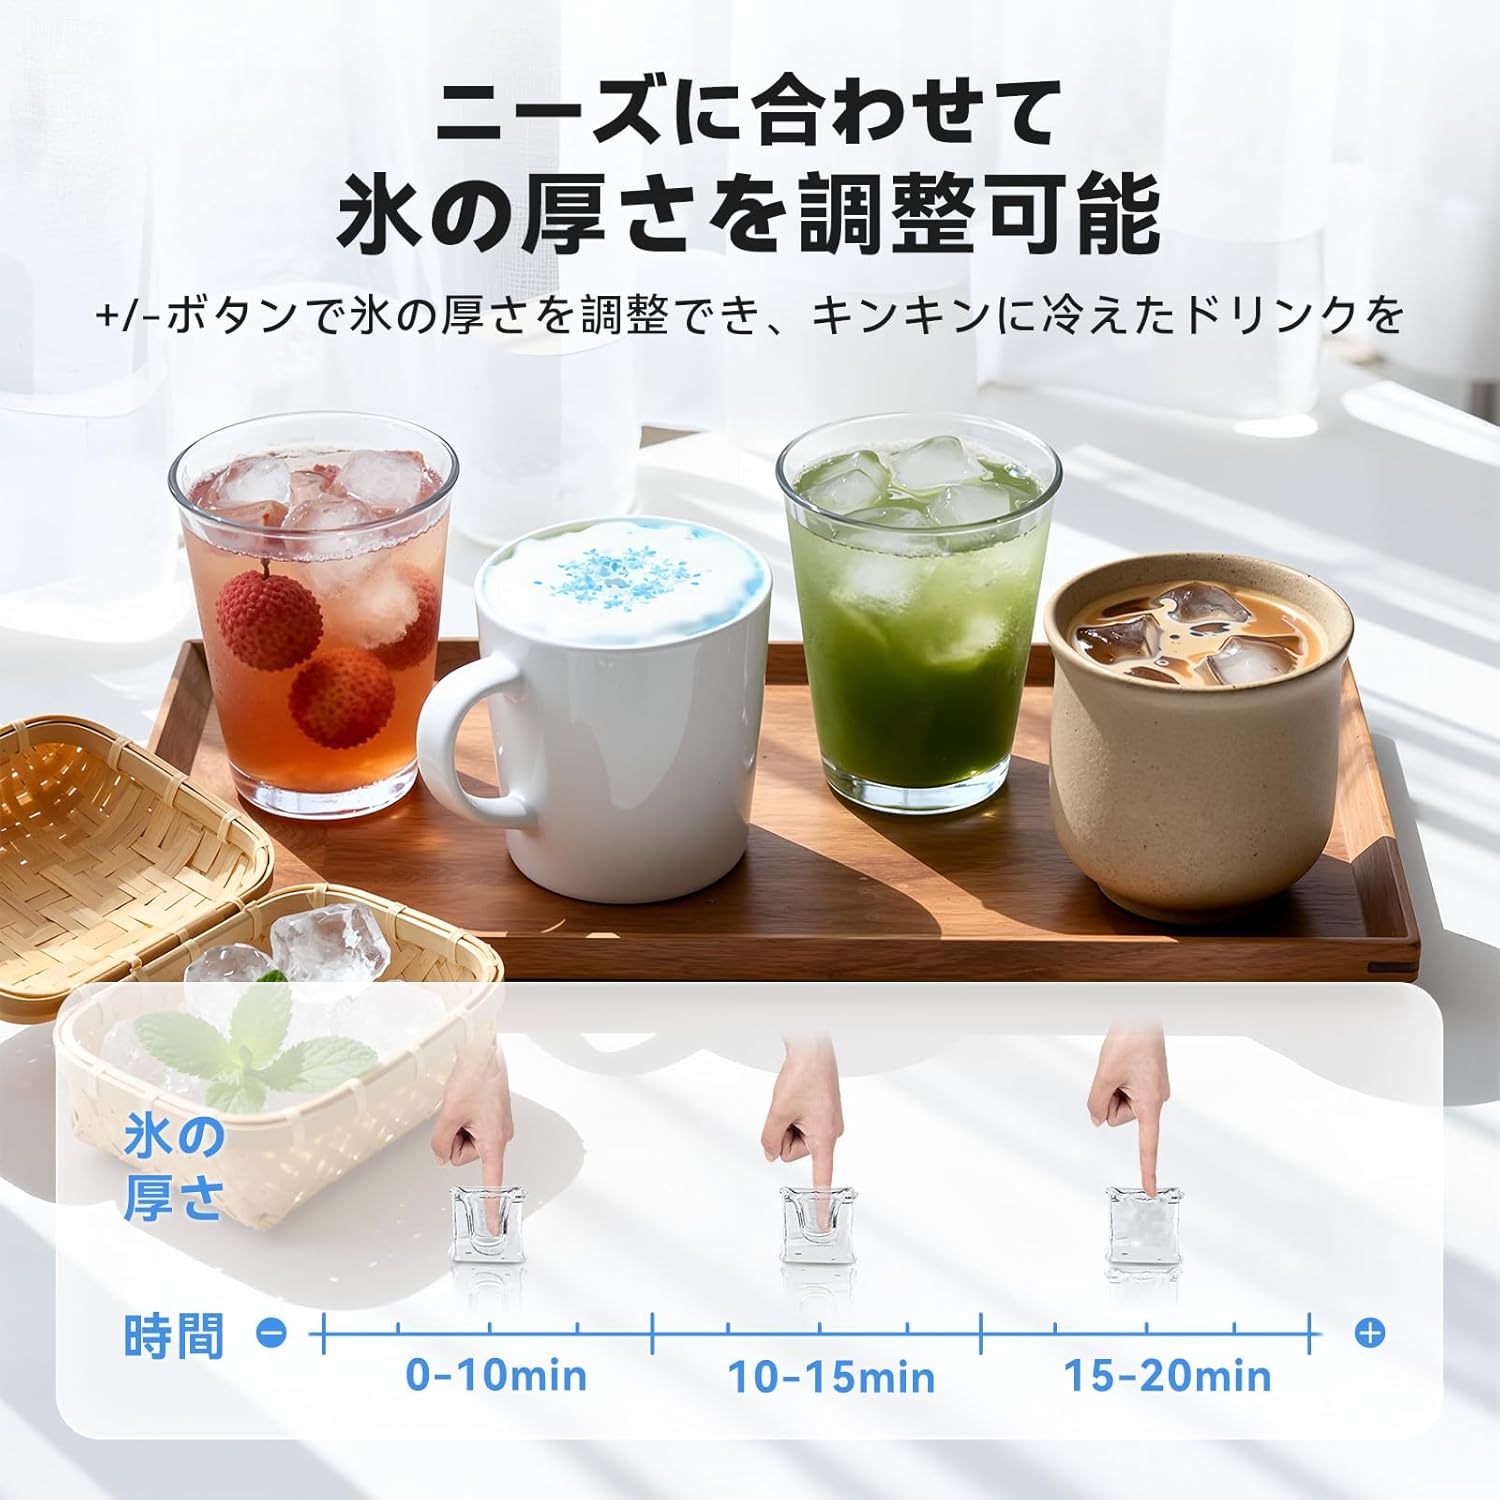
Image: Visual representation of ice thickness adjustment, showing different ice cube sizes corresponding to various production times (0-10 min, 10-15 min, 15-20 min).
Usa o +/- buttons on the control panel to select your desired ice thickness. A longer production time results in thicker ice.
4.4 Función de temporizador
The ice maker features a timer function, allowing you to schedule ice production up to 8 hours in advance.

Image: The ice maker with a visual indicating a 24-hour timer function, suggesting convenience for scheduled ice production.
- Preme o TEMPORIZADOR/LIMPEZA botón unha vez.
- Usa o +/- botóns para axustar o tempo de retardo desexado (en horas).
- The unit will start ice production after the set time has elapsed.
5. Mantemento
5.1 Función de limpeza automática
The ice maker is equipped with an automatic cleaning function to simplify maintenance.

Image: An animated diagram illustrating the internal water circulation during the automatic cleaning cycle, showing water being thoroughly circulated and drained.
- Asegúrese de que o depósito de auga estea cheo de auga limpa.
- Manteña premido o TEMPORIZADOR/LIMPEZA botón durante 5 segundos.
- O ciclo de limpeza comezará e durará aproximadamente 20 minutos.
- Despois do ciclo, drene a auga da unidade.
5.2 Drenaxe de auga
Para drenar a auga da unidade:
- Desconecte a máquina de xeo da toma de corrente.
- Localice o tapón de drenaxe na parte inferior da unidade.
- Place a container under the drain plug and remove the plug to allow water to flow out.
- Unha vez drenado, volva colocar o tapón de forma segura.
5.3 Limpeza regular
For optimal performance and hygiene, perform regular cleaning:
- Clean the ice basket and ice scoop with warm, soapy water.
- Limpe o exterior da unidade cun suave, damp pano.
- Periodically clean the water tank and ice-making components using a solution of water and vinegar (10:1 ratio) to prevent mineral buildup. Run a cleaning cycle with this solution, then rinse by running two cycles with fresh water.
6 Solución de problemas
Consulta a táboa seguinte para ver os problemas comúns e as súas solucións.
| Problema | Causa posible | Solución |
|---|---|---|
| Auga Shortage Indicator is on | O depósito de auga está baleiro ou o nivel de auga é demasiado baixo. | Add potable water to the water tank. |
| Ice Full Indicator is on | A cesta de xeo está chea. | Elimina o xeo da cesta. |
| Sen produción de xeo | Unit not plugged in; water tank empty; ambient temperature too high; refrigerant issue. | Check power connection; add water; ensure proper ventilation; contact customer support if issue persists. |
| Ice cubes are too small or soft | Short ice making cycle; water temperature too high; ambient temperature too high. | Adjust ice thickness setting to a longer cycle; use colder water; ensure unit is in a cool, well-ventilated area. |
| Ruído insólito | Unidade non nivelada; obstrución do ventilador; funcionamento normal do compresor. | Ensure unit is on a level surface; check for obstructions around the fan; some noise from compressor is normal. |
7. Especificacións
| Característica | Especificación |
|---|---|
| Marca | EUHOMY |
| Número de modelo | IM004-CSI |
| Dimensións (D x W x H) | 25 cm x 37.4 cm x 35 cm |
| Capacidade do depósito de auga | 3.2 litros |
| Produción diaria de xeo | Ata 18 kg |
| Capacidade de almacenamento de xeo | 1200 g |
| Voltage | 100 V CA |
| Wattage | 120 vatios-hora |
| Refrixerante | R290a |
| Material | Stainless Steel exterior, Plastic interior components |
| Nivel de ruído | Aprox. 45 dB |
8. Garantía e atención ao cliente
8.1 One-Year Quality Guarantee

Image: A badge indicating a "ONE YEAR GUARANTEE" for the product.
EUHOMY provides a one-year quality guarantee for this product. All products undergo strict quality inspection before shipment to ensure customer satisfaction.
8.2 Atención ao cliente

Image: Customer support representatives wearing headsets, ready to assist.
Should you encounter any issues or have questions regarding your EUHOMY ice maker, please do not hesitate to contact our customer support team. We are committed to providing prompt and courteous service.
For inquiries after purchase, please follow these steps:
- Go to your Amazon "Order History."
- Select "Problem with order."
- Choose "View profile."
- Click "Ask a question."
Alternatively, you may contact the dedicated customer service channel provided in the Japanese instruction manual included with your product.