1. Introdución
This manual provides detailed instructions for the safe and effective use of your Fujifilm FinePix S7000 Digital Camera. Please read this manual thoroughly before using the camera and keep it in a safe place for future reference. The FinePix S7000 combines a 6.3-megapixel Super CCD HR sensor with a 6x optical zoom lens, offering advanced photographic capabilities for various users.
2. Información de seguridade
- Non expoña a cámara á auga nin á humidade.
- Avoid direct sunlight or high temperatures.
- Use só baterías e accesorios recomendados.
- Manter fóra do alcance dos nenos.
- Non intente desmontar nin modificar a cámara.
- Observe proper disposal guidelines for batteries and electronic components.
3. Contido do paquete
Verifica que todos os elementos estean presentes no teu paquete:
- Cámara dixital Fujifilm FinePix S7000
- Tarxeta xD-Picture de 16 MB
- 4 baterías alcalinas AA
- Cable USB
- Cable de audio e vídeo
- Tapa de lente
- Lens Cap Holder
- Correa de ombreiro
- CD-ROM (FinePix View 4.1, Pixela VCD 2 Image Mixer, QuickTime 5, USB drivers)
4. Camera Parts and Controls
Familiarize yourself with the various parts and controls of your FinePix S7000 camera.

Figura 4.1: Arriba View of Camera Controls
This image displays the top panel of the Fujifilm FinePix S7000, highlighting the mode dial (P, S, A, M, AUTO, SP), the shutter release button, and the power switch. The hot shoe for external flash units is also visible.

Figura 4.2: Traseira View of Camera Controls
A parte traseira view of the camera shows the 1.8-inch LCD monitor, the electronic viewfinder (EVF), and various control buttons including the Menu/OK button, Display button, Back button, and zoom controls (W/T).

Figura 4.3: Lateral View with AF Mode Dial
This image illustrates the side of the camera, featuring the autofocus mode dial (C-AF, S-AF, MF) and the DC IN port for external power.

Figure 4.4: Front Lens Detail
A close-up of the camera's front lens, showing the SUPER-EBC FUJINON LENS with 6x optical zoom capabilities.

Figura 4.5: Abaixo View de Cámara
The bottom of the camera, showing the closed battery compartment cover and the tripod mount thread.

Figure 4.6: Memory Card Compartment
This image shows the side of the camera where the memory card compartment is located, typically covered by a protective flap.
5. Configuración
5.1 Inserción das baterías
- Abra a tapa do compartimento da batería situada na parte inferior da cámara.
- Insert four AA batteries, ensuring correct polarity (+/-) as indicated inside the compartment. Rechargeable NiMH batteries are recommended for optimal performance.
- Pecha a tapa do compartimento da batería de forma segura.
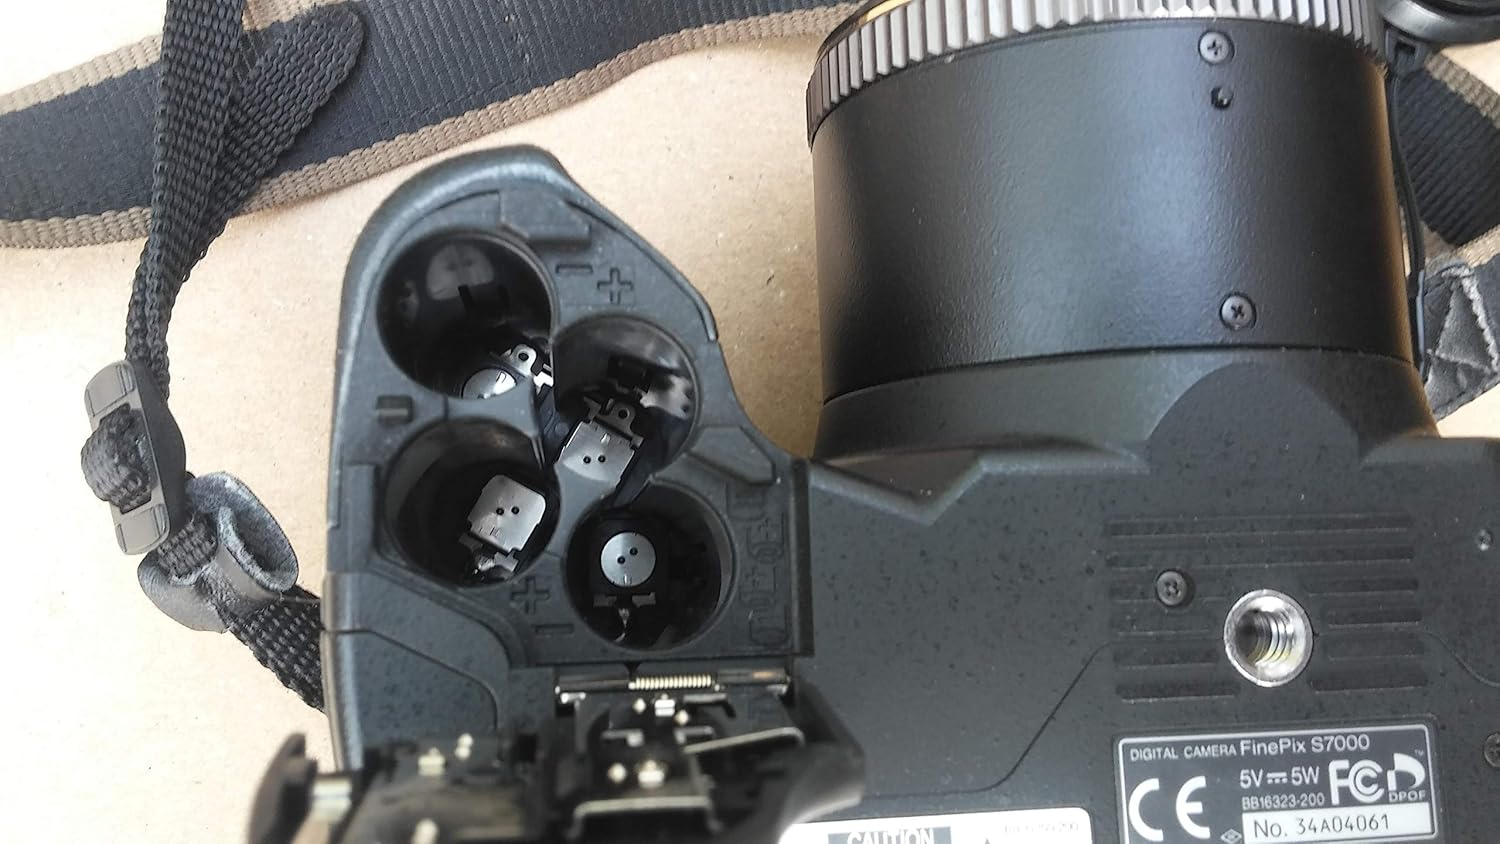
Figure 5.1: Inserting AA Batteries
The image shows the open battery compartment, revealing the four slots for AA batteries. Note the polarity markings for correct insertion.
5.2 Inserción dunha tarxeta de memoria
- Open the memory card compartment cover (refer to Figure 4.6).
- Insert an xD-Picture Card or CompactFlash Type II card (including MicroDrives) into the appropriate slot with the correct orientation until it clicks into place.
- Close the memory card compartment cover securely.

Figure 5.2: 'NO CARD' Display
This image shows the camera's LCD screen indicating 'NO CARD', which appears when no memory card is inserted or if it's not properly recognized.
5.3 Colocación da correa de ombreiro
Thread the shoulder strap through the strap lugs on the camera body as shown in the diagram (not pictured) and secure it firmly.
5.4 Attaching the Lens Cap
Place the lens cap onto the front of the lens when the camera is not in use to protect the lens surface from dust and scratches. Use the provided lens cap holder to prevent loss.
6. Funcionamento da cámara
6.1 Acendido/Apagado
Slide the power switch (refer to Figure 4.1) to the ON position to turn on the camera. Slide it to OFF to power down.
6.2 Basic Photography (AUTO Mode)
- Xire o dial de modo a AUTO (consulte a Figura 4.1).
- Encadra a túa foto usando o monitor LCD ou o dispositivo electrónico viewbuscador
- Prema o botón do obturador ata a metade para enfocar. O indicador de enfoque acenderase cando se consiga o enfoque.
- Preme completamente o botón do obturador para sacar a foto.
6.3 Modos de disparo avanzados
The FinePix S7000 offers various manual controls for creative photography:
- P (Programmed AE): Camera sets aperture and shutter speed for optimal exposure.
- S (Shutter-Priority AE): You set the shutter speed, camera sets aperture.
- A (Aperture-Priority AE): You set the aperture, camera sets shutter speed.
- M (Manual): You set both aperture and shutter speed.
- SP (Scene Position): Pre-programmed modes for specific scenes (e.g., Portrait, Landscape).
Rotate the mode dial (Figure 4.1) to select your desired shooting mode.
6.4 Funcionamento do zoom
Use the zoom lever (W/T buttons, refer to Figure 4.2) to adjust the focal length. The camera features a 6x optical zoom and a 3.2x digital zoom, providing a total of 19x zoom capability.
6.5 Focalización
The camera offers several autofocus modes, selectable via the AF mode dial (Figure 4.3):
- S-AF (Single Autofocus): Focuses when the shutter button is pressed halfway.
- C-AF (Continuous Autofocus): Continuously adjusts focus for moving subjects.
- MF (Manual Focus): Allows manual adjustment of focus.
For close-up shots, activate the Modo Super Macro, which allows focusing as close as 1cm.
6.6 modos de flash
The built-in pop-up flash offers various modes:
- Automático: Flash fires automatically when needed.
- Redución de ollos vermellos: Reduces red-eye effect.
- Flash forzado: Flash fires regardless of lighting conditions.
- Flash suprimido: Flash does not fire.
- Slow Synchro: For night portraits or scenes with ambient light.
Access flash settings through the camera's menu system.
6.7 Balance de brancos
Adjust white balance to ensure accurate color reproduction under different lighting conditions. Options include Automatic, Manual (Fine, Shade), Fluorescent (Daylight, Warm White, Cool White), Incandescent, and Custom.
6.8 Modo película
The S7000 can record MPEG video with audio. Select Movie Mode from the mode dial or menu. You can record VGA-quality video at 640 x 480 pixels at 30 frames per second for up to 13 seconds, or 320 x 240 pixels for up to 26 seconds.
6.9 Voice Memo Feature
Attach short audio recordings (up to 30 seconds) to your captured photos. These voice memos are saved as WAV files and can be useful for remembering details about a shot.
6.10 Reviewimaxes e vídeos
Preme o XOGAR button (usually indicated by a play icon, refer to Figure 4.2) to enter playback mode. Use the directional pad to navigate through your photos and videos.
7. Mantemento
7.1 Limpeza da cámara e da lente
- Use un pano suave e seco para limpar o corpo da cámara.
- For the lens, use a lens brush or a blower to remove dust, then gently wipe with a lens cleaning cloth and lens cleaning solution if necessary.
- Never use organic solvents or strong chemicals.
7.2 Almacenamento
- Cando non as use durante períodos prolongados, retire as pilas para evitar fugas.
- Garde a cámara nun lugar fresco, seco e ben ventilado, lonxe da luz solar directa e da humidade elevada.
- Keep the lens cap on to protect the lens.
8 Solución de problemas
| Problema | Causa posible | Solución |
|---|---|---|
| A cámara non se acende. | As baterías están esgotadas ou inseridas incorrectamente. | Replace with fresh batteries or ensure correct polarity. Recharge NiMH batteries if applicable. |
| "NO CARD" message displayed. | Memory card is not inserted or not recognized. | Insert memory card correctly. Ensure it is compatible and not damaged. |
| As imaxes son borrosas. | Tremor da cámara, enfoque incorrecto ou lente sucia. | Hold camera steady, use a tripod, ensure proper focus, clean the lens. |
| O flash non se dispara. | Flash mode set to 'Suppressed Flash' or batteries are low. | Change flash mode. Replace or recharge batteries. |
| Non se poden transferir imaxes ao ordenador. | USB cable not connected properly, driver issues, or incorrect camera settings. | Ensure USB cable is securely connected. Install necessary drivers from the provided CD-ROM. Check camera's USB mode setting. |
9. Especificacións
- Sensor: 6.3-megapixel Super CCD HR (12.3 million recorded pixels)
- Lente: Fujinon 6x Optical Zoom (35-210mm equivalent in 35mm format), f/2.8-3.1
- Zoom dixital: 3.2x (19x total with optical zoom)
- Resolución da imaxe: 4048 x 3040 (12M), 2848 x 2136 (6M), 2016 x 1512 (3M), 1600 x 1200 (2M), 1280 x 960 (1M)
- File Formatos: JPEG (Exif 2.2), CCD-RAW
- Gravación de películas: 640 x 480 pixels (30 fps, up to 13 sec) or 320 x 240 pixels (30 fps, up to 26 sec) with audio (MPEG)
- Medios de almacenamento: xD-Picture Card, CompactFlash Type II (including MicroDrives)
- Monitor LCD: LCD TFT de 1.8 polgadas
- Viewbuscador: Electrónica de alta resolución Viewbuscador (EVF)
- Sensibilidade ISO: Auto (160-800), Manual (200-1600)
- Velocidade de obturación: 15 segundos a 1/10,000 de segundo
- Fonte de enerxía: 4 AA batteries (Alkaline, NiMH recommended)
- Dimensións (W x H x D): Aproximadamente 122 x 97 x 81 mm (4.8 x 3.8 x 3.2 polgadas)
- Peso: Approximately 500g (17.6 oz) excluding batteries and media
- Interface: USB 2.0, saída A/V
10. Garantía e soporte
For warranty information and customer support, please refer to the warranty card included in your product package or visit the official Fujifilm website. Keep your purchase receipt as proof of purchase for warranty claims. For technical assistance, contact Fujifilm customer service.
Online resources and FAQs may also be available on the Fujifilm support portal.


