1. Introdución
This manual provides detailed instructions for the proper installation, operation, and maintenance of your Lanzar RBHTG414 Heritage 600 Watt 4-Channel MOSFET Amplifier. To ensure optimal performance and safety, please read this manual thoroughly before attempting to install or operate the amplificador. Conserve este manual para futuras consultas.
2. Instrucións de seguridade
Observe sempre as seguintes precaucións de seguridade durante a instalación e o funcionamento:
- Desconecte o terminal negativo da batería do vehículo antes de comezar calquera traballo de instalación para evitar curtocircuítos.
- Asegúrate de que todo o cableado estea correctamente colocado e fixado para evitar danos por bordos afiados ou pezas móbiles.
- Empregue cableado do calibre axeitado para as conexións de alimentación e terra, tal e como se especifica na sección de instalación.
- Instala o ampo refrigerador nun lugar que permita unha ventilación axeitada para evitar o sobrequecemento.
- Evite montar o amplifter en zonas expostas a humidade ou vibracións excesivas.
- Non intente reparar ou modificar o ampEncárguese vostede mesmo do mantemento. Envíe todo o mantemento a persoal cualificado.
3. Produto rematadoview
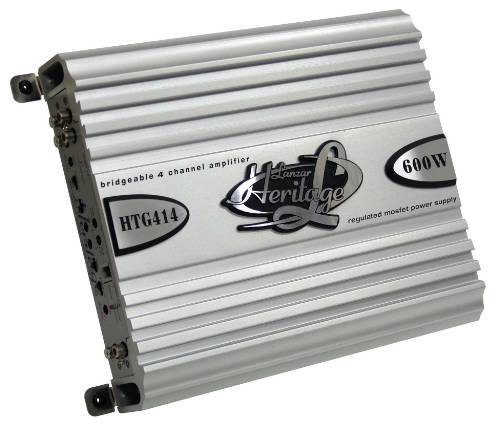
The Lanzar RBHTG414 Heritage amplifier is a 600 Watt, 4-channel MOSFET amplifier designed to deliver powerful and clear audio performance for your car audio system. It features a regulated MOSFET power supply and is bridgeable, offering flexible configuration options for various speaker setups.
4. Configuración e instalación
Unha instalación axeitada é crucial para o rendemento e a lonxevidade do seu amplifier. The Lanzar RBHTG414 is designed for surface mounting.
4.1 Lista de comprobación previa á instalación
- Ensure you have all necessary tools and wiring kits (power wire, ground wire, remote turn-on wire, RCA cables, speaker wire, fuses, terminals).
- Choose a mounting location that is dry, well-ventilated, and secure.
- Plan your wiring routes to avoid interference and potential damage.
4.2 Conexións de cableado
The following outlines general wiring procedures. Consult a professional installer if you are unsure about any steps.
- Power Connection (BATT+): Connect a heavy-gauge power cable (e.g., 8-gauge or 4-gauge depending on total system power) directly from the vehicle's positive battery terminal to the amplifier's BATT+ terminal. Install an in-line fuse holder within 18 inches (45 cm) of the battery.
- Conexión a terra (GND): Connect a heavy-gauge ground cable of the same length as the power cable from the ampo terminal GND do adaptador a unha superficie metálica limpa e sen pintar no chasis do vehículo. Asegúrese de que a conexión sexa sólida e de baixa resistencia.
- Acendido remoto (REM)Conecte un cable de calibre menor (por exemplo, de calibre 18) desde o ampterminal REM do adaptador á saída de acendido remoto da unidade principal. Este cable sinala o ampactivador para acender e apagar co sistema de son do teu coche.
- Conexións de entrada RCA: Connect RCA audio cables from your head unit's pre-amp saídas ao amplifier's RCA input jacks. For 4-channel operation, use two pairs of RCA cables (Front L/R, Rear L/R).
- Conexións de altofalantes: Connect your speakers to the ampterminais de saída de altofalantes do adaptador.
- 4-Channel Stereo Mode: Connect each speaker to its corresponding channel output (e.g., Front Left speaker to CH1+, CH1-, Front Right to CH2+, CH2-, etc.).
- Bridged Mode (2-Channel): For higher power output to subwoofers or a pair of speakers, the RBHTG414 can be bridged. Refer to the amplifier's terminal markings for specific bridged connection points (typically CH1+ and CH2- for one bridged channel, and CH3+ and CH4- for the second). Ensure your speakers are rated for the increased power output in bridged mode.
4.3 Montaxe
Monte de forma segura o amplifier to a solid surface using appropriate screws. Ensure there is sufficient space around the amplifier for air circulation, especially around the heat sink fins, to prevent thermal shutdown.
5. Instrucións de funcionamento
Unha vez instalado, o amplifier will turn on automatically with your head unit. Adjustments should be made carefully to achieve optimal sound quality.
- Gaña Control: The gain control matches the amplifier's input sensitivity to the output level of your head unit. Start with the gain set to minimum, then slowly increase it until you hear distortion, then back off slightly. This is not a volume control.
- Configuración de cruce: Se o teu amplifier includes crossover controls (e.g., High-Pass Filter (HPF), Low-Pass Filter (LPF)), adjust them according to your speaker type. HPF is used for full-range speakers to block low frequencies, while LPF is used for subwoofers to block high frequencies.
- Boost Boost: Use the bass boost feature sparingly, if available, as excessive boosting can lead to distortion and potential speaker damage.
6. Mantemento
Un mantemento regular axuda a garantir a lonxevidade e o rendemento do seu ampmáis vivo.
- Limpeza: Limpar periodicamente o amplifier's exterior with a soft, dry cloth. Ensure the heat sink fins are free of dust and debris to maintain proper cooling.
- Conexións: Occasionally check all wiring connections for tightness and corrosion. Loose connections can cause poor performance or damage.
- Ventilación: Asegúrese de que o amplifier's mounting location remains clear of obstructions that could impede airflow.
7 Solución de problemas
Se tes problemas co teu amplifier, refer to the following common problems and solutions before seeking professional service.
| Problema | Causa posible | Solución |
|---|---|---|
| Ampo lifier non se acende | Blown fuse; loose power/ground/remote wire; no power from head unit remote output. | Comprobe o fusible en liña e amplifier fuses; verify all power, ground, and remote connections are secure; test remote wire for 12V when head unit is on. |
| Sen saída de son | Loose RCA cables; incorrect gain setting; speaker wires disconnected; amplificador en modo de protección. | Comprobe as conexións RCA en ambos os dous amplifier and head unit; ensure gain is set correctly; verify speaker wire connections; check for protect light indicator. |
| Son distorsionado | Gain set too high; improper crossover settings; damaged speaker; poor ground connection. | Reduce gain setting; adjust crossover filters; inspect speakers for damage; ensure ground connection is solid. |
| Ampo lifier sobrequenta | Insufficient ventilation; impedance mismatch; prolonged high-power operation. | Asegurar un fluxo de aire axeitado arredor do amplifier; verify speaker impedance matches amplifier's rating; reduce volume or operating time. |
8. Especificacións
The following are key specifications for the Lanzar RBHTG414 Heritage Ampmáis vivo:
- Marca: Lanzar
- Número de modelo: RBHTG414
- Número de canles: 4
- Potencia de saída600 vatios (máximo)
- Ampclase máis viva: MOSFET
- Tipo de montaxe: Montaxe en superficie
- Dimensións do produto (L x W x H): 2 x 2 x 2 polgadas
- Peso do elemento: 10.89 libras
- UPC: 068888725088
- Cor: BLACK (Unit shown in image is silver, but product data indicates BLACK)
9. Garantía e soporte
Lanzar products are designed for reliability and performance. For information regarding warranty coverage, technical support, or service, please refer to the warranty card included with your product or visit the official Lanzar website. Please have your model number (RBHTG414) and purchase information ready when contacting support.


