1. Produto rematadoview
The CURT 11064 Class 1 Trailer Hitch is a vehicle-specific towing component designed for select Honda Fit models. It features a 1-1/4-inch receiver, suitable for light-duty towing applications. This hitch is constructed from strong, welded steel and is rated for a maximum gross trailer weight of 2,000 lbs and a tongue weight of 200 lbs. It is important to note that actual towing capacity is limited by the lowest-rated towing component of your vehicle.
The hitch is finished with a dual-coat process, including a liquid A-coat and a durable black powder coat, providing enhanced resistance against rust, chipping, and UV damage. Each CURT hitch design undergoes thorough testing to meet SAE J684 specifications, ensuring safety and reliability.

Imaxe 1.1: Enganche de remolque CURT 11064 Clase 1, mostraasinpola súa robusta construción e o seu acabado con revestimento en po negro.
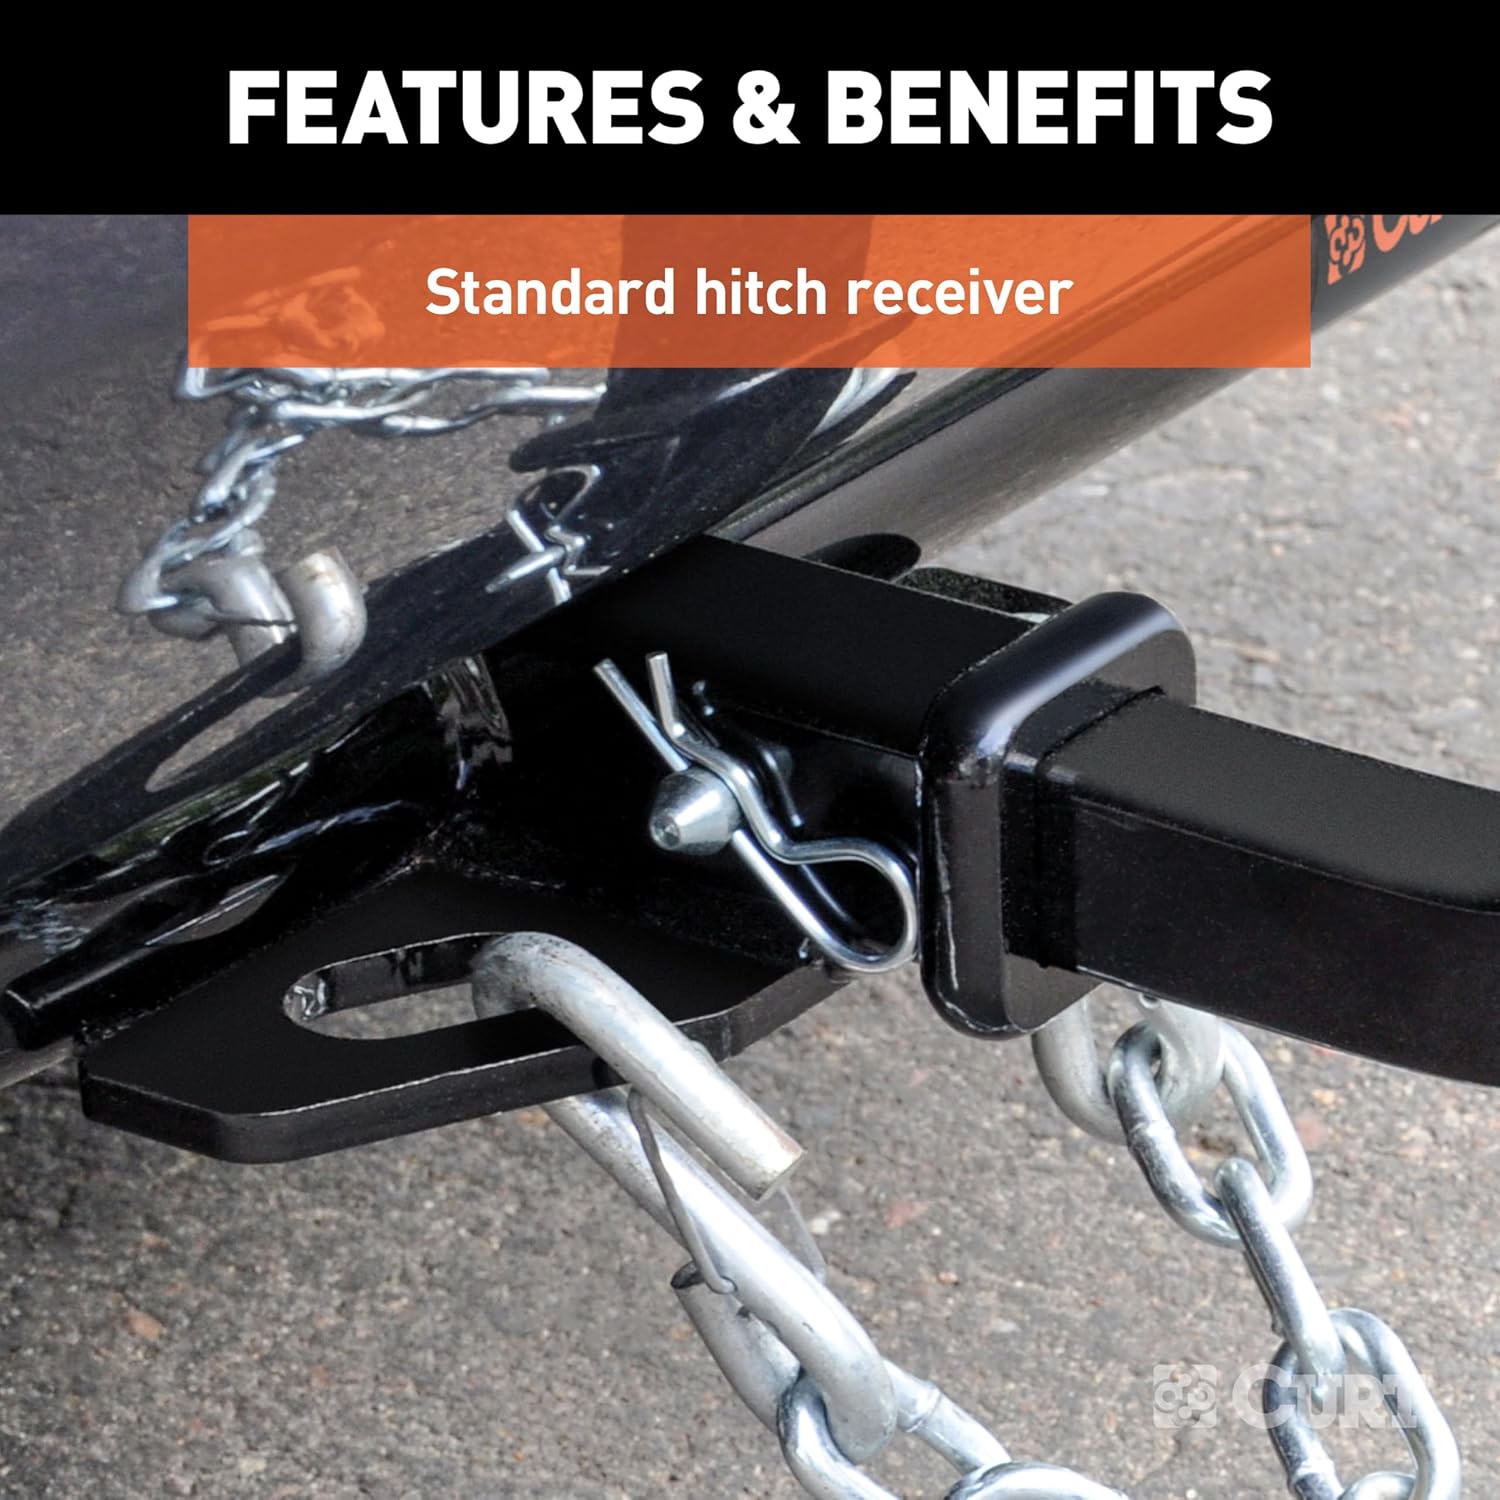
Image 1.2: Diagram highlighting key features such as vehicle-specific design, standard hitch receiver, fully tested design, and industry-leading dual-coat finish.
2. Que hai na caixa
Upon unpacking, please verify that all components are present and undamaged. The package for the CURT 11064 Class 1 Trailer Hitch should contain the following:
- Class 1 Hitch (Main Assembly)
- Installation Hardware Kit (bolts, nuts, washers, fish wire, handle nuts, spacers)
- Manual de instrucións (este documento)
3. Información de seguridade
Before installation or operation, read and understand all instructions and safety warnings. Failure to do so may result in property damage, serious injury, or death.
- Always wear appropriate personal protective equipment (PPE), including safety glasses, gloves, and hearing protection, during installation.
- Ensure the vehicle is securely supported on jack stands or a lift before working underneath it. Never rely solely on a jack.
- Do not exceed the lowest weight rating of any towing component (hitch, vehicle, trailer, or ball mount).
- Regularly inspect the hitch for signs of wear, damage, or corrosion. Replace any damaged components immediately.
- Asegúrese de que todos os elementos de fixación estean apertados cos valores de torque especificados.
4. Instrucións de instalación
This CURT Class 1 hitch is designed for a vehicle-specific fit on select Honda Fit models. While designed for ease of installation, some steps may require specialized tools or mechanical experience. It is recommended to consult a professional installer if you are unsure about any step.
4.1 Ferramentas necesarias
- Luvas e lentes de seguridade
- Wrench Set (various sizes)
- Chave dinamométrica
- Drill and 1/2-inch Drill Bit (high-quality, suitable for metal)
- Plastic Rivet Remover Tool (and possibly replacement plastic rivets)
- File or Grinder (for shaping drilled holes)
- Jack and Jack Stands or Vehicle Lift
4.2 Pasos previos á instalación
- Estacione o vehículo nunha superficie chan e active o freo de man.
- Raise the vehicle using a lift or jack stands to provide adequate working space underneath. Ensure the vehicle is stable and secure.
- Locate the mounting points on the vehicle frame. For the Honda Fit, these are typically near the rear bumper.
- On the driver's side, it may be necessary to remove a portion of the plastic fender panel or wheel well liner to access the frame. Use a plastic rivet remover tool to carefully detach any plastic rivets.
4.3 Montaxe do enganche
- Drilling Access Holes: Identify the location on the vehicle frame where a new hole needs to be drilled for the carriage bolt. This is typically near the bumper attachment on the driver's side. Drill a 1/2-inch hole. It may be necessary to enlarge or shape this hole slightly with a file or grinder to allow the carriage bolt head and square neck plate to pass through.
- Fish Wire Technique: Use the provided fish wire to guide the carriage bolts and square hole spacers into position inside the vehicle frame. Insert the square hole spacer first, then the carriage bolt, pulling them through the drilled access hole.
- Positioning Spacers: Carefully insert the appropriate spacers between the hitch and the vehicle frame at each mounting point. Refer to the detailed diagram in the included paper instructions for correct spacer placement.
- Lifting the Hitch: With assistance, or using a jack to support the hitch, carefully raise the hitch into position, aligning the mounting holes with the dangling carriage bolts and any other attachment points.
- Securing with Handle Nuts: For the front attachment points (often near the spare tire well), use the provided handle nuts. These are designed to hold the nuts in place while you tighten the bolts. If a handle nut breaks, it may be necessary to hold the nut manually or use an alternative method to secure it.
- Apertura final: Once all bolts are in place and finger-tight, use a torque wrench to tighten all fasteners to the manufacturer's specified torque values. Refer to the specific torque chart in the paper instructions.
- Remontaxe: Reinstall any removed fender panels or other components.

Imaxe 4.1: Primeiro plano view of the standard 1-1/4-inch hitch receiver, showing the pinhole and safety chain attachment points.

Image 4.2: Illustration of the main body of the CURT Class 1 Hitch, designed to integrate discreetly with the vehicle's undercarriage.
5. Instrucións de funcionamento
Proper operation of your CURT trailer hitch ensures safe towing and extends the life of your equipment.
5.1 Connecting a Trailer or Accessory
- Insert the ball mount or accessory shank into the 1-1/4-inch receiver tube.
- Align the pinholes and insert the hitch pin. Secure it with a clip or lock.
- Attach safety chains from the trailer to the designated safety chain loops on the hitch. Ensure chains are crossed under the trailer tongue to cradle it in case of detachment.
- Connect all necessary trailer wiring.
- Verify all connections are secure and that the trailer lights are functioning correctly before driving.

Image 5.1: A CURT Class 1 Hitch with a ball mount properly inserted and secured, ready for towing.
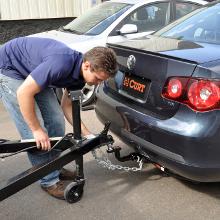
Image 5.2: Close-up of the safety chain loops on a CURT hitch, designed for secure attachment of trailer safety chains.
5.2 Weight Capacity and Compatibility
- Peso bruto do remolque (GTW): Máximo 2,000 libras.
- Peso da lingua (PL): Máximo 200 libras.
- Tamaño do receptor: 1-1/4-inch x 1-1/4-inch.
- Bike Rack Compatibility: This hitch is compatible with standard and tray-style bike racks. It is non compatible with vertical hanging bike racks that require bikes to be hung or mounted vertically.

Image 5.3: Diagram illustrating compatibility with standard and tray-style bike racks, and incompatibility with vertical hanging bike racks.
6. Mantemento
Un mantemento regular garante a lonxevidade e o funcionamento seguro do seu enganche de remolque CURT.
- Inspección de rutina: Before each use, inspect the hitch, ball mount, and all fasteners for any signs of wear, damage, cracks, or corrosion. Ensure all bolts are tight.
- Limpeza: Periodically clean the hitch with mild soap and water. Rinse thoroughly and dry.
- Protección anticorrosiva: The dual-coat finish provides excellent rust resistance. However, in harsh environments (e.g., salted roads), it is advisable to clean the hitch more frequently and apply a protective wax or rust inhibitor to exposed areas if needed.
- Coidado do tubo receptor: Keep the inside of the receiver tube clean and free of debris. A rubber hitch plug can help prevent dirt and moisture accumulation when not in use.

Image 6.1: CURT hitch components immersed in the liquid A-coat bath, part of the dual-coat finishing process for enhanced durability and corrosion resistance.
7 Solución de problemas
If you encounter issues with your CURT trailer hitch, consider the following common troubleshooting steps:
- Conexións soltas: If you notice excessive movement or rattling, check all bolts and fasteners. Tighten them to the specified torque values.
- Ruídos pouco comúns: Squeaking or grinding noises during towing may indicate insufficient lubrication on the hitch ball or issues with the trailer coupler. Inspect and lubricate as necessary.
- Dificultade para inserir o soporte de bóla: Ensure the receiver tube is clean and free of obstructions. A small amount of grease can aid insertion.
- Corrosión: Address minor rust spots immediately by cleaning and applying a rust-inhibiting paint. For significant corrosion, replacement may be necessary.
- Balanceo do remolque: Excessive trailer sway can be caused by improper weight distribution, incorrect tire pressure, or exceeding speed limits. Re-distribute load, check tire pressure, and reduce speed. Consider a weight distribution hitch or sway control if persistent.
8. Especificacións
Key technical specifications for the CURT 11064 Class 1 Trailer Hitch:
| Especificación | Valor |
|---|---|
| Número de modelo | 11064 |
| Clase de enganche | Clase 1 |
| Tamaño do receptor | 1-1/4 inch x 1-1/4 inch |
| Peso bruto do remolque (MTW) | 2,000 libras |
| Peso da lingua (TW) | 200 libras |
| Material | Aceiro carbono |
| Tipo de acabado | Revestimento en po negro brillante |
| Dimensións do produto | 27 x 43 x 8 polgadas |
| Peso do elemento | 35 libras |
| Tipo de servizo do vehículo | Car (Honda Fit specific) |

Image 8.1: Visual representation of the 1-1/4-inch receiver tube size, indicating compatibility with various towing accessories.
9. Información da garantía
CURT stands behind the quality of its trailer hitches. The CURT 11064 Class 1 Trailer Hitch is backed by a garantía limitada de por vida. This warranty covers defects in materials and workmanship for the original purchaser. For specific terms, conditions, and claim procedures, please refer to the official CURT warranty documentation or contact customer support.
10. Atención ao cliente
For further assistance, technical support, or warranty claims, please contact CURT customer service:
- Websitio: www.curtmfg.com
- Teléfono: Consultar o CURT websitio web para obter os números de contacto máis actuais.
- Correo electrónico: Consultar o CURT websitio web para enderezos de correo electrónico de atención ao cliente.
Teña á man o número de modelo do produto (11064) e a información de compra cando contacte co servizo de asistencia.


