1. Introdución
This manual provides comprehensive instructions for the installation, operation, maintenance, and troubleshooting of your Baldwin G6310.LLS Left Handed Lever Strength Entrance or Storeroom Mortise Lock. Please read these instructions carefully before installation and use to ensure proper function and longevity of the product.
The Baldwin G6310.LLS is designed for left-handed door applications, offering robust security and reliable performance for entrance or storeroom doors.
2. Información de seguridade
WARNING: Failure to follow these instructions may result in product damage, property damage, or personal injury.
- Use sempre o equipo de protección individual (EPI) axeitado, como lentes e luvas de seguridade, durante a instalación.
- Asegúrese de que todos os compoñentes estean presentes e sen danos antes de comezar a instalación.
- Non modifiques os compoñentes da fechadura. As modificacións non autorizadas poden comprometer a seguridade e anular a garantía.
- Manteña as pezas pequenas lonxe dos nenos para evitar riscos de asfixia.
- Consult a qualified locksmith or professional installer if you are unsure about any step of the installation process.
3. Contido do paquete
Verifique que todos os seguintes compoñentes estean incluídos no seu paquete:
- Corpo de bloqueo embutido
- Exterior Lever Handle Assembly (Left Handed)
- Interior Lever Handle Assembly
- Fuso
- Cylinder(s) with Keys
- Placa de folga
- Caixa de po
- Parafusos e elementos de fixación de montaxe
- Modelo de instalación (se corresponde)
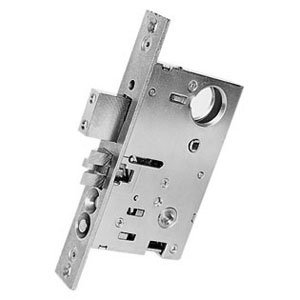
Figura 1: Example of Baldwin G6310.LLS Mortise Lock components. Your package may vary slightly.
4. Configuración e instalación
This section outlines the general steps for installing the Baldwin G6310.LLS Mortise Lock. Specific door preparation may be required. Refer to the provided installation template for precise measurements and drilling instructions.
4.1 Ferramentas necesarias
- Perforar coas brocas adecuadas
- Cicel
- Desaparafusadores (Phillips e Flathead)
- Cinta métrica
- Lapis
- Martelo
4.2 Pasos da instalación
- Prepara a porta: Use the provided template to mark and drill holes for the mortise lock body, spindle, and cylinder. Chisel out the mortise pocket in the door edge to accommodate the lock body. Ensure the pocket depth matches the lock body thickness.
- Instalar o corpo da fechadura de embutir: Insert the mortise lock body into the prepared pocket in the door edge. Secure it with the provided screws. Ensure the faceplate is flush with the door edge.
- Instalación do cilindro: Insert the cylinder(s) into the lock body from the appropriate side(s) of the door. Secure the cylinder(s) with the set screw(s) located on the mortise lock body faceplate.
- Install Spindle: Insert the spindle through the square hole in the mortise lock body. Ensure it passes through correctly to engage both lever assemblies.
- Instalar as manivelas: Attach the exterior (left-handed) and interior lever handle assemblies to the spindle. Secure them with the provided set screws or mounting screws, ensuring they operate smoothly and return to their horizontal position.
- Install Strike Plate and Dust Box: Mark the position for the strike plate on the door frame, aligning it with the mortise lock's latch and deadbolt. Chisel out the recess for the strike plate and dust box. Secure the dust box, then the strike plate, with screws.
- Proba de funcionamento: Close the door and test the operation of the latch, deadbolt, and lever handles from both sides using the key and thumbturn (if applicable). Ensure smooth engagement and disengagement. Adjust the strike plate if necessary for proper alignment.
Figure 2: General illustration of mortise lock installation. Refer to your specific template for precise details.
5. Instrucións de funcionamento
The Baldwin G6310.LLS is a Left Handed Lever Strength Entrance or Storeroom Mortise Lock. Its operation depends on whether it's configured as an entrance or storeroom function.
5.1 Entrance Function
- Exterior: Key retracts latchbolt. Lever retracts latchbolt when unlocked.
- Interior: Lever always retracts latchbolt for egress.
- Pechadura: Operated by key from exterior and thumbturn/key from interior (depending on cylinder type).
5.2 Storeroom Function
- Exterior: Key retracts latchbolt. Lever is rigid (always locked).
- Interior: Lever always retracts latchbolt for egress.
- Pechadura: Not typically present or not used in standard storeroom function, or operated by key from exterior and thumbturn/key from interior if present.
Always ensure the door is securely latched and/or deadbolted when leaving the premises.
6. Mantemento
Regular maintenance will ensure the smooth operation and extend the lifespan of your Baldwin mortise lock.
- Limpeza: Limpar as superficies exteriores cun pano suave eamp cloth. Avoid abrasive cleaners or solvents that may damage the finish. For polished brass, use a non-abrasive brass cleaner if needed, following the cleaner's instructions.
- Lubricación: Periodically apply a small amount of graphite-based lubricant or a silicone-based spray lubricant to the keyway and internal moving parts of the lock body. Do not use oil-based lubricants as they can attract dust and grime.
- Parafusos de apriete: Check all mounting screws and set screws periodically and tighten them if they have become loose. Do not overtighten.
- Inspección: Inspect the lock for any signs of wear, damage, or misalignment. Address any issues promptly to prevent further damage or security compromise.
7 Solución de problemas
| Problema | Causa posible | Solución |
|---|---|---|
| Key turns but lock does not operate. | Cylinder set screw loose; internal mechanism disengaged. | Tighten cylinder set screw. If issue persists, consult a locksmith. |
| Lever handle is loose or wobbly. | Lever set screw loose; spindle not properly seated. | Tighten lever set screw. Re-seat spindle if necessary. |
| Latchbolt or deadbolt does not extend/retract smoothly. | Lack of lubrication; debris in mechanism; strike plate misalignment. | Lubricate lock mechanism. Clean out any debris. Adjust strike plate alignment. |
| A porta non pecha correctamente. | Strike plate misalignment; door sag. | Adjust strike plate. Check door hinges for sag. |
8. Especificacións
- Marca: Baldwin
- Número de modelo: G6310.003.LLS
- Número de peza: G6310.003.LLS
- ASIN: B006FOCZFI
- UPC: 829846779501
- Entrega: Esquerdo
- Función: Lever Strength Entrance or Storeroom Mortise Lock
- Remate: Latón pulido
- Grao: ANSI F21 2.50 GRD1 (Commercial Mortise)
- Cantidade do paquete do artigo: 1
- Data de primeira dispoñibilidade: 2 de xullo de 2010
9. Información da garantía
Baldwin products are manufactured to the highest standards and are backed by a limited warranty. For specific warranty terms and conditions applicable to your G6310.LLS Mortise Lock, please refer to the warranty documentation included with your purchase or visit the official Baldwin websitio. Garda o comprobante de compra para reclamacións de garantía.
10. Atención ao cliente
If you require further assistance, have questions regarding installation, or need to report a problem, please contact Baldwin customer support:
- Websitio: www.baldwinhardware.com
- Teléfono: Refer to the Baldwin websitio para os números de contacto rexionais.
- Correo electrónico: Refer to the Baldwin websitio para correo electrónico de atención ao cliente.
When contacting support, please have your product model number (G6310.003.LLS) and purchase information readily available.
11. Vídeos de produtos
No official product videos from the seller are available for embedding at this time. Please check the manufacturer's website for any instructional videos.


