Avisos importantes de seguridade
AVISO: To reduce the risk of injury, always observe the following safety precautions.
- Do not touch the cutting element while the tool is in operation.
- Ensure the tool is properly grounded or double-insulated.
- Keep hands and body parts away from the cutting area.
- Disconnect the tool from the power supply when not in use or during maintenance.
- Always wear appropriate personal protective equipment, including eye protection, long trousers, and sturdy footwear.
- Keep bystanders, especially children and pets, at a safe distance (at least 15 meters) from the operating area.
- Inspect the area for debris before starting.
Produto rematadoview
The BLACK+DECKER GL8033-QS is an 800W corded grass trimmer designed for efficient lawn and garden maintenance. It features a 33cm cutting width and a powerful motor positioned at the top for improved ergonomics.
- Motor de 800 W: Top-mounted for enhanced balance and ergonomic use.
- E-Drive Gear System: Provides consistent cutting efficiency across various grass types.
- Cabezal pivotante 180°: Allows for easy conversion between trimming and edging functions.
- Mango axustable: Second handle adjustable to 5 positions for user comfort and control.
- Integrated Cable Retention: Prevents accidental disconnection of the power cable.
- Guide Wheel: Assists in precise edging along flowerbeds and pathways.
- Velocidade de corte: 7000 rpm for effective grass cutting.

Figura 1: Máisview of the BLACK+DECKER GL8033-QS Corded Grass Trimmer.
Instrucións de configuración
1. Montaxe
The trimmer requires minimal assembly. Carefully remove all components from the packaging.
- Engadir a protección: Secure the safety guard to the trimmer head using the provided fasteners. Ensure it is firmly in place to protect against debris.
- Montar o eixo: Connect the two sections of the shaft. Ensure the curved pole is oriented correctly. Tighten any screws or clamps para asegurar a conexión.
- Install the Second Handle: Slide the adjustable second handle onto the shaft. Position it for comfortable operation and tighten the locking mechanism.

Figure 2: Ensure the cable retainer is properly attached to manage the power cord.
2. Axustes
- Axuste do mango: The second handle can be adjusted to 5 different positions. Loosen the adjustment knob, move the handle to your desired position for balance and comfort, then retighten the knob.
- Telescopic Shaft Adjustment: Adjust the length of the telescopic shaft to suit your height for optimal posture during operation.
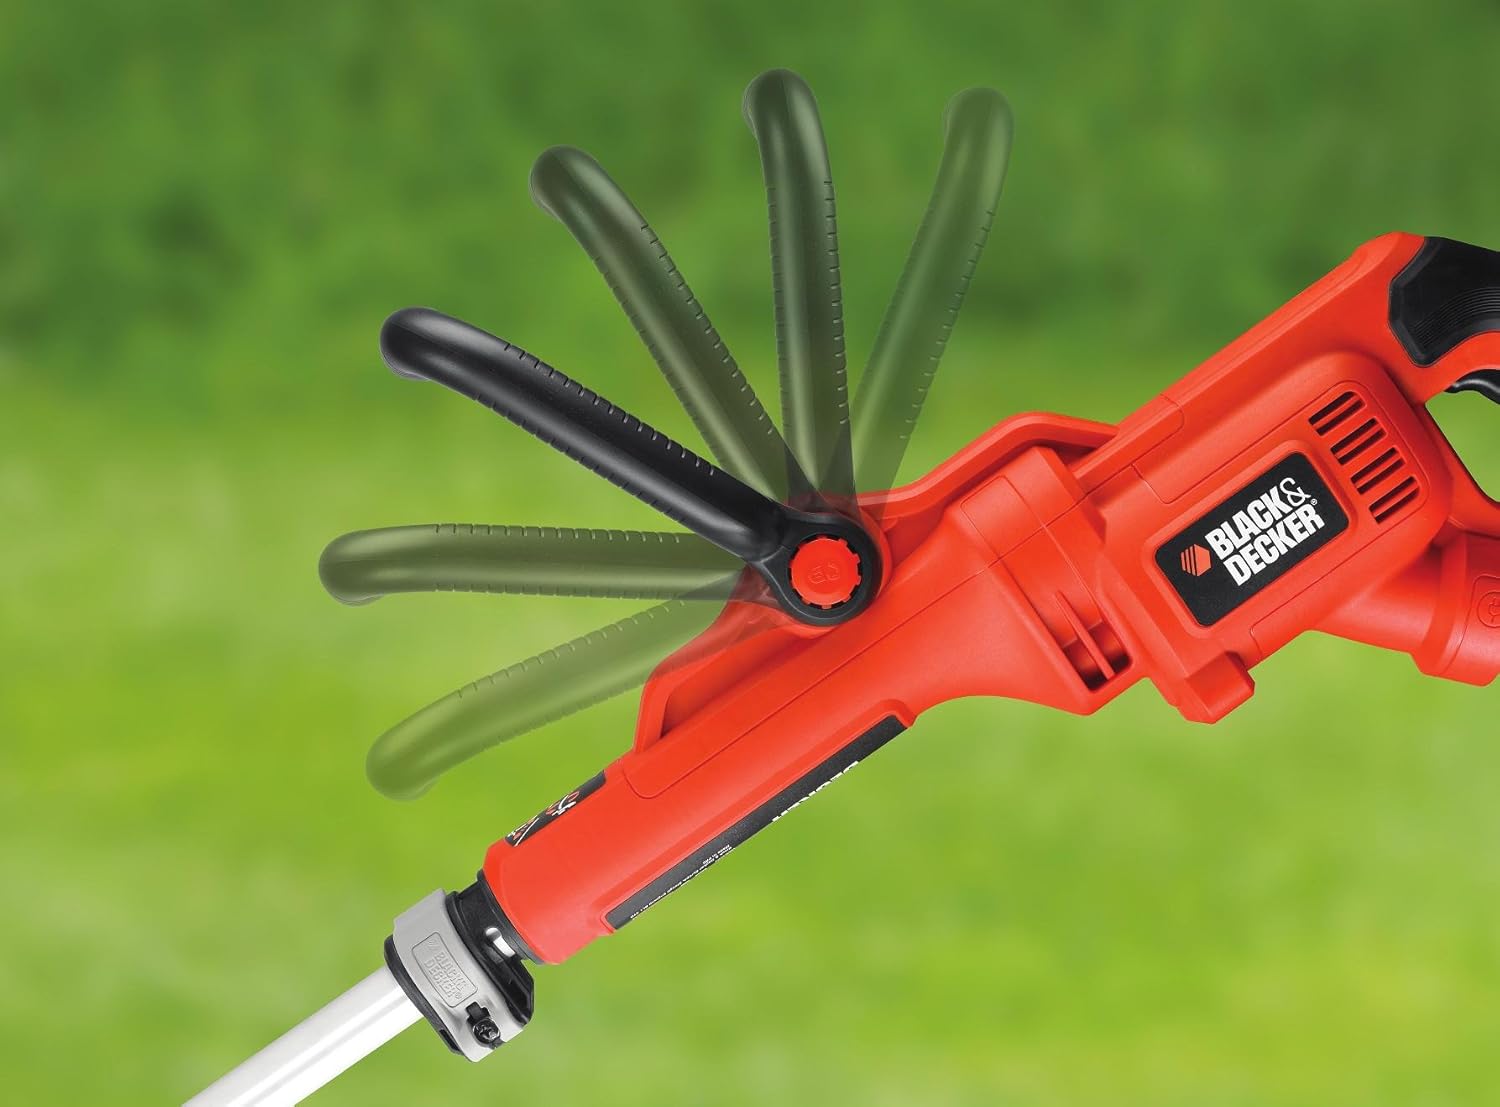
Figure 3: The secondary handle can be adjusted for ergonomic comfort.
Instrucións de funcionamento
1. Arranque e parada
- Conectar enerxía: Plug the trimmer into a suitable power outlet. Use an outdoor-rated extension cord if necessary, ensuring it is secured by the integrated cable retention feature.
- Comezo: Press the safety lock-off button and then squeeze the trigger switch to start the trimmer.
- Parar: Release the trigger switch to stop the trimmer. Always unplug the tool after use.
2. Recortar a herba
Hold the trimmer firmly with both hands. Maintain a comfortable distance from the cutting head.
- Move the trimmer slowly and steadily across the area to be cut.
- Avoid hitting hard objects like stones, fences, or walls, as this can damage the cutting line and the tool.
- For best results, cut tall grass in stages, starting from the top.

Figure 4: Operating the trimmer for general grass cutting.

Figure 5: The cutting head efficiently trims grass.
3. Función de bordos
The trimmer head can pivot 180° to convert into an edger.
- Pivot Head: Release the locking mechanism near the trimmer head and rotate the head 180° until it locks into the edging position.
- Use Guide Wheel: Engage the guide wheel (if applicable) to assist in maintaining a straight line along edges of paths or flowerbeds.
- Bordes: Walk slowly, guiding the trimmer along the edge. The guide wheel helps maintain a consistent cutting depth.

Figure 6: The trimmer head pivots 180 degrees for precise edging.

Figure 7: The guide wheel assists in maintaining a straight line during edging.
4. Automatic Line Feed
This trimmer features an automatic line feed system. The cutting line will automatically extend as it wears down. If the line does not feed, briefly tap the trimmer head on the ground while the motor is running to advance the line.
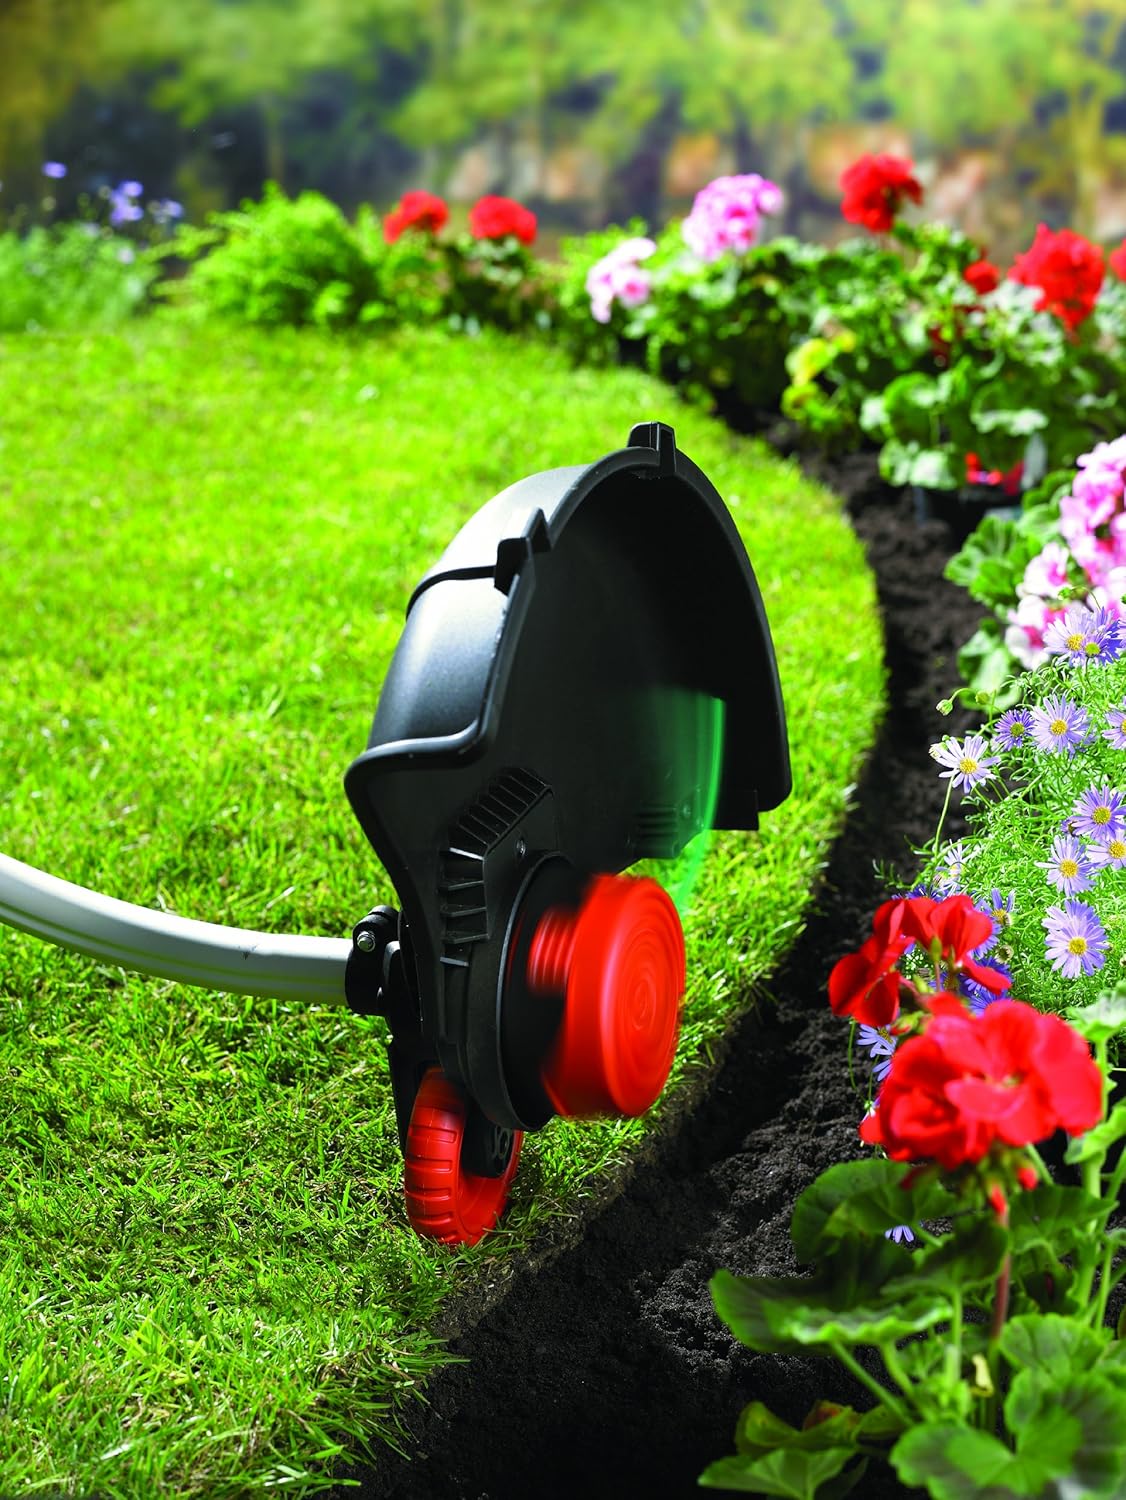
Figure 8: The automatic line feed system ensures continuous cutting.
Mantemento
Regular maintenance ensures optimal performance and extends the life of your trimmer. Always unplug the tool before performing any maintenance.
1. Substitución de liña
When the cutting line runs out, it needs to be replaced.
- Desconecte o cortador da fonte de alimentación.
- Remove the spool cap and the empty spool from the trimmer head.
- Insert a new pre-wound spool or manually wind new line onto the existing spool according to the instructions provided with the replacement line. Ensure the line is properly secured and extends through the eyelets.
- Replace the spool cap, ensuring it clicks into place.
2. Limpeza
- After each use, clean the trimmer housing with a damp pano. Non use produtos químicos agresivos ou produtos de limpeza abrasivos.
- Remove any grass clippings or debris from the cutting head and guard to prevent buildup and ensure proper function.
- Asegúrese de que as aberturas de ventilación estean libres de obstáculos.
3. Almacenamento
- Garde a desbrozadora nun lugar seco e seguro, fóra do alcance dos nenos.
- Protexa o cable de alimentación de danos durante o almacenamento.
Resolución de problemas
| Problema | Causa posible | Solución |
|---|---|---|
| A desbrozadora non arranca. | Sen fonte de alimentación. Bloqueo de seguridade non activado. | Comprobe a conexión de enerxía e o interruptor automático. Ensure safety lock-off button is pressed before squeezing the trigger. |
| Cutting line does not feed automatically. | Line is tangled or empty. Spool cap not properly seated. | Disconnect power, remove spool cap, untangle line or replace spool. Ensure spool cap is securely fastened. |
| O motor funciona pero a liña non corta. | Line is too short or broken. Line is worn out. | Advance the line by tapping the head or replace the spool. |
| Vibración excesiva. | Cabezal de corte danado ou fío desequilibrado. | Disconnect power, inspect cutting head for damage. Replace line if unevenly worn. |
Especificacións técnicas
| Número de modelo | GL8033-QS |
| Poder | 800 vatios |
| Ancho de corte | 33 cm |
| Voltage | 230 voltios |
| Velocidade | 7000 rpm |
| Peso | 3.73 quilogramos |
| Lonxitude do cordón | 2 metros |
| Dimensións (L x W x H) | 14.2 x 12.8 x 29.5 cm |
| Fonte de enerxía | Eléctrico con cable |
| Fabricante | BLACK+DECKER |
| País de Orixe | China |
Información da garantía
BLACK+DECKER products are manufactured to high-quality standards and are guaranteed for a period of 24 months from the date of purchase against faulty materials or workmanship. This guarantee does not affect your statutory rights. For full terms and conditions, please refer to the official BLACK+DECKER websitio ou póñase en contacto co servizo de atención ao cliente.
Atención ao cliente
Should you have any questions about your BLACK+DECKER GL8033-QS Corded Grass Trimmer, require technical assistance, or need to order replacement parts, please visit the official BLACK+DECKER websitio ou póñase en contacto co seu departamento de atención ao cliente.
- Websitio: www.blackanddecker.com
- Información de contacto: Refer to your regional BLACK+DECKER websitio para obter números de contacto locais e opcións de asistencia.