Información importante de seguridade
Please read and understand all instructions before using the laminator. Keep this manual for future reference.
- Do not operate the laminator if the power cord or plug is damaged.
- Keep the laminator away from water or other liquids.
- Do not insert metal objects into the laminator.
- Asegúrese de que haxa unha ventilación axeitada arredor da máquina durante o funcionamento.
- Desenchufe a laminadora cando non estea en uso ou antes de limpala.
- Este aparello non está pensado para o seu uso por persoas (incluídos nenos) con capacidades físicas, sensoriais ou mentais reducidas, ou con falta de experiencia e coñecementos, a menos que teñan supervisión ou instrucións sobre o uso do aparello por unha persoa responsable da súa seguridade.
Produto rematadoview
The Amazon Basics 9-Inch Thermal Laminator is designed for home, office, or classroom use, providing high-quality lamination for various document sizes.
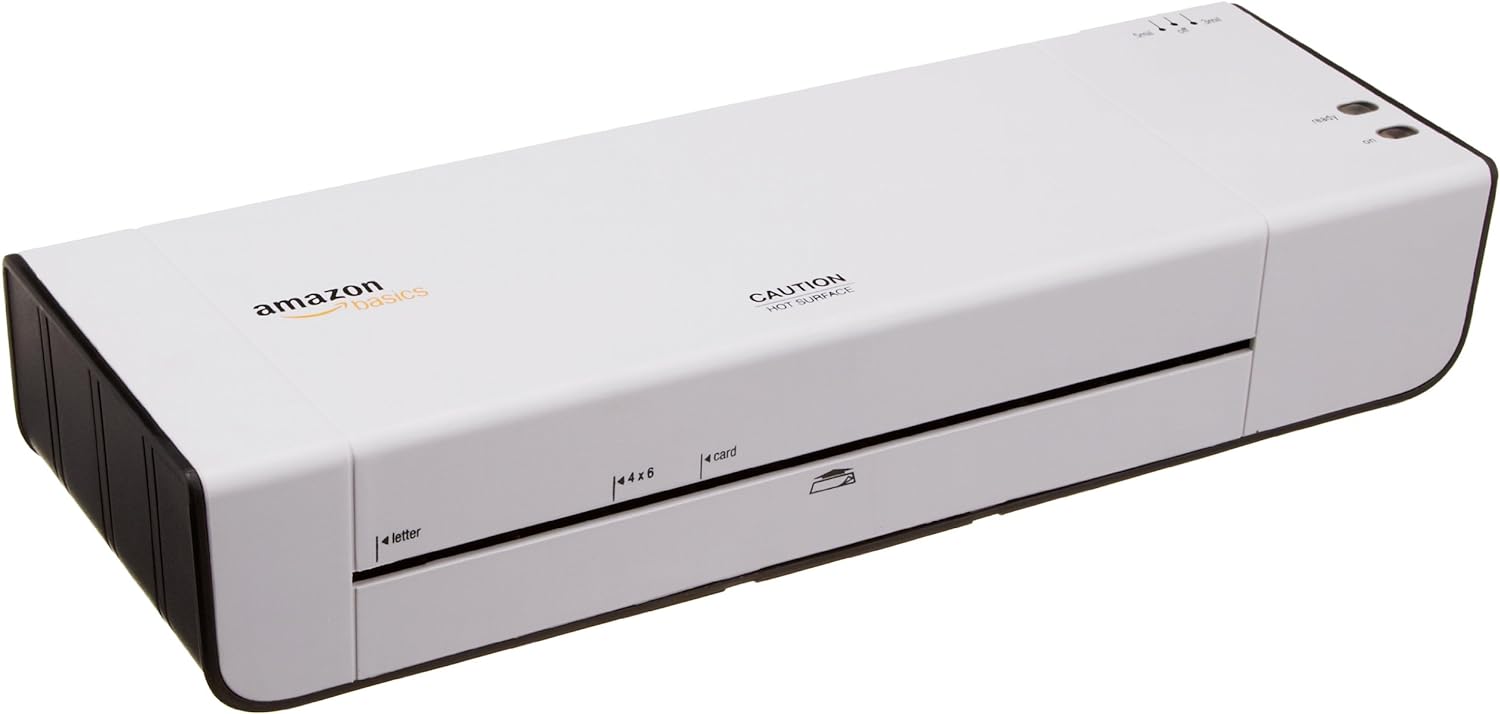
Figura 1: Fronte view of the Amazon Basics 9-Inch Thermal Laminator Machine, showing the feed slot and branding.
Características principais:
- Laminates documents up to 9 inches wide.
- Two heat settings: 3 mil and 5 mil.
- Quick 4-minute warm-up time.
- Jam release lever for easy clearing.
- Deseño compacto.
Configuración
Desembalaxe:
Carefully remove the laminator from its packaging. Retain the packaging for future storage or transport.
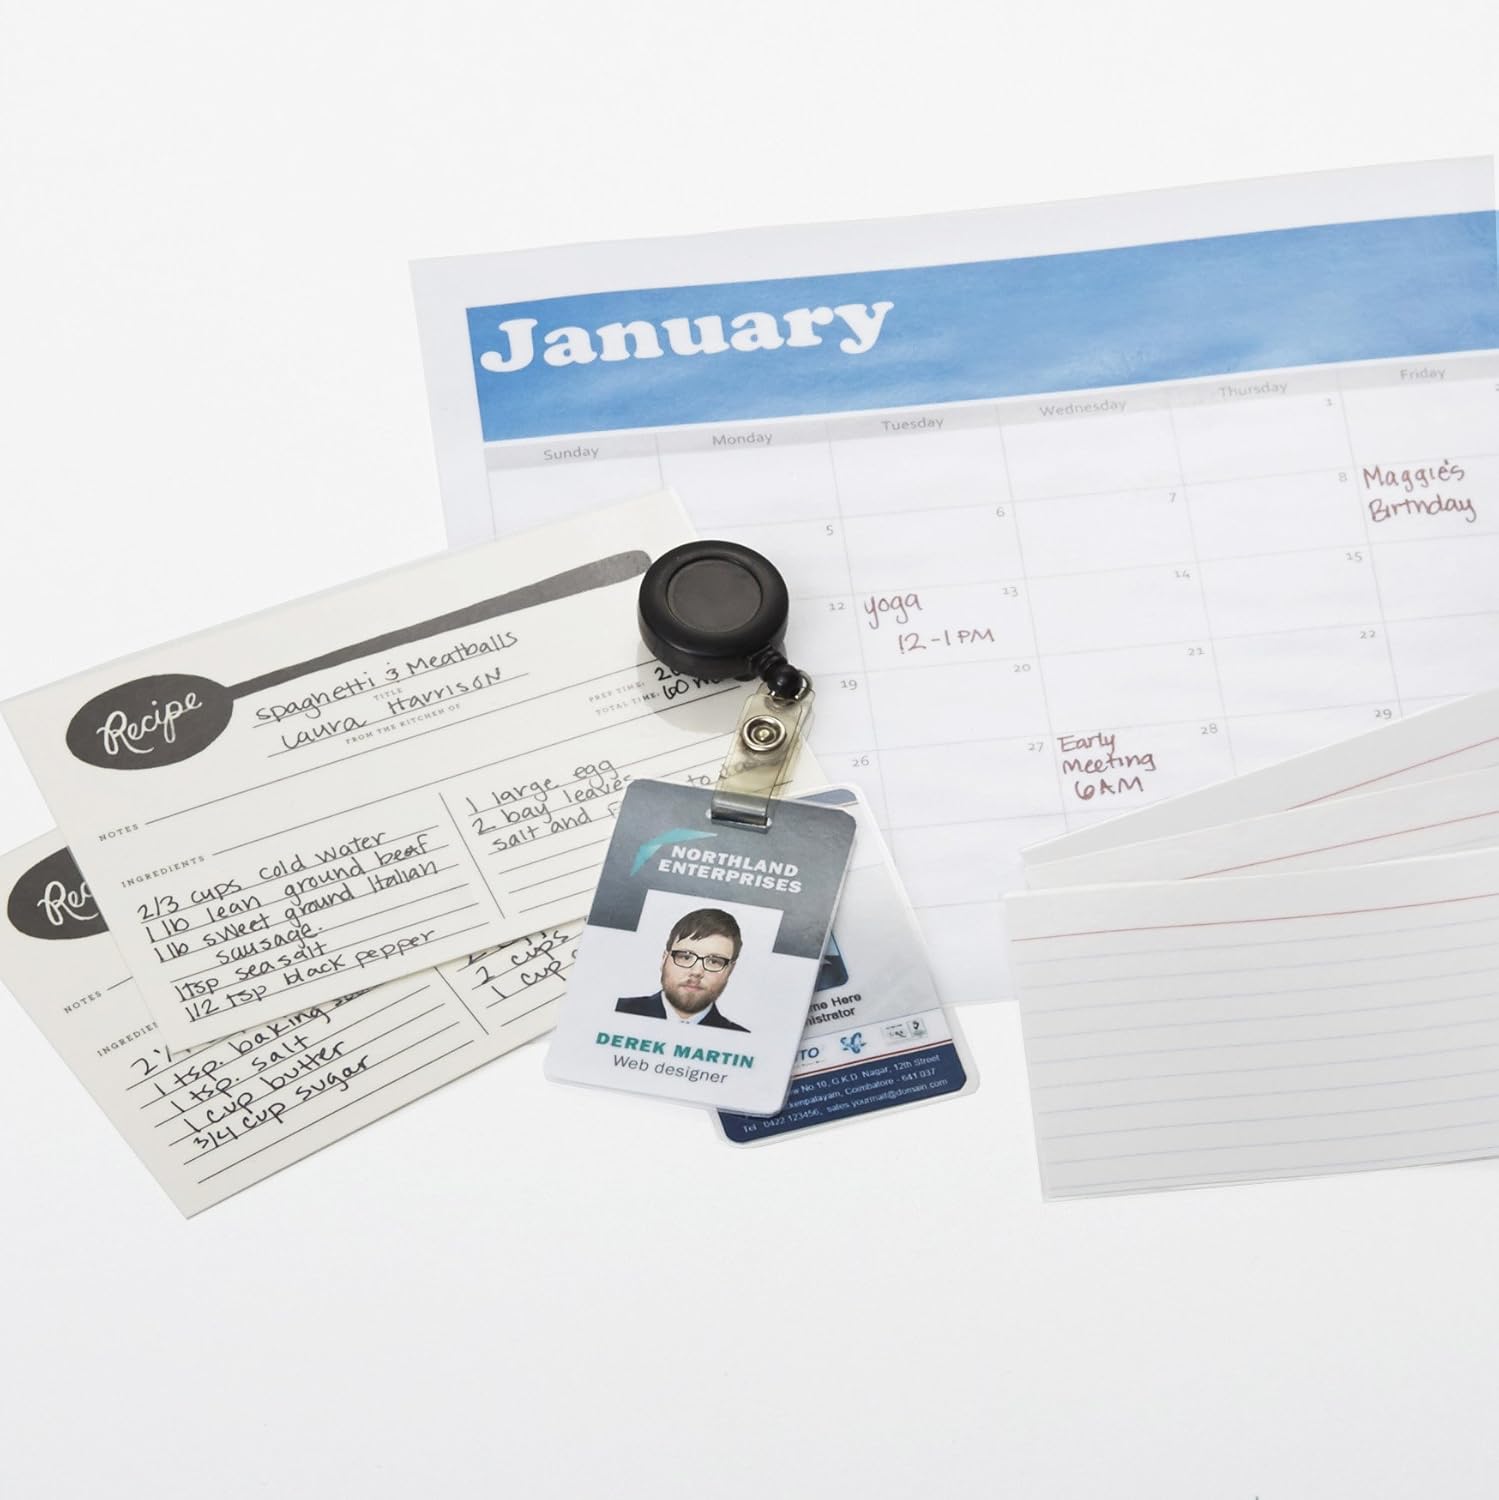
Figure 2: The laminator machine as it appears inside its frustration-free packaging.
Colocación:
Place the laminator on a flat, stable, and heat-resistant surface. Ensure there is adequate space around the machine for proper ventilation and for documents to exit the rear.
Conexión de alimentación:
Plug the power cord into a standard electrical outlet. The power switch is located on the side of the unit.

Imaxe 3: Primeiro plano view of the power switch, 3mil/5mil heat settings, and release lever on the side of the laminator.
Instrucións de funcionamento
Laminating a Document:
Power On and Warm-up:
Turn the power switch to the "On" position. The "Ready" indicator light will illuminate once the machine has warmed up (approximately 4 minutes).
Seleccione a configuración de calor:
Choose the appropriate heat setting based on the laminating pouch thickness:
- 3 mil: For normal documents, photos, and card stock.
- 5 mil: For thinner papers.
Preparar documento:
Place the document inside a laminating pouch, ensuring it is centered and there is an even border around the edges. Use the included 3 mil thick, 8.9 by 11.4 inch laminating pouches or any compatible 3 mil or 5 mil pouch.

Figura 4: Example of laminating recipe cards, showing the document being fed into the laminator.
Inserir bolsa:
Carefully insert the sealed edge of the laminating pouch into the laminator's feed slot. The machine will automatically pull the pouch through.

Figure 5: A calendar page being laminated, demonstrating the machine's ability to handle various document types.
Retrieve Laminated Document:
Once the pouch exits the rear of the machine, allow it to cool on a flat surface before handling to ensure proper sealing.

Figure 6: A collection of laminated items, including recipe cards, ID badges, and a calendar, showcasing the versatility of the laminator.
Mantemento
Limpeza:
Asegúrate de que a plastificadora estea desconectada e completamente fría antes de limpala. Limpa o exterior cun pano suave eamp pano. Non use produtos de limpeza ou disolventes abrasivos.
Roller Cleaning (Optional):
Periodically, you may run a cleaning sheet (available separately) through the laminator to remove any adhesive residue from the rollers.
Almacenamento:
Store the laminator in a cool, dry place when not in use. Ensure the power cord is neatly wrapped and not kinked.
Resolución de problemas
| Problema | Causa posible | Solución |
|---|---|---|
| A laminadora non se acende. | Non conectado; interruptor de alimentación apagado; sen corrente na toma de corrente. | Check power cord connection; ensure power switch is "On"; test outlet with another device. |
| Pouch jams in the machine. | Pouch inserted incorrectly; pouch too thick; foreign object. | Preme o palanca de liberación to clear the jam. Ensure pouch is inserted sealed edge first and is within specified thickness (3 or 5 mil). |
| Lamination is cloudy or bubbly. | Incorrect heat setting; machine not fully warmed up; low-quality pouch. | Ensure correct heat setting (3 mil for normal, 5 mil for thinner); wait for "Ready" light; use high-quality laminating pouches. |
| Lamination is not sealed properly. | Incorrect heat setting; machine not fully warmed up; document too thick for pouch. | Verify heat setting; wait for "Ready" light; ensure document fits pouch with adequate border. |
Especificacións
| Característica | Detalle |
|---|---|
| Número de modelo | PL9-US |
| Ancho de laminación | Ata 9 polgadas |
| Configuración de calor | 3 mil, 5 mil |
| Tempo de quecemento | Aproximadamente 4 minutos |
| Número de rolos | 2 |
| Peso | 1.2 kg |
| Fonte de alimentación | Estándar AC |
Garantía e Soporte
For warranty information and customer support, please visit the official Amazon Basics website or contact Amazon customer service directly.
Soporte en liña: Amazon Basics Store
Note: Reading the full user manual is recommended prior to the first use of this product.


