Introdución
Thank you for choosing the Hunter Fan Builder Deluxe Ceiling Fan. This manual provides comprehensive instructions for the safe and efficient installation, operation, and maintenance of your new ceiling fan. Please read all instructions carefully before beginning installation to ensure proper function and safety.
Información importante de seguridade
Siga sempre as precaucións de seguridade básicas ao instalar e usar este electrodoméstico para reducir o risco de incendio, descarga eléctrica e lesións persoais.
- AVISO: Para evitar posibles descargas eléctricas, antes de instalar o ventilador, desconecte a alimentación desconectando os interruptores de circuíto da caixa de toma asociada á localización do interruptor de parede.
- AVISO: All wiring must be in accordance with national and local electrical codes. If you are unfamiliar with wiring, use a qualified electrician.
- AVISO: To reduce the risk of personal injury, do not bend the blade brackets when installing the brackets, balancing the blades, or cleaning the fan.
- AVISO: Non introduza obxectos estraños entre as aspas do ventilador xirando.
- Ensure the mounting structure can support the fan's weight (8.3 kg / 18.3 lbs).
- Manteña unha distancia mínima de 7 pés desde o chan ata a parte inferior das aspas do ventilador.
Contido do paquete
Comprobe que todos os compoñentes que se indican a continuación estean incluídos no paquete antes de comezar a instalación:
- Montaxe do motor do ventilador
- 5 Reversible Fan Blades
- Light Kit with Glass Bowl
- 2 x 9W Light Bulbs
- Varilla de 3 polgadas
- Cadea de tracción para o control da velocidade do ventilador
- Pull Chain for Light Control
- Kit de hardware de montaxe
- Manual de instrucións (este documento)
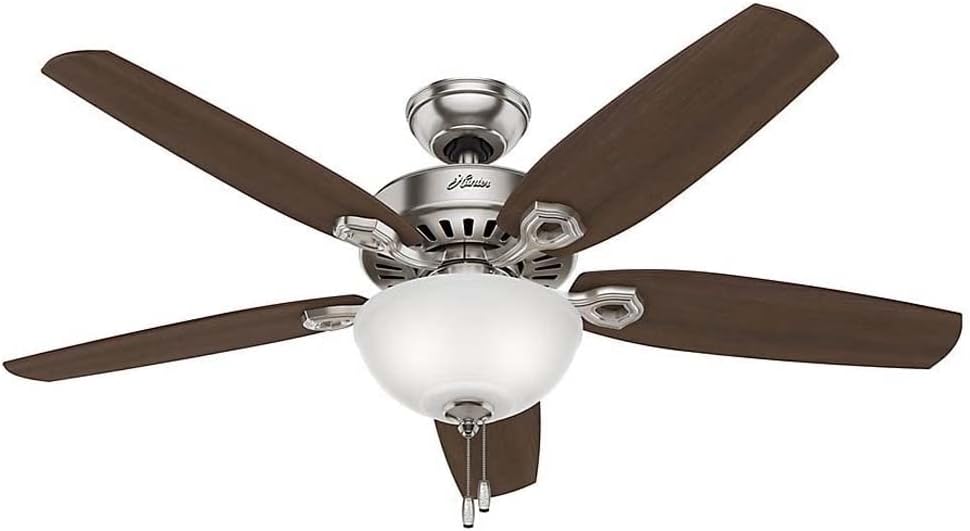
Image: The Hunter Fan Builder Deluxe Ceiling Fan, showcasing its polished nickel finish and five reversible blades, with the integrated light kit and pull chains visible.
Configuración e instalación
Follow these steps for proper installation of your ceiling fan:
- Apagar a enerxía: Before starting, ensure power is disconnected at the circuit breaker.
- Instalar soporte de montaxe: Securely attach the mounting bracket to the ceiling outlet box. Ensure the outlet box is directly supported by the building structure.
- Montar a varilla de subida: Introduza a varilla de subida a través da cuberta e conéctea ao conxunto do motor do ventilador.
- Ventilador colgado: Levante con coidado o conxunto do ventilador e colóqueo no soporte de montaxe.
- Realizar conexións eléctricas: Connect the fan's electrical wires to the household wiring according to the wiring diagram provided in the separate wiring guide (if applicable) or standard electrical practices (e.g., black to black, white to white, green/bare to ground).
- Canopy segura: Slide the canopy up and secure it to the mounting bracket.
- Conecte as aspas do ventilador: Secure each of the five reversible blades to the blade holders, then attach the blade holders to the motor. Ensure all screws are tightened.
- Instalación do kit de luz: Connect the light kit wiring and attach the light kit assembly to the bottom of the fan motor housing. Install the included 9W light bulbs.
- Attach Glass Bowl: Secure the glass bowl to the light kit.

Image: The Hunter Fan Builder Deluxe Ceiling Fan elegantly installed in a living room, demonstrating its suitability for interior spaces.
Instrucións de funcionamento
Your Hunter Fan Builder Deluxe fan is designed for ease of use with convenient pull chain controls.
Control de velocidade do ventilador
The fan features a 3-speed WhisperWind motor. Locate the pull chain for fan speed control (typically the longer chain). Pull the chain repeatedly to cycle through the speed settings:
- First pull: High speed
- Second pull: Medium speed
- Third pull: Low speed
- Fourth pull: Off
Control de luz
The integrated light kit is controlled by a separate pull chain (typically the shorter chain). Pull the chain to turn the light on or off.

Imaxe: Primeiro plano view of the pull chains extending from the fan's light kit, used for controlling fan speed and light.
Función motora reversible
Your fan has a reversible motor for year-round comfort. A small switch on the fan motor housing allows you to change the direction of blade rotation:
- Modo de verán (en sentido antihorario): Airflow creates a cooling breeze.
- Modo de inverno (en sentido horario): Airflow pushes warm air down, recirculating heat.
To change direction, ensure the fan is off and the blades have stopped completely before flipping the switch.
Mantemento
Regular maintenance ensures the longevity and optimal performance of your Hunter Fan.
- Limpeza: Limpa periodicamente as aspas do ventilador e a carcasa do motor cun pano suave e sen fiapos. Non empregues produtos de limpeza abrasivos nin disolventes, xa que poden danar o acabado.
- Substitución da lámpada: Ensure power is off before replacing bulbs. Use only bulbs of the specified wattage (9W LED or equivalent).
- Aperte os parafusos: Periodically check all screws on the fan blades and mounting hardware to ensure they are secure. Loose screws can cause wobbling or noise.
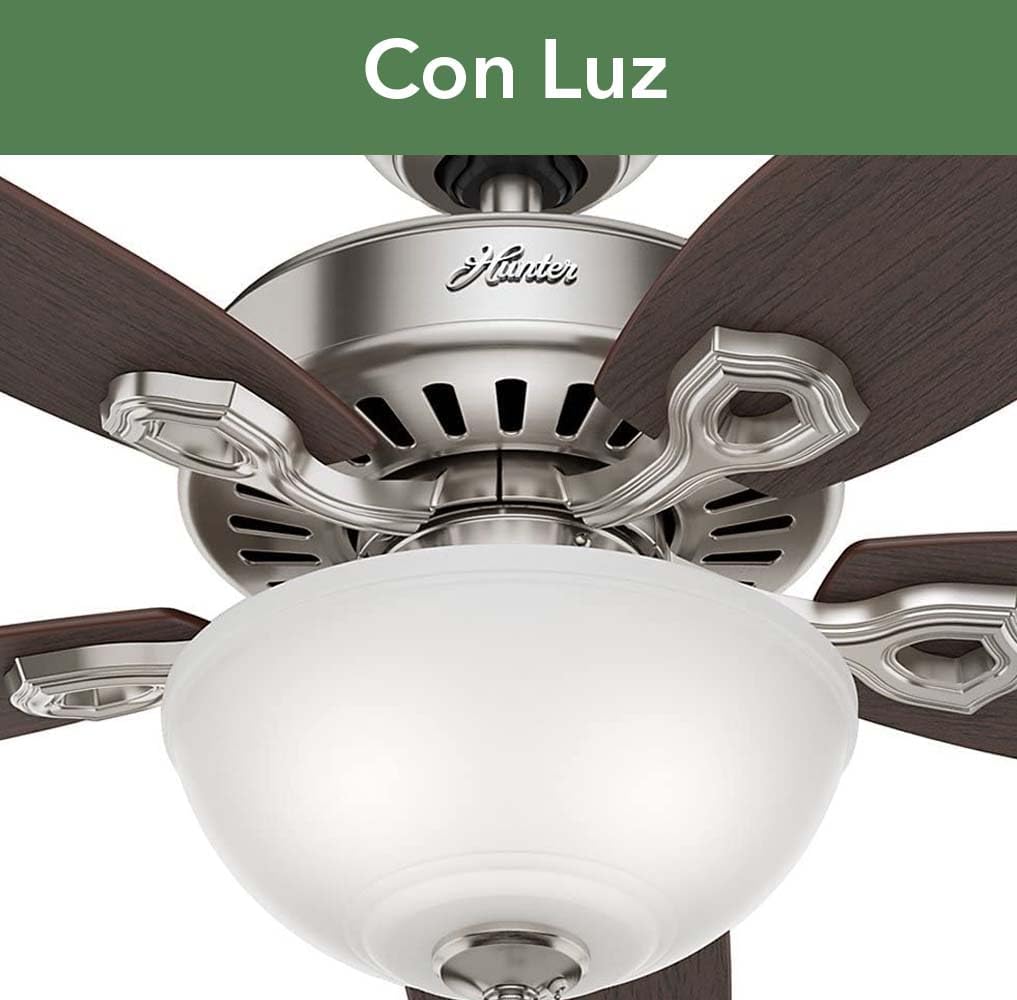
Imaxe: Unha detallada view of the fan's light kit, featuring the frosted glass bowl, which houses the light bulbs.
Resolución de problemas
Se tes problemas co teu ventilador, consulta os seguintes problemas e solucións comúns:
| Problema | Causa posible | Solución |
|---|---|---|
| O ventilador non comezará | No power to fan; Loose wire connections; Motor switch not engaged. | Check circuit breaker; Verify all wire connections are secure; Ensure pull chain is in the 'on' position. |
| O ventilador tambalea | Parafusos da lámina soltos; láminas desequilibradas; soporte de montaxe solto. | Aperte todos os parafusos da lámina; use un kit de equilibrado (non incluído) se é necesario; asegúrese de que o soporte de montaxe estea ben fixado. |
| A luz non funciona | Loose wire connections; Faulty bulb; Light kit switch off. | Check light kit wiring; Replace bulb; Ensure light pull chain is in the 'on' position. |
| Funcionamento ruidoso | Loose screws; Fan not level; Bearings need lubrication (rare for sealed bearings). | Tighten all screws; Ensure fan is mounted level; Contact customer support if noise persists after checking connections. |
Especificacións
| Característica | Detalle |
|---|---|
| Fabricante | Fan de cazador |
| Número de modelo | 53090 |
| Tamaño | 52 inches (132 cm) diameter |
| Cor | Níquel pulido |
| Estilo | Tradicional |
| Material | Aceiro de aliaxe |
| Fonte de enerxía | Eléctrico con cable |
| Voltage | 120 voltios |
| Wattage (ventilador) | 64 vatios |
| Capacidade de fluxo de aire | 5110 pés cúbicos por minuto |
| Tipo de bombilla | Electric (2 x 9W included) |
| Número de láminas | 5 (Reversible) |
| Características especiais | 3 speeds, WhisperWind motor, Pull Chain Control |
| Peso | 8300 gramos (18.3 libras) |
| Dimensións (LxWxH) | 132.1 cm x 132.1 cm x 42.6 cm |
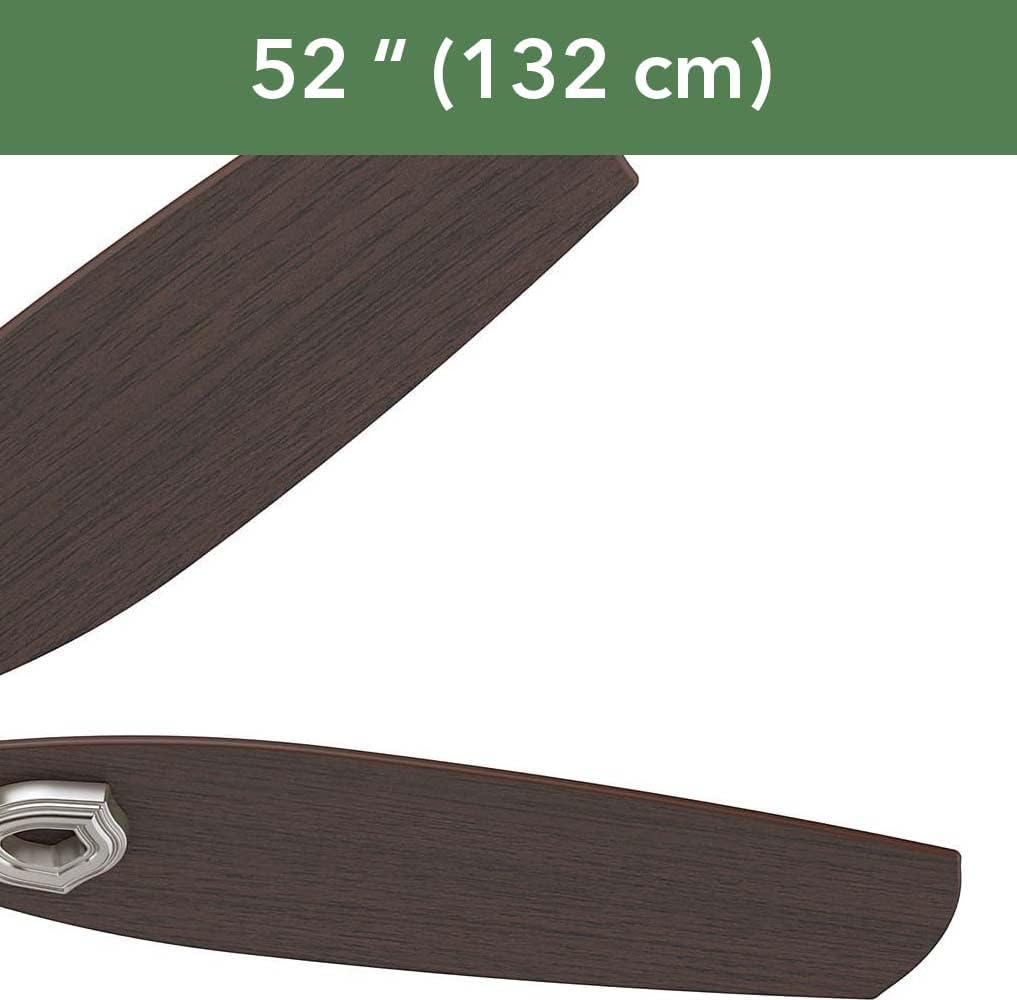
Image: A visual representation highlighting the 52-inch (132 cm) diameter of the fan, indicating its size.
Garantía e Soporte
A empresa Hunter Fan avala a calidade dos seus produtos.
Información da garantía
This Hunter Fan Builder Deluxe Ceiling Fan comes with a limited lifetime motor warranty, ensuring peace of mind regarding the fan's core functionality. Please refer to the warranty card included in your original packaging for full terms and conditions.
Atención ao cliente
For technical assistance, replacement parts, or warranty claims, please visit the official Hunter Fan website or contact their customer service department. Have your model number (53090) and purchase information ready when contacting support.
Soporte en liña: www.hunterfan.com/support
Asistencia telefónica: Refer to the contact information on the Hunter Fan websitio para a súa rexión.


