1. Introdución
This manual provides detailed instructions for the assembly, operation, and maintenance of your Sharkoon VS4-W Series ATX/MicroATX Mid-Tower PC Case, model SHA-VS4-WBK. Please read this manual thoroughly before beginning installation to ensure proper setup and to maximize the lifespan of your product.
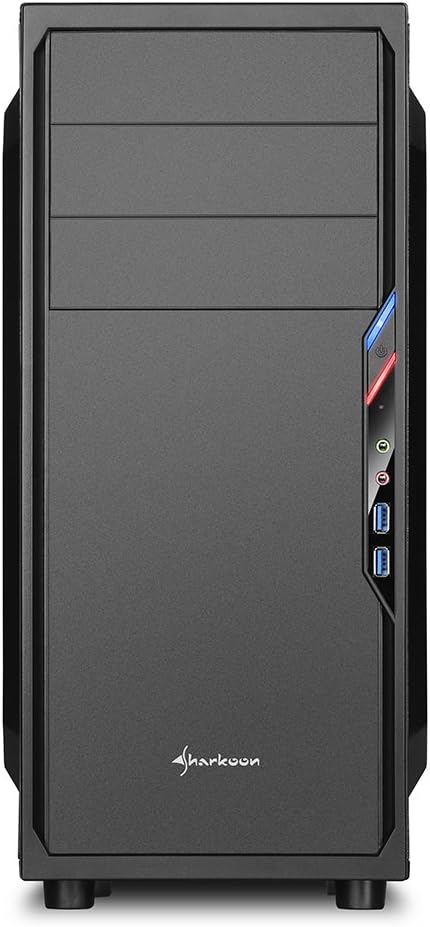
The Sharkoon VS4-W Series is designed for users seeking a cost-effective and functional PC case. It features a full-black aesthetic with an acrylic side window panel, offering a clear view of your internal components. The case supports ATX and Micro-ATX motherboards and provides ample space for various components, including multiple storage drives and long graphics cards.
2. Produto rematadoview
2.1. Características clave
- Acrylic side window panel for component visibility.
- Full-black interior and exterior design.
- Support for ATX and Micro-ATX motherboards.
- Three 5.25-inch drive bays, two with tool-less mechanisms.
- Seven drive bays for storage: three 3.5-inch and four 2.5-inch.
- Generous expansion card space, up to 385mm with 2.5-inch cage removed.
- Cable management space behind the motherboard tray due to a bulged side panel design.
- Supports CPU coolers up to 160mm in height.
- Front I/O panel with 2x USB 3.0 and 2x USB 2.0 ports, plus HD Audio.
- Pre-installed 120mm front fan and 120mm blue LED rear fan.
2.2. Identificación de compoñentes


3. Configuración e instalación
3.1. Preparación do caso
- Unpack the PC case and remove all packaging materials.
- Coloque a caixa sobre unha superficie estable e plana.
- Remove the side panels by unscrewing the thumbscrews at the rear of the case.
3.2. Instalación da placa base
- Instala a protección de E/S que vén coa placa base no recorte da parte traseira da caixa.
- Ensure standoffs are correctly aligned for your ATX or Micro-ATX motherboard. Install additional standoffs if necessary.
- Carefully place the motherboard into the case, aligning it with the standoffs and I/O shield.
- Asegure a placa base con parafusos.
3.3. Instalación da fonte de alimentación
- Mount the power supply unit (PSU) in the designated area at the bottom rear of the case.
- Fixe a fonte de alimentación con parafusos na parte traseira da caixa.
- Route necessary power cables through the cable management cutouts.
3.4. Instalación da unidade
- 5.25-inch Drives: For tool-less bays, slide the drive in until it clicks into place. For other bays, secure with screws.
- 3.5-inch Drives: Slide the 3.5-inch drives into the designated bays and secure them.
- 2.5-inch Drives: Mount 2.5-inch SSDs/HDDs onto the dedicated mounting points.
3.5. Instalación da tarxeta de expansión
- Retire as tapas das ranuras PCI necesarias da parte traseira da caixa.
- Insira a súa tarxeta gráfica ou outras tarxetas de expansión nas ranuras PCI-E correspondentes da placa base.
- Secure the cards with screws. For longer graphics cards, the 2.5-inch drive cage can be removed to provide up to 385mm of space.
3.6. Xestión de cables
Utilize the space behind the motherboard tray and the various cable routing holes to organize cables. This improves airflow and aesthetics.
4. Instrucións de funcionamento
Once all components are installed and connected, replace the side panels and secure them with the thumbscrews. Connect your peripherals (monitor, keyboard, mouse, etc.) to the motherboard's I/O ports. Connect the power cable to the PSU and a wall outlet. Press the power button on the front panel to start your system.
5. Mantemento
5.1. Limpeza
- Regularly clean dust filters (if present) to maintain optimal airflow.
- Use compressed air to remove dust from internal components and fans.
- Limpe o exterior da carcasa cun pano suave eamp pano. Evite produtos de limpeza abrasivos.
5.2. Mantemento de ventiladores
Ensure fans are free from obstructions and spinning correctly. If a fan becomes noisy or stops working, consider replacing it to maintain proper cooling.
6 Solución de problemas
6.1. O sistema non se acende
- Check all power connections, including the PSU to the wall, and internal connections to the motherboard and components.
- Asegúrate de que o cable do botón de acendido da caixa estea conectado correctamente ao conector do panel frontal da placa base.
- Verifique que o interruptor da PSU estea na posición "ON".
6.2. Poor Airflow/Overheating
- Clean any dust filters and internal components.
- Ensure fans are operating correctly and oriented for optimal airflow (intake/exhaust).
- Mellorar a xestión dos cables para reducir as obstrucións á circulación do aire.
6.3. Front Panel USB/Audio Not Working
- Verify that the front panel USB and HD Audio cables are securely connected to the corresponding headers on your motherboard.
7. Especificacións
| Nome do modelo | VS4-W Series |
| Número de modelo do produto | SHA-VS4-WBK |
| Tipo de caso | Torre media |
| Material | Aceiro, Plástico, Acrílico |
| Cor | Negro |
| Compatibilidade da placa base | ATX, Micro-ATX |
| Compartimentos para unidades de 5.25" | 3 (2 with tool-less mechanism) |
| Compartimentos para unidades internas de 3.5" | 3 |
| Compartimentos para unidades de 2.5" | 4 |
| Ranuras de expansión PCI | 7 |
| Máx. Lonxitude da tarxeta gráfica | 310mm (385mm with 2.5" cage removed) |
| Máx. Altura do enfriador da CPU | 160 mm |
| Máx. Lonxitude da PSU | 260 mm |
| Portos de E / S dianteiros | 2x USB 3.0, 2x USB 2.0, HD Audio (Mic/Headphone) |
| Ventiladores preinstalados | Front: 1x 120mm, Rear: 1x 120mm Blue LED |
| Método de arrefriamento | Refrixeración por aire |
| Dimensións do produto (L x W x H) | 44.5 x 20 x 43 cm |
| Peso do elemento | 3.5 kg |
8. Garantía e soporte
Para obter información sobre a garantía e asistencia técnica, consulte a páxina oficial de Sharkoon websitio web ou póñase en contacto co seu distribuidor local. Garde o comprobante de compra para reclamacións de garantía.
Sharkoon oficial Websitio: www.sharkoon.com


