1. Introdución
The Arducam 5MP OV5647 Camera Module is a high-definition video camera designed for various Raspberry Pi models, including Model A, B, B+, 2, 3, 3B+, 4, and 5. It features a 5-megapixel Omnivision OV5647 sensor with a fixed-focus lens, capable of capturing still pictures at 2592 x 1944 resolution and video at 1080p. This module connects to the Raspberry Pi via the dedicated MIPI Camera Serial Interface (CSI) connector, offering a compact and efficient solution for imaging projects.
2. Información de seguridade
- Handle the camera module with care to avoid damage to the lens or circuit board.
- Ensure the Raspberry Pi is powered off before connecting or disconnecting the camera module.
- Avoid touching the sensor or lens surface directly to prevent smudges or scratches.
- Keep the module away from moisture, extreme temperatures, and static electricity.
- Do not use excessive force when inserting the FPC cable into the CSI connector.
3. Contido do paquete
Verifica que todos os elementos estean presentes no teu paquete:
- 1x Arducam 5MP OV5647 Camera Module
- 1x 15cm 15-pin to 15-pin FPC Cable
- 1x 15cm 15-pin to 22-pin FPC Cable (for Raspberry Pi models requiring a 22-pin connector)
- 1x USB Cable (if included in your specific kit)

Image: Arducam 5MP OV5647 Camera Module with a short flexible printed circuit (FPC) cable attached.
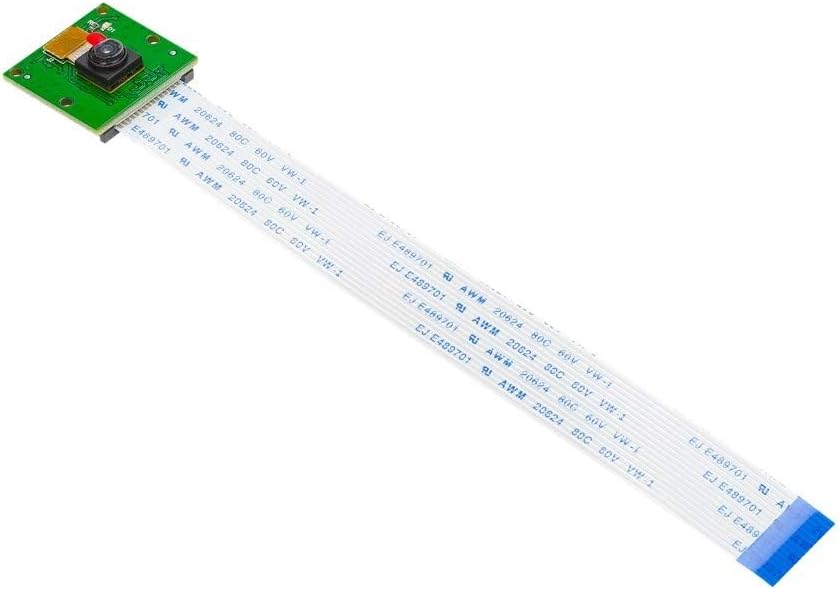
Image: Arducam 5MP OV5647 Camera Module with a longer flexible printed circuit (FPC) cable attached, showing the full length of the cable.
4. Instrucións de configuración
4.1 Conexión de hardware
- Power Off Raspberry Pi: Before connecting the camera, ensure your Raspberry Pi is completely powered off and disconnected from its power source.
- Locate CSI Connector: Identify the CSI (Camera Serial Interface) connector on your Raspberry Pi board. This is typically a long, narrow slot.
- Abrir conector: Gently pull up the plastic clip on the top edge of the CSI connector.
- Insert FPC Cable: Carefully insert the FPC cable from the camera module into the CSI connector. Ensure the silver contacts on the cable are facing the correct direction (towards the HDMI port on most Raspberry Pi models). Use the appropriate FPC cable (15-pin or 22-pin) for your specific Raspberry Pi model.
- Pechar conector: Push the plastic clip back down to secure the FPC cable in place.
- Encendido: Reconnect the power to your Raspberry Pi.

Image: The Arducam 5MP OV5647 Camera Module connected to a Raspberry Pi board via its FPC cable, illustrating the proper hardware connection.

Image: The Arducam 5MP OV5647 Camera Module connected to a Raspberry Pi Zero board using a different, narrower FPC cable. Note: This cable for Raspberry Pi Zero is typically not included with the standard module and must be purchased separately.
4.2 Configuración do software
After connecting the hardware, you need to enable and configure the camera module in your Raspberry Pi's operating system.
- Activar a interface da cámara:
- Open a terminal on your Raspberry Pi.
- Executar o comando:
sudo raspi-config - Navega ata Opcións de interface -> Cámara e habilitálo.
- Reinicia a túa Raspberry Pi cando se che solicite.
- Edit config.txt for OV5647: For optimal performance and detection, it is recommended to manually configure the
config.txtfile.- Abre o
config.txtfile using a text editor:sudo nano /boot/config.txt - Locate the line
camera_auto_detect=1e cambialo porcamera_auto_detect=0. - Baixo o
[all]section, add the line:dtoverlay=ov5647 - Save the changes (Ctrl+O, then Enter for nano) and exit the editor (Ctrl+X).
- Reboot your Raspberry Pi:
sudo reboot
- Abre o

Image: A visual note detailing the required changes to the Raspberry Pi's config.txt file for the OV5647 camera module, specifically changing 'camera_auto_detect' and adding 'dtoverlay=ov5647'.

Image: The Arducam 5MP OV5647 Camera Module with a red dashed circle highlighting the power indicator LED (D1) on the circuit board.
5. Instrucións de funcionamento
Once the camera module is connected and configured, you can use various tools to capture images and videos.
5.1 Basic Usage with libcamera (Raspberry Pi OS Bookworm or newer)
- Take a still picture:
libcamera-still -o test.jpg - Gravar un vídeo:
libcamera-vid -t 10000 -o test.h264(records for 10 seconds) - Preview a transmisión da cámara:
libcamera-hello
5.2 Basic Usage with raspistill/raspivid (Legacy Raspberry Pi OS Bullseye or older)
- Take a still picture:
raspistill -o image.jpg - Gravar un vídeo:
raspivid -o video.h264 -t 10000(records for 10 seconds) - Preview a transmisión da cámara:
raspistill -t 0
For more advanced options and parameters, refer to the official Raspberry Pi camera documentation online. The camera supports a maximum still picture resolution of 2592 x 1944 and video resolution of 1080p at 30fps.
6. Mantemento
- Limpeza da lente: Use a soft, lint-free microfiber cloth specifically designed for optics to gently clean the lens. Avoid using abrasive materials or harsh chemicals.
- Almacenamento: When not in use, store the camera module in an anti-static bag or a protective case to prevent dust accumulation and physical damage.
- Xestión de cables Ensure the FPC cable is not sharply bent or crimped, as this can damage the internal conductors.
- Condicións ambientais: Operate and store the camera within recommended temperature and humidity ranges to prolong its lifespan.
7 Solución de problemas
- Cámara non detectada:
- Ensure the FPC cable is correctly inserted into both the camera module and the Raspberry Pi's CSI connector, with the silver contacts facing the correct direction.
- Verify that the camera interface is enabled in
raspi-confige que oconfig.txtmodifications (as described in Section 4.2) have been applied and the Pi rebooted. - Check if the correct FPC cable (15-pin or 22-pin) is being used for your specific Raspberry Pi model.
- Test the camera on another Raspberry Pi if available, or try a different FPC cable to rule out component failure.
- Dim or Poor Image Quality:
- Ensure adequate lighting in the environment. This camera module performs best in well-lit conditions.
- Clean the camera lens gently with a microfiber cloth.
- The OV5647 module has a fixed-focus lens. Ensure your subject is within the optimal focus range (1m to infinity).
- Update your Raspberry Pi OS to the latest version to ensure you have the most recent camera drivers and software.
- Lens Fell Off / Physical Damage:
- Physical damage, such as a detached lens, typically indicates a manufacturing defect or improper handling. Contact Arducam support for assistance.
8. Especificacións
| Característica | Descrición |
|---|---|
| Sensor | Omnivision OV5647, 5 Megapixels |
| Resolución de imaxe fixa | 2592 x 1944 píxeles |
| Resolución máxima de vídeo | 1080p (1920x1080) a 30 fps |
| Campo de View | 54 x 41 graos |
| Fixed Focus Range | 1 meter to infinity |
| Interface | MIPI Camera Serial Interface (CSI) |
| Dimensións | 0.94 x 2.36 x 0.98 inches (approx. 24mm x 25mm for the board) |
| Peso | 0.32 onzas |
| Compatibilidade | Raspberry Pi Model A, B, B+, 2, 3, 3B+, 4, 5 (NOT for Pi Zero without specific cable) |

Image: The Arducam 5MP OV5647 Camera Module with dimensions indicated, showing the board size of approximately 25mm x 24mm.
9. Garantía e soporte
Arducam products are designed for reliability and performance. For warranty information, technical support, or further assistance, please visit the official Arducam websitio web ou póñase en contacto directamente co servizo de atención ao cliente.
Official Arducam Websitio: www.arducam.com


