Introdución
The TFA Dostmann Timeline Max Radio-Controlled Clock (Model 60.4512.01) features a large, exceptionally clear display, making it easily readable from a distance. This makes it ideal for various settings such as entrance areas, reception desks, waiting rooms, and offices. Its clear structure simplifies time orientation, and with the displayed day of the week and full date, it serves as a valuable daily aid, particularly for seniors and individuals with cognitive impairments.
The clock automatically receives time signals via the DCF 77 signal, ensuring precise, second-accurate time and date display without manual adjustment. It also automatically switches between summer and winter time. Its simple and clear design allows it to seamlessly integrate into any environment, whether mounted on a wall or placed on a surface.
Contido do paquete
Ao desembalar, comproba o contido do paquete para asegurarte de que estean presentes todos os elementos:
- TFA Dostmann Timeline Max Radio-Controlled Clock
- Manual de instrucións
Nota: 4 x 1.5 V AA batteries are required for operation and are not included in the package.
Información importante de seguridade
- Lea atentamente todas as instrucións antes do uso.
- Conserve este manual para futuras consultas.
- Non expoñas o dispositivo a temperaturas extremas, luz solar directa nin humidade elevada.
- Evite deixar caer ou someter o dispositivo a fortes impactos.
- Non intente desmontar nin reparar o dispositivo vostede mesmo. Encargue todo o mantemento a persoal cualificado.
- Desfágase das baterías segundo a normativa local. Non mesture baterías vellas e novas nin baterías de diferentes tipos.
- Manteña as pilas fóra do alcance dos nenos.
Configuración
1. Instalación da batería
The clock requires 4 x 1.5 V AA batteries (not included).
- Localiza o compartimento da batería na parte traseira do reloxo.
- Abra a tapa do compartimento da batería.
- Insira 4 pilas AA novas, asegurándose de manter a polaridade correcta (+ e -) como se indica no interior do compartimento.
- Pecha a tapa do compartimento da batería de forma segura.

Figura 1: Traseira view of the clock with battery compartment and control buttons.
2. Sincronización inicial da hora (controlada por radio)
After inserting the batteries, the clock will automatically begin searching for the DCF 77 radio signal. This process may take several minutes. During synchronization, the radio signal icon (often a tower or wave symbol) will typically flash on the display.
- Coloca o reloxo preto dunha xanela ou nunha zona aberta para unha mellor recepción do sinal.
- Evite colocalo preto de dispositivos electrónicos que poidan causar interferencias.
- Once the signal is received, the time and date will automatically set, and the radio signal icon will become solid.

Figure 2: Front display showing synchronized time and date.
3. Opcións de colocación
The Timeline Max clock is designed for both wall mounting and freestanding placement.
- Para montaxe en parede: Use the integrated hanging hole on the back of the clock. Ensure the wall fixture is secure enough to support the clock's weight (approx. 520g).
- For Freestanding: Extend the integrated stand on the back of the clock to place it on a desk, shelf, or table.

Figura 3: Lateral view demonstrating the clock's integrated stand.
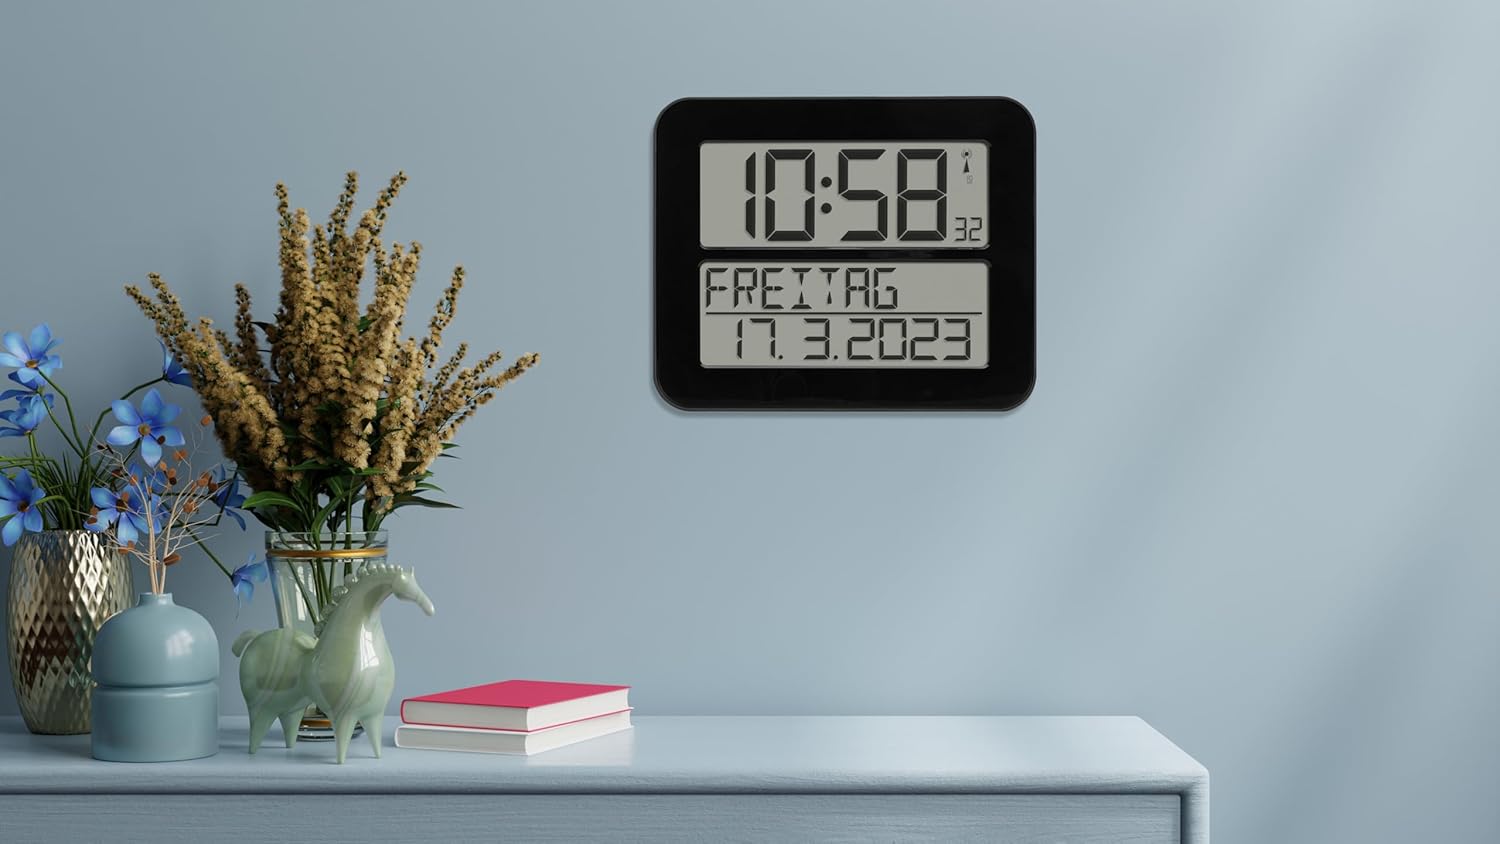
Figure 4: The clock in a typical freestanding setup.
Instrucións de funcionamento
Mostrar información
The large display shows the following information:
- Pantalla superior: Current time (hours and minutes), seconds (small digits), and radio signal indicator.
- Pantalla inferior: Day of the week (in selected language) and full date (day, month, year).

Figure 5: Clear display of time, day, and date.
Función de alarma
The clock includes an alarm function. Refer to the buttons on the back of the clock (SET, ALARM, UP, DOWN, WAVE, SNOOZE) for setting the alarm.
- Preme o ALARMA botón para entrar no modo de configuración da alarma.
- Usa o UP e ABAIXO botóns para axustar a hora da alarma.
- Preme ALARMA again to confirm and move to the next setting (e.g., alarm on/off).
- Preme SET para saír do modo de configuración da alarma.
- Cando soe a alarma, prema AMORTAR for a temporary pause, or any other button to turn off the alarm for the day.
Manual Time Setting (If Radio Signal is Unavailable)
In areas with poor radio signal reception, you can manually set the time and date.
- Manteña premido o SET button for a few seconds until the display flashes.
- Usa o UP e ABAIXO buttons to adjust the flashing digit (e.g., hour, minute, year, month, day).
- Preme SET to confirm the current setting and move to the next.
- Continue until all settings are adjusted. The clock will exit manual setting mode automatically after a period of inactivity or by pressing SET repeatedly until the normal display returns.
Day of Week Language Setting
The day of the week can be displayed in 7 different languages.
- Consult the full instruction manual (included in the box) for specific steps on changing the language setting, as this often involves a combination of button presses.
Mantemento
Limpeza
To clean the clock, use a soft, dry, or slightly damp cloth. Do not use abrasive cleaners, solvents, or chemical agents, as these may damage the display or casing.
Substitución da batería
When the display dims or the clock stops functioning correctly, it's time to replace the batteries. Follow the "Battery Installation" steps in the Setup section. Always replace all 4 batteries at once with new, high-quality AA batteries.
Resolución de problemas
| Problema | Causa posible | Solución |
|---|---|---|
| O reloxo non mostra nada ou a pantalla está escura. | As pilas están gastadas ou inseridas incorrectamente. | Substitúe as pilas por outras novas, garantindo a polaridade correcta. |
| Clock does not synchronize with radio signal. | Poor signal reception due to location or interference. | Move the clock to a different location, preferably near a window and away from electronic devices. Allow sufficient time for synchronization (up to 24 hours). |
| Time is incorrect after synchronization. | Temporary signal disruption or incorrect time zone setting (if applicable). | Initiate a manual signal search (refer to full manual) or perform a manual time setting. Ensure the clock is in the correct time zone for your region (if this feature is available, consult the full manual). |
| Non soa a alarma. | A alarma non está activada ou está configurada incorrectamente. | Verify that the alarm time is set correctly and the alarm function is enabled. |
Especificacións
| Modelo | 60.4512.01 |
| Tipo de reloxo | Radio-Controlled (DCF 77 signal) |
| Material | Plástico |
| Opcións de montaxe | For hanging or standing |
| Fonte de alimentación | 4 pilas AA de 1.5 V (no incluídas) |
| Dimensións (L x W x H) | 258 x 30 (120 with stand) x 212 mm |
| Peso | 520 g |
| Tipo de visualización | Dixital |
| Características especiais | Alarm, Calendar Display, Day of week in 7 languages |
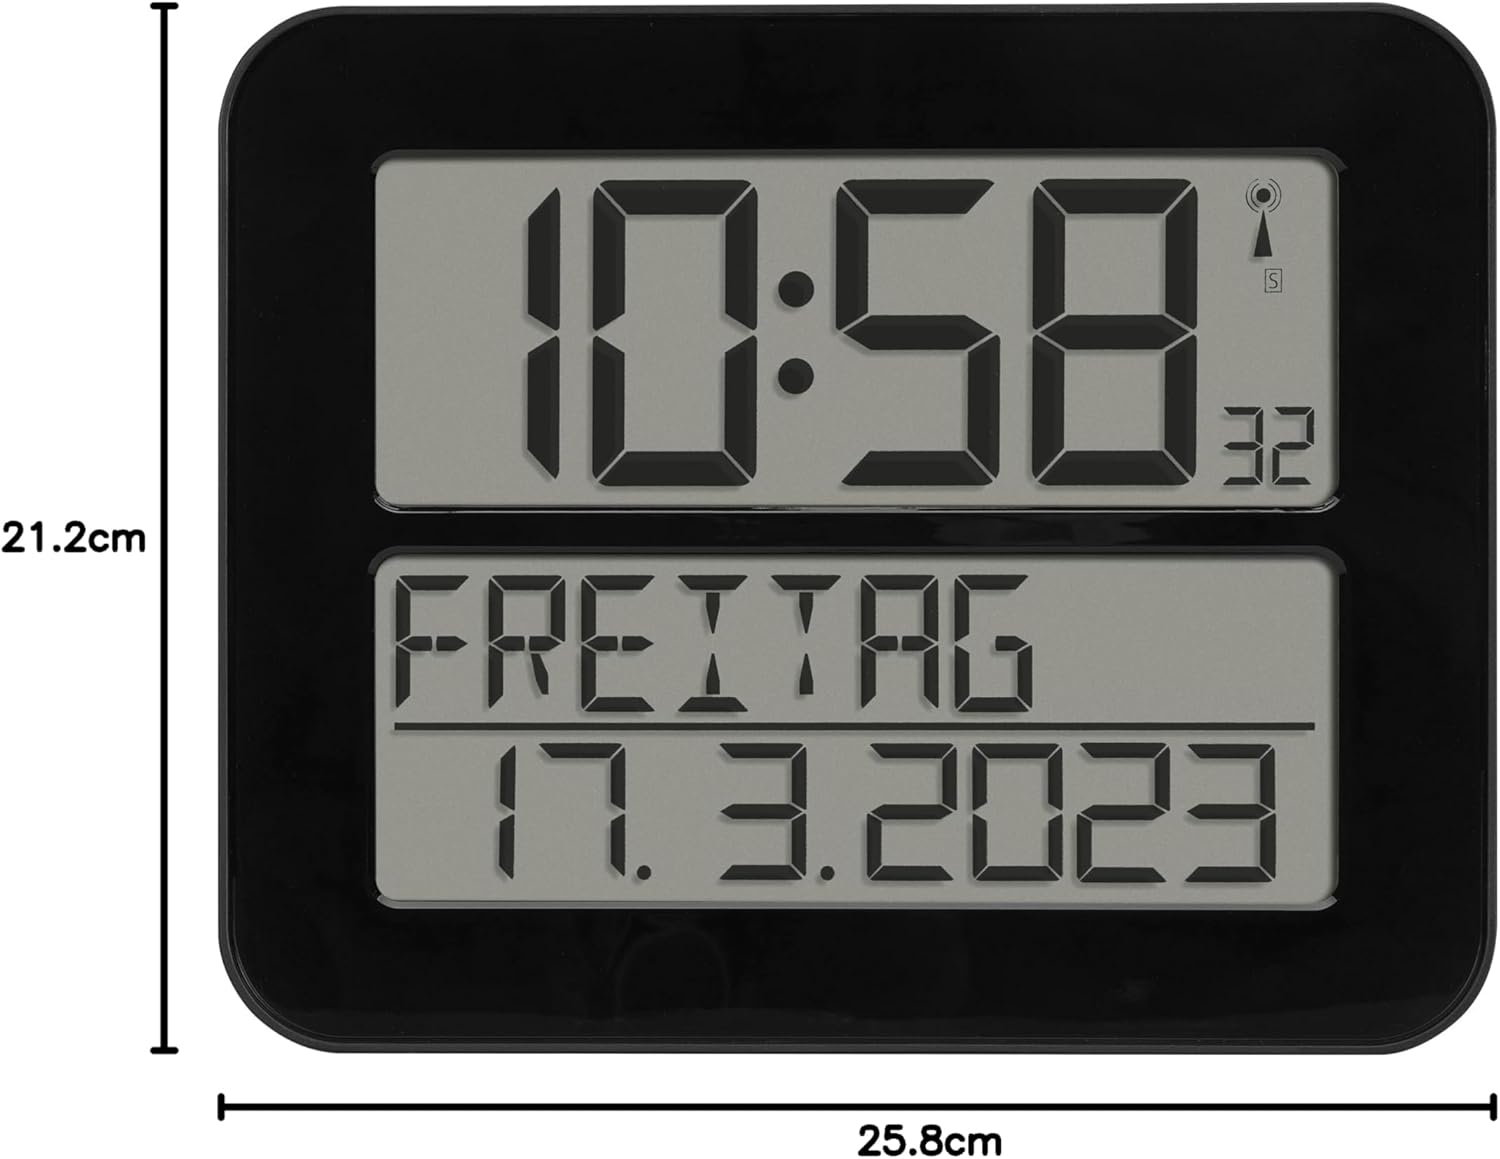
Figura 6: Dimensións do produto.
Garantía e Soporte
TFA Dostmann products are manufactured with high quality standards. For information regarding warranty coverage, please refer to the warranty card included with your product or visit the official TFA Dostmann website. For technical support or inquiries, please contact TFA Dostmann customer service.
Manufacturer: TFA Dostmann GmbH, Zum Ottersberg 12, D-97877 Wertheim am Main, Germany.
Websitio: www.tfa-dostmann.de


