1. Introdución
Grazas por escoller o KOLINK Refractor Midi-Tower computer case. This manual provides essential information for the proper installation, operation, and maintenance of your new PC chassis. Please read this manual carefully before beginning the assembly process to ensure a smooth and safe build.
1.1 Información de seguridade
- Desconecte sempre a fonte de alimentación da toma de corrente antes de instalar ou retirar calquera compoñente.
- Use unha pulseira antiestática para evitar danos por descarga electrostática (ESD) en compoñentes sensibles.
- Handle components with care. Avoid touching pins or circuit boards directly.
- Manteña pezas e ferramentas pequenas lonxe dos nenos.
- Asegúrate de que haxa unha ventilación axeitada arredor da carcasa para evitar o sobrequecemento.
2. Contido do paquete
Please verify that all the following items are present in your package:
- KOLINK Refractor Midi-Tower Chassis
- Caixa de accesorios (que contén parafusos, separadores, bridas para cables, etc.)
- Manual de usuario (este documento)
If any items are missing or damaged, please contact your retailer or KOLINK support.
3. Produto rematadoview
Familiarize yourself with the key features and components of your KOLINK Refractor Midi-Tower.
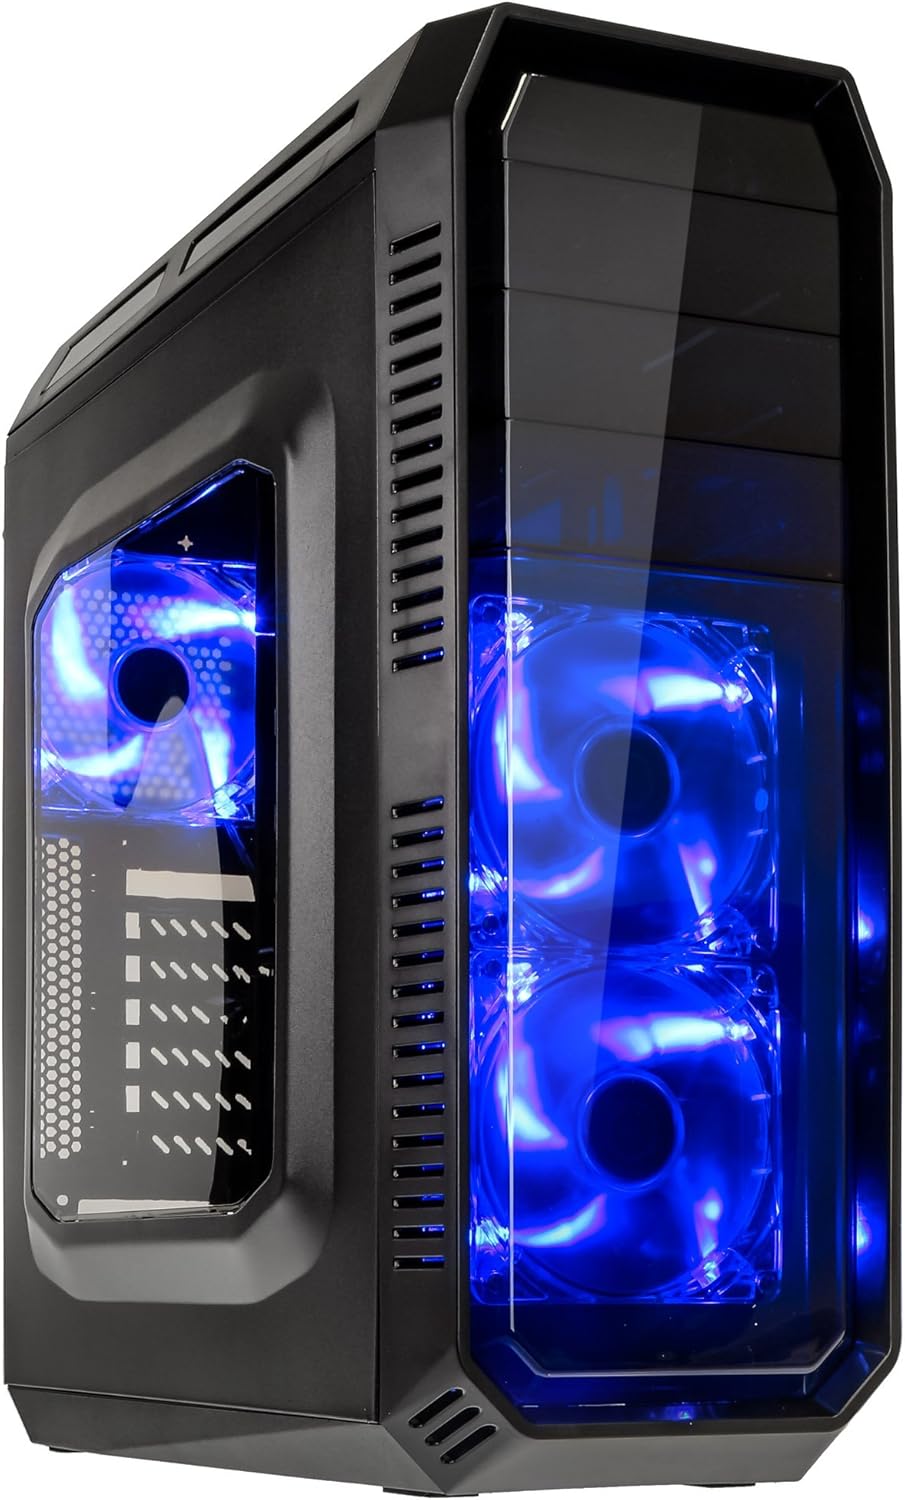
This image displays the KOLINK Refractor Midi-Tower from a front-left perspective, highlighting its sleek black design. The front panel features two pre-installed 120mm blue LED fans, visible through a transparent section, providing both cooling and aesthetic appeal. The left side panel includes a window, allowing visibility of internal components.

A top-front view of the case, illustrating the conveniently located I/O panel on the top. This panel includes two USB 3.0 ports, two USB 2.0 ports, and audio input/output jacks. The top surface also features a mesh area for additional ventilation, contributing to optimal airflow.

This image shows the right side panel of the KOLINK Refractor Midi-Tower. It is a solid black panel, designed for cable management behind the motherboard tray, ensuring a clean and organized interior.

This composite image provides three distinct views of the case. The left panel shows the front with its blue LED fans. The middle panel displays the rear of the case, featuring the motherboard I/O cutout, seven expansion slots, and a 120mm fan mount. The right panel offers a close-up of the top I/O ports, including USB 3.0, USB 2.0, and audio jacks.

A detailed close-up of the top I/O panel. It clearly shows the power and reset buttons, two USB 3.0 ports, two USB 2.0 ports, and the microphone and headphone jacks, providing easy access for peripherals.
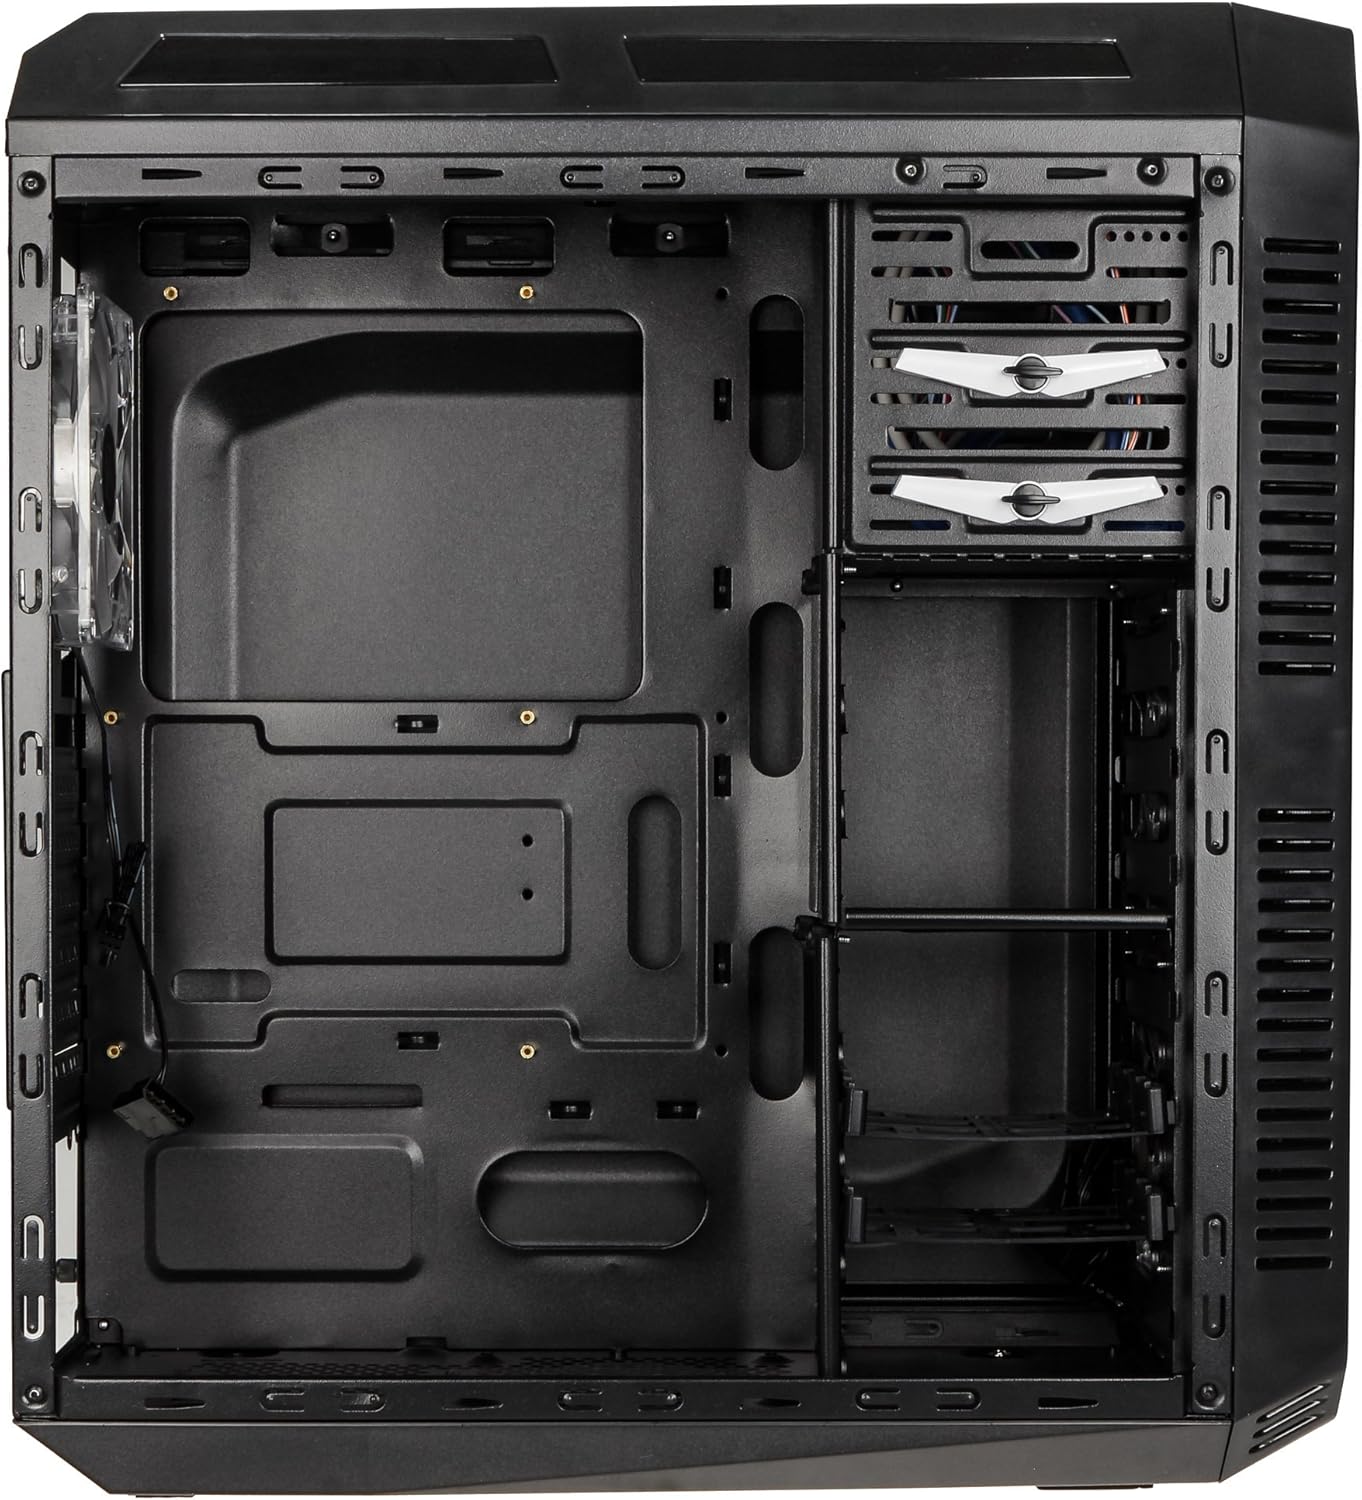
This image presents the interior of the case from the left side, revealing the spacious motherboard tray compatible with ATX motherboards. It features a large cutout behind the CPU area for easy cooler installation and multiple grommeted holes for efficient cable routing.

Unha interna view from the right side, focusing on the drive bay configuration. The case offers three external 5.25-inch bays and seven internal 2.5/3.5-inch drive bays, providing ample storage expansion options.

A closer look at the internal drive bays, illustrating the design for mounting 2.5-inch or 3.5-inch storage drives. These bays are designed for easy installation and removal of hard drives and SSDs.

Esta imaxe proporciona unha imaxe interna view looking down from the top, showcasing the pre-installed 120mm blue LED fan at the rear for exhaust. The top panel's mesh area for additional fan mounting is also visible, contributing to overall system cooling.
4. Configuración e instalación
Follow these steps to install your computer components into the KOLINK Refractor Midi-Tower.
4.1 Preparación do caso
- Coloque a caixa sobre unha superficie plana e estable.
- Remove the left and right side panels by unscrewing the thumbscrews at the rear of the case and sliding the panels backward.
4.2 Instalación da placa base
- Install the I/O shield that came with your motherboard into the cutout at the rear of the case.
- Ensure the correct motherboard standoffs are installed for your ATX motherboard. Adjust or add standoffs as necessary using the provided accessory kit.
- Coloca con coidado a placa base sobre os separadores, aliñando os orificios dos parafusos.
- Fixe a placa base cos parafusos axeitados do kit de accesorios.
4.3 Instalación da fonte de alimentación
- Position your ATX power supply unit (PSU) in the designated compartment at the bottom rear of the case.
- Aliñe a fonte de alimentación cos orificios para os parafusos da parte traseira da caixa.
- Secure the PSU using the screws provided with your power supply.
4.4 Instalación da unidade
5.25-inch External Drives:
- Remove the desired 5.25-inch bay cover from the front panel.
- Slide your optical drive or other 5.25-inch device into the bay from the front.
- Secure the drive using the tool-less clips or screws.
2.5/3.5-inch Internal Drives:
- Locate the internal drive bays.
- Mount your 2.5-inch SSD or 3.5-inch HDD into the drive trays.
- Slide the populated drive trays back into the drive cage until they click into place.
4.5 Instalación da tarxeta de expansión
- Remove the necessary expansion slot covers at the rear of the case.
- Insert your graphics card or other PCIe expansion card into the corresponding slot on the motherboard.
- Secure the card with the provided screws.
4.6 Xestión de cables
Utilize the cable routing holes and tie-down points behind the motherboard tray to organize cables. This improves airflow and gives your build a cleaner appearance.
4.7 Fan Installation (Optional)
The case comes with two 120mm blue LED fans pre-installed at the front and one 120mm blue LED fan at the rear. Additional fan mounting locations include:
- Top: 1x 120/140mm fan
- Bottom: 1x 120mm fan (under the PSU)
Install additional fans as needed for optimal cooling, ensuring proper airflow direction.
5. Instrucións de funcionamento
5.1 Encendido inicial
- Once all components are installed and cables are connected, replace both side panels.
- Connect your monitor, keyboard, mouse, and other peripherals.
- Connect the power cable to the PSU and then to a wall outlet.
- Press the power button on the top I/O panel to start your system.
5.2 Front Panel I/O Usage
The top I/O panel provides convenient access to:
- Portos USB 3.0 (x2): Para a transferencia de datos de alta velocidade con dispositivos compatibles.
- Portos USB 2.0 (x2): Para conectar dispositivos USB estándar.
- Audio Jacks (Headphone/Microphone): For connecting headsets or external audio devices.
- Botón de encendido: To turn the system on/off.
- Botón de reinicio: Para reiniciar o sistema.
5.3 Iluminación LED
The pre-installed front and rear fans feature blue LED lighting, which illuminates when the system is powered on, adding an aesthetic element to your build.
6. Mantemento
Regular maintenance helps ensure optimal performance and longevity of your computer system.
6.1 Limpeza
- Filtros de po: The case includes a removable dust filter under the PSU. Regularly remove and clean this filter to prevent dust buildup and maintain airflow.
- Exterior: Limpe as superficies exteriores cun suave, damp pano. Evite produtos de limpeza abrasivos.
- Interior: Periodically use compressed air to remove dust from internal components and fan blades. Ensure the system is powered off and unplugged before cleaning the interior.
6.2 Airflow Optimization
Ensure that the case's ventilation areas (front, top, rear, bottom) are not obstructed. Proper cable management also contributes significantly to unrestricted airflow within the case.
7 Solución de problemas
Esta sección aborda problemas comúns cos que podes atoparte.
7.1 Problemas comúns
- O sistema non se acende:
- Comprobe se o cable de alimentación está conectado correctamente tanto á fonte de alimentación como á toma de corrente.
- Asegúrese de que o interruptor da fonte de alimentación estea na posición "ON".
- Verifique que o cable do botón de acendido do panel frontal estea conectado correctamente á placa base.
- Confirm all internal power cables (24-pin ATX, CPU, GPU) are properly seated.
- Os ventiladores non xiran:
- Check if the fan power cables are correctly connected to the motherboard or fan controller.
- Ensure the system is receiving power.
- Os portos USB non funcionan:
- Verify that the front panel USB 3.0 and USB 2.0 headers are correctly connected to the motherboard.
- Ensure the device you are connecting is functioning correctly.
- Audio Ports Not Working:
- Check that the front panel audio header (HD Audio) is correctly connected to the motherboard.
- Confirm your audio drivers are installed and up to date.
For further assistance, please refer to your motherboard manual or contact KOLINK support.
8. Especificacións
Especificacións técnicas detalladas para o KOLINK Refractor Midi-Tower.
| Característica | Especificación |
|---|---|
| Nome do modelo | Refractor Midi-Tower |
| Dimensións (W x H x D) | 190 x 475 x 445 mm (7.5 x 18.7 x 17.5 polgadas) |
| Material | Steel (body), Plastic (front) |
| Peso | Aprox. 4.8 kg (10.6 libras) |
| Cor | Negro |
| Factor de forma | Torre Midi |
| Compatibilidade da placa base | ATX |
| Compartimentos de unidades externas | 3 x 5.25 polgadas |
| Baxas de unidades internas | 7x 2.5/3.5-inch |
| Ranuras de expansión | 7 |
| Ventiladores preinstalados | 2x 120mm (front, blue LED), 1x 120mm (rear, blue LED) |
| Fan Support (Total Possible) | Front: 2x 120mm, Top: 1x 120/140mm, Bottom: 1x 120mm, Rear: 1x 120mm |
| Panel de E/S | 2x USB 3.0, 2x USB 2.0, 1x Audio In/Out |
| Lonxitude máxima da tarxeta gráfica | 360 mm |
| Altura máxima do refrigerador da CPU | 174 mm |
| Compatibilidade da fonte de alimentación | Standard ATX (optional) |
| Filtros de po | Floor (under PSU, removable) |
9. Garantía e soporte
KOLINK products are manufactured to high-quality standards. This product is covered by a manufacturer's warranty against defects in materials and workmanship. The specific terms and duration of the warranty may vary by region and retailer.
Please retain your proof of purchase for warranty claims. For technical support, warranty inquiries, or to report missing/damaged parts, please contact your point of purchase or visit the official KOLINK websitio para recursos de apoio.
KOLINK Official Websitio: www.kolink.eu (Please note: This is a general link and may not lead directly to a support page for this specific model.)


