1. Introdución
This manual provides detailed instructions for the safe and efficient operation of your Optoma EH416 Full HD 3D DLP Projector. Please read this manual thoroughly before using the projector and retain it for future reference. Proper use and maintenance will ensure optimal performance and longevity of your device.
Información de seguridade
- Non mire directamente á lente do proxector cando estea aceso.amp está acendido. A luz intensa pode causar danos nos ollos.
- Asegúrese de que haxa unha ventilación axeitada arredor do proxector. Non bloquee as aberturas de ventilación.
- Use only the power cord supplied with the projector. Connect to a properly grounded outlet.
- Non expoña o proxector á choiva, á humidade ou a un exceso de humidade.
- Enderece calquera tarefa de mantemento a persoal de servizo cualificado. Non intente abrir nin reparar o proxector vostede mesmo.
2. Que hai na caixa
Please verify that all items listed below are present in your package. If any items are missing or damaged, contact your dealer immediately.
- Optoma EH416 Projector
- Cable de alimentación
- Cable VGA a VGA
- Control remoto
- Bolsa de transporte
- Baterías para mando a distancia
- Multilingual CD-ROM User’s Manual
- Tarxeta de inicio rápido
- Tarxeta de garantía
3. Produto rematadoview
Características clave
- Alto Brillo: 4200 lumens for clear images in various lighting conditions.
- Alto contraste: 20,000:1 contrast ratio for sharp, luminous images with deep blacks.
- Resolución Full HD: Native 1080p (1920x1080) resolution, supporting up to WUXGA (1920x1200).
- Advanced Optical Lens: Features a 1.6x zoom and vertical lens shift for flexible installation.
- Conectividade ampla: Dual HDMI (one with MHL support), dual audio-in, VGA, and more.
- sRGB Color Profile: Enables vibrant and highly accurate colors based on Rec. 709 HDTV specification.
- Axuste da cor da parede: Compensates for brightness loss when projecting on non-white surfaces.
- Edge Mask: Eliminates soft edges and jaggedness on the projection border for a smooth image.
- Audio integrado: Altavoz incorporado de 10 W.
Compoñentes do proxector
The image below illustrates the main components of the Optoma EH416 projector, including the lens, control panel, and various ports.
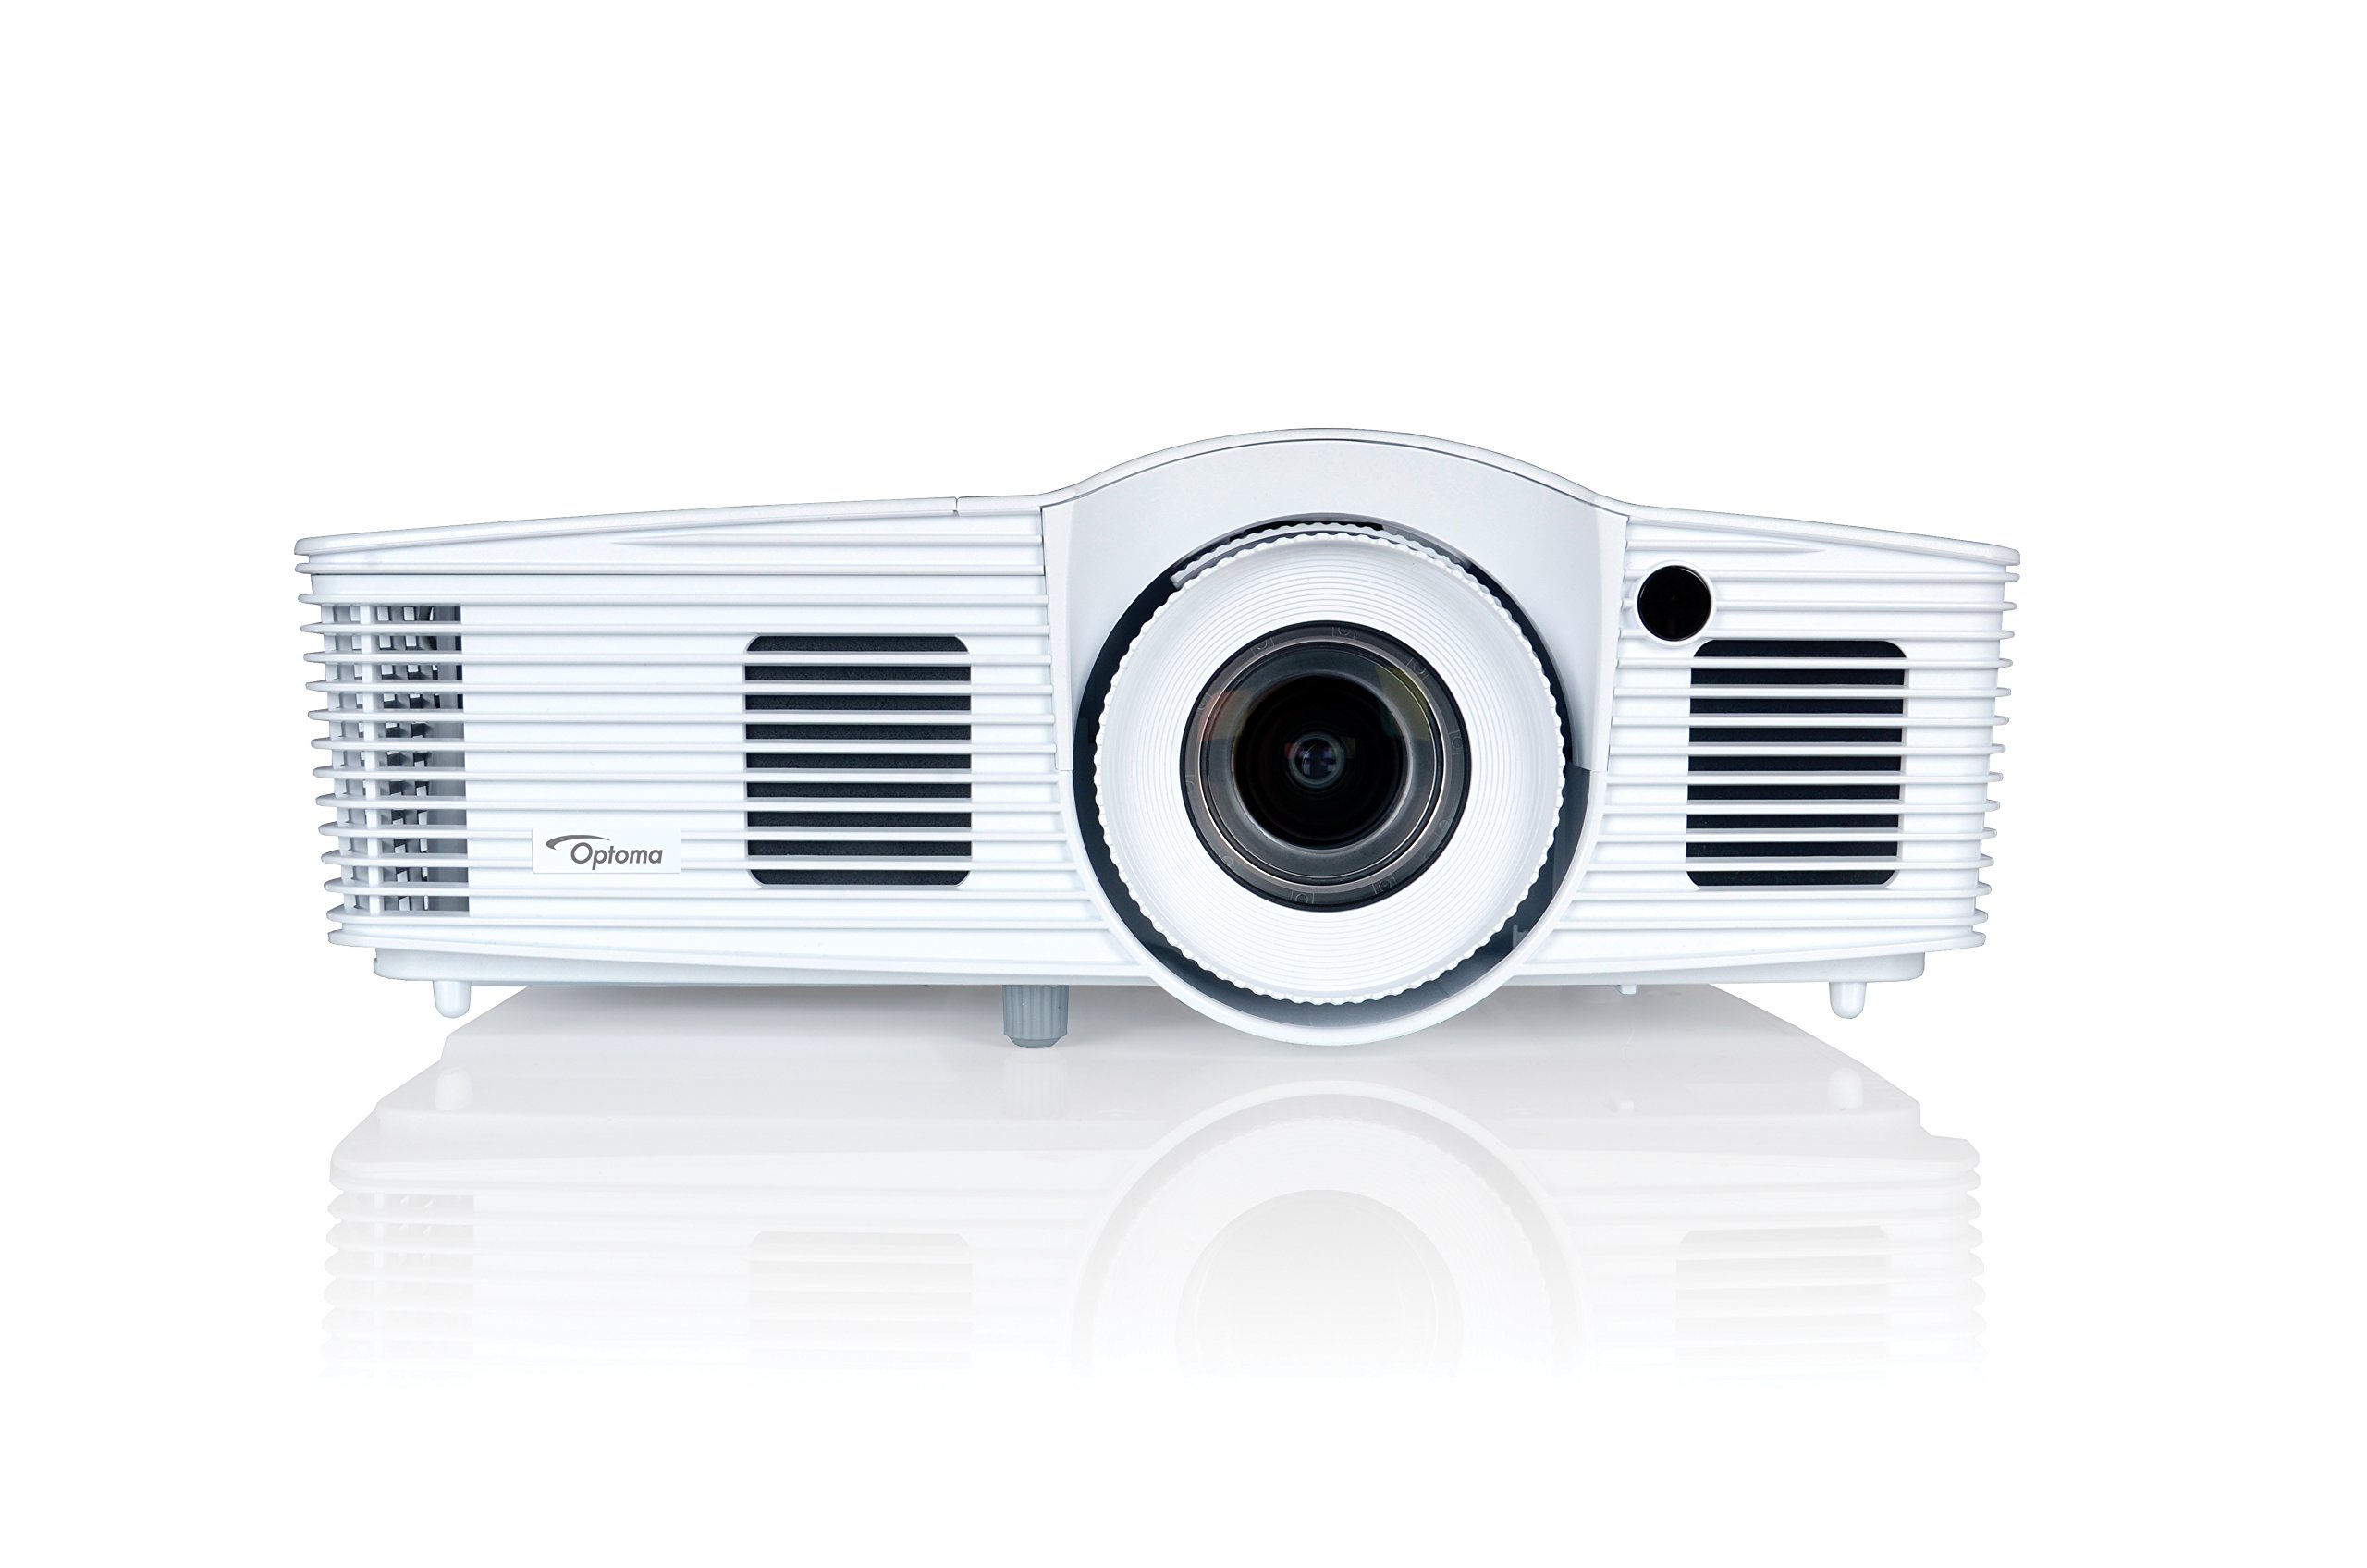
Figura 1: Fronte view of the Optoma EH416 Projector, showing the lens and primary controls.
Portos de conectividade
The Optoma EH416 projector offers a wide range of connectivity options located on the rear panel for versatile integration with various devices.
- HDMI (x2): Digital input for high-definition video and audio. One port supports MHL for mobile devices.
- VGA (x2): Analog input for computer connections.
- Audio In (x2): 3.5mm stereo jack for analog audio input.
- Saída de audio: 3.5mm stereo jack for connecting external speakers.
- USB-A: For power output or service.
- RS232: Para o control do proxector a través dun ordenador ou sistema de control.
- RJ45 (Ethernet): Para o control e a xestión da rede.
4. Configuración
Colocación do proxector
The Optoma EH416 offers flexibility in placement due to its 1.6x zoom and vertical lens shift capabilities. Position the projector on a stable surface or mount it securely. Adjust the distance from the screen to achieve the desired image size. The 1.6x zoom allows for a larger image from a shorter distance or a smaller image from a longer distance without moving the projector.
Conectando Dispositivos
- Conexión de alimentación: Conecte o cable de alimentación á entrada de corrente do proxector e despois a unha toma de corrente con conexión a terra.
- Fonte do vídeo:
- For HDMI devices (e.g., Blu-ray player, laptop): Connect an HDMI cable from your device to one of the HDMI ports on the projector.
- For VGA devices (e.g., older laptops): Connect a VGA cable from your device to a VGA port on the projector. If audio is also required, connect a separate 3.5mm audio cable from your device to an Audio In port on the projector.
- For MHL compatible mobile devices: Connect an MHL cable to the designated HDMI/MHL port.
- Saída de audio (opcional): If using external speakers, connect an audio cable from the projector's Audio Out port to your sound system.
Encendido/apagado
- Para acender: Prema o botón de acendido no panel de control do proxector ou no mando a distancia. A luz indicadora de acendido acenderase en azul.
- Para apagar: Press the power button twice. The projector will enter a cooling down cycle before completely shutting off. Do not unplug the projector during the cooling cycle.
5. Funcionamento do proxector
Operación básica
- Selección da fonte: Use the 'Source' button on the remote or control panel to cycle through available input sources (HDMI1, HDMI2/MHL, VGA1, VGA2).
- Navegación do menú: Press the 'Menu' button to access the On-Screen Display (OSD). Use the arrow keys to navigate and 'Enter' to select options.
- Control de volume: Use the volume buttons on the remote control to adjust the audio output from the built-in speaker or Audio Out port.
Axustes da imaxe
- Enfoque e zoom: Rotate the focus and zoom rings on the projector lens to achieve a sharp and appropriately sized image.
- Corrección Keystone: If the image appears trapezoidal, use the 'Keystone' function in the OSD menu or the dedicated button on the remote to correct the image shape. The EH416 supports ±40° vertical keystone correction.
- Desplazamento vertical da lente: This feature allows you to physically move the image up or down without tilting the projector, minimizing keystone distortion. Adjust the lens shift dial located near the lens.
- Axuste da cor da parede: Access this feature in the OSD menu to compensate for the color of your projection surface (e.g., blackboard, light yellow wall). This helps maintain accurate color reproduction even on non-white walls.
- sRGB Color Profile: For the most accurate and vibrant colors, especially when connecting to a PC, Mac, or sRGB compatible source, select the sRGB picture mode in the OSD. This profile adheres to the Rec. 709 HDTV specification.
- Edge Mask: This function, found in the OSD, helps to refine the edges of the projected image, eliminating any soft or jagged appearance on the border.
6. Mantemento
Limpeza do proxector
- Lente: Usa un pano suave e sen fiapos deseñado especificamente para lentes ópticas. Non empregues produtos de limpeza abrasivos.
- Casing: Limpar o proxector casincun pano suave e seco. Para a sucidade persistente, use un pano lixeiramente secoamp un pano cun deterxente suave e logo seque.
- Ventos de aire: Regularly check and clean the air vents to prevent dust buildup, which can lead to overheating. Use a soft brush or compressed air.
Lamp Coidados
O proxector lamp ten unha vida útil finita. Cando o lamp life is nearing its end, a warning message may appear on the screen. Refer to the full user manual on the included CD-ROM for detailed instructions on lamp replacement. Always use genuine Optoma replacement lamps para garantir un rendemento e unha seguridade óptimos.
7 Solución de problemas
This section addresses common issues you might encounter. For more detailed troubleshooting, refer to the comprehensive user manual on the included CD-ROM.
- Sen imaxe na pantalla:
- Check if the projector is powered on and the lamp está aceso.
- Verify that the video source device is powered on and functioning correctly.
- Ensure the video cable (HDMI, VGA) is securely connected to both the projector and the source device.
- Selecciona a fonte de entrada correcta usando o botón "Fonte" no mando a distancia ou no proxector.
- Imaxe borrosa ou distorsionada:
- Axuste o anel de enfoque da lente do proxector.
- If the image is trapezoidal, use the keystone correction function.
- Ensure the projector is perpendicular to the screen or use vertical lens shift.
- Sen son:
- Comprobe o nivel de volume no proxector e no dispositivo fonte.
- If using an analog VGA connection, ensure a separate audio cable is connected.
- Verify that the audio output is not muted.
- O control remoto non funciona:
- Comprobe e substitúa as pilas.
- Asegúrate de que non haxa obstrucións entre o mando a distancia e o receptor de infravermellos do proxector.
8. Especificacións
| Característica | Detalle |
|---|---|
| Número de modelo | EH416 |
| Resolución de visualización | 1920 x 1080 (Full HD) |
| Brillo | 4200 lúmenes |
| Relación de contraste | 20,000:1 |
| Tecnoloxía de conectividade | Wireless, HDMI, MHL, VGA |
| Dimensións do produto | 8.81 x 12.36 x 4.48 polgadas |
| Peso do elemento | 6.6 libras |
| Usos recomendados | Business, Education |
| Fabricante | TECNOLOXÍA OPTOMA |
| Data de primeira dispoñibilidade | 5 de abril de 2016 |
9. Garantía e soporte
Your Optoma EH416 projector comes with a manufacturer's warranty. Please refer to the included warranty card for specific terms, conditions, and registration information. For technical support, product registration, or to download the latest drivers and firmware, please visit the official Optoma website or contact Optoma customer service.


