1. Introdución
The Unitek Y-3026 is a versatile USB 3.0 Dual SATA HDD/SSD Docking Station designed for efficient data management. It supports both 2.5-inch and 3.5-inch SATA I, II, and III hard disk drives (HDDs) and solid-state drives (SSDs) of various capacities. This docking station features a SuperSpeed USB 3.0 interface for fast data transfer and an integrated offline clone function, allowing direct disk-to-disk duplication without requiring a computer connection.
Características principais:
- Offline Clone Function: Duplicate hard drives without a computer.
- USB 3.0 de supervelocidade: Data transfer rates up to 5Gbps.
- Dual Bay Design: Simultaneously work with two hard drives.
- Ampla compatibilidade: Supports 2.5" and 3.5" SATA I/II/III HDDs and SSDs.
- Modo de suspensión automático: Energy-saving feature after 30 minutes of inactivity.
- Plug and Play: No drivers required for standard operation.
2. Contido do paquete
- Unitek Y-3026 Dual SATA HDD Docking Station
- Cable de datos USB 3.0
- Adaptador de alimentación
- Manual de usuario (este documento)
3. Produto rematadoview
Familiarize yourself with the components of your Unitek Y-3026 docking station.
Fronte/arriba View:

Figura 3.1: Fronte view of the Unitek Y-3026 docking station, showing the two drive bays labeled A and B, and LED indicators.

Figura 3.2: Arriba view highlighting the two SATA drive slots (A and B) and the status LED panel.
Traseira View:

Figura 3.3: Traseira view showing the USB 3.0 port, DC 12V power input, and On/Off switch.
Compoñentes:
- Drive Bay A: Upper slot for 2.5" or 3.5" SATA HDD/SSD.
- Drive Bay B: Lower slot for 2.5" or 3.5" SATA HDD/SSD.
- Botón de encendido: Located on the rear panel, controls power to the unit.
- Porto USB 3.0: Located on the rear panel, connects to your computer.
- Entrada de alimentación DC 12 V: Located on the rear panel, connects to the power adapter.
- Botón Clonar: Located on the front panel, initiates the offline cloning process.
- Indicadores LED: Display power status, drive activity, and clone progress.
- Anti-slip Pads: Located on the bottom for stability.

Figure 3.4: Detail showing the anti-slip pads for stabilization and the On/Off switch.
4. Configuración e instalación
- Inserir discos duros:
- Gently slide your 2.5" or 3.5" SATA HDD/SSD into the drive bays (A and/or B) until they are securely seated. Ensure the SATA connectors align correctly.
- For data transfer mode, you can insert one or two drives.
- For offline cloning, insert the source drive into Bay A and the target drive into Bay B.
- Conectar enerxía:
- Connect the provided power adapter to the DC 12V input port on the rear of the docking station.
- Enchufe o adaptador de alimentación a unha toma de corrente.
- Connect to Computer (for data transfer):
- Connect one end of the USB 3.0 cable to the USB 3.0 port on the rear of the docking station.
- Connect the other end of the USB 3.0 cable to an available USB 3.0 port on your computer.
- Encendido:
- Press the On/Off switch on the rear panel to power on the docking station. The power LED indicator will illuminate.
5. Instrucións de funcionamento
5.1. Data Transfer Mode (Connected to Computer)
When connected to a computer via USB, the docking station functions as an external drive enclosure, allowing you to access data on the inserted HDDs/SSDs.
- Ensure the docking station is powered on and connected to your computer via the USB 3.0 cable.
- The operating system will automatically detect the drives. New drives may require initialization and formatting before use.
- Access the drives through your computer's file explorador (Windows) ou Finder (macOS).

Figure 5.1: Illustration comparing data transfer speeds when connected to a PC versus using the offline clone function.

Figure 5.2: The docking station supports SATA III at 5Gbps with UASP, enabling quick access to large files.
5.2. Offline Clone Function (Stand-alone Duplication)
The offline clone function allows you to duplicate a source drive (Disk A) to a target drive (Disk B) without connecting to a computer. The target drive must have a capacity equal to or greater than the source drive.

Figure 5.3: Visual guide for the one-click HDD duplication or capacity update process, showing source disk (A) and target disk (B).
- Preparar as unidades:
- Ensure the docking station is powered off and disconnected from any computer.
- Insira o Disco de orixe (the drive you want to copy from) into Baía A.
- Insira o Disco obxectivo (the drive you want to copy to) into Baía B.
- Importante: All data on the target disk (Bay B) will be erased during the cloning process. Back up any important data from the target disk before proceeding.
- The target disk's capacity must be equal to or larger than the source disk's capacity.
- Start Cloning:
- Power on the docking station using the On/Off switch.
- Press and hold the "Clone" button (located on the front panel) for approximately 3-5 seconds until the clone progress LEDs start flashing.
- Solta o botón.
- Monitor de progreso:
- The LED indicators (25%, 50%, 75%, 100%) will illuminate sequentially to show the cloning progress.
- When all four LEDs are solid, the cloning process is complete.
- Remate:
- Power off the docking station.
- Carefully remove the drives.
Nota: Do not disconnect the power or remove drives during the cloning process, as this may lead to data corruption.
6. Indicadores LED
The LED indicators provide visual feedback on the docking station's status and cloning progress.
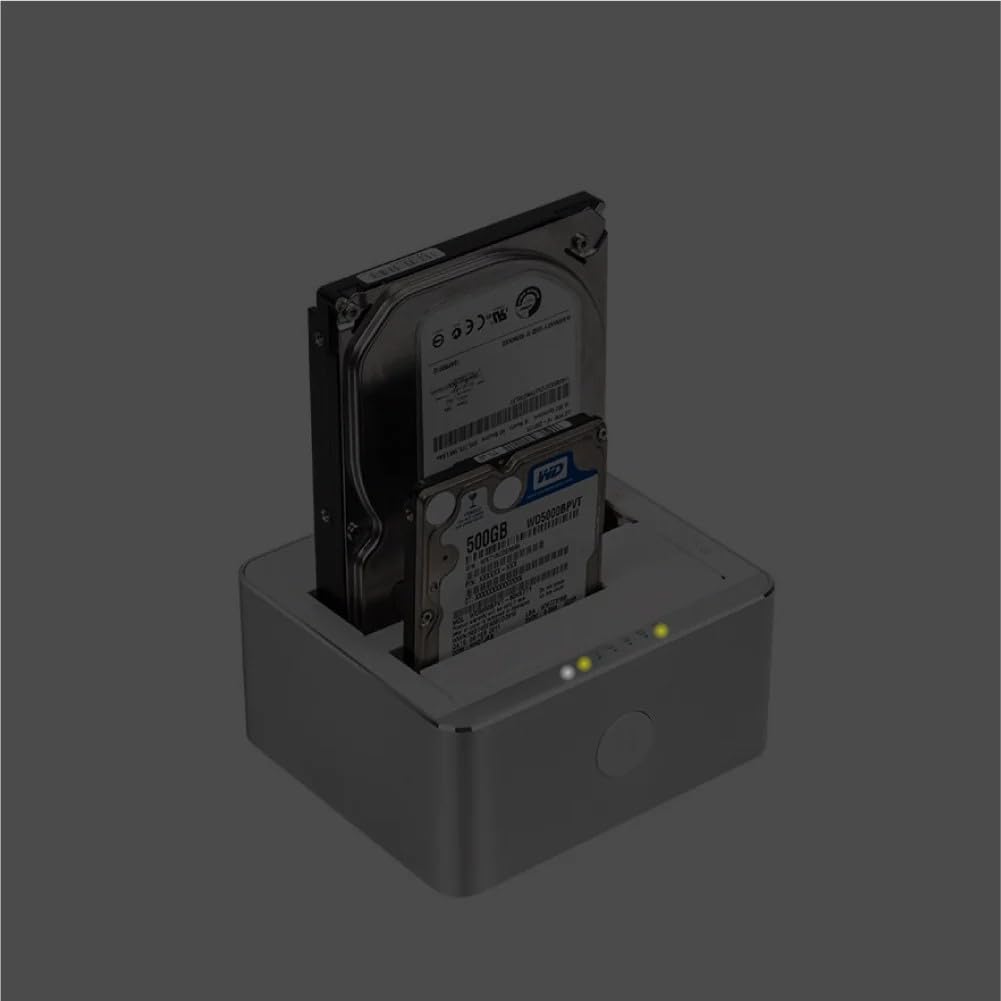
Figure 6.1: Docking station with drives inserted, showing illuminated power and activity LEDs.
- LED de alimentación: Illuminates when the docking station is powered on.
- Drive A/B Activity LEDs: Flash when data is being accessed or written to the respective drive.
- Clone Progress LEDs (25%, 50%, 75%, 100%):
- Flash sequentially during an active cloning process.
- Remain solid when the cloning process is complete.
7 Solución de problemas
| Problema | Causa posible | Solución |
|---|---|---|
| Docking station does not power on. | No power connection or faulty power adapter. | Ensure the power adapter is securely connected to the docking station and a working power outlet. Check the On/Off switch. |
| Unidade non detectada polo ordenador. | Loose drive connection, faulty USB cable, uninitialized/unformatted drive, or incompatible drive. |
|
| Offline clone fails or does not start. | Target drive capacity too small, drives not properly seated, or clone button not held long enough. |
|
| Velocidades lentas de transferencia de datos. | Connected to a USB 2.0 port, or drive performance limitations. |
|
8. Especificacións
| Característica | Detalle |
|---|---|
| Modelo | Y-3026 |
| Marca | Unitek |
| Interface | USB 3.0 (compatible con USB 2.0) |
| Compatibilidade con unidades | 2.5" / 3.5" SATA I/II/III HDD & SSD |
| Número máximo de dispositivos compatibles | 2 |
| Taxa de transferencia de datos | Ata 5 Gbps (USB 3.0) |
| Material | Aluminio |
| Dimensións do produto | 11.5 x 13 x 6.1 cm |
| Peso do elemento | 699 gramos |
| Entrada de enerxía | CC 12 V (a través do adaptador de corrente incluído) |
| Características especiais | Offline Clone Function, Automatic Sleep Mode |
9. Coidados e mantemento
- Keep the docking station in a dry environment, away from direct sunlight and extreme temperatures.
- Evite deixar caer ou someter o dispositivo a fortes impactos.
- Clean the exterior with a soft, dry cloth. Do not use liquid cleaners or solvents.
- Asegúrese de que haxa unha ventilación axeitada arredor do dispositivo durante o seu funcionamento.
- When not in use, disconnect the power adapter.
10. Garantía e soporte
Unitek products are designed for reliability and performance. For warranty information and technical support, please refer to the warranty card included with your product or visit the official Unitek websitio.
For further assistance, please contact Unitek customer support through their official channels.


