1. Introdución
This manual provides instructions for the proper setup, operation, and maintenance of your Levenhuk 720B Binocular Microscope. Please read these instructions carefully before using the instrument to ensure correct usage and to prolong its lifespan. This microscope is designed for laboratory, clinical, and medical research applications.
2. Produto rematadoview
The Levenhuk 720B is a binocular compound microscope featuring multiple objective lenses and eyepieces for various magnification levels. It includes a mechanical stage, LED illumination, and coarse/fine focusing mechanisms.

Figura 2.1: Fronte view of the Levenhuk 720B Binocular Microscope, showing the binocular head, objective lenses, mechanical stage, and base.
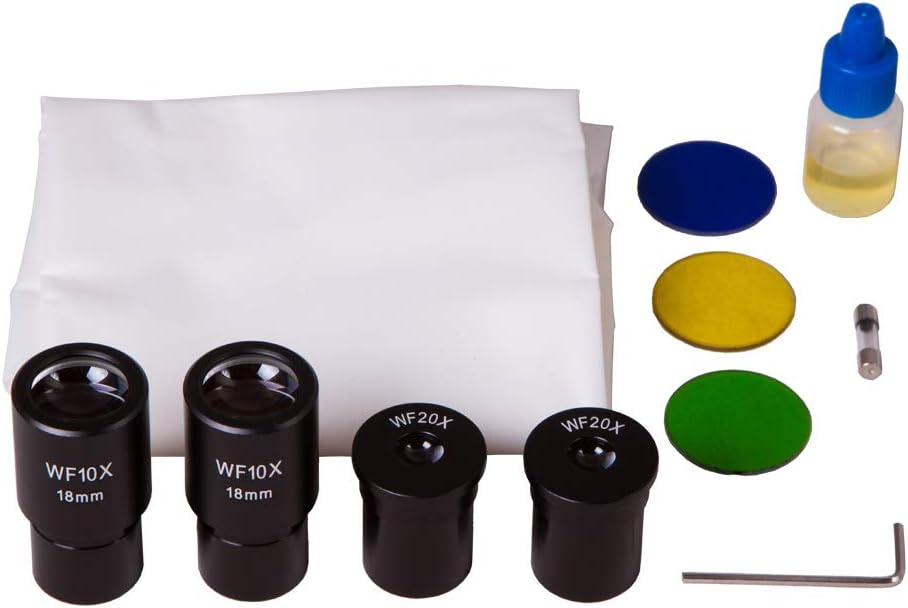
Figure 2.2: Included accessories: WF10x/18mm eyepieces (2), WF20x eyepieces (2), color filters (blue, yellow, green), immersion oil, cleaning cloth, hex key, and spare fuse.
3. Configuración
- Desembalaxe: Retire con coidado todos os compoñentes da embalaxe. Garde a embalaxe orixinal para futuros transportes ou almacenamentos.
- Colocación: Place the microscope on a stable, level surface away from direct sunlight, high temperatures, dust, and vibrations.
- Conexión de alimentación: Connect the power cord to the microscope's power input (AC100V-240V, 50/60Hz) located at the rear of the base, then plug it into a suitable electrical outlet. Ensure the power switch is in the OFF position before connecting.
- Instalación do ocular: Insert the desired eyepieces (e.g., WF10x) into the eyepiece tubes of the binocular head.
- Binocular Head Adjustment: If the binocular head is rotatable, adjust it to a comfortable viewposición de ing.
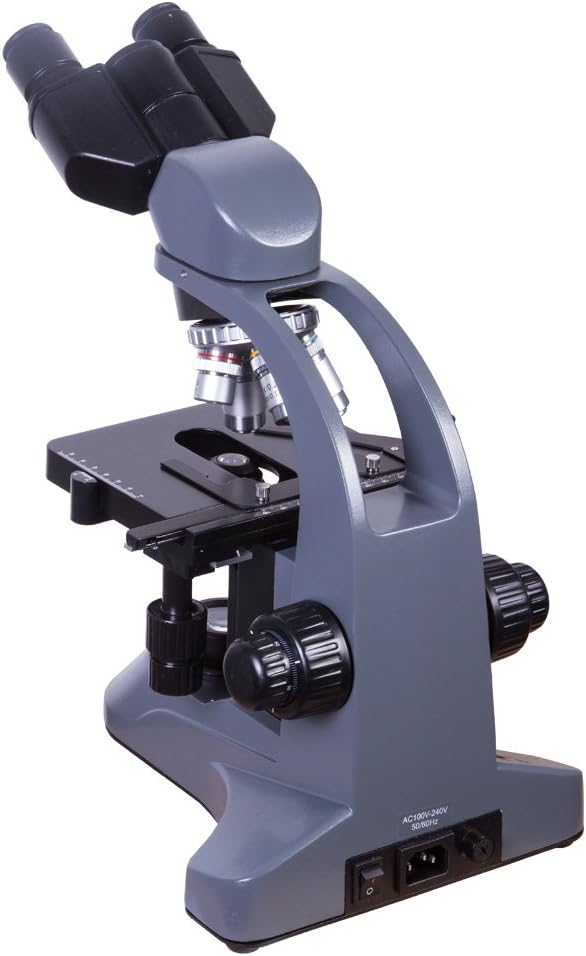
Figura 3.1: Traseira view of the microscope showing the power input and switch.
4. Instrucións de funcionamento
- Encendido: Flip the power switch located on the rear of the microscope base to the ON position. Adjust the illumination intensity using the dimmer control.
- Colocación da mostra: Place a prepared microscope slide onto the mechanical stage. Secure it with the stage clips. Use the stage control knobs to center the specimen area of interest over the condenser aperture.
- Magnification Selection: Rotate the revolving nosepiece to select the lowest power objective lens (e.g., 4x). Ensure the objective clicks firmly into place.
- Focalización:
- While looking through the eyepieces, use the coarse focus knob para enfocar aproximadamente a mostra.
- Despois, utiliza o fine focus knob for precise focusing until the image is sharp and clear.
- Axuste da iluminación:
- Axuste o brillo usando o control de atenuación.
- Adjust the iris diaphragm lever on the condenser to control the amount of light reaching the specimen and improve contrast.
- Axuste da distancia interpupilar: Adjust the distance between the two eyepiece tubes by gently pushing them together or pulling them apart until you see a single, circular field of view.
- Axuste de dioptrías: If one eyepiece has a diopter adjustment ring, focus on the specimen with your dominant eye (usually the right eye) using only the fine focus knob. Then, close your dominant eye and use the diopter adjustment ring on the other eyepiece to focus for your non-dominant eye without touching the fine focus knob.
- Higher Magnification: Once focused at low power, rotate the nosepiece to a higher power objective. Only minor adjustments with the fine focus knob should be needed due to the parfocal design.
- Immersion Oil (for 100x objective): For the 100x objective lens, a drop of immersion oil must be placed directly on the specimen slide. Lower the objective into the oil carefully. After use, clean the 100x objective and slide thoroughly with lens cleaning solution.

Imaxe 4.1: Primeiro plano view da mecánica stage with the condenser and iris diaphragm visible below.

Figura 4.2: View of the illuminated condenser and objective lens from below the stage.
5. Mantemento
- Limpeza de lentes: Use a soft, lint-free lens cleaning cloth and a specialized lens cleaning solution. Never touch optical surfaces with your fingers.
- Limpeza xeral: Limpe o corpo do microscopio cun pano suave eamp pano. Evite o uso de limpadores abrasivos ou disolventes.
- Almacenamento: When not in use, cover the microscope with a dust cover to protect it from dust and debris. Store in a dry, cool place.
- Substitución de fusibles: If the illumination fails, check the fuse located near the power input. Replace it with a fuse of the same type and rating (a spare fuse is included).
6 Solución de problemas
| Problema | Causa posible | Solución |
|---|---|---|
| Sen iluminación | Power cord disconnected, power switch off, dimmer at minimum, blown fuse. | Check power connection, turn on switch, increase dimmer, replace fuse. |
| Image unclear/blurry | Incorrect focus, objective lens dirty, eyepiece dirty, slide upside down. | Adjust focus, clean lenses, check slide orientation. |
| Campo escuro de view | Iris diaphragm closed, low illumination, objective not clicked into place. | Open diaphragm, increase brightness, rotate nosepiece until objective clicks. |
| Two overlapping images | Interpupillary distance incorrect. | Adjust interpupillary distance until a single field of view is seen. |
7. Especificacións
- Número de modelo: 69656
- Marca: Levenhuk
- Aumento máximo: 2000x
- Tipo de fonte de luz: LED
- Descrición da lente obxectivo: Acromático
- Ángulo real de View: 45 graos
- Fonte de enerxía: Eléctrico con cable
- Voltage: 110 voltios
- Dimensións do produto: 19.29 x 15.75 x 10.63 polgadas
- Peso do artigo: 12.36 libras (5.62 quilogramos)
- UPC: 611901504766
8. Garantía e soporte
For warranty information and technical support, please refer to the documentation provided with your purchase or visit the official Levenhuk websitio. Garda o comprobante de compra para reclamacións de garantía.


