Introdución
This manual provides comprehensive instructions for the setup, operation, and maintenance of your GPX Digital AM/FM Clock Radio, model C224B. Please read this manual thoroughly before using the device to ensure proper functionality and to maximize your user experience. Keep this manual for future reference.
Produto rematadoview
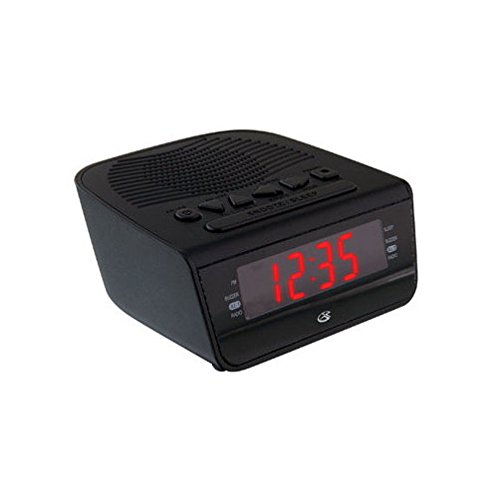
Figura 1: Fronte view of the GPX Digital AM/FM Clock Radio. This image shows the compact black unit with its digital display and control buttons.
The GPX Digital AM/FM Clock Radio (C224B) is designed for reliable timekeeping and audio entertainment. Key features include a clear multi-display clock, AM/FM radio tuner, dual alarm functionality, and a battery backup option to ensure continuous operation during power interruptions. Its compact and modern design makes it suitable for various indoor settings.
Configuración
1. Desembalaxe
Carefully remove the clock radio from its packaging. Ensure all components are present: the clock radio unit and the power adapter.
2. Conexión de alimentación
- Plug the power adapter into the DC input jack located on the back of the clock radio.
- Plug the other end of the power adapter into a standard wall outlet (AC 120V, 60Hz).
- The display will illuminate, indicating the unit is receiving power.
3. Instalación de batería de reserva (opcional)
Para enerxía de reserva durante a saídatages, install batteries (not included).
- Localice o compartimento da batería na parte inferior da unidade.
- Abra a tapa do compartimento da batería.
- Insert the required batteries (e.g., 2 x AAA, check unit for specific type) according to the polarity markings (+ and -).
- Pecha a tapa do compartimento da batería de forma segura.
Nota: Batteries are for backup only and will not power the display or radio functions continuously. They preserve time and alarm settings during a power interruption.
Instrucións de funcionamento
1. Axustar a hora
- Manteña premido o HORARIO botón ata que a pantalla parpadee.
- Usa o HORA e MINUTO botóns para axustar o tempo.
- Preme HORARIO de novo para confirmar e saír do modo de axuste da hora.
2. Configuración de alarmas (alarma 1 e alarma 2)
This unit features dual alarms, allowing you to set two independent wake-up times.
- Manteña premido o ALARMA 1 (ou ALARMA 2) button until the alarm time flashes.
- Usa o HORA e MINUTO buttons to adjust the desired alarm time.
- Preme ALARMA 1 (ou ALARMA 2) again to confirm the time.
- Immediately after confirming the time, use the MODO DE ALARMA button to select the alarm source: ZUMBADOR or RADIO.
- The alarm icon (e.g., AL1 or AL2) will appear on the display, indicating the alarm is active.
To turn off an alarm, press the corresponding ALARMA 1 ON/OFF (ou ALARMA 2 ON/OFF) button. The alarm icon will disappear.
3. Funcionamento da radio AM/FM
- Preme o RADIO ON/OFF botón para acender a radio.
- Preme o BANDA botón para cambiar entre as bandas AM e FM.
- Usa o TUNE + or SINTONIZAR - botóns para sintonizar manualmente a emisora desexada.
- To automatically scan for the next available station, press and hold TUNE + or SINTONIZAR - por uns segundos.
- Axuste o volume empregando o VOLUME + or VOLUME - botóns.
- Para apagar a radio, prema RADIO ON/OFF botón de novo.
4. Función de repetición da alarma
Cando soe unha alarma, prema o botón AMORTAR para silenciar temporalmente a alarma durante aproximadamente 9 minutos. A alarma volverá soar despois do período de repetición.
5. Función sono
The sleep function allows the radio to play for a set duration before automatically turning off.
- Mentres soa a radio, prema o botón DURMIR botón repetidamente para percorrer os tempos de repouso dispoñibles (por exemplo, 90, 60, 30, 15 minutos, OFF).
- A radio apagarase automaticamente despois do tempo seleccionado.
Mantemento
1. Limpeza
To clean the unit, wipe the exterior with a soft, slightly damp cloth. Do not use abrasive cleaners or solvents, as these may damage the finish. Ensure the unit is unplugged before cleaning.
2. Substitución da batería
If the battery backup function is not working, or if the unit loses time during a power outage, the backup batteries may need replacement. Follow the "Battery Backup Installation" steps in the Setup section to replace them.
Resolución de problemas
| Problema | Causa posible | Solución |
|---|---|---|
| A unidade non se acende. | O adaptador de corrente non está conectado ou a toma de corrente está defectuosa. | Asegúrate de que o adaptador de corrente estea conectado correctamente á unidade e a unha toma de corrente que funcione. Proba cunha toma de corrente diferente. |
| Non soa a alarma. | Alarm not set, alarm volume too low, or alarm turned off. | Verify alarm time and source (buzzer/radio) are set correctly. Ensure alarm is activated (icon visible). Increase radio volume if alarm source is radio. |
| Mala recepción de radio. | Sinal débil ou interferencias. | Adjust the position of the unit or the antenna (if external). Move away from other electronic devices that may cause interference. |
| Perda de tempo/configuración despois dun apagadotage. | As baterías de reserva están gastadas ou non están instaladas. | Install fresh backup batteries or replace existing ones. |
Especificacións
- Modelo: C224B
- Fonte de enerxía: AC 120V, 60Hz (main); Battery Powered (backup)
- Tipo de visualización: Pantalla dixital LED
- Bandas de radio: AM/FM
- Dimensións (aprox.): 5.12" de ancho x 5.12" de alto
- Peso (aprox.): 3 libras
- Cor: Negro
- Material: Plástico
Garantía e Soporte
For warranty information or technical support, please refer to the warranty card included with your product or visit the official GPX website. Do not attempt to repair this unit yourself, as this may void your warranty.
GPX Official Websitio: www.gpx.com


