Introdución
This manual provides detailed instructions for the installation, operation, and maintenance of your Pawfly LED Aquarium Light. This lighting unit is designed to provide optimal illumination for freshwater aquariums, supporting plant growth and enhancing the visual appeal of your aquatic environment. Please read this manual thoroughly before use to ensure proper function and safety.
Información de seguridade
- Always disconnect the power supply before performing any maintenance or cleaning on the light fixture or inside the aquarium.
- Do not immerse the light fixture or power adapter in water. This product is not water resistant.
- Ensure your hands are dry when handling the power plug and switch.
- Manter fóra do alcance dos nenos.
- Do not operate if any part of the light or power cord is damaged.
- This light is designed for indoor use only.
- Ensure the light is securely mounted to prevent it from falling into the aquarium.
Contido do paquete
Verifica que todos os compoñentes estean presentes no paquete:
- Pawfly LED Aquarium Light Fixture
- Extendable Brackets (2 sets)
- Adaptador de corriente DC 24V
- Screws and Rubber Plugs for assembly

Image: All components included in the Pawfly LED Aquarium Light package, showing the light bar, two sets of extendable brackets, and the DC 24V power adapter.

Imaxe: Detallada view of the individual bracket components, including the clear plastic support racks, various screws, and rubber plugs required for assembly.
Configuración e instalación
Follow these steps to assemble and install your Pawfly LED Aquarium Light:
Step 1: Assemble the Support Racks
- Take the clear plastic support racks.
- Tighten the short screws into the designated holes on the support rack.
- Tighten the long screws into the remaining holes on the support rack.
- For the collection rack feature, ensure the short screws are tightened on the side of the collection rack.

Image: Visual instructions for Step 1 of assembly, demonstrating how to tighten the short and long screws into the plastic support racks, including the collection rack section.
Step 2: Attach Metal Brackets to Support Racks
- Pull out the small rubber plugs from the ends of the metal support rods.
- Insert the metal bracket rods into the transparent support racks. Ensure they are fully seated.
- Place the support rack onto the metal bracket.
Step 3: Secure and Mount the Light
- Re-insert the rubber plugs onto the ends of the metal bracket rods.
- Insert the assembled brackets into the slots on the sides of the LED light fixture.
- Adjust the extendable brackets to fit your aquarium length (18 to 24 inches).
- Place the light fixture securely on top of your aquarium. The height can be adjusted up to 4 inches by sliding the metal rods through the support racks.

Image: Close-up of the assembled bracket, highlighting the stainless steel support bracket, the plastic support rack, the light set screw, the rise-and-fall set screw for height adjustment, and the rubber plug.

Image: Illustration of the adjustable height feature, demonstrating how the light fixture can be moved up or down on its support rods, allowing for up to 4 inches of height adjustment.

Image: Diagram illustrating the extendable length of the light fixture, showing its adaptability to fit aquarium tanks ranging from 18 inches to 24 inches in width.
Once the light is securely positioned, connect the DC 24V power adapter to the light fixture and then plug it into a standard electrical outlet. Ensure a drip loop is formed with the power cord to prevent water from running down to the outlet.
Instrucións de funcionamento
The Pawfly LED Aquarium Light features a single touch-sensitive button for control.
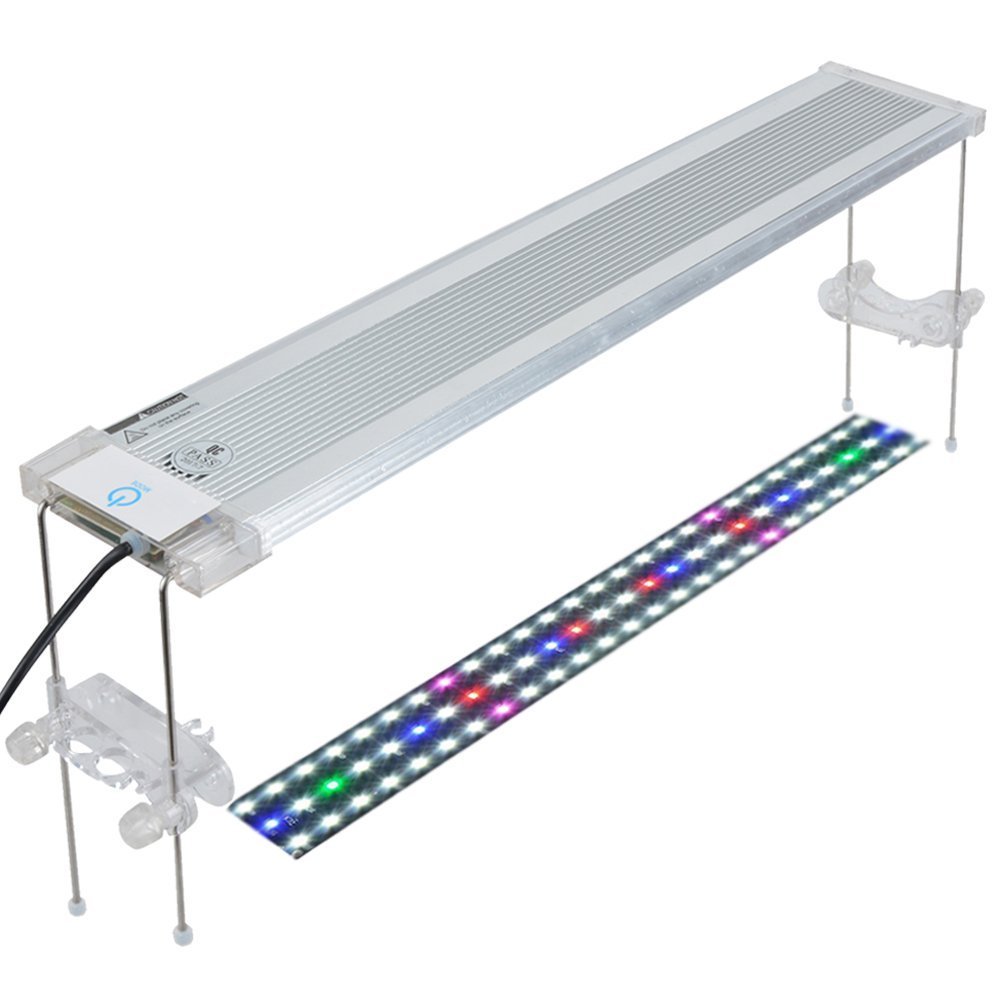
Image: The light fixture installed on an aquarium, highlighting the touch-sensitive MODE button. Text indicates the availability of 7 optional lighting modes and the ability to adjust brightness by long-pressing the button.
- Encendido/apagado: Briefly press the MODE button to turn the light on or off.
- Cambiar os modos de iluminación: With the light on, briefly press the MODE button repeatedly to cycle through the 7 available lighting modes. These modes combine different colors (White, Blue, Red, Green) to create various spectrums.
- Axustar o brillo: To adjust the brightness, press and hold the MODE button. The light will gradually dim or brighten. Release the button when the desired brightness level is reached. The light will save the last brightness setting even after being unplugged.

Imaxe: View of the LED array on the underside of the light, showing 46 individual LEDs in White, Blue, Red, and Green colors. Also visible is the integrated collection rack designed for holding aquatic plant tools.
Collection Rack Feature
The integrated collection rack on the support brackets provides a convenient place to store small aquatic plant tools, keeping them organized and easily accessible.
Mantemento
- Limpeza: Regularly wipe the light fixture with a soft, damp cloth to remove dust, water spots, and algae. Ensure the light is unplugged before cleaning. Do not use abrasive cleaners or solvents.
- Inspección: Periodically inspect the power cord and adapter for any signs of damage. Check the bracket screws for tightness.
- Lonxevidade do LED: The LEDs are designed for long-term use. Avoid touching the LED surface directly.
Resolución de problemas
- A luz non se acende:
- Ensure the power adapter is securely plugged into both the light fixture and a working electrical outlet.
- Comprobe se a toma de corrente recibe corrente conectando outro dispositivo.
- Verify that the power adapter's indicator light (if present) is on.
- A luz é tenue ou parpadea:
- Ensure the brightness setting is not at its lowest. Press and hold the MODE button to increase brightness.
- Check for any loose connections between the light and the power adapter.
- If the issue persists, the power adapter or LED unit may be faulty. Contact customer support.
- Brackets are unstable:
- Ensure all screws on the support racks are tightened.
- Verify that the metal rods are fully inserted into the light fixture slots and the plastic support racks.
- Confirm the light is correctly positioned on the aquarium rim.
Especificacións
| Característica | Detalle |
|---|---|
| Modelo | B076J93HMX |
| Marca | Pawfly |
| Wattage | 16 vatios |
| Tipo de fonte de luz | LED (White, Blue, Red, Green) |
| Fonte de enerxía | Corded Electric (DC 24V Adapter) |
| Tipo de controlador | Push Button (Touch-sensitive) |
| Lonxitude axustable | Fits tanks from 18 to 24 inches |
| Altura axustable | Ata 4 polgadas |
| Number of Individual LEDs | 46 (inferred from product image) |
| Peso do elemento | 1.8 libras |
| Tipo de material | Aluminum, Glass, Metal |
| Uso interior/exterior | Interior |
| Nivel de resistencia á auga | Non resistente á auga |
Garantía e Soporte
Specific warranty details are not provided in the product information. For warranty claims or technical support, please refer to the retailer's return policy or contact Pawfly customer service directly through their official websitio web ou a plataforma onde se comprou o produto.
When contacting support, please have your product model number (B076J93HMX) and purchase date available.
