1. Introdución
This user manual provides comprehensive instructions for the installation, operation, and maintenance of your Audio System CO-600.5 High-Performance 5-Channel Class A/B Amplifier. To ensure optimal performance and safety, please read this manual thoroughly before using the product and retain it for future reference.
2. Información de seguridade
General Product Safety according to EU Regulation 2023/2028:
- Observe the manufacturer's instructions and operating instructions for switching off the power supply to the vehicle and in the retrofit products.
- The supply line to the retrofit product must not be longer than 30cm from the operating battery.
- Fasten retrofit devices and accessories properly.
- It is recommended that the retrofit devices/accessories be installed by a specialist workshop. Otherwise, product or vehicle damage and fire can occur.
Always disconnect the vehicle's battery before performing any installation or maintenance work to prevent electrical shock or damage.
3. Produto rematadoview
The Audio System CO-600.5 is a high-performance 5-channel Class A/B amplifier designed for car audio systems. It features switchable High-Pass (HP) and Low-Pass (LP) filters, a full active mode, and includes a wired RTC remote control for convenient adjustments. The amplifier supports an input sensitivity range of 0.2V to 6V and includes a high-level RCA input with automatic turn-on capability.
Características principais:
- 5-Channel Class A/B Ampmáis vivo
- Switchable High-Pass (HP) and Low-Pass (LP) Filters
- Full Active Mode
- Wired RTC Remote Control Included
- Input Sensitivity: 0.2V - 6V
- High-Level RCA Input with Auto-On
- Power Output: 4 x 60W RMS (4 Ohm) / 4 x 85W RMS (2 Ohm) and 1 x 250W RMS (4 Ohm mono) / 1 x 350W RMS (2 Ohm mono)
Produto Views

Figura 3.1: Arriba view of the CO-600.5 amplifier, highlighting its sleek design and branding.

Figura 3.2: Fronte view da amplifier, displaying the cooling fins.
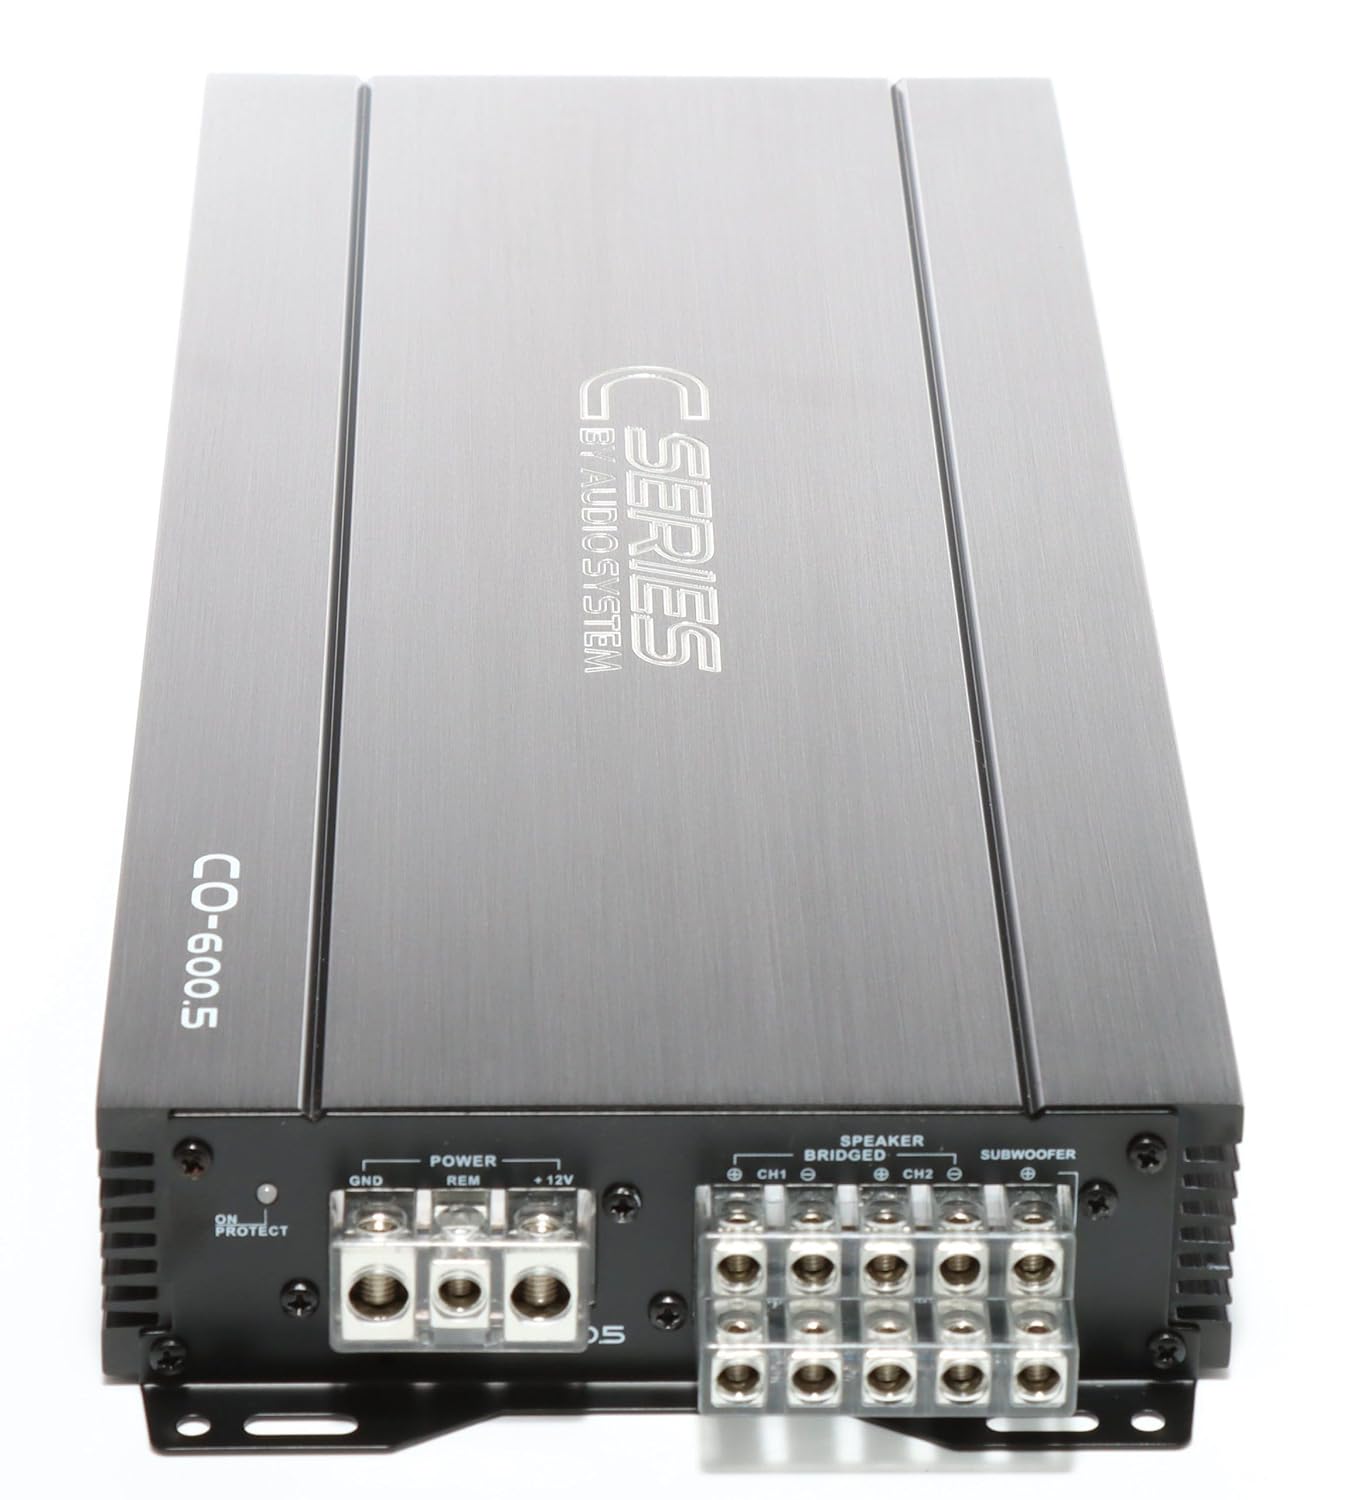
Figura 3.3: Traseira view da amplifier, detailing the power input (GND, REM, +12V) and speaker output terminals.

Figure 3.4: Input and control panel, featuring RCA inputs, gain level adjustments, and crossover frequency controls.
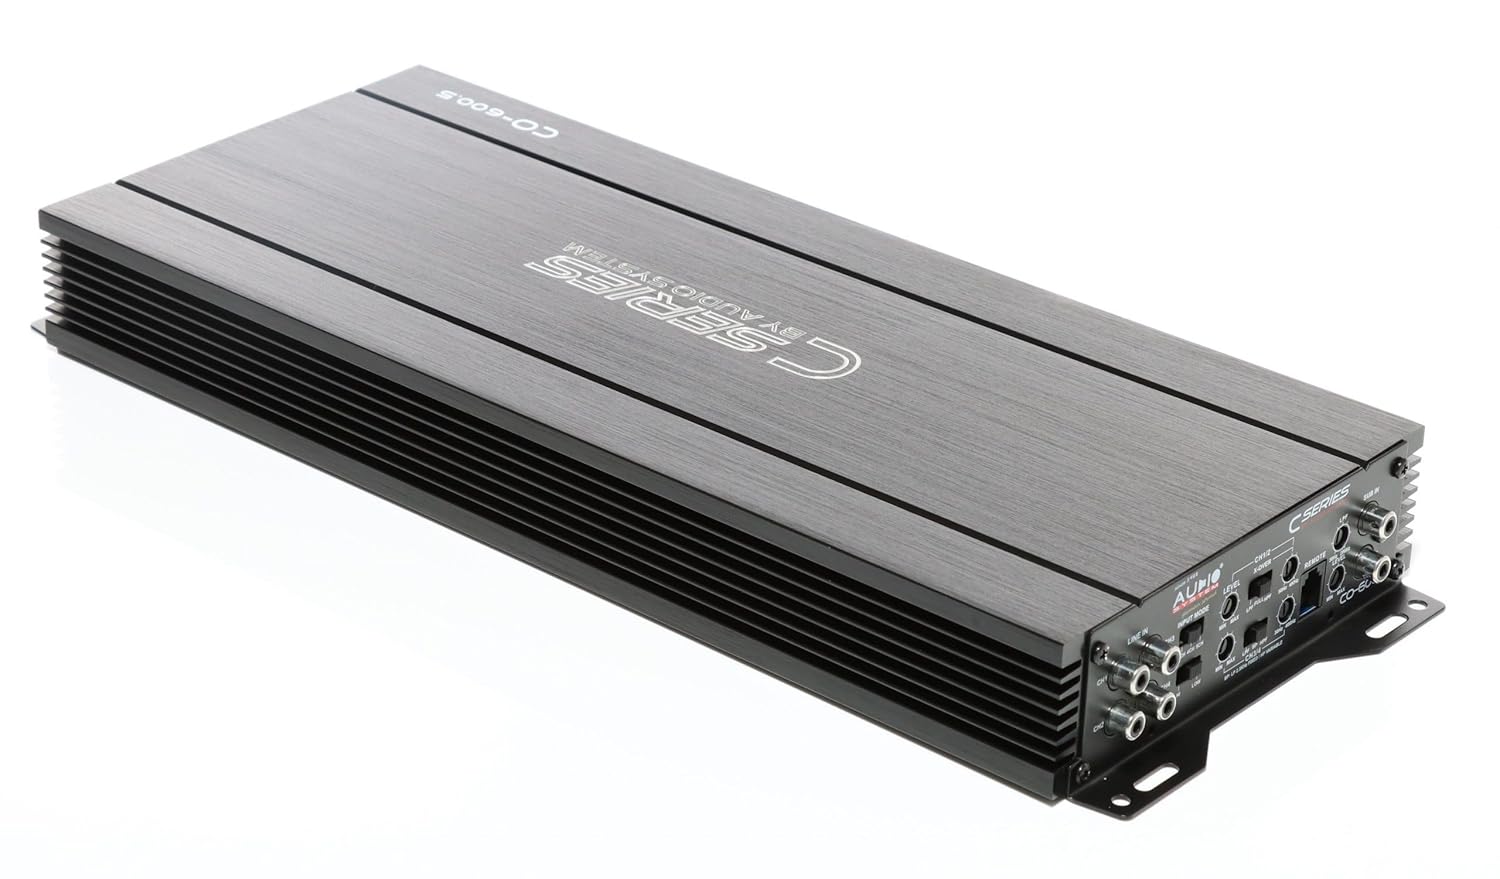
Figura 3.5: En ángulo view providing a comprehensive look at both connection sides of the ampmáis vivo.
4. Configuración e instalación
Unha instalación axeitada é crucial para o rendemento e a lonxevidade do seu amplificador. Recoméndase encarecidamente que a instalación sexa realizada por un profesional cualificado.
4.1 Localización de montaxe
- Escolle un lugar seco e ben ventilado, lonxe da luz solar directa e de fontes de calor.
- Asegúrese de que o fluxo de aire quente arredor do amplifier for proper cooling.
- Monte o amplifier securely to a solid surface using appropriate hardware to prevent movement during vehicle operation.
4.2 Conexións de cableado
Antes de facer calquera conexión, desconecte o terminal negativo da batería do vehículo.
- Potencia (BATT+): Connect a fused power cable directly from the vehicle's positive battery terminal to the +12V terminal on the amplifier. Ensure the fuse is located within 30cm of the battery.
- Terra (GND): Connect a ground cable of the same gauge as the power cable to a clean, unpainted metal surface on the vehicle chassis. The connection point must be free of rust and paint.
- Remoto (REM): Conecta un cable de acendido remoto da saída remota da unidade principal ao terminal REM do amplificador. Isto activará o ampacende e apaga o activador coa unidade principal.
- Entradas RCA: Conecta as saídas RCA da unidade principal ao amplifier's RCA inputs (CH1/2, CH3/4, SUB IN).
- Saídas de altofalantes: Connect your speakers to the corresponding speaker output terminals (CH1, CH2, CH3, CH4, SUBWOOFER). Observe correct polarity (+ to + and - to -).
5. Instrucións de funcionamento
Unha vez que amplifier is correctly installed and wired, you can proceed with initial setup and operation.
5.1 Encendido inicial
- Volva conectar o terminal negativo da batería do vehículo.
- Acenda a unidade principal. O amplifier should power on automatically via the remote wire. The power indicator LED on the amplifier should illuminate.
5.2 Gain Level Adjustment
The gain control (LEVEL) matches the amplifier's input sensitivity to the output of your head unit. This is not a volume control.
- Establece o amplifier's gain control to minimum (fully counter-clockwise).
- Axusta o volume da unidade principal a aproximadamente o 75-80 % do seu máximo.
- Aumentar lentamente o ampcontrol de ganancia do lificador ata que escoites unha lixeira distorsión e, a seguir, redúceo lixeiramente ata que o son sexa claro.
5.3 Crossover Settings (X-OVER)
The CO-600.5 features switchable HP (High-Pass) and LP (Low-Pass) filters for precise sound tuning.
- HPF (filtro paso alto): Allows frequencies above the set point to pass through. Use for full-range speakers to prevent low frequencies that can cause distortion.
- LPF (filtro de paso baixo): Allows frequencies below the set point to pass through. Use for subwoofers to prevent high frequencies.
- Adjust the crossover frequencies (e.g., 50Hz-250Hz for HPF, 30Hz-250Hz for LPF) according to your speaker specifications and listening preferences.
5.4 RTC Remote Control
The included wired RTC remote control allows for convenient adjustment of the subwoofer level from the driver's seat.
6. Mantemento
The Audio System CO-600.5 ampO lificador require un mantemento mínimo.
- Manteña o ampManteña o refrigerador limpo e sen po. Use un pano suave e seco para a limpeza.
- Asegúrate de que todas as conexións estean ben fixadas. Comproba periodicamente o cableado para detectar calquera sinal de desgaste ou corrosión.
- Non empregue produtos químicos agresivos nin produtos de limpeza abrasivos no ampmáis vivo.
7 Solución de problemas
Se tes problemas co teu amplifier, consulte os seguintes problemas e solucións comúns:
| Problema | Causa posible | Solución |
|---|---|---|
| Sen enerxía / Ampo lifier non se acende |
|
|
| Sen saída de son |
|
|
| Son distorsionado |
|
|
If the problem persists after attempting these solutions, please contact Audio System customer support or a qualified car audio technician.
8. Especificacións
| Característica | Detalle |
|---|---|
| Número de modelo | 02002CO6005 |
| Canles | 5 (4 full-range + 1 mono/subwoofer) |
| Potencia de saída (RMS) |
|
| Sensibilidade de entrada | 0.2V - 6V |
| Filtros | Switchable High-Pass (HP) and Low-Pass (LP) |
| Dimensións (produto) | Aproximadamente 420 x 47 x 171 mm |
| Dimensións do paquete | 59.99 x 19.99 x 15.01 cm |
| Peso do paquete | 1 quilogramo |
| Voltage (Operativo) | 6 Volts (Note: Typically car audio operates at 12V. Please refer to product labeling for exact operating voltage.) |
| Vol. Subministración máximatage | 6 voltios |
| Tipo de montaxe | Montaxe en superficie |
9. Garantía e soporte
For warranty information, please refer to the documentation provided with your purchase or contact your authorized Audio System dealer. Warranty terms and conditions may vary by region and retailer.
For technical support, service, or inquiries regarding spare parts, please contact Audio System customer service directly or visit their official websitio. A información de contacto adoita estar dispoñible na embalaxe do produto ou na ficha do fabricante websitio.
Fabricante: Sistema de audio
Enderezo do fabricante: JRS Labs - The Art of Sound, Heinrich-Heine-Straße 13A, 63329 Rödermark


