1. Introdución
This manual provides detailed instructions for the MARATHON CL030068 Atomic Wall Clock. This clock is designed to automatically synchronize with the NIST radio signal for precise timekeeping, and it displays time, date, day of the week, and indoor temperature.

Image 1.1: The MARATHON CL030068 Atomic Wall Clock, showcasing its large digital display and sleek design.
2. Contido do paquete
- MARATHON CL030068 Atomic Wall Clock
- AA Alkaline Batteries (included)
- Manual de usuario (este documento)
3. Configuración
3.1 Instalación da batería
- Localiza o compartimento da batería na parte traseira do reloxo.
- Insert the included AA batteries, ensuring correct polarity (+ and -).
- Pecha a tapa do compartimento da batería.
3.2 Initial Synchronization and Time Zone Selection
Upon battery insertion, the clock will automatically begin searching for the NIST atomic time signal. This process may take several minutes to several hours, depending on your location and signal strength. The atomic time signal is broadcast from Colorado, USA, and is primarily effective in North America.
- Zona horaria: Locate the time zone switch or button on the back of the clock. Select your appropriate North American time zone: Pacific, Mountain, Central, Eastern, Atlantic, Newfoundland, Alaska, or Hawaii.
- Recepción do sinal: For optimal signal reception, place the clock near a window, away from electronic devices that may cause interference. The signal is often strongest during nighttime hours.

Image 3.1: The atomic wall clock mounted on a wall, demonstrating its suitability for various environments.
4. Instrucións de funcionamento
4.1 Modos de visualización
The clock offers multiple display modes. Use the 'MODE' button (if available) or refer to specific buttons on the back of your clock to cycle through the following displays:
- Visualización do tempo: Choose between AM/PM or 24-hour format.
- Visualización da data: Shows the month, weekday, and date.
- Visualización da temperatura: Displays the indoor room temperature in Celsius or Fahrenheit. Use the ‘C/F’ button to switch between units.
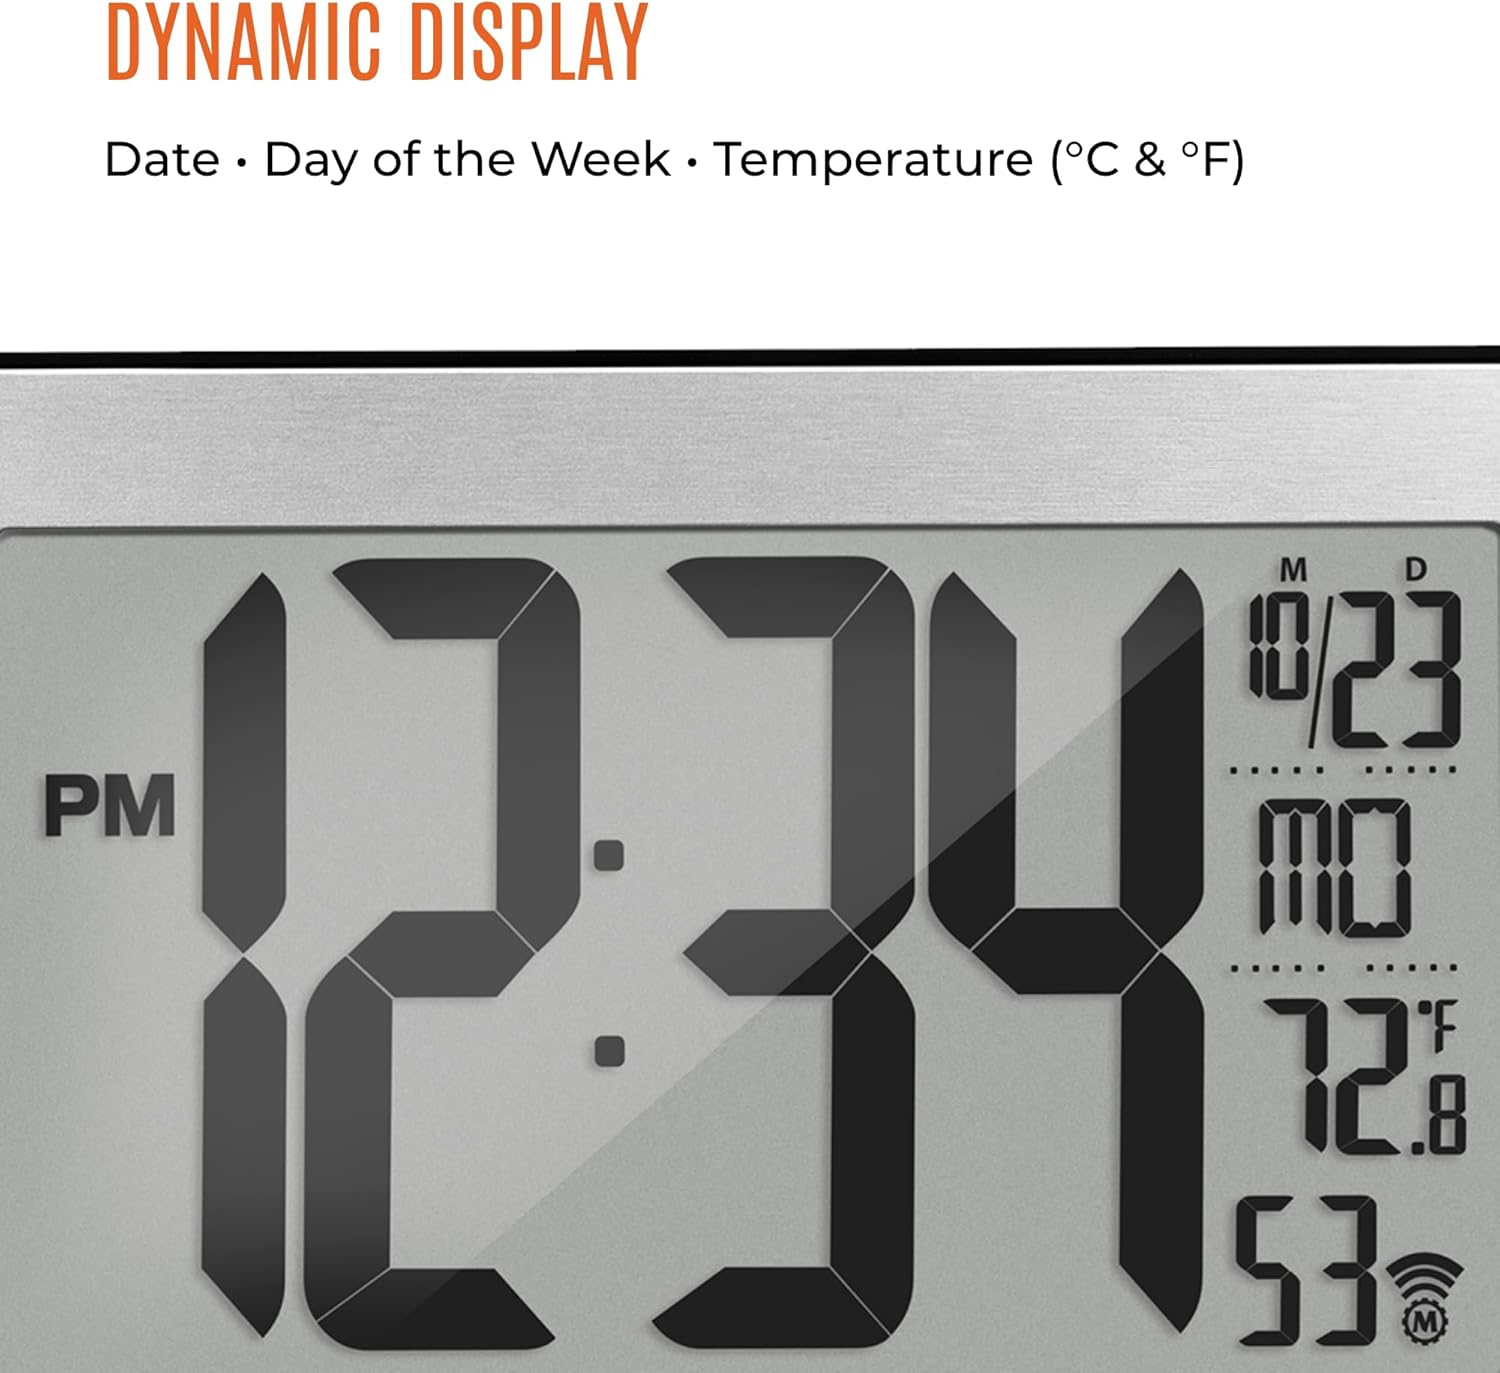
Imaxe 4.1: Primeiro plano view of the clock's dynamic display, showing time, date, day, and temperature.
4.2 Configuración manual do tempo
In the event that the atomic signal cannot be received, or if you wish to set the time manually, follow these steps:
- Press and hold the 'SET' button (or similar) until the time display begins to flash.
- Use the '+' or '-' buttons to adjust the hour, then press 'SET' to confirm.
- Repita para minutos, ano, mes e día.
- Press 'SET' one last time to exit manual setting mode.
5. Funcións máisview
- Self-Setting and Self-Adjusting: Automatically synchronizes with the NIST atomic clock signal for accurate time, including Daylight Saving Time adjustments.
- Pantalla grande: Features a 9-inch display with large 4-inch digits for easy readability from a distance.
- Múltiples modos de visualización: Provides options for AM/PM or 24-hour time, full date (month, weekday, date), and indoor temperature in Celsius or Fahrenheit.
- Eight North American Time Zones: Supports Pacific, Mountain, Central, Eastern, Atlantic, Newfoundland, Alaska, and Hawaii standard times.
- Colocación versátil: Designed for both wall mounting and tabletop use with a sturdy fold-out stand.
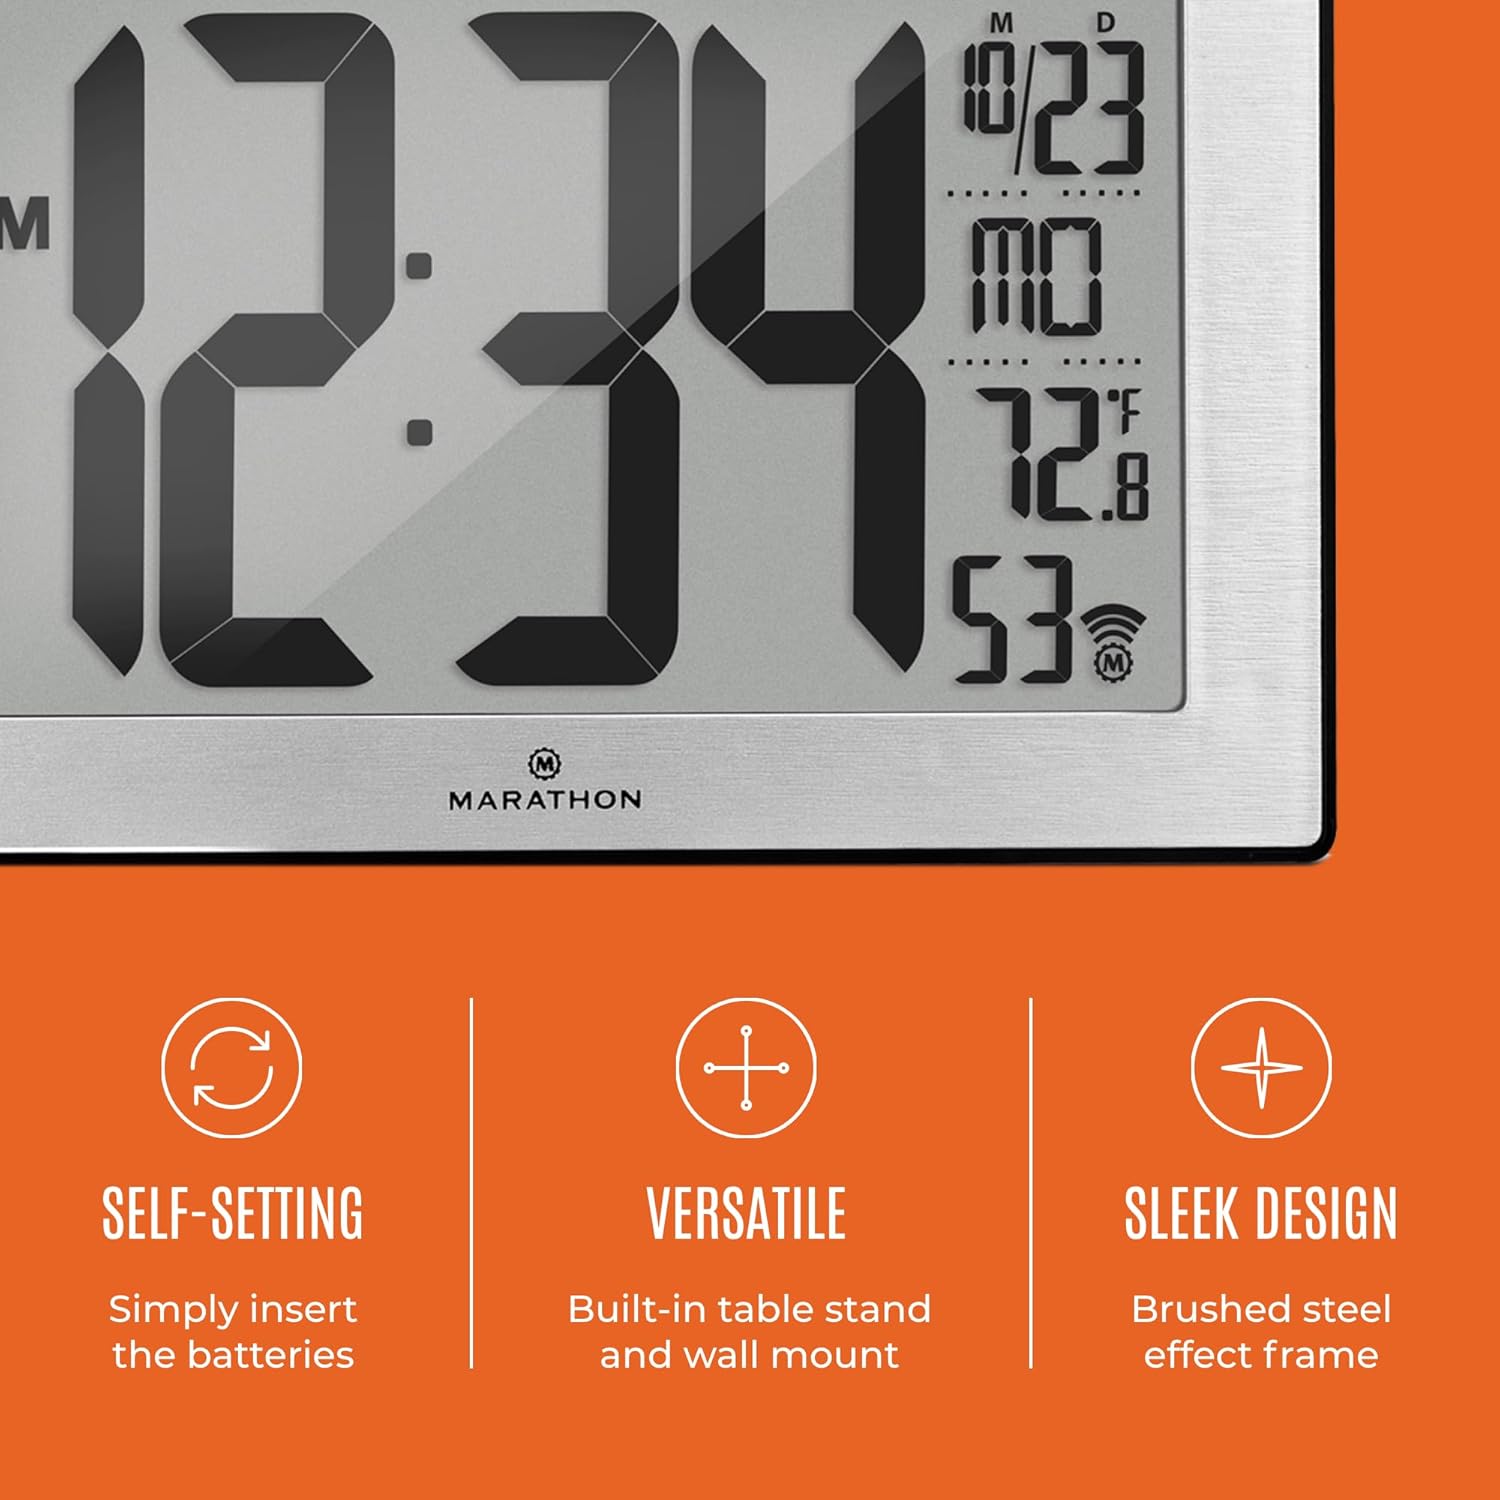
Image 5.1: Key features of the clock, including its self-setting capability, versatile placement options, and sleek design.
6. Montaxe e colocación
6.1 Montaxe na parede
The clock features a keyhole slot on the back for easy wall mounting. Ensure the wall is suitable for supporting the clock's weight (approximately 558g).
6.2 Colocación da mesa
Utilize the integrated fold-out stand on the back of the clock to place it securely on any flat surface, such as a desk, shelf, or table.
6.3 Optimal Signal Reception
For best atomic signal reception, position the clock:
- Near a window.
- Away from large metal objects or electronic devices that may cause interference (e.g., televisions, computers, microwaves).
- In an area with minimal structural obstructions.

Image 6.1: The clock displayed in a home environment, illustrating its ease of placement and clear visibility.
7. Mantemento
7.1 Substitución da batería
When the display dims or becomes erratic, it is time to replace the batteries. Always replace all batteries at the same time with new, high-quality AA alkaline batteries. Do not mix old and new batteries or different types of batteries.
7.2 Limpeza
To clean the clock, use a soft, dry cloth. Do not use abrasive cleaners, solvents, or chemical sprays, as these may damage the display or casing.
8 Solución de problemas
| Problema | Causa posible | Solución |
|---|---|---|
| O reloxo non mostra nada. | As baterías están agotadas ou están mal instaladas. | Comprobe a polaridade das pilas. Substitúaas por pilas AA novas. |
| Clock does not synchronize with atomic signal. | Poor signal reception due to location or interference. | Move the clock to a different location, preferably near a window and away from electronics. Allow several hours, especially overnight, for synchronization. Manually set the time if necessary. |
| Hora incorrecta mostrada. | Incorrect time zone selected or atomic signal not received. | Verify the correct time zone is selected. Attempt to resynchronize or manually set the time. |
| A lectura da temperatura é inexacta. | Clock placed near a heat source or vent. | Traslada o reloxo a unha zona con temperatura ambiente estable. |
9. Especificacións
| Característica | Detalle |
|---|---|
| Número de modelo | CL030068 |
| Marca | MARATÓN |
| Tipo de visualización | Dixital |
| Cor | Black Frame with Steel Inset |
| Dimensións do produto | 24 x 3.81 x 16 cm (9.4 x 1.5 x 6.3 polgadas) |
| Peso do elemento | 558 g (1.23 lb) |
| Fonte de enerxía | Baterías AA (incluídas) |
| Características especiais | Atomic Time Synchronization, Calendar Display, Temperature Display |
| Zonas horarias | 8 North American Time Zones |

Image 9.1: Dimensions of the MARATHON CL030068 Atomic Wall Clock.
10. Garantía e soporte
Para obter información sobre a garantía e a atención ao cliente, consulte a páxina oficial do fabricante websitio web ou póñase en contacto co seu departamento de atención ao cliente. Garde o recibo da compra como proba de compra.

Image 10.1: The MARATHON brand logo and a brief historical note about the company.


