1. Introdución
Thank you for choosing the DEWALT DCE571N-XJ 18V Cordless Caulking Gun. This tool is designed for professional applications requiring precise and controlled material dispensing. Please read this manual carefully before operating the tool to ensure safe and efficient use. Keep this manual for future reference.
Instrucións xerais de seguridade
- Always wear appropriate personal protective equipment (PPE) such as safety glasses.
- Asegúrate de que a zona de traballo estea ben iluminada e libre de obstáculos.
- Non utilice a ferramenta en atmosferas explosivas, como en presenza de líquidos, gases ou po inflamables.
- Manteña os nenos e os espectadores afastados mentres manexa a ferramenta.
- Desconecte a batería antes de facer axustes, cambiar accesorios ou gardar a ferramenta.
- Use only DEWALT recommended accessories and battery packs.
2. Produto rematadoview
The DEWALT DCE571N-XJ is an 18V cordless caulking gun designed for efficient and precise application of sealants and adhesives. Key features include:
- Marcación de velocidade variable: Allows for precise control over material flow rate.
- Agarre ergonómico: Contoured handle with rubber overmold for enhanced comfort and maneuverability.
- Función antigoteo: Durable piston rod with an automatic retraction mechanism to prevent dripping.
- Luz LED integrada: Illuminates the work area for improved visibility during application.
- Porta cartuchos: Compatible with 300-400ml cartridges.
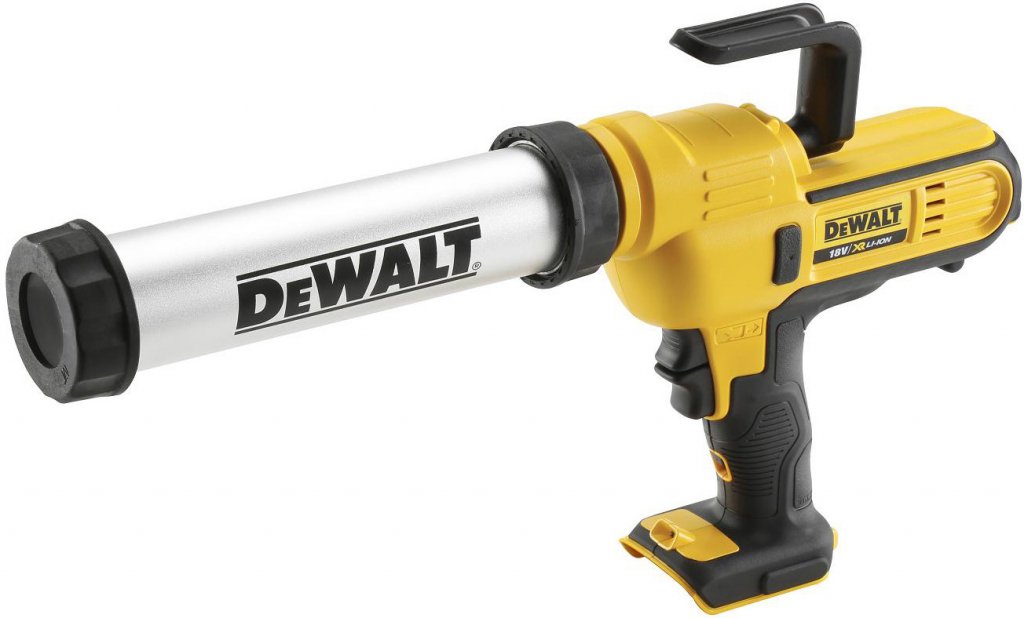
Figure 1: DEWALT DCE571N-XJ 18V Cordless Caulking Gun. This image shows the tool's main body, handle, trigger, and cartridge holder.
3. Configuración
3.1 Instalación da batería (a batería e o cargador véndense por separado)
- Asegúrese de que a ferramenta estea desactivada.
- Aliñe a batería co porto da batería na base da ferramenta.
- Deslice a batería no porto ata que encaixe firmemente no seu lugar.
- Para retirala, prema o botón de liberación da batería e deslice a batería cara a fóra.
3.2 Loading a Cartridge (300-400ml)
- Asegúrate de retirar a batería por seguridade.
- Press the plunger release lever (if applicable) to retract the plunger rod fully.
- Remove the front cap of the cartridge holder.
- Insert the sealant or adhesive cartridge into the holder, nozzle end first.
- Replace the front cap, ensuring it is securely fastened.
- Cut the tip of the cartridge nozzle to the desired bead size at a 45-degree angle.
- Puncture the inner seal of the cartridge using a long nail or wire, if necessary.
4. Instrucións de funcionamento
4.1 Acendido/Apagado
- To turn on the tool, depress the trigger switch. The LED light will activate.
- Para apagar, solte o interruptor de disparo.
4.2 Adjusting Material Flow (Variable Speed Dial)
- Locate the variable speed dial, typically near the trigger.
- Rotate the dial to select the desired speed setting. Lower numbers indicate slower flow, higher numbers indicate faster flow.
- Start with a lower setting and gradually increase as needed for optimal control and bead consistency.
4.3 Applying Sealant/Adhesive
- Coloque a boquilla no punto inicial da súa aplicación.
- Depress the trigger to begin dispensing material.
- Maintain a consistent speed and angle as you move the tool along the desired path.
- Release the trigger to stop the flow. The anti-drip feature will retract the plunger slightly to prevent excess material from oozing out.
- Use the integrated LED light for enhanced visibility in dimly lit areas.
5. Mantemento
5.1 Limpeza
- After each use, remove the cartridge and clean any excess material from the plunger rod and cartridge holder.
- Usa anuncioamp cloth to wipe down the exterior of the tool. Do not use harsh solvents or abrasive cleaners.
- Ensure no material dries inside the cartridge holder or on the plunger rod, as this can impede future operation.
5.2 Almacenamento
- Garde a ferramenta nun lugar limpo e seco, fóra do alcance dos nenos.
- Retire a batería antes de gardala durante períodos prolongados.
- Evite o almacenamento baixo a luz solar directa ou a temperaturas extremas.
6 Solución de problemas
| Problema | Causa posible | Solución |
|---|---|---|
| A ferramenta non funciona. | Batería non instalada correctamente ou descargada. | Asegúrate de que a batería estea completamente cargada e correctamente colocada. |
| Material flow is inconsistent or stops. | Cartridge empty, nozzle clogged, or inner seal not punctured. | Replace cartridge, clear nozzle, or puncture inner seal. |
| Excessive dripping after releasingatillo g. | Anti-drip mechanism obstructed or material too thin. | Clean plunger rod and mechanism. Allow more time for retraction. |
| Plunger rod does not retract fully. | Material buildup on rod or mechanism. | Clean the plunger rod and surrounding area thoroughly. |
7. Especificacións
| Característica | Especificación |
|---|---|
| Número de modelo | DCE571N-XJ |
| Voltage | 18 voltios |
| Dimensións do produto (L x W x H) | 53 x 29.2 x 8.5 cm |
| Peso | 2.76 kg |
| Capacidade do cartucho | 300-400ml (holder included) |
| Batería incluída | Non (Véndese por separado) |
| Cargador incluído | Non (Véndese por separado) |
8. Garantía e soporte
DEWALT products are engineered to the highest standards. For detailed warranty information, please refer to the warranty card included with your product or visit the official DEWALT website. For technical support, spare parts, or service inquiries, please contact your local DEWALT service center or authorized dealer.
Nota: A información sobre a dispoñibilidade de pezas de reposto non se proporciona nos datos do produto.