1. Introdución
Thank you for choosing the Petlibro Automatic Pet Feeder. This device is designed to provide consistent and timely meals for your pet, ensuring they are fed according to a set schedule, even when you are away. Please read this manual thoroughly before use to ensure proper operation and maintenance of your feeder.
2. Información importante de seguridade
Observe as seguintes precaucións de seguridade para evitar lesións ou danos ao produto:
- Lea atentamente todas as instrucións antes de operar o alimentador.
- Manteña o alimentador lonxe dos nenos e das mascotas cando non estea en uso ou durante a montaxe.
- Non mergullo a unidade principal en auga ou outros líquidos.
- Use only dry pet food with a diameter between 5-15mm. Do not use wet, canned, or moist food.
- Asegúrate de colocar o alimentador sobre unha superficie estable e nivelada.
- Unplug the feeder before cleaning or performing any maintenance.
- Do not attempt to repair or modify the feeder yourself. Contact customer support for assistance.
- Desfágase das baterías de forma responsable segundo a normativa local.
3. Contido do paquete
Comprobe o contido do paquete para asegurarse de que estean presentes todos os elementos:
- Petlibro Automatic Pet Feeder Main Unit
- Bol de Comida
- USB-C Power Adapter and Cable
- Desiccant Bag (pre-installed or separate)
- Manual de usuario
4. Produto rematadoview
Familiarize yourself with the different parts of your Petlibro Automatic Pet Feeder:
- Tanque de comida: Stores dry pet food.
- Tapa: Covers the food tank to keep food fresh.
- Panel de control: Buttons and display for setting schedules and manual feeding.
- Punto de venda de alimentos: Where food dispenses into the bowl.
- Cunca de comida: Detachable bowl for your pet to eat from.
- Power Port (USB-C): Conéctase ao adaptador de alimentación.
- Compartimento de batería: Holds backup batteries (not included).
5. Configuración
Follow these steps to set up your Petlibro Automatic Pet Feeder:
5.1 Asemblea
- Desempaquetar: Retire coidadosamente todos os compoñentes da embalaxe.
- Install Food Bowl: Place the food bowl securely at the base of the feeder.
- Install Food Tank: Align the food tank with the base and twist to lock it into place.
- Inserir a bolsa desecante: If not pre-installed, open the desiccant compartment (usually under the lid) and insert the desiccant bag to keep food fresh. Replace every 15-30 days.

Image: Step-by-step assembly guide for the Petlibro Automatic Pet Feeder. It shows how to twist open the lid, take out the food bowl, put the desiccant bag into its compartment, install the food tank, put the lid back on, and finally install the food bowl.
5.2 Fonte de alimentación
The feeder can be powered by a USB-C adapter or backup batteries.
- Potencia primaria: Connect the USB-C power adapter to the feeder's power port and plug it into a wall outlet.
- Batería de reserva (opcional): Para poder outages, install 3 D-cell batteries (not included) into the battery compartment at the bottom of the feeder. This ensures continuous operation.
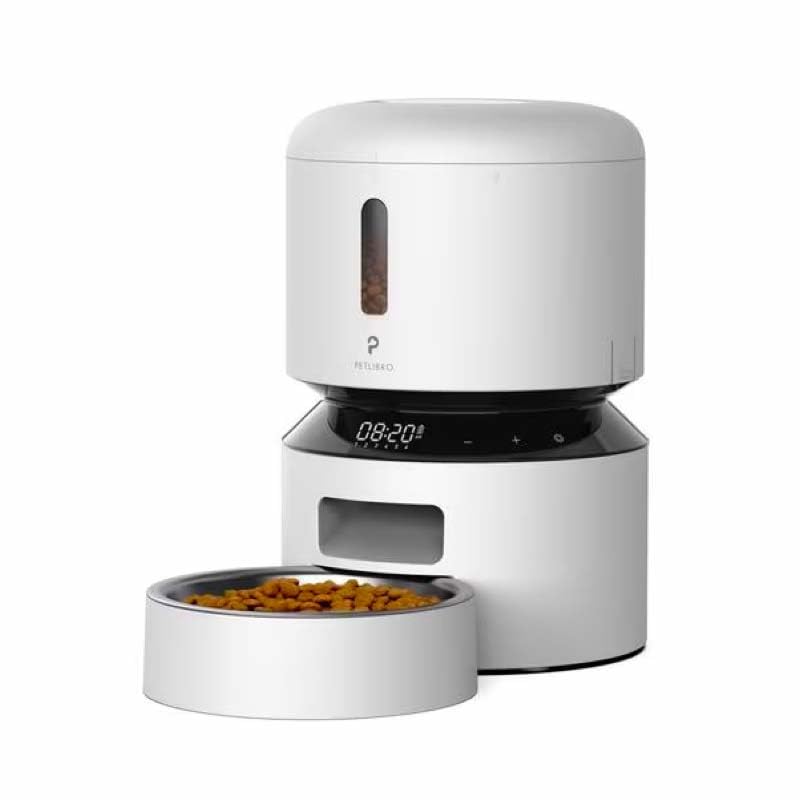
Image: Diagram illustrating the dual power supply system of the Petlibro Automatic Pet Feeder. It shows the USB-C adapter connected for primary power and the battery compartment for backup power. A note indicates that batteries are not included.
6. Instrucións de funcionamento
Once assembled and powered, you can begin programming your feeder.
6.1 Encher o depósito de comida
- Abra a tapa do depósito de comida.
- Pour dry pet food into the tank. Ensure the food is within the recommended size (5-15mm diameter).
- Close the lid securely to maintain freshness.
6.2 Setting Meal Schedules and Portions
The feeder allows you to schedule up to 6 meals per day, with 1 to 50 portions per meal.

Image: A cat eating from the Petlibro Automatic Pet Feeder, illustrating the feeder's function. Text overlays indicate "Portion: 1-50" and "Meals: 1-6", highlighting the customizable feeding schedule.
- Establecer a hora actual: Use the control panel buttons (e.g., "SET", "UP", "DOWN") to set the current time.
- Horarios das comidas do programa: Press the "MEAL" button to enter meal programming mode. Select the desired meal number (e.g., Meal 1) and set the feeding time.
- Set Portions: For each programmed meal, set the number of portions (1-50) using the "PORTION" or "UP/DOWN" buttons.
- Repeat for all meals: Program up to 6 meals as needed.
- Gardar configuración: Ensure all settings are saved according to the feeder's specific interface (usually by pressing "SET" or waiting for auto-save).
6.3 Alimentación manual
To dispense food instantly, press the manual feed button (often labeled "FEED" or a paw icon) on the control panel. Each press typically dispenses one portion.
7. Mantemento e Limpeza
A limpeza regular garante a hixiene e prolonga a vida útil do teu alimentador.
- Desconectar: Always unplug the feeder from the power outlet before cleaning.
- Desmontar: Remove the food bowl and food tank.
- Compoñentes limpos: Wash the food bowl and food tank with mild soap and water. Rinse thoroughly and dry completely before reassembling.
- Limpar a unidade principal: Limpe a unidade principal cun suave, damp pano. Non mergullo a unidade principal na auga.
- Substituír o desecante: Replace the desiccant bag every 15-30 days to maintain food freshness.
- Remontar: Ensure all parts are dry before reassembling the feeder.
8 Solución de problemas
If you encounter issues with your feeder, refer to the following common problems and solutions:
| Problema | Causa posible | Solución |
|---|---|---|
| O alimentador non se acende. | No power connection; batteries depleted or incorrectly installed. | Check power adapter connection; replace batteries or ensure correct polarity. |
| Comida non dispensada. | Food tank empty; food jammed; dispenser blocked; incorrect schedule settings. | Refill food tank; clear any food jams; check dispenser for blockages; verify meal schedule and portion settings. |
| Food dispenses too much/too little. | Incorrect portion settings. | Adjust portion settings for each meal. |
| A pantalla non funciona. | Problema de alimentación; avaría da pantalla. | Check power supply; if problem persists, contact customer support. |
9. Especificacións
| Característica | Detalle |
|---|---|
| Nome do produto | Petlibro Automatic Pet Feeder |
| Modelo | Comedero automático para mascotas de 3 litros |
| Capacidade | 3 litros |
| Material | Food-grade ABS plastic |
| Fonte de alimentación | USB-C adapter (5V/1A); 3 x D-cell batteries (backup, not included) |
| Comidas por día | Ata 6 comidas |
| Racións por comida | 1-50 portions (approx. 5-10g per portion, depending on food density) |
| Tamaño de alimento recomendado | 5-15mm dry kibble |
| Cor | Branco |
10. Garantía e soporte
Your Petlibro Automatic Pet Feeder comes with a standard manufacturer's warranty. For detailed warranty information, please refer to the warranty card included in your package or visit the official Petlibro websitio.
If you have any questions, require technical support, or need assistance with your product, please contact Petlibro customer service. Contact details can typically be found on the product packaging, the official website, or by searching for "Petlibro customer support" online.


