1. Introdución
This manual provides detailed instructions for the assembly, operation, and maintenance of your MUSETEX 903-S4 ATX Mid Tower Gaming Computer Case. Please read this manual thoroughly before beginning installation to ensure proper setup and safe usage. Keep this manual for future reference.
2. Información de seguridade
- Desconecte sempre a fonte de alimentación da toma de corrente antes de instalar ou retirar calquera compoñente.
- Use unha pulseira antiestática ou toque con frecuencia un obxecto metálico conectado á terra para evitar danos por descarga electrostática (ESD) nos compoñentes.
- Handle tempered glass panels with care. They are fragile and can break if dropped or subjected to impact.
- Manteña as pezas e os accesorios pequenos fóra do alcance dos nenos.
3. Contido do paquete
Verifica que todos os elementos estean presentes no paquete:
- MUSETEX 903-S4 ATX Mid Tower Gaming Computer Case
- 4 x 120mm RGB LED Fans (3 front, 1 rear)
- Accessory Kit (screws, standoffs, cable ties, HDD screws with rubber rings)
- Manual de usuario (este documento)
4. Produto rematadoview
The MUSETEX 903-S4 is an ATX Mid Tower case featuring two dark tempered glass panels for component visibility and enhanced aesthetics. It includes pre-installed RGB fans and offers ample space for various PC components.
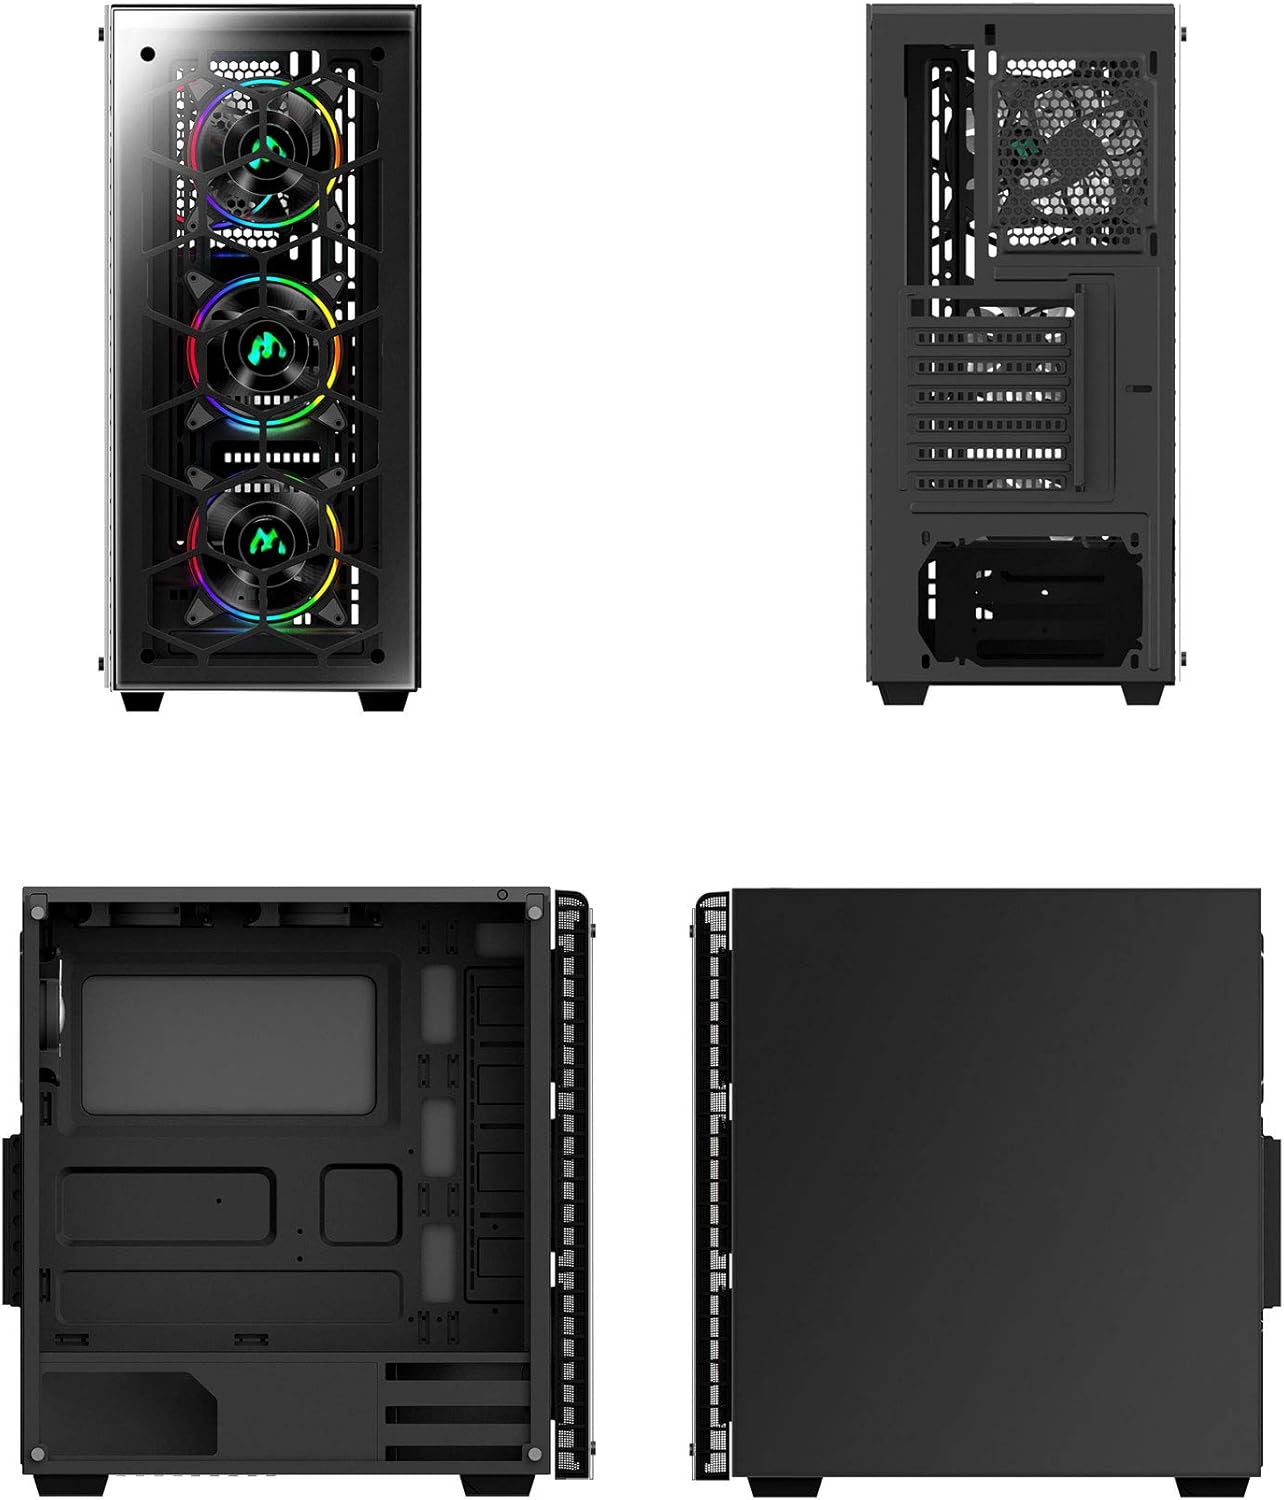
Figura 1: Varios views of the MUSETEX 903-S4 computer case, illustrating its external design and internal layout.

Figure 2: Exploded diagram showing the individual components of the MUSETEX 903-S4 case, including the frame, tempered glass panels, and fans.
4.1. Top I/O Panel
- 1 x porto USB 3.0
- 2 x portos USB 2.0
- 1 x HD Audio (Headphones)
- 1 x HD Audio (Microphone)
- Botón de encendido
- Botón de reinicio
- RGB Lighting Control Button

Figura 3: detallada view of the top I/O panel, highlighting the USB ports, audio jacks, power/reset buttons, and the dedicated RGB lighting control button.
5. Instrucións de configuración
5.1. Preparación do caso
- Coloque a caixa sobre unha superficie plana e estable.
- Carefully remove the tempered glass side panels by unscrewing the thumb screws. Set them aside in a safe place to prevent damage.
5.2. Instalación da placa base
The case supports Micro ATX, ATX, IXT, and E-ATX motherboards.
- Install the necessary standoffs for your motherboard form factor.
- Align your motherboard with the standoffs and I/O shield opening.
- Secure the motherboard with screws from the accessory kit.
5.3. Instalación do dispositivo de almacenamento
The case provides mounts for up to 3 x 3.5" HDDs and 3 x 2.5" SSDs.
5.3.1. 2.5" SSD Installation
SSD mounts are located on the back of the motherboard tray.
- Align the SSD with the mounting holes on the tray.
- Secure the SSD using screws from the accessory kit.
5.3.2. 3.5" HDD Installation
HDD mounts are typically located in a drive cage at the bottom of the case.
- Slide the HDD into the drive bay.
- Secure the HDD using the provided HDD screws and rubber rings.
5.4. Instalación da tarxeta gráfica (GPU)
The case supports GPUs up to 380mm in length.
- Remove the necessary PCI expansion slot covers from the rear of the case.
- Insert the GPU into the appropriate PCIe slot on your motherboard.
- Fixa a GPU con parafusos.
5.5. Instalación da fonte de alimentación (PSU)
The PSU compartment is located at the bottom of the case.
- Slide the PSU into its designated compartment.
- Secure the PSU from the rear of the case using screws.
5.6. Liquid Cooling Radiator Installation (Optional)
The case supports up to a 360mm liquid-cooling radiator at the front.
- Mount the radiator and fans to the designated front mounting points.
- Ensure proper hose routing and clearance for other components.
5.7. Xestión de cables
Utiliza os recortes para o paso de cables e os puntos de suxeición que hai detrás da bandexa da placa base para organizar os cables. Isto mellora a circulación do aire e a estética.
6. Instrucións de funcionamento
6.1. Acendido/apagado
Press the Power Button on the top I/O panel to turn the system on or off.
6.2. RGB Fan Control
The case includes 4 pre-installed 120mm RGB LED fans. You can control their lighting effects using the dedicated RGB button on the top I/O panel.
Video 1: Demonstration of the MUSETEX 903-S4 case, showcasing its RGB fans and features. This video highlights the visual aspects and functionality of the pre-installed fans.
Pressing the RGB button cycles through various lighting modes:
- Single Color RGB Cycle
- Modo onda
- Modo de fluxo
- Breath Mode (Red, Yellow, Green, Cyan, Blue, White, Purple)
- Single Color (Red, Yellow, Green, Cyan, Blue, White, Purple)
- Long press to turn lights off.
7. Mantemento
7.1. Limpeza do filtro de po
The case is equipped with dust filters on the top and bottom to prevent dust accumulation. Regularly clean these filters to maintain optimal airflow and cooling performance.
- Gently remove the magnetic dust filter from the top panel.
- Slide out the dust filter located under the PSU compartment.
- Clean the filters using compressed air or by rinsing with water (ensure they are completely dry before reinstallation).
- Reinstall the dust filters.
7.2. Tempered Glass Cleaning
Use a soft, lint-free cloth and a mild glass cleaner to clean the tempered glass panels. Avoid abrasive materials or harsh chemicals that could scratch or damage the glass.
8. Especificacións
| Característica | Especificación |
|---|---|
| Tipo de caso | Torre media ATX |
| Material do caso | Steel chassis / ABS / Tempered Glass |
| Compatibilidade da placa base | Micro ATX / ATX / IXT / E-ATX |
| paneis de vidro temperado | 2 x 4mm dark translucent panels (front and side) |
| Ranuras de expansión PCI | 7 |
| Lonxitude máxima da GPU | 380 mm |
| Bahías de almacenamento | 3 discos duros de 3.5 polgadas, 3 unidades SSD de 2.5 polgadas |
| Ventiladores preinstalados | 4 x 120mm RGB LED (3 front, 1 rear) |
| Soporte de refrixeración líquida | Up to 360mm radiator (front) |
| Altura máxima do refrigerador da CPU | 160 mm |
| Filtros de po | Top (magnetic) / Bottom (PSU compartment) |
| Portos de E/S superiores | 1 x USB 3.0, 2 x USB 2.0, HD Audio (Headphones/Mic), Power/Reset, RGB Button |
| Dimensións do produto (LxWxH) | 15.75 x 7.91 x 17.13 polgadas |
| Peso do elemento | 13.67 libras |
9 Solución de problemas
9.1. Power Supply Unit (PSU) Installation Difficulty
If you encounter difficulty installing the PSU, ensure that any removable metal side panels or brackets in the PSU shroud area are correctly positioned or removed as needed. Some designs may require specific orientation or temporary removal of parts to facilitate PSU placement.
9.2. PCI-E Bracket Removal
Some PCI-E slot covers may be designed to be broken off rather than screwed. If you find the brackets difficult to remove, carefully bend them back and forth until they detach. It is advisable to do this before installing the motherboard to avoid accidental damage.
9.3. Fan Control and RGB Synchronization
If the RGB fans are not functioning as expected or you wish to synchronize them with your motherboard's RGB software, ensure the fan controller is correctly connected to both the power supply and the motherboard's D-RGB header (if available and compatible). Refer to your motherboard manual for specific D-RGB header locations and software instructions.
10. Garantía e soporte
For warranty information and technical support, please refer to the documentation included with your product or visit the official MUSETEX websitio. Garda o comprobante de compra para reclamacións de garantía.


