1. Introdución
Thank you for choosing the WMF Bueno Pro Coffee Maker Thermo. This manual provides essential information for the safe and efficient operation, maintenance, and troubleshooting of your new coffee maker. Please read these instructions carefully before first use and keep them for future reference.
Instrucións de seguridade importantes
- Le todas as instrucións antes de usar o aparello.
- Non toque superficies quentes. Use asas ou botóns.
- Para protexerse contra incendios, descargas eléctricas e lesións ás persoas, non mergulle o cable, os enchufes ou o aparello en auga ou noutro líquido.
- É necesaria unha estreita supervisión cando calquera aparello é usado por nenos ou preto de eles.
- Desenchufe da toma cando non estea en uso e antes de limpalo. Deixar arrefriar antes de poñer ou quitar pezas e antes de limpar o aparello.
- Non faga funcionar ningún aparello cun cable ou enchufe danados ou despois de que o aparello funcione mal, ou teña danado de calquera xeito.
- O uso de accesorios non recomendados polo fabricante do aparello pode provocar incendios, descargas eléctricas ou lesións ás persoas.
- Non use ao aire libre.
- Non deixes que o cable colgue do bordo da mesa ou do mostrador nin toque superficies quentes.
- Non o coloque sobre ou preto dun queimador eléctrico ou de gas quente, nin nun forno quente.
- Conecte sempre primeiro o enchufe ao electrodoméstico e, a seguir, o cable á toma de corrente. Para desconectalo, poña calquera control na posición de apagado e, a seguir, retire o enchufe da toma de corrente.
- Non use o aparello para outros usos que os previstos.
2. Produto rematadoview
The WMF Bueno Pro Coffee Maker Thermo is designed for ease of use and durability, featuring high-quality Cromargan: stainless steel 18/10.

Figura 2.1: En xeral view of the WMF Bueno Pro Coffee Maker Thermo, showcasinpolo seu elegante deseño en negro e aceiro inoxidable.

Figura 2.2: Fronte view highlighting the external water level indicator on the side, allowing for easy monitoring of water quantity.
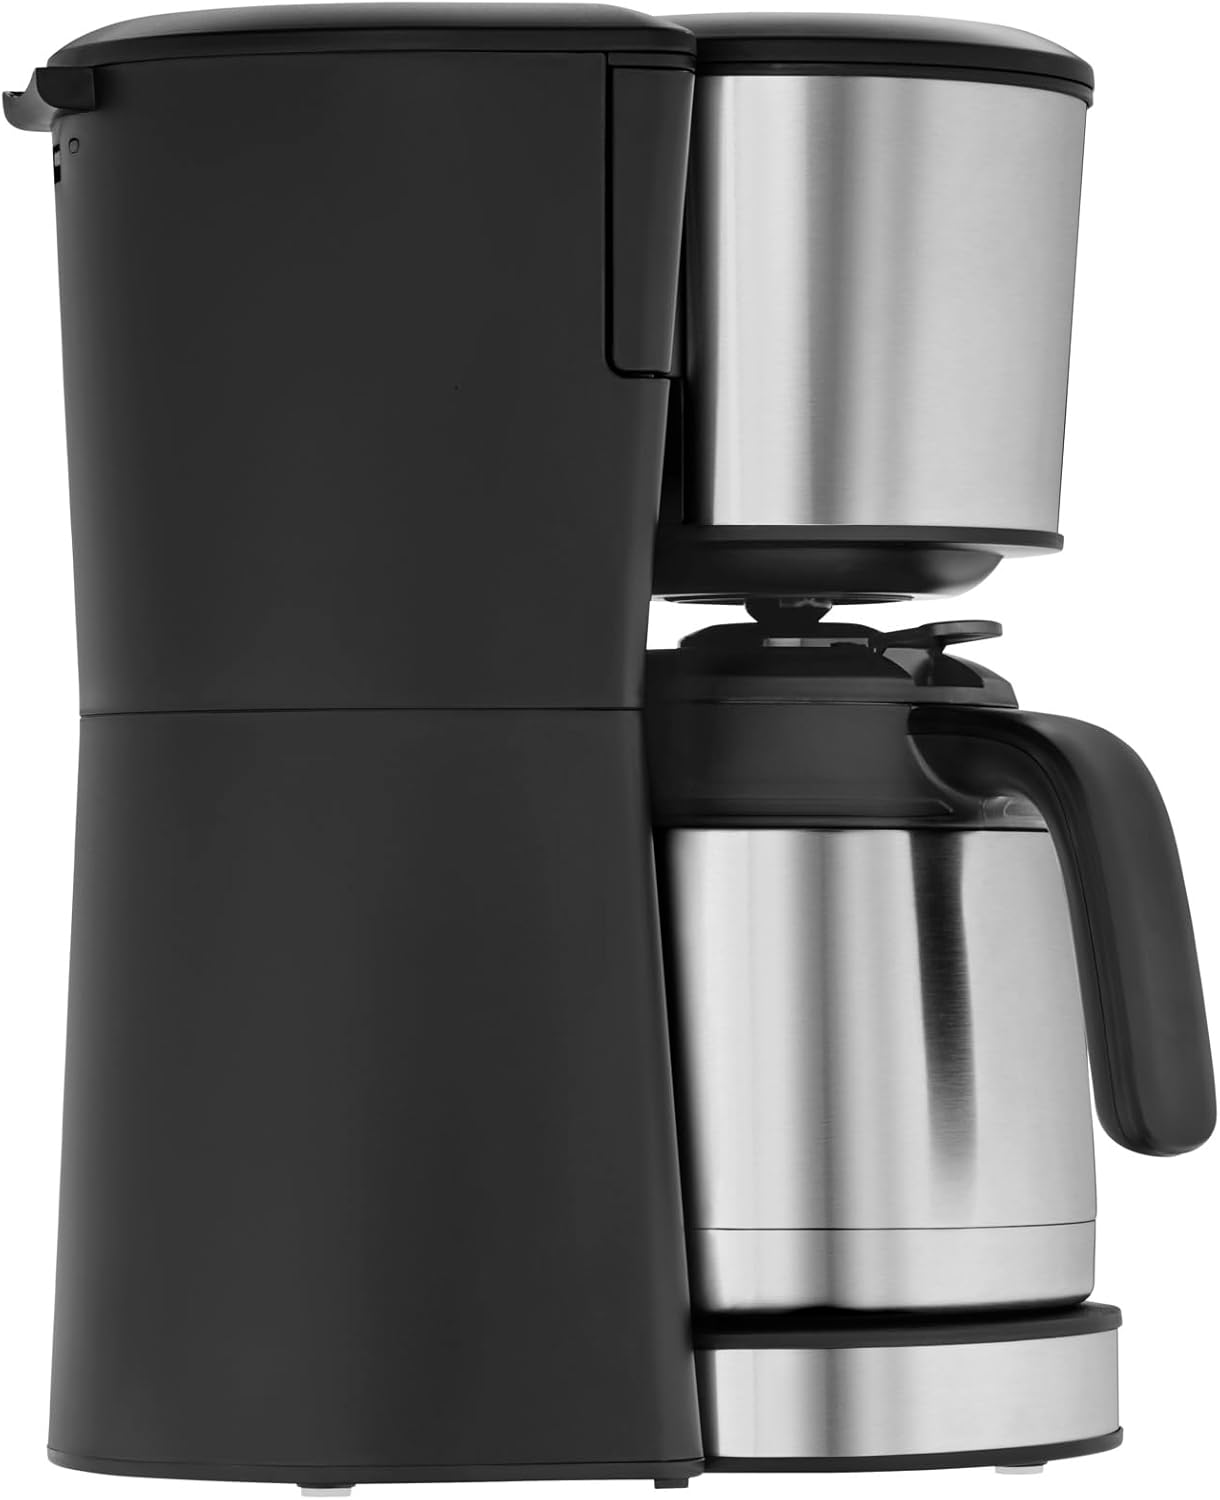
Figura 2.3: Arriba view showing the swing filter compartment, which opens for easy access to insert or remove the filter.

Figura 2.4: Close-up of the high-quality thermal jug, designed to keep coffee warm for extended periods.

Figura 2.5: Detail of the illuminated on/off button, indicating the appliance's operational status.
Compoñentes:
- Main Unit with Water Tank
- Indicador de nivel de auga externo
- Swing Filter Holder with Removable Filter Insert (Size 1x4)
- Thermal Jug with Lid (1.25 L capacity for 10 cups)
- On/Off Button with Control Lamp
- Drip Stop Mechanism
3. Configuración
Desembalaxe e limpeza inicial:
- Retire con coidado todos os materiais de embalaxe da cafeteira.
- Wash the thermal jug and its lid, and the removable filter insert with warm, soapy water. Rinse thoroughly and dry.
- Limpe o exterior da cafeteira cun anuncioamp pano. Non mergullo a unidade principal na auga.
Primeiro uso (ciclo de limpeza):
Before brewing coffee for the first time, it is recommended to run two full cycles with only water to clean the internal components.
- Fill the water tank with fresh, cold water up to the "10 cup" mark using the external water level indicator.
- Place the empty thermal jug with its lid on the warming plate.
- Ensure the swing filter holder is closed and no coffee filter or grounds are present.
- Conecte o cable de alimentación a unha toma de corrente axeitada de 220 V.
- Press the On/Off button. The control lamp will illuminate, and the brewing process will begin.
- Allow the cycle to complete. Once finished, discard the hot water from the jug.
- Repita este proceso unha vez máis.
- Your coffee maker is now ready for brewing.
4. Instrucións de funcionamento
Preparación de café:
- Ensure the coffee maker is unplugged and cool.
- Fill the thermal jug with the desired amount of fresh, cold water (up to 1.25 L or 10 cups). Pour this water into the coffee maker's water tank. The external water level indicator will show the current fill level.
- Open the swing filter holder. Insert a size 1x4 paper coffee filter into the removable filter insert.
- Add the desired amount of ground coffee into the paper filter. A general guideline is one tablespoon of ground coffee per cup (150ml), but adjust to your taste.
- Close the swing filter holder securely.
- Place the thermal jug with its lid firmly on the warming plate. Ensure the lid is correctly positioned to allow coffee to flow into the jug.
- Conecte o cable de alimentación a unha toma de corrente axeitada de 220 V.
- Press the On/Off button. The control lamp will illuminate, indicating that the brewing process has started.
- Once the brewing cycle is complete, the coffee maker will automatically turn off, and the control lamp will extinguish. The drip stop feature prevents dripping when the jug is removed.
- Carefully remove the thermal jug and serve your freshly brewed coffee. The thermal jug will keep the coffee warm for an extended period.
Nota: For optimal temperature retention, pre-warm the thermal jug with hot water before brewing.
5. Mantemento e Limpeza
Regular cleaning ensures optimal performance and extends the lifespan of your WMF Bueno Pro Coffee Maker Thermo. Always unplug the appliance and allow it to cool completely before cleaning.
Limpeza diaria:
- Thermal Jug and Lid: Wash the thermal jug and its lid with warm, soapy water after each use. Use a soft brush for the interior if needed. Rinse thoroughly and dry.
- Filter Insert: Remove the used paper filter and coffee grounds. Wash the removable filter insert with warm, soapy water. Rinse and dry.
- Exterior: Limpe as superficies exteriores da cafeteira cun pano suave eamp pano. Non utilice produtos de limpeza abrasivos nin estropajos.
Descaling (Periodic Cleaning):
Mineral deposits from water can build up over time, affecting performance and taste. Descale your coffee maker regularly, depending on water hardness and frequency of use (e.g., every 2-4 months).
- Prepare a descaling solution according to the descaler manufacturer's instructions (e.g., white vinegar diluted with water, or a commercial descaling agent).
- Despeje a solución descalcificante no depósito de auga.
- Place the empty thermal jug with its lid on the warming plate.
- Start a brewing cycle without coffee grounds. Allow about half of the solution to brew through, then turn off the coffee maker and let it sit for 15-20 minutes to allow the solution to work.
- Volva a acender a cafeteira e deixe que a solución restante ferva.
- Discard the descaling solution from the jug.
- Rinse the coffee maker by running two full cycles with fresh, clean water only to remove any residual descaler.
Atención: Nunca mergulle a unidade principal da cafeteira en auga nin en ningún outro líquido.
6 Solución de problemas
If you encounter issues with your WMF Bueno Pro Coffee Maker Thermo, please consult the table below before contacting customer support.
| Problema | Causa posible | Solución |
|---|---|---|
| A cafeteira non se acende. |
|
|
| O café non se prepara. |
|
|
| O café ten un sabor débil ou demasiado forte. |
|
|
| Gotexa auga da cafeteira. |
|
|
7. Especificacións
| Característica | Detalle |
|---|---|
| Marca | WMF |
| Nome do modelo | Bueno Pro |
| Número de modelo do artigo | 0412290011 |
| Poder | 900 W |
| Voltage | 220 voltios |
| Capacidade do xerro | 1.25 litros (aprox. 10 cuncas) |
| Material | Cromargan: Stainless Steel 18/10, Plastic |
| Cor | Negro |
| Dimensións do produto (P x A x A) | 7.09" de profundidade x 0.39" de ancho x 13.78" de alto (aprox. 18 x 1 x 35 cm) |
| Peso do elemento | 6.03 libras |
| Tamaño do filtro | 1x4 |
| Características especiais | Thermal Jug, External Water Level Indicator, Drip Stop, Keep Warm Function |
8. Garantía e soporte
WMF products are manufactured with high-quality materials and undergo strict quality control. For detailed information regarding the warranty period and terms for your WMF Bueno Pro Coffee Maker Thermo, please refer to the warranty card included with your product or visit the official WMF websitio.
If you require technical assistance, spare parts, or have questions not covered in this manual, please contact WMF customer support.
- Oficial da WMF Websitio: www.wmf.com (Check for regional support contact information)
- Atención ao cliente: Refer to your product packaging or the WMF website for local contact numbers and email addresses.
Teña á man o número de modelo (0412290011) e a data de compra cando contacte co servizo de asistencia.


