1. Introdución
The ARGO Iro Plus is a versatile portable air conditioner designed for year-round comfort, featuring both cooling and heating capabilities. Its minimalist design and intuitive controls make it a perfect addition to any living space. This manual provides essential information for the safe and efficient operation, setup, and maintenance of your ARGO Iro Plus unit.
Características principais:
- Portable air conditioner with heat pump, Energy Class A.
- Four operating modes: Cooling, Heating, Ventilation, and Dehumidification.
- Three fan speeds for customized airflow.
- Motorized top flap with Swing function for wide air distribution.
- Digital 24-hour timer for scheduled operation.
- Sleep function for enhanced comfort during rest.
- Memory function for automatic restart with previous settings after power interruption.
- Refrixerante R290 ecolóxico.
- Equipped with practical handles and multi-directional wheels for easy portability.
2. Información de seguridade
Lea atentamente todos os avisos e instrucións de seguridade antes de usar o aparello para evitar lesións ou danos. Garde este manual para futuras consultas.
- Always connect the unit to a grounded power outlet with the correct voltage.
- Non utilice a unidade cun cable de alimentación ou un enchufe danados.
- Do not block the air inlets or outlets. Ensure adequate clearance around the unit for proper airflow.
- Non introduza os dedos nin obxectos nas saídas de aire.
- Keep the unit away from water and other liquids. Do not use in bathrooms or very humid environments.
- Desconecte a unidade antes de limpala ou realizar calquera mantemento.
- Non intente reparar nin modificar a unidade vostede mesmo. Póñase en contacto co persoal de servizo cualificado para as reparacións.
- Este aparello non está pensado para o seu uso por persoas (incluídos nenos) con capacidades físicas, sensoriais ou mentais reducidas, ou con falta de experiencia e coñecementos, a menos que teñan supervisión ou instrucións sobre o uso do aparello por unha persoa responsable da súa seguridade.
- Os nenos deben ser supervisados para asegurarse de que non xoguen co aparello.
3. Compoñentes do produto
Familiarize yourself with the main parts of your ARGO Iro Plus portable air conditioner.

Figura 3.1: Fronte view of the ARGO Iro Plus portable air conditioner, showcasing its sleek white design and compact form factor.

Figura 3.2: Outra fronte view of the ARGO Iro Plus, highlighting the minimalist design.

Figura 3.3: De arriba abaixo view of the control panel with digital display and touch-sensitive buttons for various functions like Swing, Timer, Speed, Temperature Up/Down, Mode, Sleep, and Power.

Figura 3.4: Traseira view of the unit, showing the exhaust air outlet, power cord storage, and air intake grilles.

Figura 3.5: Lateral view of the ARGO Iro Plus, highlighting the integrated handle for easy lifting and portability.

Figura 3.6: Lateral view of the ARGO Iro Plus, showing the exhaust port and side grilles.

Figure 3.7: Technical diagram illustrating the dimensions of the ARGO Iro Plus unit: 770mm height, 470mm width, and 382mm depth.
Accesorios incluídos:
- Mangueira de escape flexible
- Adaptador de fiestra
- Kit for Fixed Glass Installation
- Control remoto
4. Configuración e instalación
4.1 Colocación
Place the ARGO Iro Plus on a flat, stable surface. Ensure there is at least 30 cm (12 inches) of clearance around the unit for proper air circulation. Do not place the unit near heat sources or in direct sunlight.
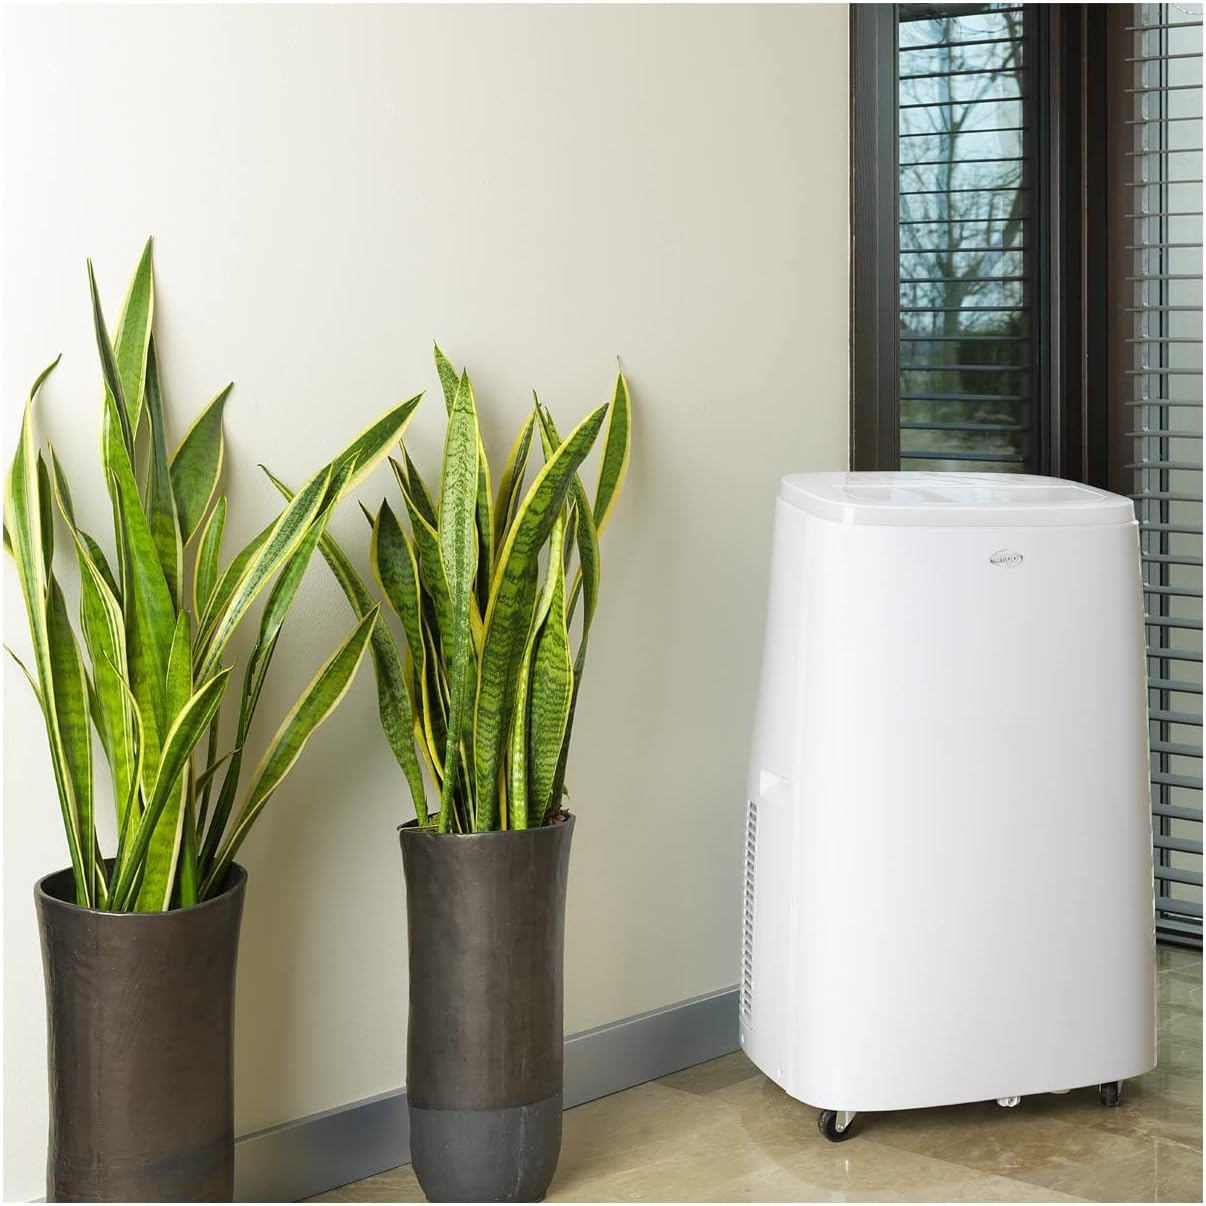
Figure 4.1: The ARGO Iro Plus unit positioned in a room, demonstrating suitable placement near a window for exhaust hose connection.
4.2 Instalación da mangueira de escape
- Attach one end of the flexible exhaust hose to the air outlet on the back of the unit. Twist clockwise until securely fastened.
- Attach the window adapter to the other end of the exhaust hose.
- Open a window or sliding door and place the window adapter firmly in the opening. Ensure the opening is sealed as much as possible to prevent outside air from entering.
- For fixed glass installations, use the provided kit according to its specific instructions.
Importante: The exhaust hose must be as short and straight as possible to ensure optimal performance. Bends or excessive length will reduce efficiency.
5. Instrucións de funcionamento
Your ARGO Iro Plus can be operated using the control panel on the top of the unit or the included remote control.
5.1 Panel de control rematadoview
Refer to Figure 3.3 for the layout of the control panel buttons.
- Botón POWER: Acende ou apaga a unidade.
- Botón MODE: Cycles through operating modes: Cool, Heat, Fan, Dehumidify.
- Botóns ARRIBA/ABAIXO: Axusta a configuración de temperatura ou a duración do temporizador.
- Botón SPEED: Selecciona a velocidade do ventilador (Baixa, Media, Alta).
- Botón TIMER: Configura o temporizador de acendido ou apagado automático.
- Botón SWING: Activates or deactivates the automatic swing function of the top flap.
- Botón SLEEP: Activates Sleep mode for quiet operation and optimized temperature control during sleep.
5.2 Modos de funcionamento
- Modo de arrefriamento: For cooling the room. Set desired temperature using UP/DOWN buttons.
- Modo de calefacción: For heating the room (Heat Pump function). Set desired temperature.
- Modo de ventilador: Fai circular o aire sen arrefriar nin quentar. Selecciona a velocidade desexada do ventilador.
- Modo de deshumidificación: Removes moisture from the air. The unit will operate at a low fan speed. Continuous drainage is recommended in this mode.
5.3 Función de temporizador
O temporizador de 24 horas permíteche configurar a unidade para que se acenda ou se apague automaticamente despois dun período específico.
- Preme o botón TIMER.
- Use the UP/DOWN buttons to set the desired delay time (in hours).
- The timer will activate after a few seconds.
6. Mantemento
Regular maintenance ensures optimal performance and extends the lifespan of your ARGO Iro Plus. Always unplug the unit before cleaning.
6.1 Limpeza do filtro de aire
O filtro de aire debe limparse cada dúas semanas ou con máis frecuencia se a unidade se usa nun ambiente poeirento.
- Apague e desenchufe a unidade.
- Locate the air filter panel (usually on the side or back).
- Retire o filtro.
- Clean the filter with a vacuum cleaner or wash it gently with lukewarm water and mild detergent.
- Deixe que o filtro se seque completamente antes de reinserilo.
6.2 Drenaxe de auga
The unit automatically evaporates most condensation. However, in high humidity conditions or during dehumidification mode, the internal water tank may fill up. The unit will stop operating and display an indicator when the tank is full.
- Apague e desenchufe a unidade.
- Place a shallow pan or container under the drainage outlet (usually at the bottom rear of the unit).
- Retire o tapón de drenaxe para permitir que saia a auga.
- Once drained, replace the drain plug firmly.
- For continuous drainage in dehumidification mode, connect a suitable drain hose (not included) to the continuous drainage outlet.
7 Solución de problemas
Antes de contactar co servizo de atención ao cliente, consulta os seguintes problemas comúns e as súas solucións.
| Problema | Causa posible | Solución |
|---|---|---|
| A unidade non se acende. | Sen electricidade, cable de alimentación solto, disyuntor saltado. | Comprobe a conexión eléctrica, asegúrese de que a toma de corrente funcione e reinicie o disyuntor. |
| Unit is running but not cooling/heating. | Exhaust hose blocked/disconnected, room too large, windows/doors open, air filter dirty, temperature setting too high/low. | Ensure exhaust hose is properly installed and unblocked. Close windows/doors. Clean air filter. Adjust temperature setting. |
| A unidade é ruidosa. | Unit not on a flat surface, fan speed too high, internal components loose. | Place unit on a flat surface. Reduce fan speed. If noise persists, contact support. |
| Fuga de auga. | Drain plug loose, continuous drainage hose not properly connected, unit tilted. | Ensure drain plug is secure. Check continuous drainage hose connection. Place unit on a level surface. |
| "Full Tank" indicator (or similar) is on. | O depósito de auga interno está cheo. | Baleire o depósito de auga como se describe na Sección 6.2. |
If the problem persists after trying these solutions, please contact ARGO customer support.
8. Especificacións
| Número de modelo | IRO PLUS |
| Marca | ARGO |
| Dimensións do produto (H x W x D) | 77 x 47 x 38 cm |
| Peso do elemento | 31.5 kg |
| Factor de forma | Portátil |
| Capacidade de refrixeración | 13000 BTU/h |
| Voltage | 216.67 V |
| Fonte de Enerxía | Eléctrico con cable |
| Clasificación de eficiencia enerxética | A |
| Características especiais | Automatic shutdown, Cooling, Dehumidification, Fan, Heating, Air filter |
| Primeira data dispoñible | 15 de xaneiro de 2020 |
9. Garantía e soporte
9.1 Información da garantía
The ARGO Iro Plus portable air conditioner comes with a 2-year supplier warranty desde a data de compra. Esta garantía cobre defectos de materiais e fabricación en condicións de uso normal. Conserve o comprobante de compra para reclamacións de garantía.
A garantía non cubre os danos derivados de:
- Improper installation or use not in accordance with this manual.
- Accidents, abuse, neglect, fire, water, lightning, or other acts of nature.
- Reparacións ou modificacións non autorizadas.
- Desgaste normal.
9.2 Atención ao cliente
For technical assistance, troubleshooting beyond this manual, or warranty claims, please contact ARGO customer support through their official website or the retailer where you purchased the product. Have your model number (IRO PLUS) and purchase date ready.


