Introdución
This manual provides detailed instructions for the installation, operation, and maintenance of your FLYLINKTECH Dash Cam CD10. Please read this manual thoroughly before using the device to ensure proper functionality and safety.

Imaxe: Fronte e parte traseira view of the FLYLINKTECH Dash Cam CD10, highlighting its compact design and 1.5-inch LCD screen.
Características do produto
- Vídeo Full HD 1080p: Records video at 1080p resolution for clear details.
- Lente gran angular de 170°: Covers up to 5 traffic lanes, reducing blind spots.
- G-Sensor and Emergency Lock: Automatically detects collisions and locks video files.
- WDR Function: Enhances video quality in various lighting conditions, including low light.
- Gravación en bucle: Overwrites oldest files when storage is full, ensuring continuous recording.
- Pantalla LCD de 1.5 polgadas: Compact display for easy viewing e navegación.
- Monitor de estacionamento: Records incidents when the vehicle is parked.
- Detección de movemento: Initiates recording when motion is detected.
- Visión nocturna: Improved low-light performance.

Image: Diagram illustrating key features of the dash cam, including 1080P resolution, 1.5-inch LCD, G-Sensor, motion detection, loop recording, 170-degree wide angle, WDR, and super night vision.
Contido do paquete
Comprobe o contido do paquete ao desembalar:
- FLYLINKTECH Dash Cam CD10
- Montaxe para ventosa
- Monte adhesivo
- Adhesivos estáticos
- Car Charger with additional USB port
- Cable Micro USB
- Manual de usuario (este documento)
Note: An SD card is not included and must be purchased separately.

Image: All items included in the product package: the dash cam, packaging box, car charger, micro USB cable, suction cup mount, adhesive mount, and user manual.
Configuración e instalación
1. Inserción da tarxeta Micro SD
Before first use, insert a high-speed Micro SD card (Class 10 or higher, up to 32GB recommended) into the dash cam's SD card slot. Ensure the card is inserted correctly until it clicks into place.
2. Montaxe da Dash Cam
Choose between the suction cup mount or the adhesive mount for installation.
- Montaxe con ventosa:
- Clean the windshield surface where you intend to mount the camera.
- Attach the dash cam to the suction cup mount.
- Prema a ventosa firmemente contra o parabrisas e xire a palanca para suxeitala.
- Montaxe adhesivo:
- Limpar a fondo a superficie do parabrisas.
- Apply the static sticker to the windshield first, then attach the adhesive mount to the static sticker for easier removal later.
- Attach the dash cam to the adhesive mount.
- Prema firmemente durante 30 segundos para garantir unha unión forte.
Position the dash cam near the rearview espello, asegurándote de que non obstrua a túa view da estrada.
Imaxe: Un example of the dash cam installed on a car's windshield, showing optimal placement to avoid obstructing the driver's view while covering the road ahead.
3. Potencia de conexión
Connect the provided car charger to your vehicle's cigarette lighter socket and the Micro USB cable to the dash cam's power port. Route the cable neatly along the windshield and dashboard to avoid interference with driving.
Instrucións de funcionamento
1. Acendido/apagado
- The dash cam will automatically power on and begin recording when connected to power and the vehicle ignition is turned on.
- To manually power on/off, press and hold the Power button (usually marked with a power symbol) on the device.
2. Gravación básica
Once powered on, the dash cam will automatically start loop recording. Video files are saved in segments (e.g., 1, 3, 5, or 10 minutes) and the oldest files are overwritten when the SD card is full.

Image: Visual representation of the loop recording function, showing how older video segments are automatically replaced by new ones to ensure continuous recording.
3. Sensor G (bloqueo de emerxencia)
The built-in G-Sensor detects sudden impacts or rapid deceleration. When triggered, the current video segment is automatically locked and protected from being overwritten, serving as crucial evidence in case of an accident.

Image: Illustrations depicting the G-Sensor activating upon collision and the 24-hour parking monitor function, which records incidents when the vehicle is parked.
4. Monitor de aparcamento
When enabled, the Parking Monitor function uses the internal battery to detect impacts or motion around the vehicle while parked. It will automatically start recording for a short period to capture any incidents.
5. Detección de movemento
In Motion Detection mode, the camera will only record when it detects movement in its field of view, conserving storage space. This feature is typically used when the vehicle is stationary.
6. WDR (Wide Dynamic Range)
WDR technology helps the camera perform optimally in challenging lighting conditions, such as strong backlight or low light, by balancing exposure to produce clearer images.

Image: Comparison showing how WDR improves image clarity in varying light conditions, alongside an illustration of the 170-degree wide angle coverage across multiple lanes.
Mantemento
- Limpeza: Use a soft, dry cloth to clean the camera lens and screen. Do not use liquid cleaners or abrasive materials.
- Formato da tarxeta SD: It is recommended to format the Micro SD card regularly (e.g., once a month) within the dash cam's settings to prevent data corruption and ensure optimal recording performance. This will erase all data on the card.
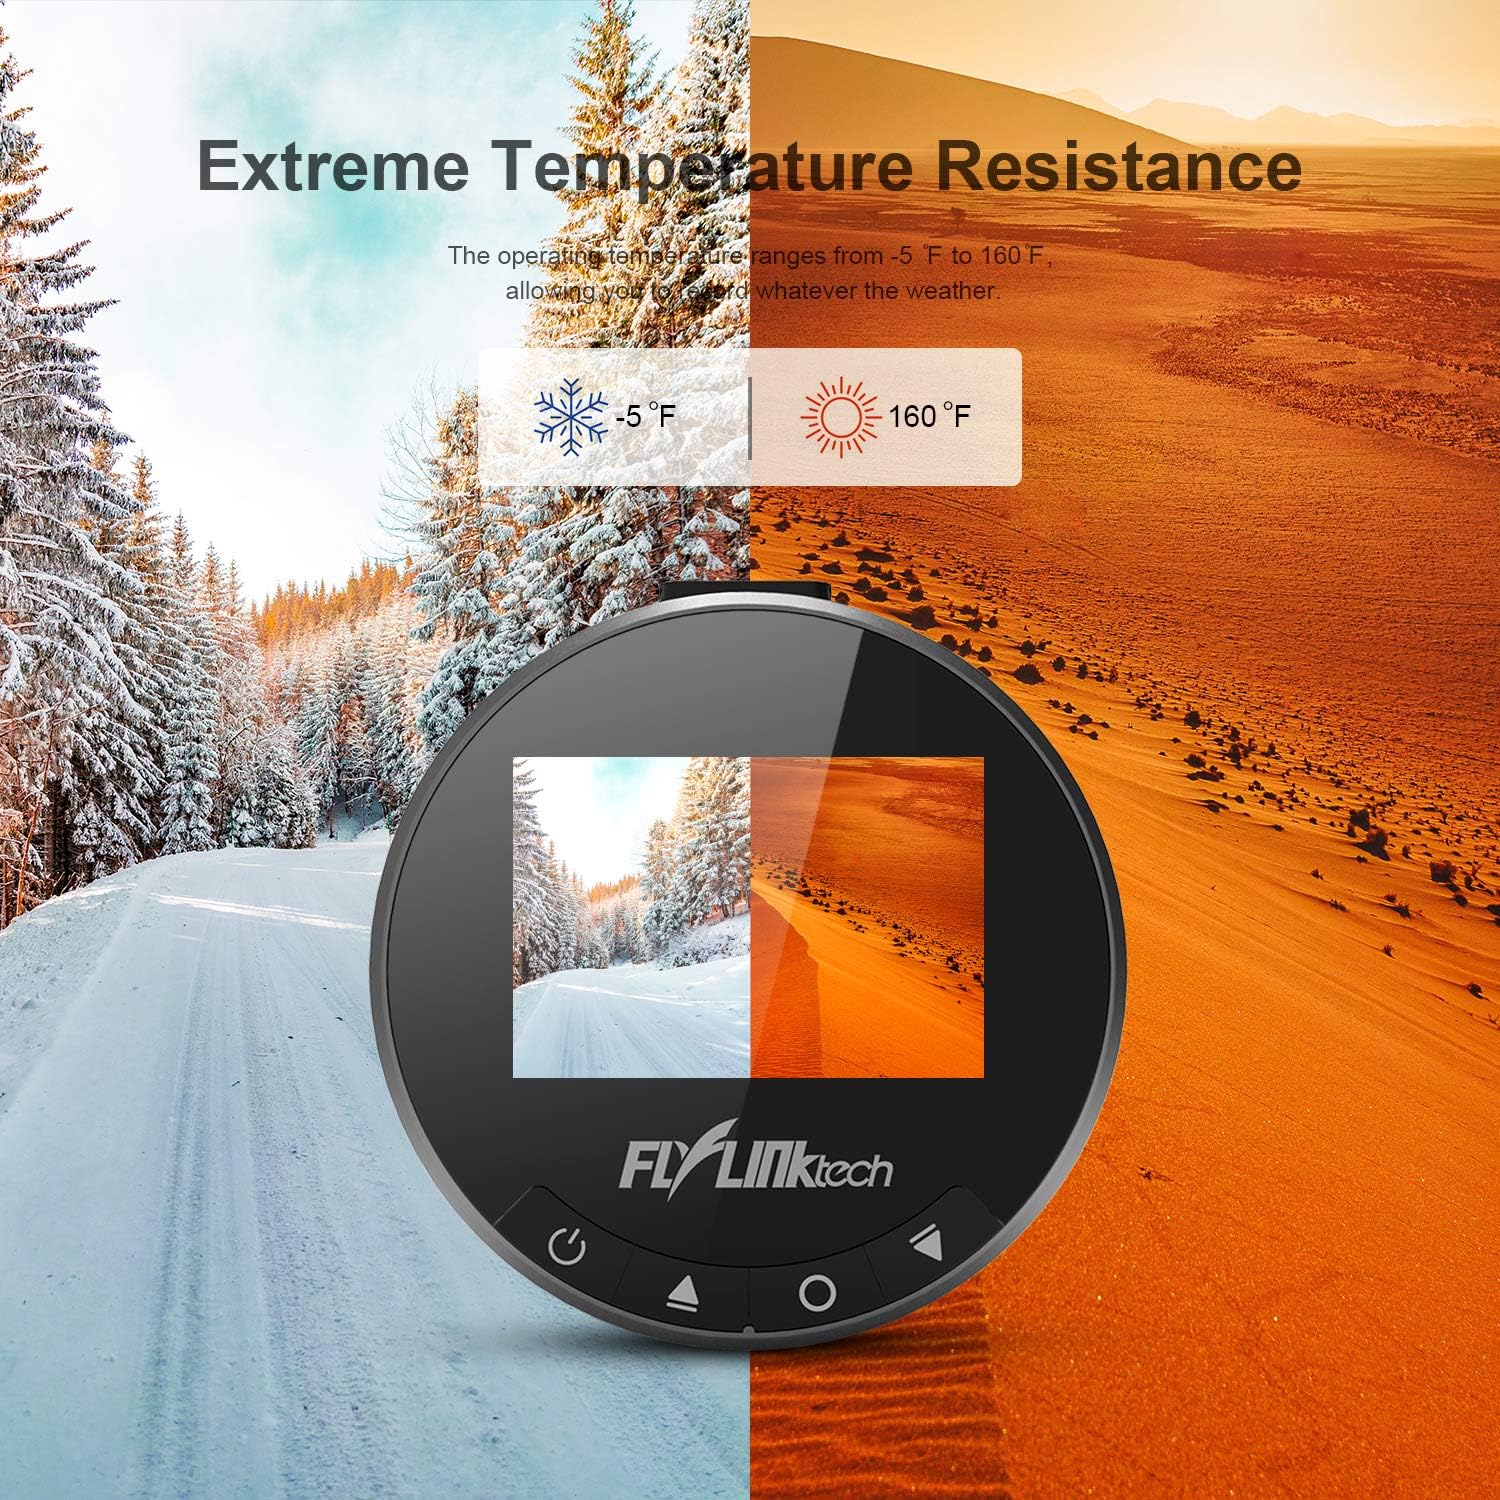
- Temperatura: Avoid exposing the dash cam to extreme temperatures outside its operating range (-20°C to 70°C / -5°F to 160°F) for prolonged periods.
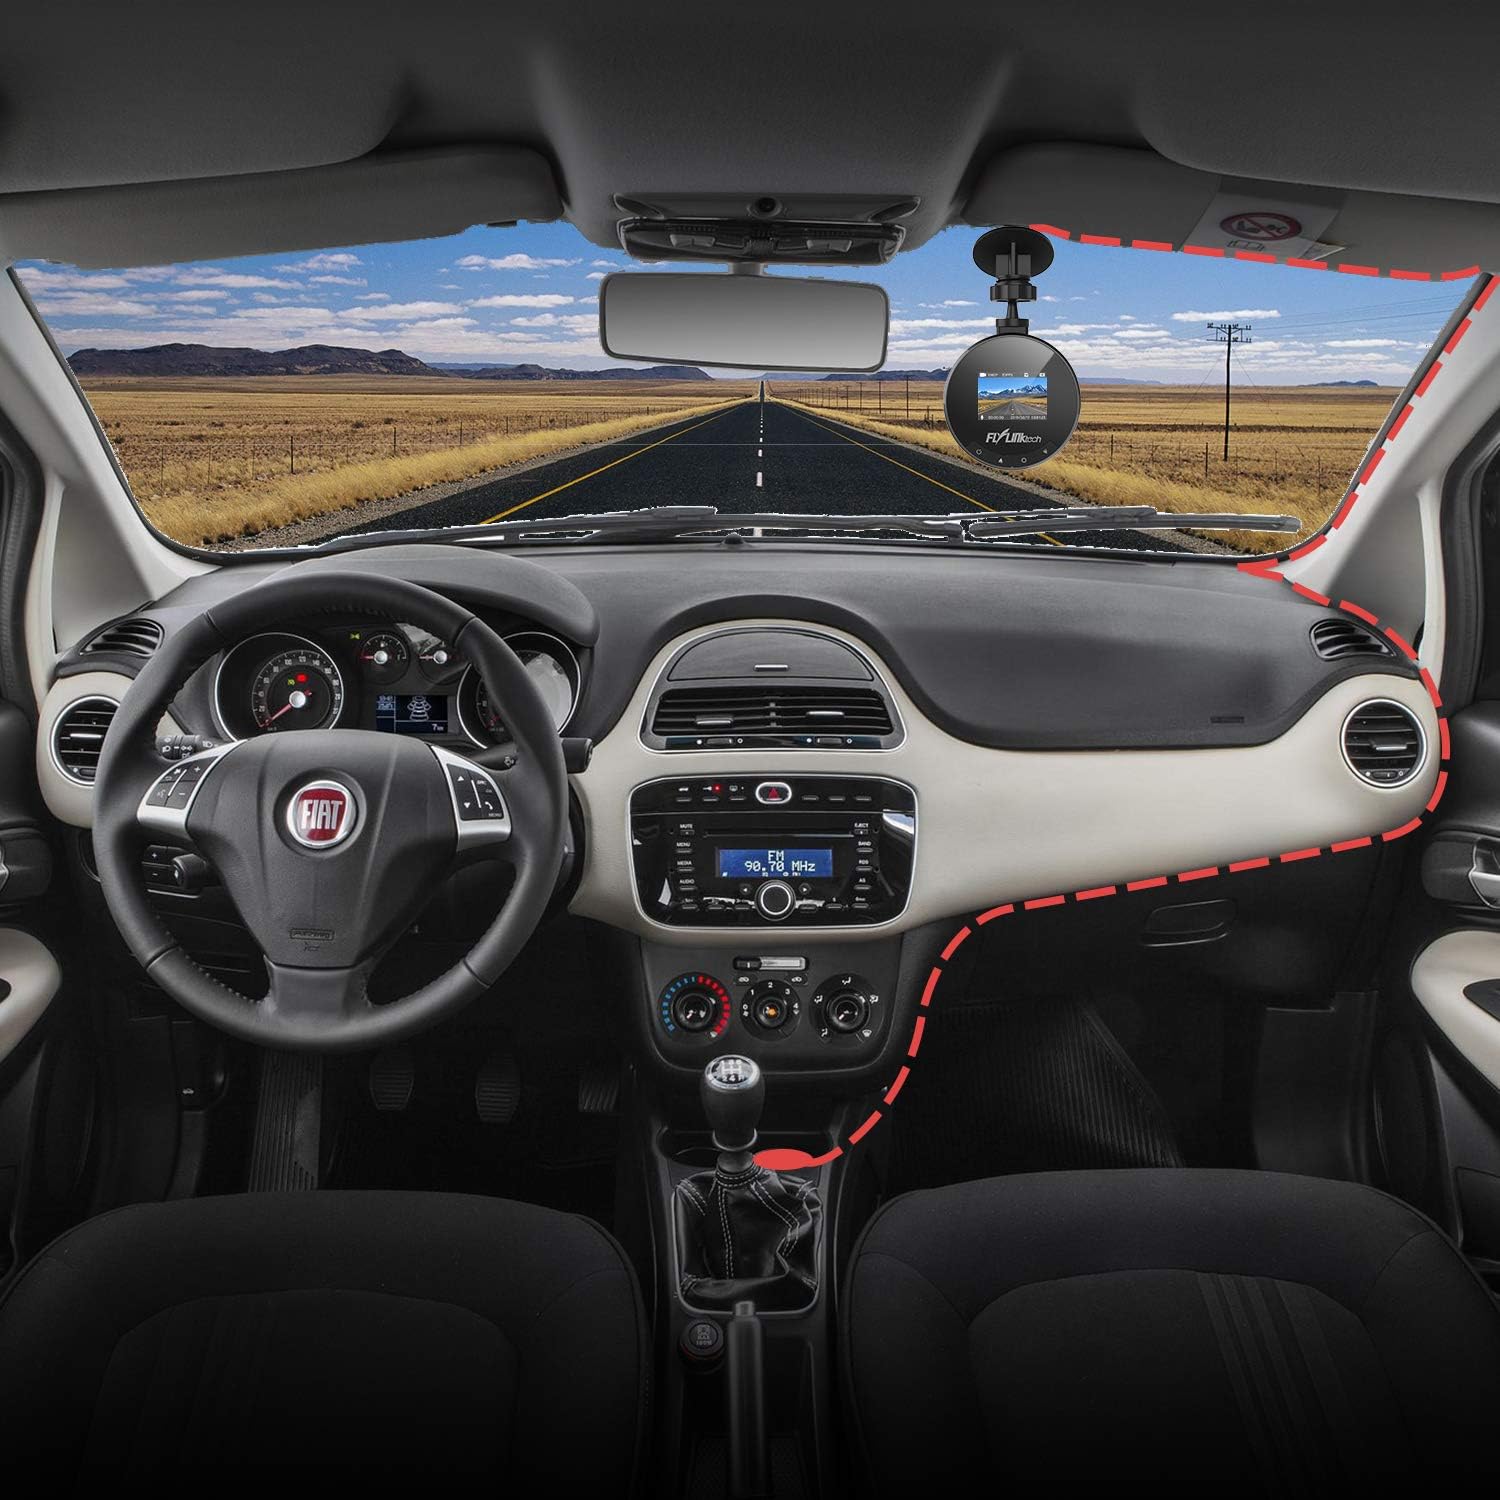
Image: Visual representation of the dash cam's ability to withstand extreme temperatures, from cold winter conditions (-5°F) to hot desert environments (160°F).
Resolución de problemas
- A cámara non se acende:
- - Ensure the car charger is properly connected to both the dash cam and the vehicle's power outlet.
- - Check if the vehicle's cigarette lighter socket is functioning.
- - Try a different USB cable or car charger if available.
- A gravación detense ou conxélase:
- - Format the Micro SD card within the camera's settings.
- - Ensure you are using a high-speed (Class 10 or higher) Micro SD card.
- - The SD card may be full; enable loop recording or replace the card.
- Mala calidade de vídeo:
- - Clean the camera lens.
- - Ensure the protective film has been removed from the lens.
- - Adjust settings for WDR or exposure if available.
- A ventosa non se pega:
- - Clean both the windshield and the suction cup thoroughly.
- - Moisten the suction cup slightly before applying.
- - Ensure the lever is fully engaged after pressing the cup to the windshield.
Especificacións
| Característica | Detalle |
|---|---|
| Pantalla | Pantalla LCD de 1.5 polgadas |
| Apertura | F1.8 |
| Sensor G | Integrado |
| Resolución de vídeo | 1080P Full HD |
| Resolución fotográfica | 12M / 10M / 8M / 5M / 3M / 2M / 1.3M |
| Modo de vídeo | Normal / Loop Recording / Motion Detection / Parking Monitor |
| Temperatura de funcionamento | -20 °C ~ 70 °C (-5 °F ~ 160 °F) |
| Dimensións | 5.99 x 5.99 x 3 cm |
| Peso | 280 g |
| Conectividade | USB |
Garantía e Soporte
FLYLINKTECH provides a 2-year worry-free warranty for all dashboard cameras.
For technical support or warranty claims, please contact FLYLINKTECH customer service through the contact information provided in your product packaging or on the official FLYLINKTECH websitio.


