Introdución
Thank you for choosing the MoKo LED Lighted Desktop Magnifier Dome. This device is designed to provide clear, magnified viewing with integrated LED lighting, making it ideal for reading small text, inspecting fine details, or engaging in hobbies. This manual provides essential information for the safe and effective use of your magnifier.
Información de seguridade
- Do not look directly at the sun through the magnifier, as this can cause permanent eye damage.
- Keep the magnifier away from direct sunlight when not in use to prevent fire hazards, as the lens can concentrate sunlight.
- Ensure batteries are inserted with correct polarity to prevent damage to the device.
- Keep out of reach of children to prevent accidental misuse or injury.
- Non expoña o dispositivo a temperaturas ou humidade extremas.
Contido do paquete
- MoKo LED Lighted Desktop Magnifier Dome
- Maletín de transporte
- Pano de limpeza de microfibra
- Manual de usuario

Image: The MoKo LED Lighted Desktop Magnifier Dome shown with its protective neoprene carrying case and a microfiber cleaning cloth.
Produto rematadoview
The MoKo LED Lighted Desktop Magnifier Dome features a durable aluminum frame and a high-quality K9 optical glass lens, providing 5X magnification. It is equipped with three LED lights for enhanced visibility in various lighting conditions. The compact design allows for easy portability and use.
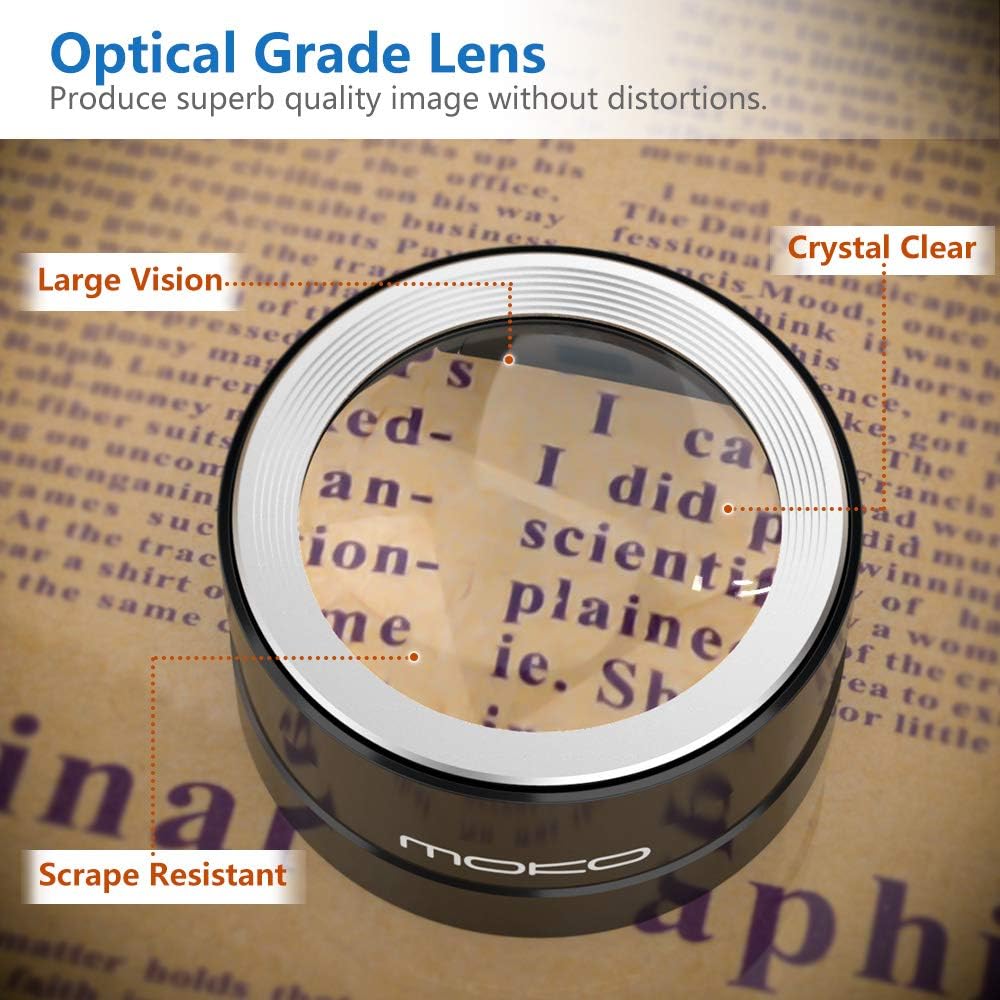
Image: A close-up of the magnifier's optical grade lens, demonstrating its clarity and magnification capabilities on text.
Configuración
Instalación de baterías
- Locate the battery compartment on the underside of the magnifier.
- Abra a tapa da batería con coidado.
- Insert the required batteries (type not specified in product data, typically button cells) ensuring correct polarity (+/-) as indicated inside the compartment.
- Pecha a tapa da batería de forma segura.

Image: The underside of the magnifier, highlighting the location of the power switch and the battery compartment.

Imaxe: Unha detallada view of the battery compartment, showing where batteries should be inserted.
Instrucións de funcionamento
Usando a lupa
- Place the magnifier dome directly onto the surface of the object or text you wish to magnify.
- Move the magnifier smoothly across the surface to view diferentes áreas.
Turning On/Off the LED Lights
- Ensure the main power switch located on the underside of the magnifier is in the 'ON' position. This switch is designed to prevent accidental activation.
- With the main switch on, gently press down on the upper silver ring surrounding the lens. The LED lights will illuminate.
- To turn off the LED lights, press the upper silver ring again.
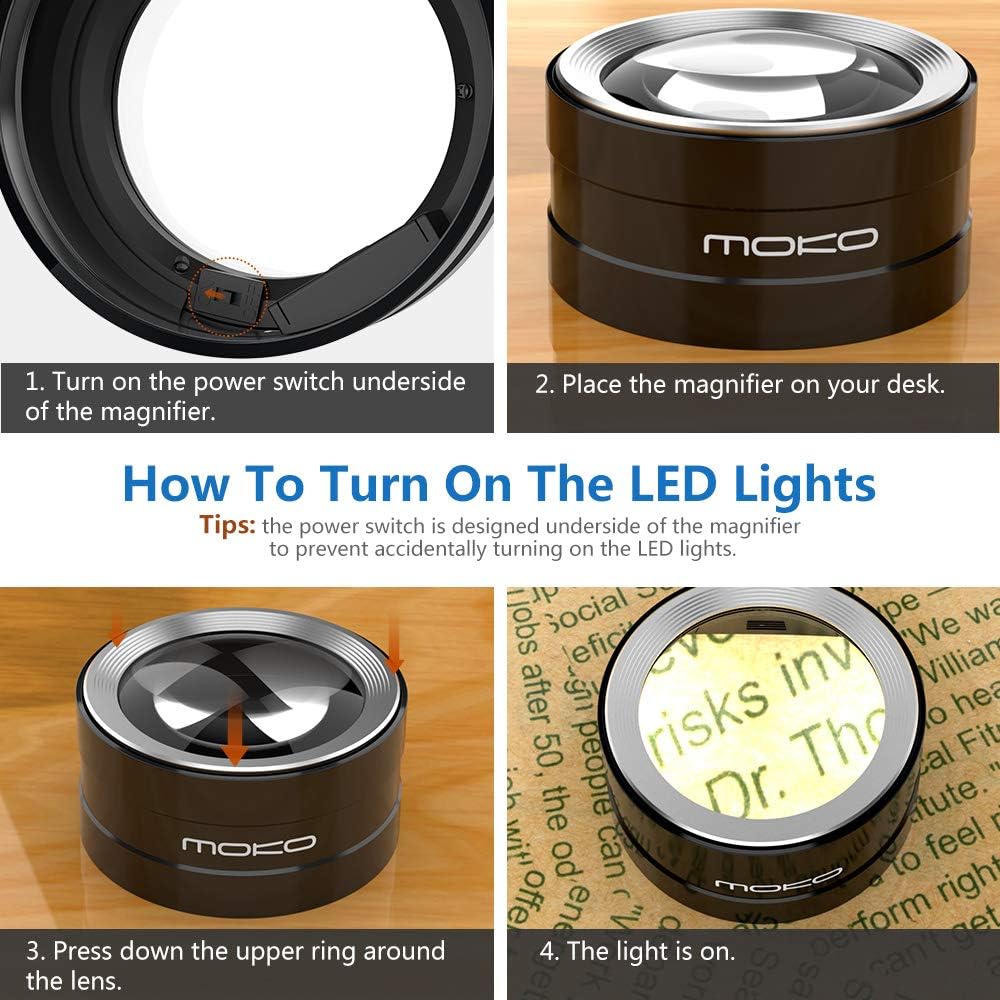
Image: Step-by-step guide on activating the LED lights, including the underside power switch and the upper ring press mechanism.
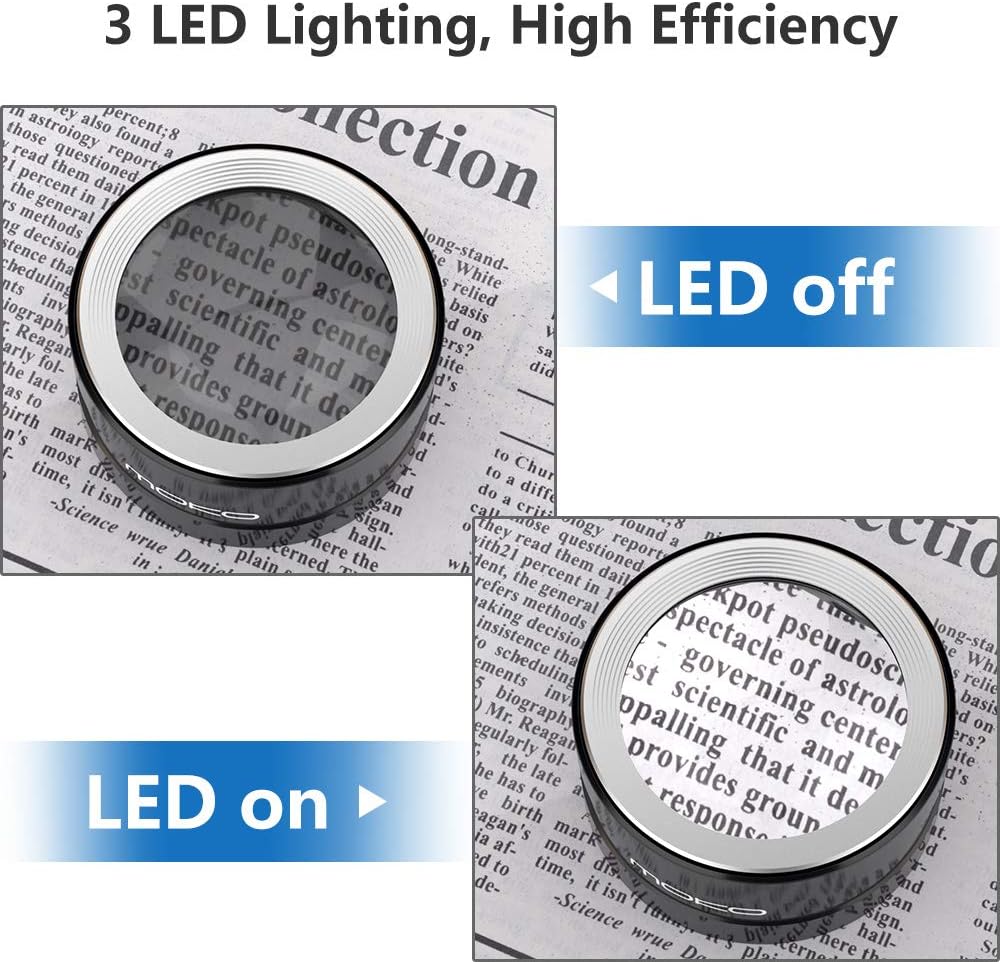
Image: A visual comparison demonstrating the enhanced clarity and illumination provided when the LED lights are activated.
Mantemento
- Limpeza da lente: Use the provided microfiber cleaning cloth to gently wipe the lens. For stubborn smudges, slightly dampLimpe o pano cunha solución de limpeza de lentes. Evite materiais abrasivos ou produtos químicos agresivos.
- Limpeza do corpo: Limpe o corpo de aluminio cun pano suave e seco.
- Almacenamento: When not in use, store the magnifier in its protective carrying case to prevent dust accumulation and scratches.
- Substitución da batería: Replace batteries when the LED lights dim or fail to illuminate. Follow the battery installation steps.
Resolución de problemas
| Problema | Causa posible | Solución |
|---|---|---|
| As luces LED non se acenden. |
|
|
| Magnified image is blurry. |
|
|
Especificacións
- Marca: MoKo
- Modelo: B07RL7234Y
- Forza de aumento: 5X
- Material da lente: Vidro óptico K9
- Material do mango: Aluminio
- Iluminación: 3 luces LED
- Dimensións do produto: 1.89" de longo x 3.62" de ancho (4.8 cm de longo x 9.2 cm de ancho)
- Peso do artigo: 9.4 onzas (266.5 gramos)

Image: A diagram illustrating the length and width dimensions of the magnifier dome.
Garantía e Soporte
For warranty information and customer support, please refer to the product packaging or contact MoKo customer service directly through their official websitio web ou o vendedor onde se comprou o produto. Garde o recibo de compra para reclamacións de garantía.


