Introdución
Thank you for choosing Mr. Beams S14 Bulb Solar LED Weatherproof Outdoor String Lights. This manual provides essential information for the safe and efficient installation, operation, and maintenance of your new string lights. Please read these instructions thoroughly before use and retain them for future reference.
Información de seguridade
- Asegúrese de que todos os compoñentes estean conectados de forma segura antes do uso.
- Do not attempt to modify or disassemble the solar panel or light bulbs.
- Manteña o panel solar e as luces lonxe de chamas abertas ou fontes de calor extremas.
- Avoid submerging the solar panel or light string in water. While weatherproof, prolonged submersion can cause damage.
- Handle glass bulbs with care to prevent breakage.
- Monte o panel solar nun lugar que reciba luz solar directa para unha carga óptima.
Contido do paquete
Verifique que todos os elementos que se indican a continuación estean incluídos no seu paquete:
- 1 x 27-foot cord with 12 sockets
- 1 x Solar panel with ground stake and wall mount accessories
- 12 x 2W S14 LED bulbs
- 1 x Manual de usuario (este documento)

Imaxe: Máis deview of the Mr. Beams S14 Bulb Solar LED String Lights, showing the string of lights and the separate solar panel unit.
Instalación
1. Colocación de paneis solares
The solar panel must be placed in a location that receives a minimum of 6-8 hours of direct sunlight daily for optimal charging. Avoid shaded areas from trees, buildings, or other obstructions.
- Instalación de estacas terrestres: Attach the ground stake to the solar panel unit. Insert the stake firmly into soft ground, ensuring the panel faces the sun.
- Instalación de montaxe en parede: Use the provided wall mount accessories to secure the solar panel to a vertical surface. Adjust the angle of the panel to maximize sun exposure.

Image: A close-up of the solar panel unit, demonstrating its adjustable angle and the ground stake attachment for flexible positioning.
2. String Light Setup
Once the solar panel is positioned, connect the string light cord to the solar panel. Carefully hang or drape the 27-foot string lights in your desired outdoor area, such as decks, patios, porches, or gazebos. The cord has 12 sockets with a 1.7-foot spacing between each, covering an 18.11-foot lighted area.
- Ensure the bulbs are securely screwed into their sockets.
- Use appropriate hooks, clips, or ties (not included) to secure the string lights along walls, railings, or other fixtures.
- Avoid excessive tension on the string to prevent damage.
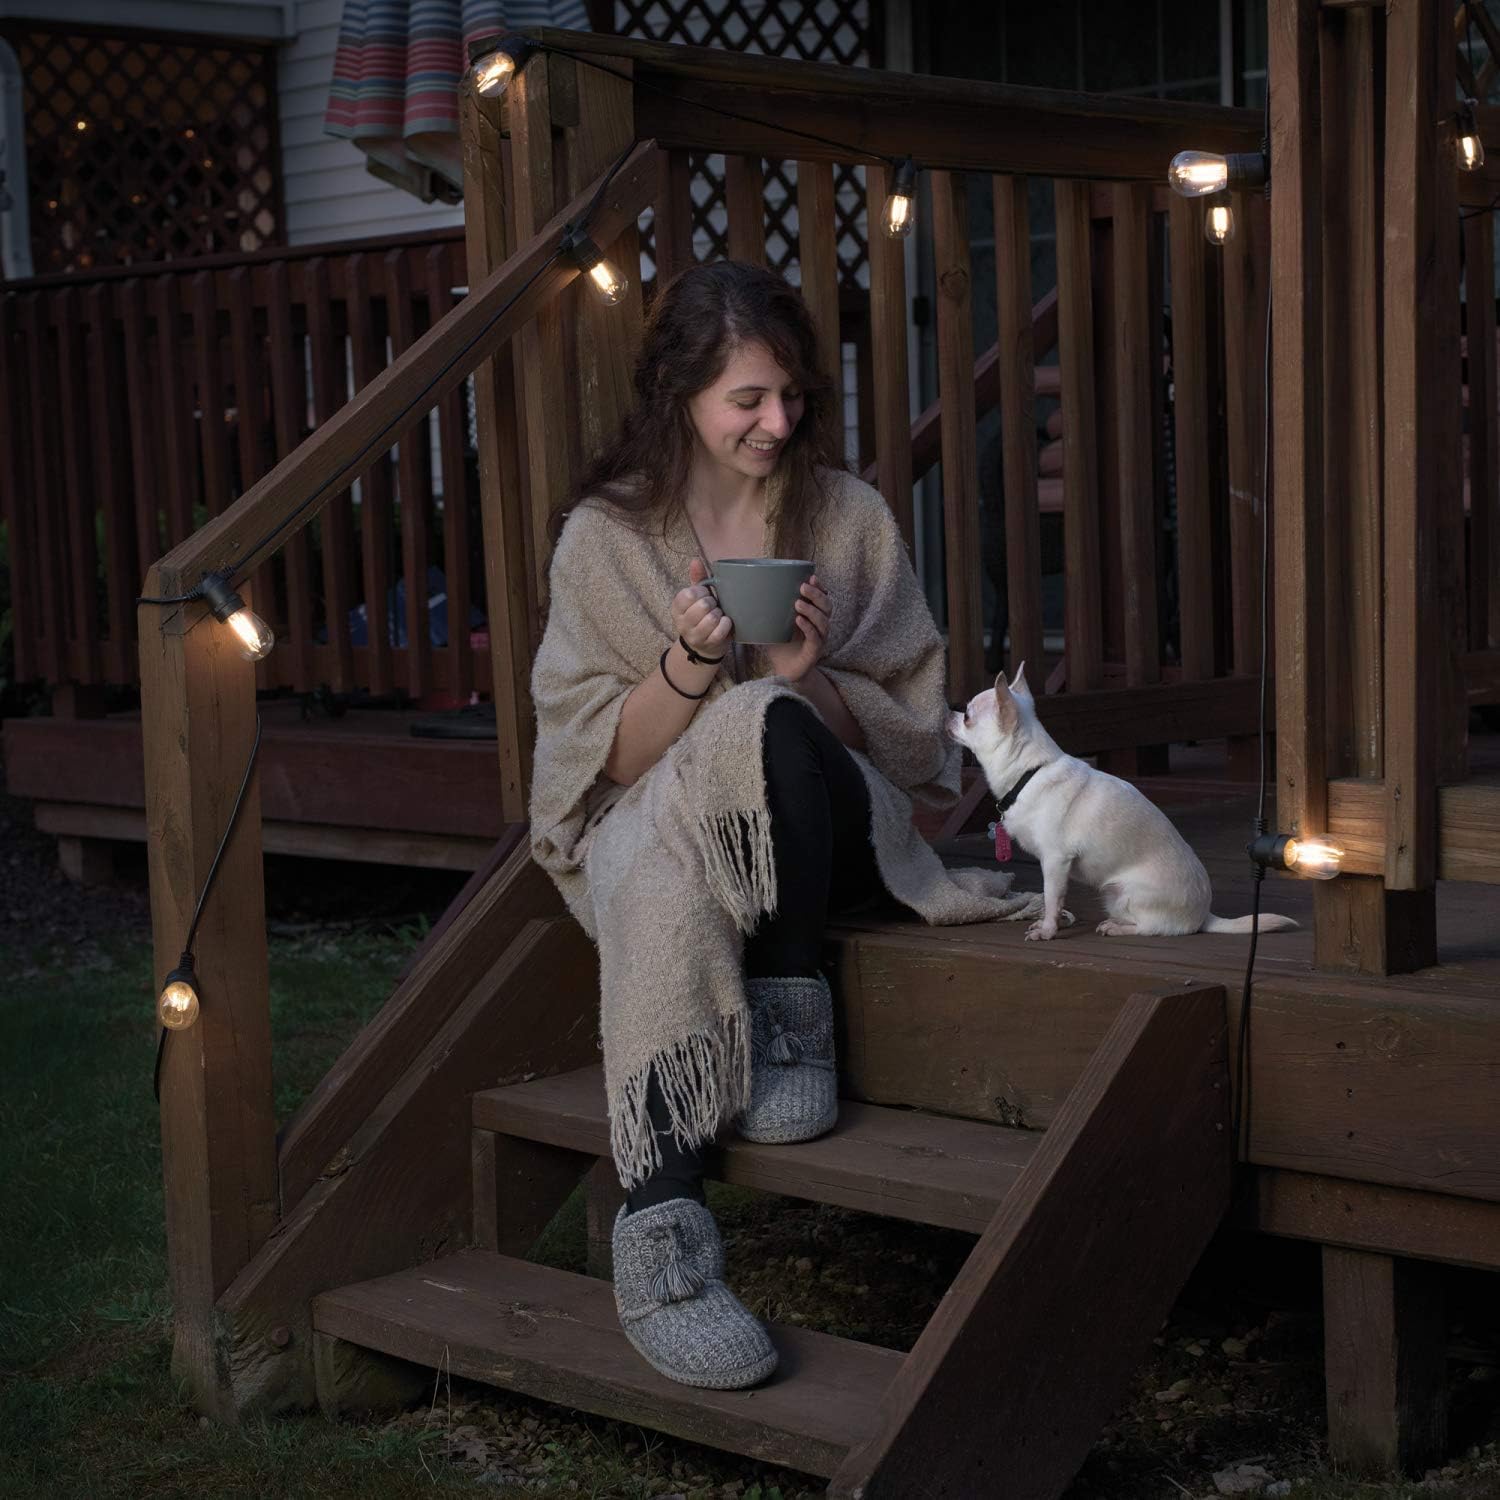
Image: Mr. Beams string lights draped along a wooden deck railing, illustrating a typical installation scenario for outdoor ambiance.
Operación
The Mr. Beams Solar LED String Lights are designed for automatic operation. After an initial full charge, the lights will automatically turn on at dusk and turn off at dawn, provided the solar panel receives sufficient sunlight during the day.
- Carga inicial: Allow the solar panel to charge for at least 24-48 hours in direct sunlight before first use to ensure the internal battery is fully charged.
- Botón de encendido: Locate the power button on the back of the solar panel. Ensure it is in the 'ON' position for automatic operation.
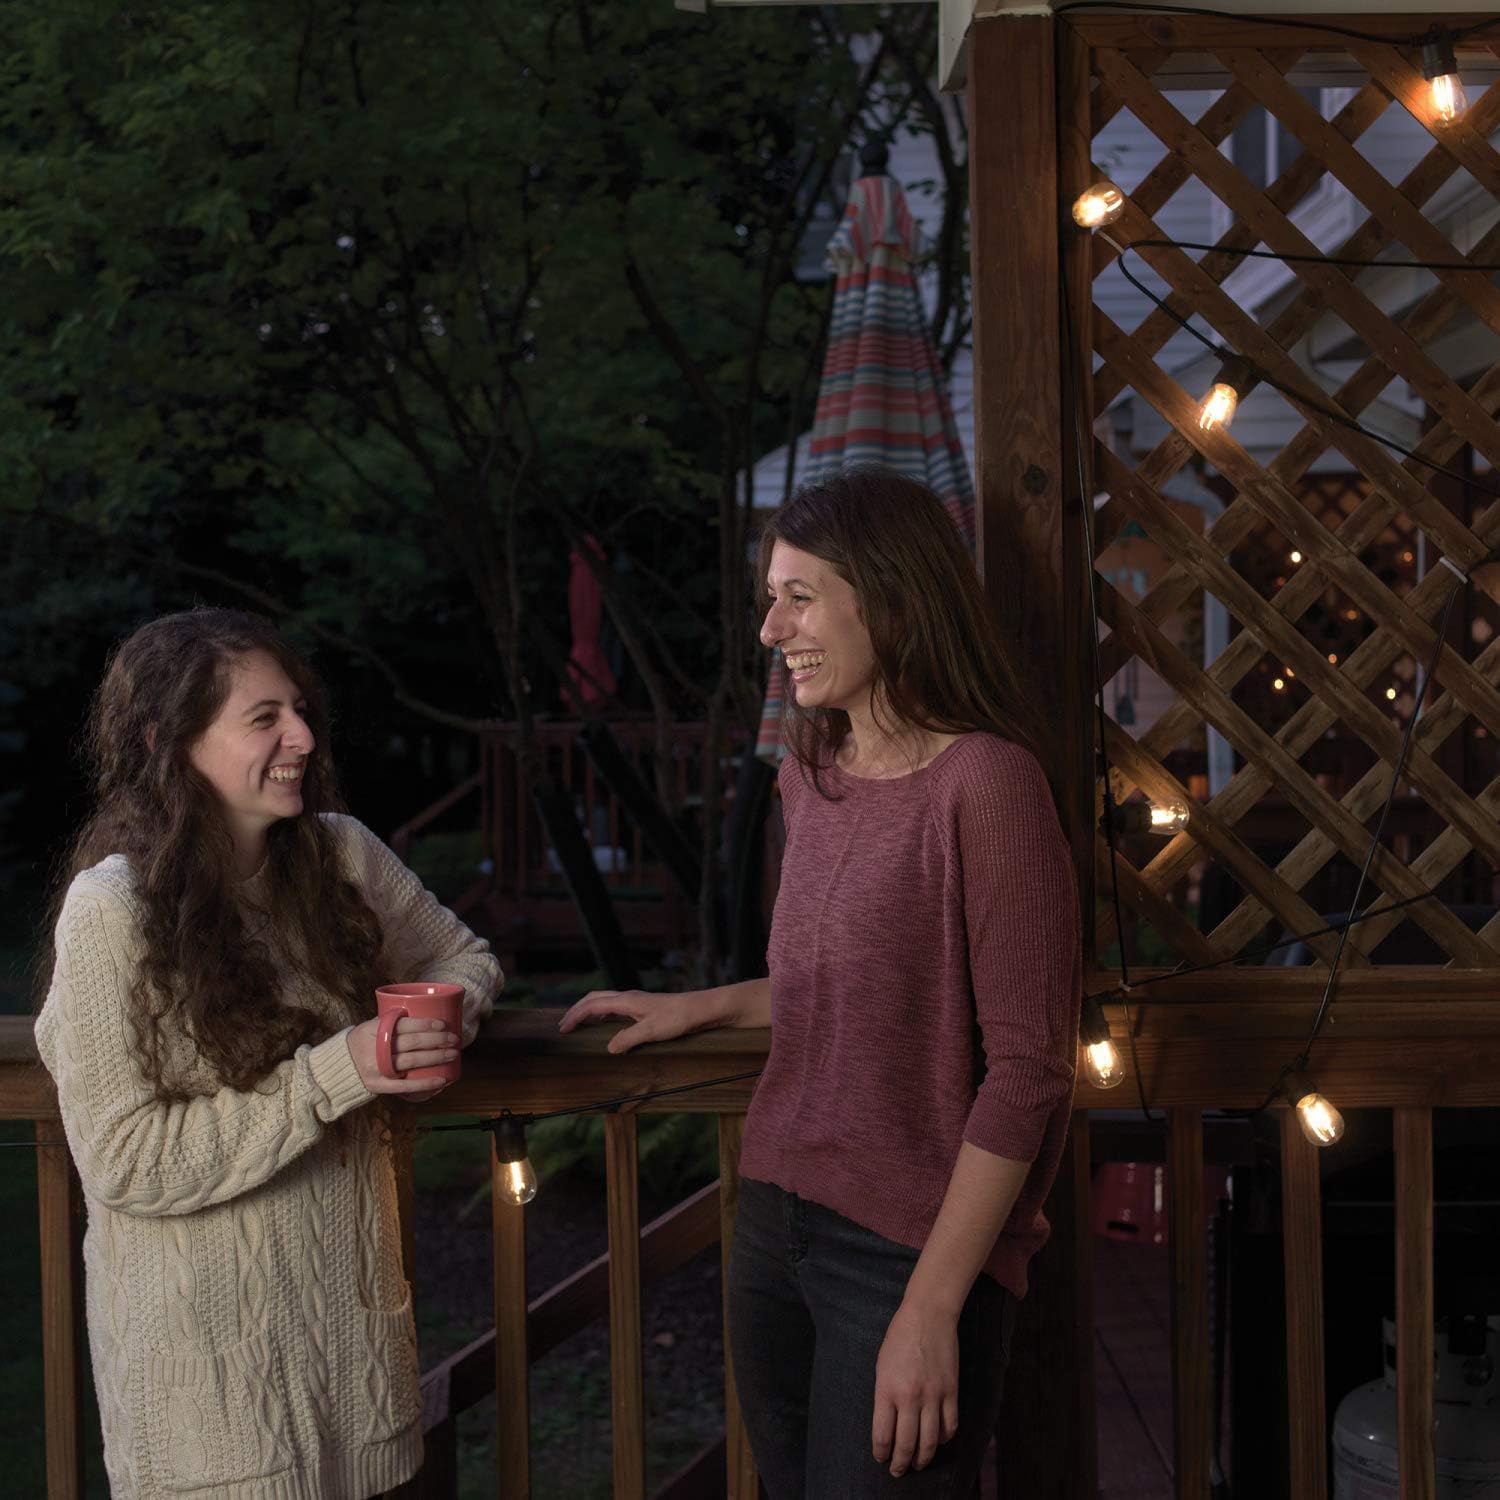
Image: The Mr. Beams S14 string lights glowing warmly on a deck at night, demonstrating their operational state and the ambiance they create.
Mantemento
1. Limpeza
Regular cleaning ensures optimal performance and longevity of your lights.
- Panel solar: Limpe periodicamente a superficie do panel solar cun pano suave eamp cloth to remove dust, dirt, or debris that may obstruct sunlight absorption.
- Bulbs and Cord: Gently clean the bulbs and cord with a soft, dry cloth. Avoid using harsh chemicals or abrasive materials.
2. Substitución da lámpada
The string lights use standard S14 LED bulbs. If a bulb needs replacement:
- Ensure the solar panel is turned off or covered to prevent the lights from activating.
- Carefully unscrew the faulty S14 bulb from its socket.
- Screw in a new S14 LED replacement bulb, ensuring it is snug but not overtightened.
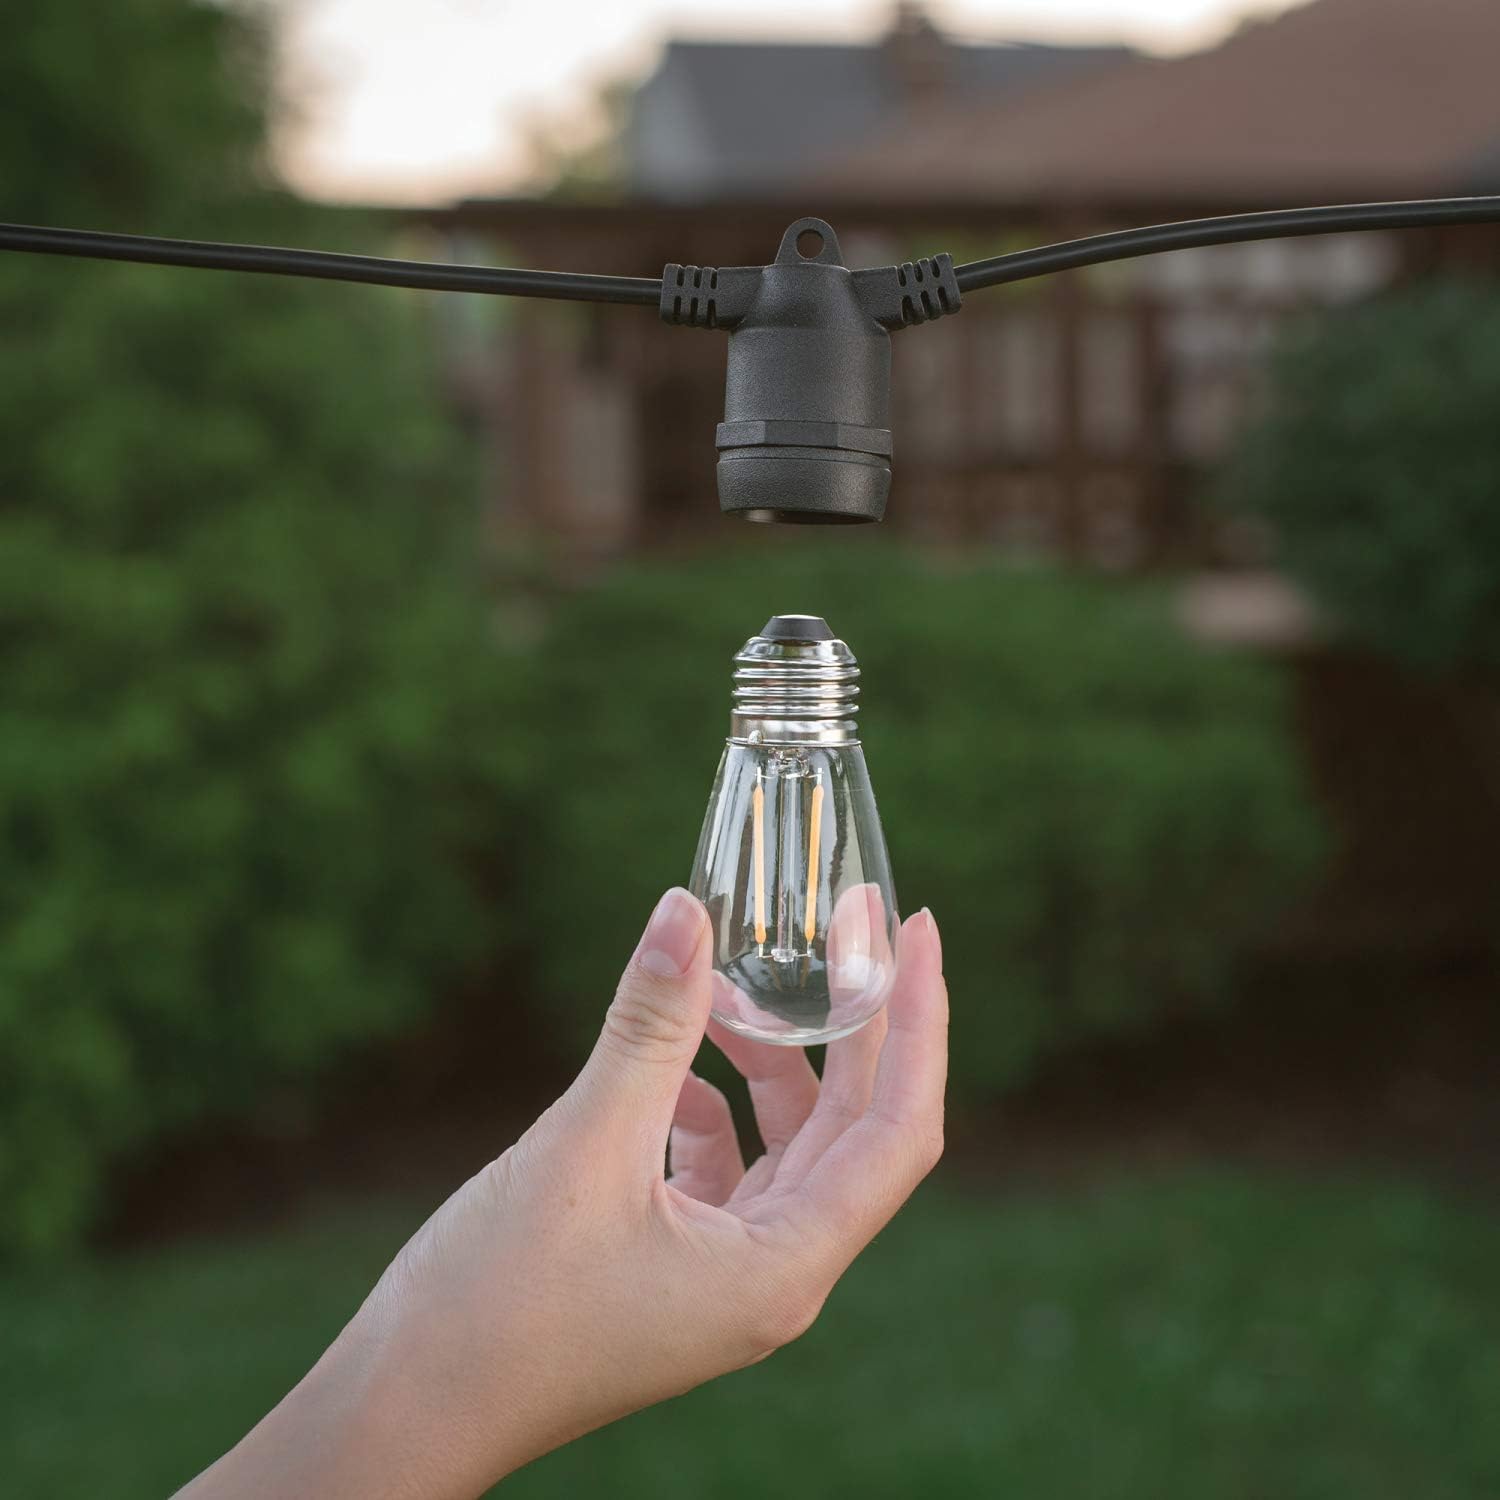
Image: A hand holding an S14 LED bulb, positioned next to an empty socket on the string light cord, illustrating the bulb replacement process.
Resolución de problemas
| Problema | Causa posible | Solución |
|---|---|---|
| As luces non se acenden pola noite. | Solar panel not receiving enough sunlight. Battery not charged. Power switch is OFF. | Relocate solar panel to a sunnier spot. Allow 24-48 hours for initial charge. Ensure power switch on solar panel is in the 'ON' position. |
| Lights are dim or only stay on for a short time. | Insufficient solar charge due to cloudy weather or partial shading. Dirty solar panel. | Ensure solar panel is clean and receives full direct sunlight. Battery may need replacement after extended use (contact support). |
| Individual bulb not lighting up. | Lámpada solta ou defectuosa. | Tighten the bulb in its socket. If still not working, replace the bulb with a new S14 LED bulb. |
| As luces parpadean. | Conexión solta ou carga baixa da batería. | Check all bulb connections. Ensure solar panel is charging effectively. |
Especificacións
- Lonxitude do cable: 27 pés
- Número de tomas: 12
- Espazo das lámpadas: 1.7 feet between each bulb
- Lighted Area: 18.11 pés
- Tipo de lámpada: LED S14
- Bombilla Wattage: 0.6 watts per bulb (2W equivalent)
- Lúmenes totais: 1080 lumens (90 lumens per bulb)
- Fonte de enerxía: Solar panel with rechargeable battery
- Clasificación meteorolóxica: IP65 (suitable for outdoor use year-round)
- Pilas necesarias: Yes (internal rechargeable battery)
- Montaxe necesaria: No (minor setup for solar panel and hanging lights)
Garantía e Soporte
Mr. Beams Solar LED String Lights come with a standard one-year protection against defects. This warranty can be extended to two years with product registration on the official Mr. Beams websitio.
For technical support, warranty claims, or further assistance, please visit the official Mr. Beams websitio ou póñase en contacto co seu departamento de atención ao cliente.


