1. Introdución e información de seguridade
Thank you for choosing the AL-KO Highline 51.9 SP-H Petrol Lawn Mower. This manual provides essential instructions for the safe and efficient operation, maintenance, and troubleshooting of your new lawn mower. Please read this manual thoroughly before initial use and keep it for future reference.
1.1 Advertencias xerais de seguridade
- Le o Manual: Lea e comprenda sempre todo o manual de instrucións antes de operar a máquina.
- Equipos de protección individual (EPI): Wear appropriate safety gear, including sturdy footwear, long trousers, and hearing protection.
- Mantéñase claro: Ensure that other persons, especially children and pets, are kept at a safe distance from the operating area.
- Manexo de combustible: Handle fuel with extreme care. Petrol is highly flammable. Refuel outdoors and do not smoke while refueling.
- Operación de pendente: Exercise extreme caution when operating on slopes. Mow across the face of slopes, never up and down.
- Inspección: Before each use, inspect the machine for damaged parts, loose fasteners, or fuel leaks.
2. Produto rematadoview
The AL-KO Highline 51.9 SP-H is a robust petrol lawn mower designed for efficient lawn care. It features a 51 cm cutting width, a powerful 3.2 kW engine, and a self-propelled drive system for effortless operation. Key functionalities include central cutting height adjustment, mulching, and side discharge.
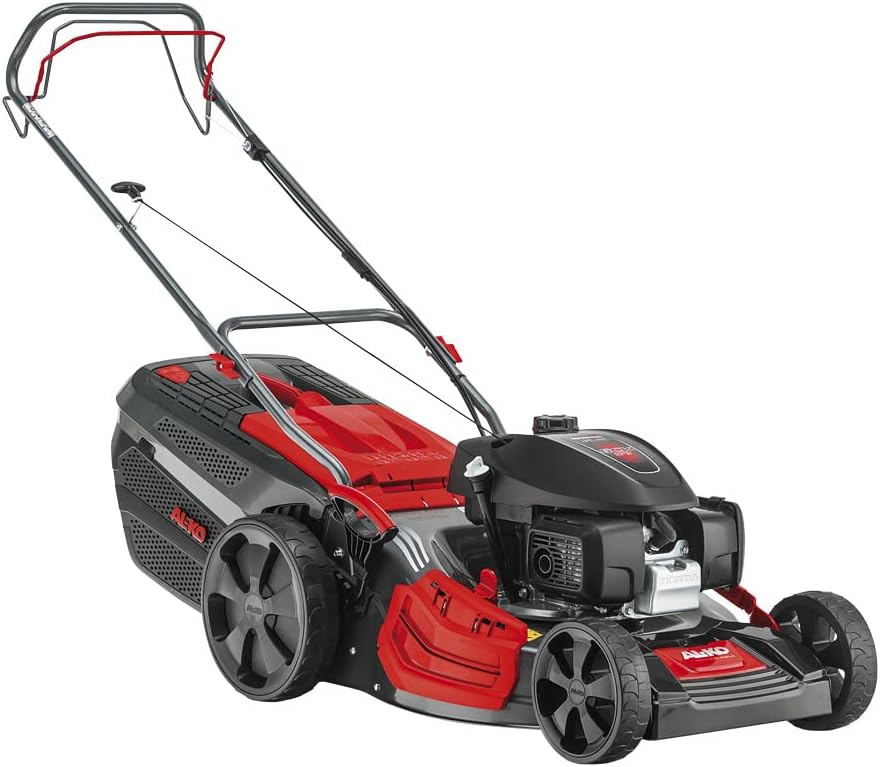
Figure 2.1: AL-KO Highline 51.9 SP-H Petrol Lawn Mower, front-side view.
2.1 Características principais
- Ancho de corte: 51 cm for efficient coverage of large areas.
- Potencia do motor: 3.2 kW for reliable performance.
- Autopropulsado: Wheel drive for reduced effort during operation.
- Axuste central da altura de corte: Easy adjustment from 30 mm to 80 mm.
- 4INONE Function: Mowing, catching, mulching, and side discharge capabilities.
3. Configuración e preparación inicial
3.1 Desembalaxe e montaxe
- Retire coidadosamente todos os compoñentes da embalaxe.
- Unfold and secure the handle assembly using the provided fasteners. Ensure all cables are routed correctly and not pinched.
- Assemble the grass catcher according to the instructions and attach it to the mower.

Figure 3.1: Mower showing the 4INONE function label, indicating versatility.
3.2 Comprobacións iniciais e repostaxe
- Aceite de motor: Before first use, check the engine oil level. If necessary, add suitable 4-stroke engine oil up to the 'MAX' mark on the dipstick. Refer to the engine manual for oil specifications.
- Combustible: Fill the fuel tank with fresh, unleaded petrol (minimum 95 RON). Do not overfill. Ensure the fuel cap is securely tightened.
- Buxía: Verify that the spark plug cable is securely connected to the spark plug.
4. Instrucións de funcionamento
4.1 Arranque e parada do motor
- Comezo: Ensure the spark plug cable is connected. Push the primer bulb (if equipped) 3-5 times. Hold the engine brake lever (safety bar) against the handle. Pull the starter cord firmly until the engine starts.
- Parando: Release the engine brake lever. The engine will stop automatically.
4.2 Axuste da altura de corte
The cutting height can be centrally adjusted using a single lever. This mower offers 7 cutting height positions from 30 mm to 80 mm.
- Ensure the engine is switched off and the blade has stopped rotating.
- Locate the central cutting height adjustment lever, typically on the side of the mower deck.
- Tire da palanca cara a fóra e móvaa ata o axuste de altura desexado. Solte a palanca para bloqueala na posición.

Figura 4.1: Lateral view of the mower, illustrating its profile and handle position.
4.3 Técnicas de sega
- Para obter mellores resultados, corta a herba cando estea seca.
- Avoid cutting more than one-third of the grass height at a time.
- Overlap each pass slightly to ensure an even cut.
- Change mowing direction regularly to prevent matting of the grass.
4.4 Función de mulching
The mulching function finely chops grass clippings and returns them to the lawn as natural fertilizer. To engage mulching:
- Retire o colector de herba.
- Insert the mulching plug into the discharge opening.
- Ensure the mulching plug is securely in place before starting the engine.
4.5 Side Discharge Function
For areas with very tall grass where catching is not desired, the side discharge function can be used.
- Remove the grass catcher and mulching plug.
- Attach the side discharge chute to the side opening of the mower deck.
- Ensure the chute is securely attached before operation.

Figure 4.2: Illustration of MAXAIRFLOW technology, enhancing grass collection and mulching performance.
5. Mantemento
Regular maintenance ensures the longevity and optimal performance of your AL-KO lawn mower. Always switch off the engine, disconnect the spark plug cap, and allow the engine to cool before performing any maintenance.
5.1 Despois de cada uso
- Limpeza: Clean the mower deck, grass catcher, and wheels of grass clippings and dirt. Use a brush or a damp cloth. Do not use high-pressure cleaners.
- Inspección: Check for any loose screws, nuts, or damaged parts. Tighten or replace as necessary.
5.2 Coidado da lámina
The cutting blade should be inspected regularly for wear, damage, or imbalance. A dull or damaged blade can lead to an uneven cut and increased engine strain.
- Afiado: Have the blade sharpened by a qualified service technician.
- Substitución: Replace severely damaged or unbalanced blades with genuine AL-KO spare parts.
5.3 Mantemento do motor
Refer to the separate engine manual for detailed maintenance schedules and procedures for the engine components.
- Filtro de ar: Limpar ou substituír o filtro de aire regularmente, especialmente en lugares con moito po.
- Buxía: Inspect and clean the spark plug annually. Replace if worn.
- Cambio de aceite: Change the engine oil after the first 5 operating hours, then annually or every 50 operating hours.
5.4 Almacenamento
- Limpar a cortacésped a fondo.
- Drain the fuel tank or add a fuel stabilizer if storing for more than 30 days.
- Store the mower in a dry, well-ventilated area, protected from frost and direct sunlight.
6 Solución de problemas
This section provides solutions for common issues you might encounter. For problems not listed here or if solutions do not resolve the issue, contact AL-KO customer support or a qualified service center.
| Problema | Causa posible | Solución |
|---|---|---|
| O motor non arranca | No fuel; Spark plug cable loose; Engine brake lever not engaged; Dirty spark plug; Old fuel. | Add fresh fuel; Connect spark plug cable; Hold engine brake lever; Clean/replace spark plug; Drain and refill with fresh fuel. |
| Uneven cutting result | Dull or damaged blade; Incorrect cutting height; Mowing too fast. | Sharpen/replace blade; Adjust cutting height; Mow at a slower pace. |
| Vibración excesiva | Lámina dobrada ou desequilibrada; Parafusos de montaxe do motor soltos. | Inspect and replace blade if bent/unbalanced; Check and tighten all bolts. |
| O motor perde potencia | Dirty air filter; Clogged fuel filter; Low oil level. | Clean/replace air filter; Clean/replace fuel filter; Check and top up oil. |
7. Especificacións técnicas
| Característica | Especificación |
|---|---|
| Modelo | Highline 51.9 SP-H |
| Número de peza | 119884 |
| Potencia do motor | 3.2 kW |
| Ancho de corte | 51 cm |
| Axuste da altura de corte | Central, 7 postos |
| Altura mínima de corte | 30 mm |
| Altura máxima de corte | 80 mm |
| Peso | 36.3 kg |
| Nivel de potencia sonora | 98 dB |
| Material | Aceiro aliado, plástico |
| Tipo de unidade | Self-propelled (wheel drive) |
| Funcións | Mowing, Catching, Mulching, Side Discharge |
8. Garantía e soporte
Your AL-KO Highline 51.9 SP-H Petrol Lawn Mower is covered by a manufacturer's warranty. Please refer to the warranty card included with your product for specific terms, conditions, and duration. Keep your proof of purchase for warranty claims.
8.1 Atención ao cliente
For technical assistance, spare parts, or service, please contact your authorized AL-KO dealer or visit the official AL-KO website for contact information in your region. When contacting support, please have your model number (119884) and serial number ready.


