1. Instrucións de seguridade importantes
Please read all instructions carefully before using the CREATE Mill PRO Coffee and Food Grinder. Retain this manual for future reference.
- Desconecte sempre o aparello da toma de corrente antes de limpar, montar ou desmontar pezas.
- Non mergulle a base do motor en auga nin en ningún outro líquido. Límpiea con aerosol.amp só tea.
- Keep hands and utensils out of the grinding cup during operation to prevent injury and damage to the appliance.
- Ensure the lid is securely in place before operating the grinder.
- Este aparello non está destinado ao uso por parte de persoas con capacidades físicas, sensoriais ou mentais reducidas, ou con falta de experiencia e coñecementos, a menos que reciban a supervisión ou instrucións sobre o uso do aparello por parte dunha persoa responsable da súa seguridade.
- Do not operate the grinder continuously for more than 30 seconds. Allow a short break between grinding cycles to prevent overheating.
- Do not grind hard, oily, or wet ingredients that may damage the blades or motor.
- Store the appliance out of reach of children.
2. Produto rematadoview
The CREATE Mill PRO is a versatile electric grinder designed for coffee beans, spices, nuts, and other dry food items. It features a powerful motor and durable stainless steel blades.

Image 2.1: The CREATE Mill PRO Coffee and Food Grinder, showcasinpolo seu elegante deseño de aceiro inoxidable e a súa tapa transparente.
Compoñentes:
- Base do motor: Contains the motor and power connection.
- Grinding Cups (x2): Stainless steel cups with integrated blades for different grinding tasks. One cup typically has a 4-blade design for general grinding, and the other a 2-blade design for coarser grinding or specific ingredients.
- Transparent Lids (x2): Allow observation of the grinding process.
- Cable de alimentación: Para conectar o aparello a unha toma de corrente.
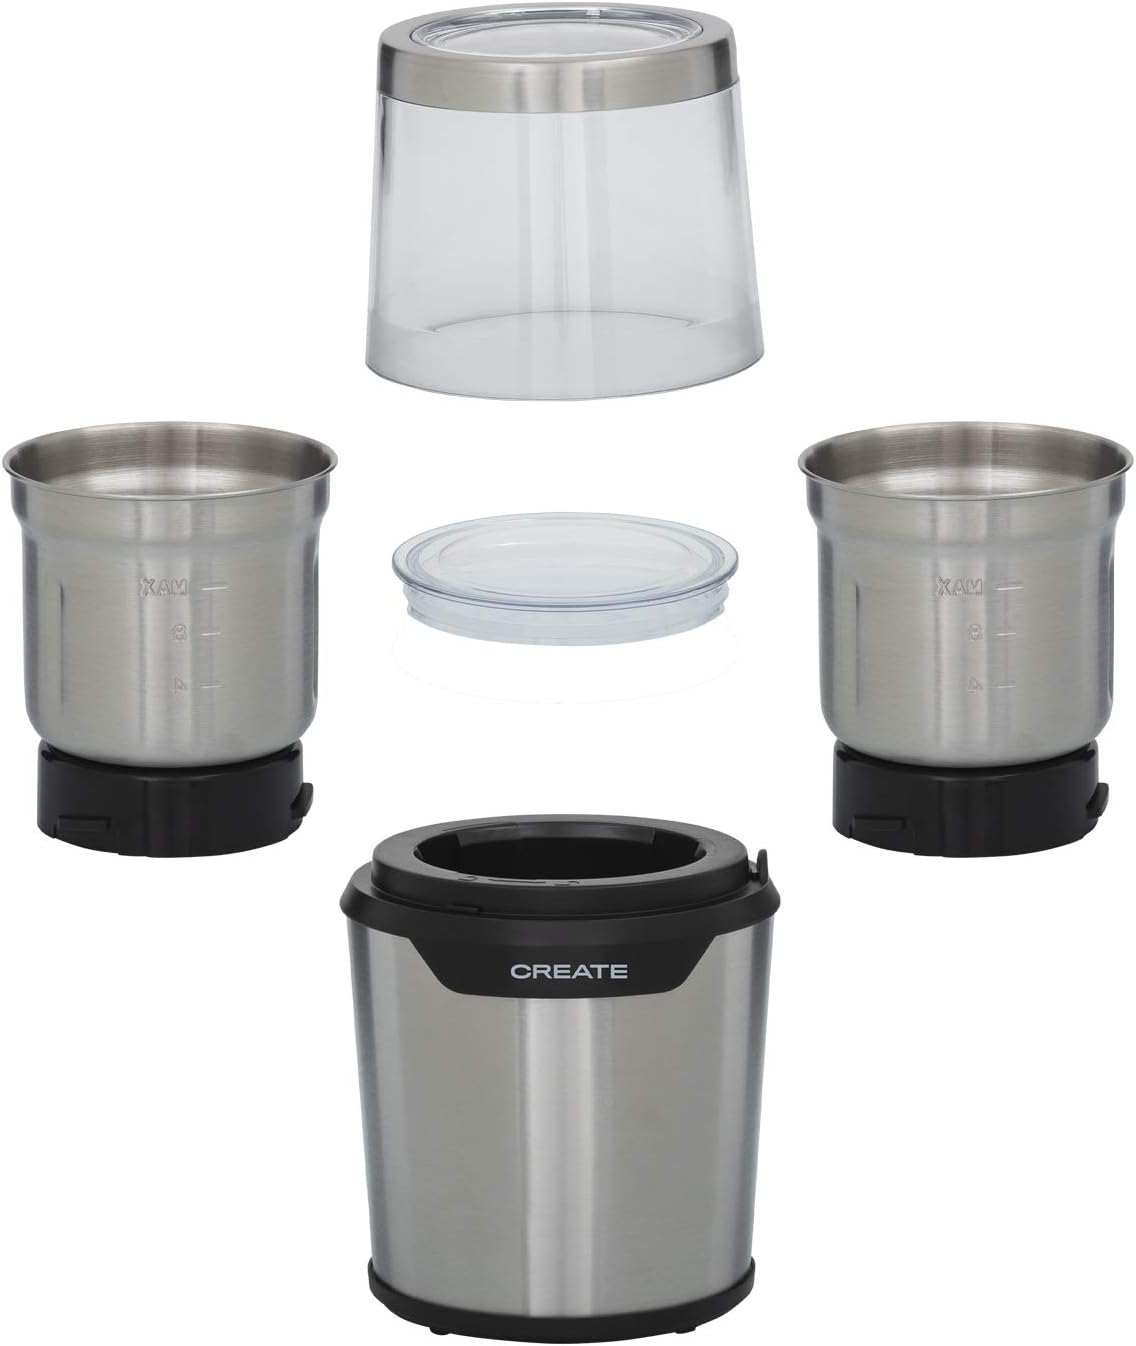
Image 2.2: All components of the CREATE Mill PRO grinder, including the motor base, two grinding cups with different blade types, and two transparent lids.
3. Configuración
- Desempaquetar: Retire coidadosamente todos os compoñentes da embalaxe.
- Limpar: Before first use, wash the grinding cups and lids with warm soapy water, then rinse and dry thoroughly. Wipe the motor base with a damp pano.
- Colocación: Coloque a base do motor sobre unha superficie estable, plana e seca.
- Assemble Grinding Cup: Select the appropriate grinding cup for your task. Ensure it is securely seated onto the motor base. The grinding cup should click into place or fit snugly.

Image 3.1: Illustration of how the grinding cup fits onto the motor base, showing the separate components before assembly.
4. Instrucións de funcionamento
- Engadir ingredientes: Place the desired amount of dry ingredients into the grinding cup. Do not exceed the 'MAX' fill line (approximately 80g capacity). Overfilling can lead to inefficient grinding and potential damage.

Imaxe 4.1: Primeiro plano view of the grinding cup interior, clearly showing the 'MAX' fill line to prevent overfilling.
- Tapa segura: Place the transparent lid onto the grinding cup and twist or press down firmly to ensure it is securely locked. The grinder will not operate if the lid is not properly secured.
- Conectar enerxía: Enchufe o cable de alimentación nunha toma eléctrica estándar.

Image 4.2: The power cord securely plugged into the base of the CREATE Mill PRO grinder.
- Moenda: Press and hold the lid or the designated power button (if present) to start grinding. The grinder operates on a pulse action. For best results, use short bursts (5-10 seconds) and check the consistency through the transparent lid.
- Monitor de progreso: Observe the grinding process through the transparent lid. Release the lid/button to stop grinding.
- Achieve Desired Consistency: Repeat short grinding bursts until the desired consistency is achieved. For very fine grinds, you may need several short cycles.
- Desconectar e retirar: Once grinding is complete, unplug the appliance. Carefully remove the lid, then lift the grinding cup from the motor base.
- Contido baleiro: Pour out the ground ingredients. Use a small brush if necessary to remove any remaining particles.
Tipos de láminas:
The CREATE Mill PRO typically includes two types of grinding cups with different blade configurations:
- 4-Blade Grinding Cup: Ideal for coffee beans, spices, and achieving finer grinds.
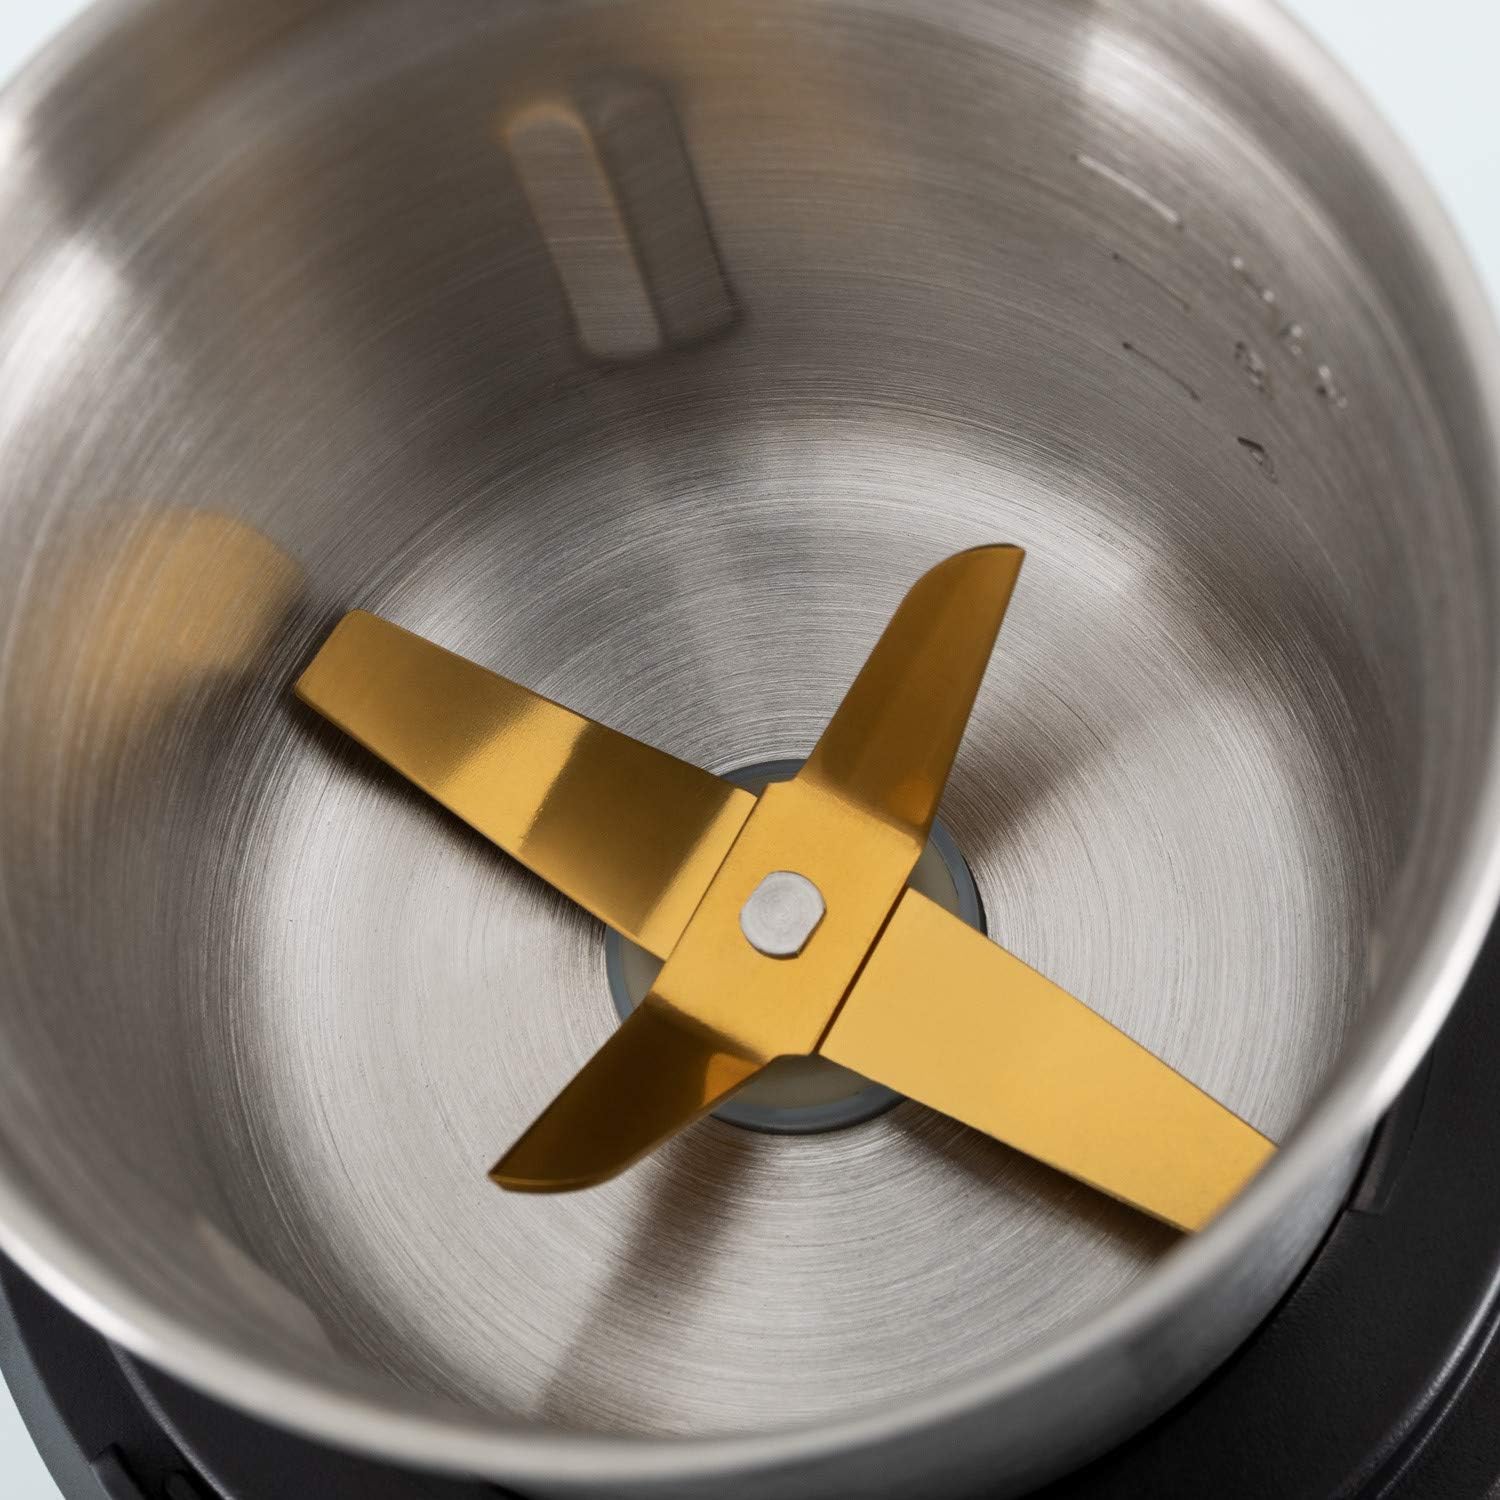
Image 4.3: Close-up of the 4-blade grinding attachment, suitable for fine grinding of coffee and spices.
- 2-Blade Grinding Cup: Suitable for coarser grinding, nuts, or larger food items.

Image 4.4: Close-up of the 2-blade grinding attachment, designed for coarser grinding tasks.
5. Mantemento e Limpeza
Unha limpeza regular garante un rendemento óptimo e prolonga a vida útil do seu moedor.
- Desconectar: Asegúrate sempre de desconectar o moedor da toma de corrente antes de limpalo.
- Clean Grinding Cups and Lids: Remove the grinding cup from the motor base. Wash the grinding cups and lids with warm, soapy water. Use a small brush to remove any stubborn residue from the blades. Rinse thoroughly and dry completely before reassembling or storing.
- Limpar a base do motor: Limpe o exterior da base do motor cun pano suave eamp pano. Non empregue produtos de limpeza abrasivos nin mergulle a base do motor en auga.
- Almacenamento: Store the grinder in a dry place, away from direct sunlight and moisture.
6 Solución de problemas
| Problema | Causa posible | Solución |
|---|---|---|
| O moedor non se acende. |
|
|
| Ingredients are not grinding effectively. |
|
|
| Ruído ou cheiro inusual durante o funcionamento. |
|
|
7. Especificacións
- Marca: CREAR
- Modelo: Mill PRO
- Potencia: 300 W
- Capacidade: 80 gramos
- Voltage: 230V AC (2.3E+2 Volts AC)
- Dimensións: 30.8 x 13 x 12.2 cm (embalaxe)
- Peso: 1.38 kg (Produto)
- Materiais: Stainless Steel, BPA-free plastics
8. Garantía e soporte
The CREATE Mill PRO Coffee and Food Grinder comes with a standard manufacturer's warranty. Please refer to the warranty card included in your product packaging for specific terms and conditions.
For technical support, troubleshooting assistance, or warranty claims, please contact CREATE customer service through their official website or the retailer where the product was purchased. Keep your proof of purchase for warranty validation.


