1. Introdución
This manual provides detailed instructions for the setup, operation, maintenance, and troubleshooting of your Hikvision DS-7204HUHI-F1/N 4-Channel TurboHD Tribrid Digital Video Recorder (DVR). Please read this manual thoroughly before using the device to ensure proper functionality and safety.
The Hikvision DS-7204HUHI-F1/N is a versatile DVR supporting 4-channel analog video input (HDTVI up to 3MP/1080p30, 720p60, CVBS 960H) and 2-channel IP video input (up to 4MP cameras). This renewed product has been professionally inspected and tested to work and look like new.
2. Contido do paquete
Verifica que todos os elementos estean presentes no teu paquete:
- Hikvision DS-7204HUHI-F1/N DVR Unit
- Adaptador de alimentación
- Rato USB
- Mando a distancia (con pilas)
- BNC Connectors / Power Splitters (for cameras)
- Mounting Screws for HDD (HDD not included)
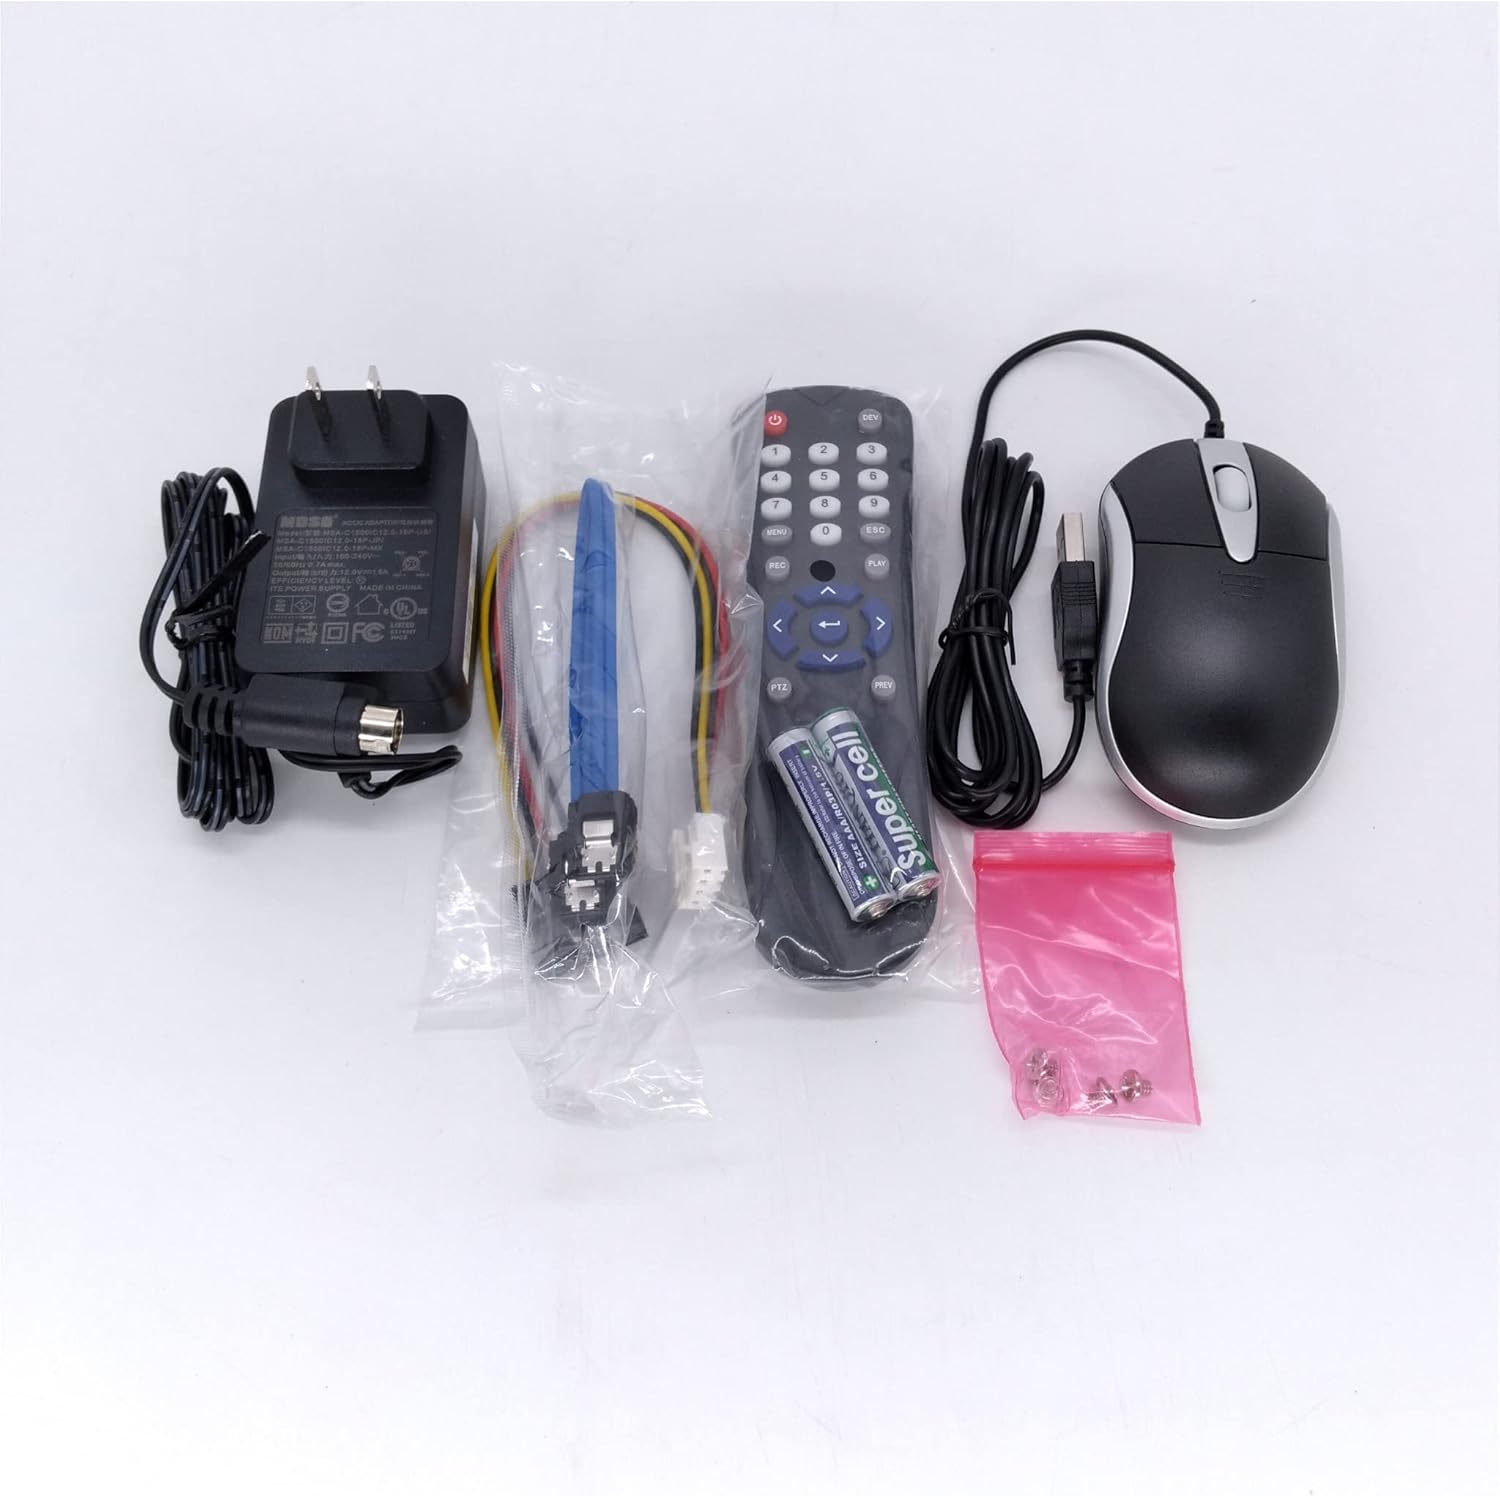
Image 2.1: Included accessories for the DVR system.
3. Configuración
3.1. Conexións físicas
Follow these steps to connect your DVR system. Refer to the provided videos for visual guidance.
- Conectar enerxía: Connect the power supply to the 12V DC Power Input port on the DVR.
- Conectar o rato: Plug the USB mouse into one of the USB input ports on the DVR.
- Conectar ao monitor: Connect the DVR to a monitor using an HDMI cable or a VGA cable.
- Network Connection (for IP Cameras/Remote Access):
- Connect the DVR to your router using an Ethernet cable.
- If using a PoE switch for IP cameras, connect the DVR to the PoE switch via an Ethernet cable.
- Connect the Ethernet cable from the PoE switch to the camera's RJ45 Network Port.
- Camera Connections (Analog Cameras):
- Connect the power input interface of the BNC cable to the power supply of the cameras.
- Connect the video cable to the DVR's video input ports.
- Connect the video cable to the camera's BNC video output and the DC cable to the camera's DC power input.

Imaxe 3.1: Parte dianteira e traseira views of the Hikvision DVR, showing various ports.

Imaxe 3.2: Detallada view of the DVR's rear panel connections.
3.2. Video Guides for Setup
These videos demonstrate the connection process for different camera types:
Video 3.1: Instructions on connecting a PoE camera to a Hiseeu 4K DVR system. This video demonstrates the general setup process for IP cameras with a DVR.
Video 3.2: Instructions on connecting analog cameras to a Hiseeu 4K DVR. This video is relevant for connecting HDTVI/CVBS cameras to your DVR.
4. Funcionamento do DVR
4.1. Initial Setup and Camera Addition
After connecting all hardware, power on the DVR. The system will boot up and display on the connected monitor.
- Menú de acceso: Right-click with the connected USB mouse on the monitor screen to bring up the main menu.
- Navigate to Camera Settings: Select the 'Camera' option from the menu.
- Refresh Camera List: In the 'Camera' interface, click the 'Refresh' button to scan for connected cameras.
- Add Cameras: Once cameras are discovered, click the '+' icon next to each camera to add it to the DVR system.
4.2. En directo View e Reprodución
Once cameras are added, you can view live feeds and access recorded footage.
- En directo View: The main screen will display the live feeds from your connected cameras.
- Reprodución: Access the 'Playback' option from the main menu to review recorded video. A 3.5-inch SATA hard disk drive (HDD) is required for recording and playback functionality.
5. Mantemento
Un mantemento regular garante un rendemento óptimo e unha maior duración do seu sistema DVR.
- Limpeza: Periodically clean the exterior of the DVR with a soft, dry cloth. Ensure ventilation openings are free from dust and obstructions.
- Actualizacións de firmware: Check the official Hikvision US website for available firmware updates. Keeping your firmware updated can improve system stability and add new features.
- Comprobacións de conexión: Regularly inspect all cable connections (power, video, network) to ensure they are secure and free from damage.
- Estado do disco duro: If an HDD is installed, monitor its health through the DVR's system settings. Back up important recordings regularly.
6 Solución de problemas
Esta sección aborda problemas comúns cos que podes atoparte.
- "No Signal" on Monitor:
- Verify that the DVR is powered on and the power adapter is securely connected.
- Check the HDMI or VGA cable connection between the DVR and the monitor.
- Asegúrate de que o monitor estea configurado na fonte de entrada correcta (HDMI/VGA).
- "Camera Offline" or "Network Error":
- Check the Ethernet cable connection between the DVR/PoE switch and the router.
- Verify the Ethernet cable connection between the PoE switch and the camera.
- Asegúrate de que a cámara estea a recibir enerxía.
- In the DVR's 'Camera' settings, try clicking 'Refresh' to rediscover cameras.
- No Recording/Playback:
- Confirm that a 3.5-inch SATA HDD is installed in the DVR.
- Check the HDD status in the DVR's 'Storage' settings. The HDD may need to be initialized or formatted.
- Difficulty Installing HDD: Some renewed units may have chassis screws that are difficult to remove. If you encounter this, contact support for assistance. Do not force screws as this may damage the unit.
7. Especificacións
| Característica | Detalle |
|---|---|
| Número de modelo | DS-7204HUHI-F1/N |
| Entrada de vídeo analóxico | 4-channel (HDTVI up to 3MP/1080p30, 720p60, CVBS 960H) |
| Entrada de vídeo IP | 2-channel (up to 4MP cameras supported) |
| Soporte de disco duro | 3.5 inch SATA drive required for recording (HDD not included) |
| Tecnoloxía de conectividade | BNC, Ethernet |
| Dispositivos compatibles | Cámaras |
| Peso do elemento | 4.44 libras |
| Dimensións do paquete | 19.2 x 11.7 x 3.2 polgadas |
8. Garantía
This Hikvision DVR is a renewed product and is covered by the Garantía renovada de Amazon. If you are not satisfied with your purchase, renewed products are eligible for replacement or refund under this guarantee. Additionally, the product includes a US warranty from Hikvision.
9. Apoio
For technical assistance or inquiries, please utilize the following resources:
- Asistencia de Estados Unidos: This product comes with US support from Hikvision. Refer to the official Hikvision US websitio para información de contacto.
- Soporte por correo electrónico: You may also contact support via email at Love@Hiseeu.com.


