1. Introdución
This manual provides essential instructions for the safe and effective operation of your Vastar Industrial Endoscope Inspection Camera. Please read this manual thoroughly before use and retain it for future reference. This device is designed for non-destructive inspection in hard-to-reach areas, offering clear visual feedback on its integrated display.
2. Produto rematadoview
2.1 Compoñentes
- Main Endoscope Unit with 4.3-inch LCD Screen
- Flexible Camera Probe (5m/16.4ft) with 6 Adjustable LED Lights
- Cable de carga USB
- Accessory Kit (Hook, Magnet, Mirror)
- Manual de usuario
2.2 Características principais
- Visualización: 4.3-inch Full-Color IPS HD LCD Screen
- Resolución: Supports 1920x1080P for images and videos
- Diámetro da cámara: 5.5mm ultra-thin lens
- Clasificación impermeable: IP67 for camera probe and lens
- Iluminación: 6 luces LED axustables na sonda da cámara
- Batería: 3000mAh rechargeable battery, providing 5-7 hours of working time
- Cable: Rigid yet flexible cable for easy maneuverability
- Almacenamento: Supports Micro SD card (not included) for photo and video recording
- Durabilidade: Silicone design for anti-collision and drop resistance

Figure 1: Vastar Industrial Endoscope main unit, flexible probe, and included accessories.

Figure 2: Detailed specifications of the endoscope's cable, lens, resolution, and waterproof rating.
3. Configuración
3.1 Carga do dispositivo
Before first use, fully charge the endoscope unit using the provided USB charging cable. Connect the micro USB end to the device's charging port (usually at the bottom) and the USB-A end to a compatible power adapter (not included).
3.2 Inserting Micro SD Card
To save photos and videos, a Micro SD card (FAT32 format, not included) is required. Locate the Micro SD card slot on the side of the device and insert the card until it clicks into place. Ensure the device is powered off before inserting or removing the card.
3.3 Instalación de accesorios
The endoscope comes with a hook, magnet, and mirror attachment. These can be screwed onto the tip of the camera probe for specific tasks, such as retrieving dropped items or viewen ángulo.

Figure 3: Included accessories: hook, magnet, and mirror, which attach to the camera probe.
4. Instrucións de funcionamento
4.1 Acendido/Apagado
Press and hold the power button (usually located on the side or front panel) for a few seconds to turn the device on. The LCD screen will illuminate. To power off, press and hold the power button again.
4.2 Funcionamento básico
Once powered on, the camera feed will display on the 4.3-inch LCD screen. Use the navigation buttons (up, down, left, right, OK) to interact with the menu and settings.
4.3 Facer fotos e gravar vídeos
- Sacar unha foto: Short press the photo key (usually indicated by a camera icon).
- Gravar vídeo: Long press the photo key to start recording. Long press again to stop recording.
All captured media will be saved to the inserted Micro SD card.
4.4 Axuste das luces LED
The camera probe features 6 adjustable LED lights. Use the scroll wheel or dedicated buttons on the side of the main unit to increase or decrease the brightness of these lights. This helps illuminate dark inspection areas.
4.5 Language and Resolution Settings
Access the device's menu to adjust various settings, including:
- Resolución: Select desired image/video resolution (e.g., 1920x1080, 1280x720, 640x480).
- Idioma: Escolla o seu idioma preferido para a interface.
- Brillo: Axusta o brillo da pantalla.
- Xirar: Rotate the image on the screen.
- Formato: Formatear a tarxeta Micro SD.
- Configuración da hora: Establece a data e a hora.
Video 1: Demonstrates basic operation, including inserting an SD card, taking photos, recording videos, and navigating language and resolution settings.
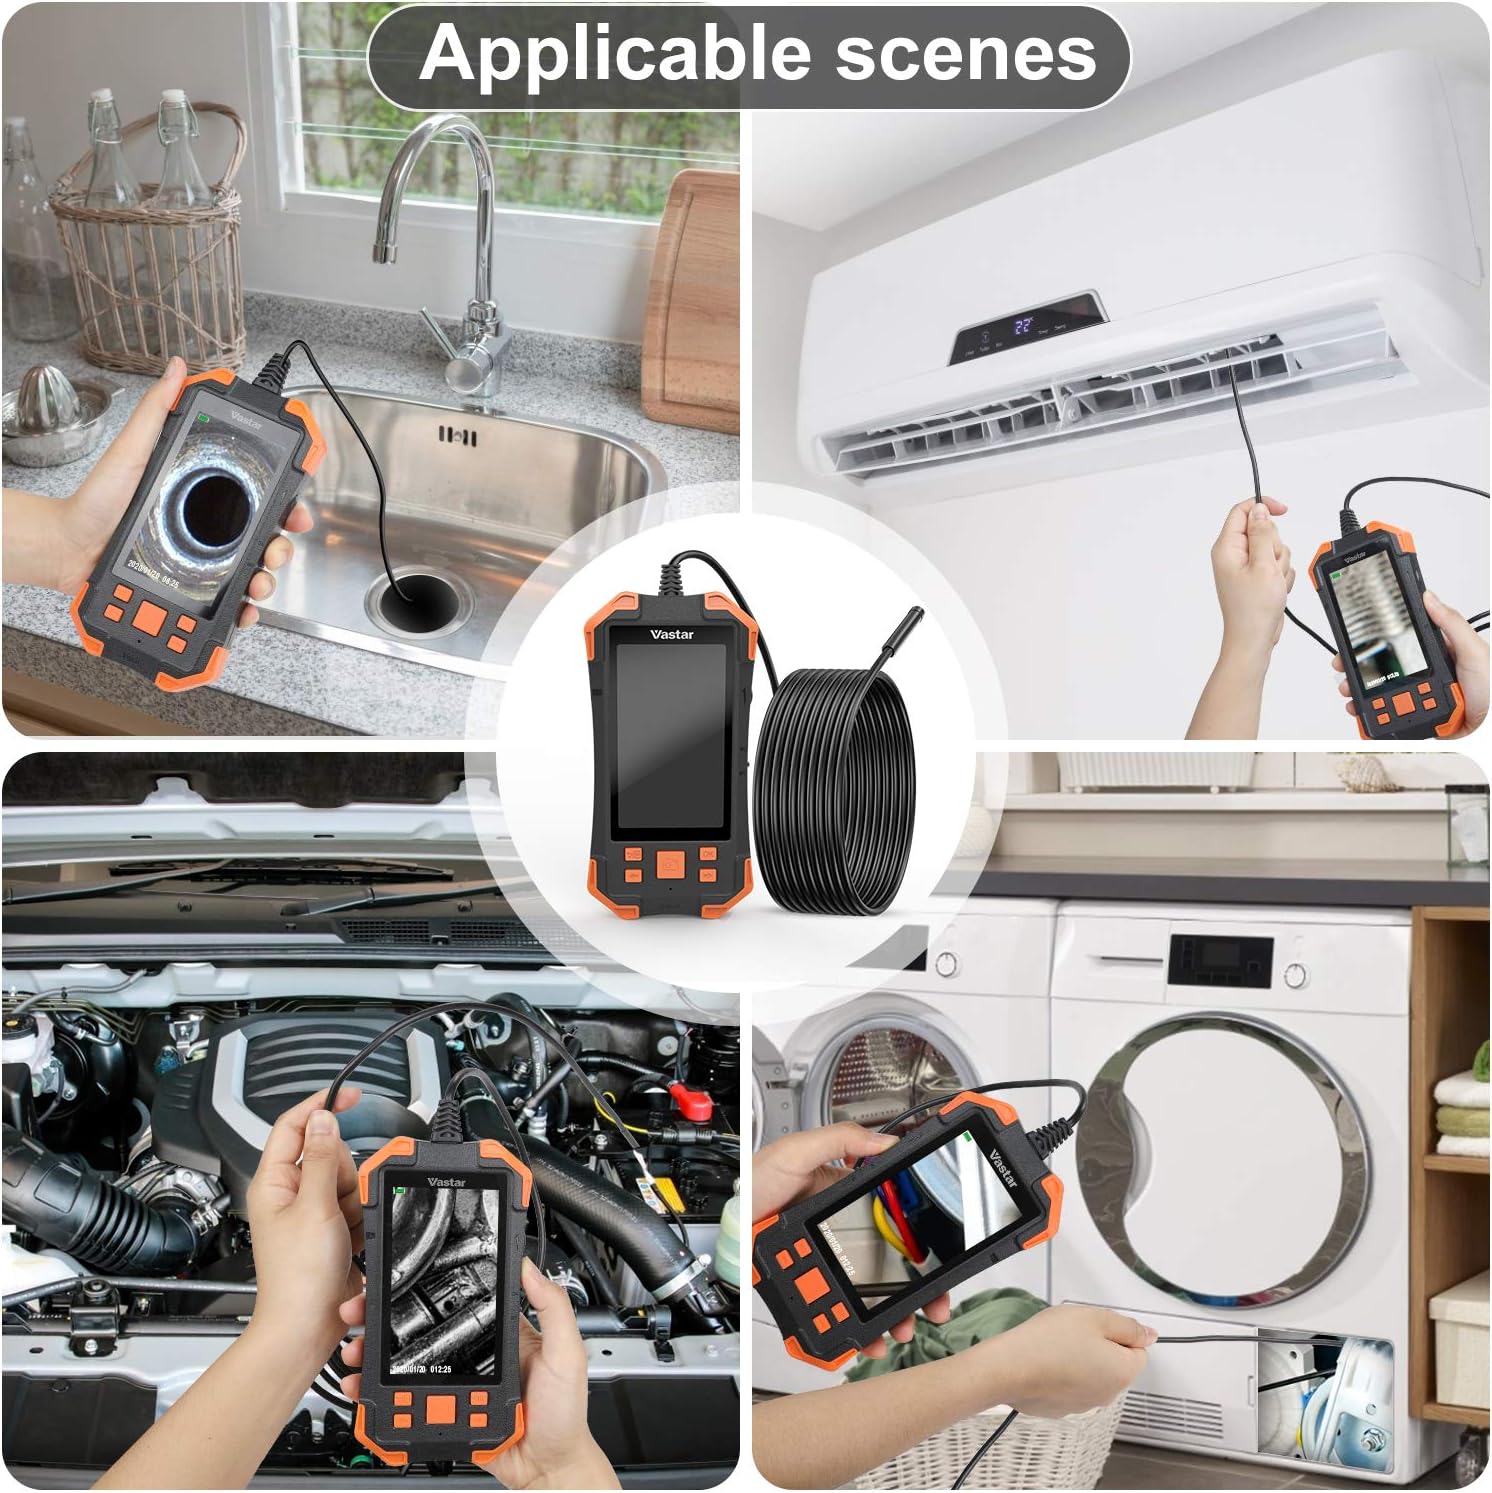
Figura 4: Examples of practical applications for the Vastar Industrial Endoscope, such as inspecting plumbing, HVAC systems, and automotive components.
5. Mantemento
- Limpeza da lente: Use a soft, dry cloth to gently clean the camera lens. For stubborn dirt, a slightly damp cloth can be used, ensuring no liquid enters the main unit.
- Coidado da batería: Para prolongar a duración da batería, evite descargar completamente o dispositivo con frecuencia. Cárgueo regularmente, mesmo se non o usa durante períodos prolongados.
- Almacenamento: Store the endoscope in a cool, dry place away from direct sunlight and extreme temperatures. Ensure the camera probe is coiled neatly to prevent damage.
- Sonda impermeable: While the camera probe is IP67 waterproof, the main unit is not. Avoid submerging the main unit in water.
6 Solución de problemas
- Sen enerxía: Ensure the device is fully charged. Check the USB charging cable and adapter.
- Imaxe borrosa: The optimal focal area is 1.5 cm to 5 cm from the object. Adjust the distance. Ensure the lens is clean. Adjust LED brightness to avoid overexposure.
- Cannot Save Photos/Videos: Ensure a Micro SD card is inserted and formatted correctly (FAT32). Check for sufficient storage space.
- Screen Pixelation: The screen resolution is 480*272P, while the camera can capture higher resolutions. Adjust camera resolution in settings for optimal viewgravación ou gravación.
- As luces LED non funcionan: Check the brightness adjustment wheel/buttons.
7. Especificacións
| Característica | Especificación |
|---|---|
| Mostrar | 4.3-inch IPS HD LCD Screen (480*272P) |
| Resolución de captura de vídeo | 1080p (1920x1080), 1280x720, 640x480 |
| Diámetro da cámara | 5.5 mm |
| Lonxitude do cable | 5 metros (16.4 pés) |
| Clasificación de impermeabilidade (sonda) | IP67 |
| Luces LED | 6 LEDs axustables |
| Capacidade da batería | 3000 mAh recargable |
| Tempo de traballo | 5-7 horas |
| Best Focal Area | 1.5 centímetros - 5 centímetros |
| Tipo de medios | Micro SD Card (FAT32 format) |
| Peso do elemento | 1.23 libras |
| Dimensións do paquete | 9.06 x 5.04 x 2.52 polgadas |
8. Garantía e soporte
For warranty information and customer support, please refer to the documentation included with your product or contact Vastar customer service directly. Keep your purchase receipt for warranty claims.


