Introdución
This manual provides essential information for the safe and efficient operation, installation, and maintenance of your OLMO 9,000 BTU 230V Ductless Mini Split Air Conditioner & Heat Pump. This system is designed to provide high-performance heating and cooling, suitable for various spaces including bedrooms, offices, and compact living areas. Please read this manual thoroughly before installation and use, and retain it for future reference.
Información de seguridade
Instrucións de seguridade importantes:
- Asegúrese sempre de que a unidade estea debidamente conectada á terra.
- Do not attempt to install or service the unit yourself. Requírese unha instalación profesional.
- Turn off all power to the unit before performing any maintenance or cleaning.
- Manteña a zona arredor da unidade exterior libre de obstáculos para garantir un fluxo de aire axeitado.
- Non introduza os dedos nin obxectos na entrada/saída de aire.
- Se o cable de alimentación está danado, debe substituílo o fabricante, o seu axente de servizo ou persoas similares para evitar riscos.
- Este aparello non está pensado para o seu uso por persoas (incluídos nenos) con capacidades físicas, sensoriais ou mentais reducidas, ou con falta de experiencia e coñecementos, a menos que teñan supervisión ou instrucións sobre o uso do aparello por unha persoa responsable da súa seguridade.
Proposición 65 Advertencia: Este produto pode expoñelo a produtos químicos, incluído o chumbo, que o Estado de California sabe que causa cancro e defectos de nacemento ou outros danos reprodutivos. Para máis información vai a www.P65Warnings.ca.gov.
Contido do paquete
Verifique que todos os compoñentes estean presentes e non presenten danos ao desembalar:
- Indoor Wall Mount Air Handler Unit
- Unidade condensadora exterior
- 16FT Insulated Copper Line Set
- 16FT Communication Cable
- 16FT Drainage Extension
- Control remoto
- Small accessories for installation

Figure 1: Included components of the OLMO Mini Split System.
Configuración e instalación
Nota: This is not a DIY system. Professional installation by a qualified HVAC technician is required to ensure proper function, safety, and warranty validity. The condenser comes pre-charged with refrigerant.
Comprobacións previas á instalación:
- Ensure the installation location for both indoor and outdoor units meets clearance requirements for proper airflow and maintenance access.
- Verify that the electrical supply matches the unit's requirements (230V for this model). A dedicated power source is recommended.
- Confirm the integrity of the pre-charged line set and all included accessories.
Instalación terminadaview (for Professional Reference):
- Mount the indoor unit securely on the wall, ensuring proper drainage slope.
- Position the outdoor condenser unit on a stable, level surface, away from obstructions.
- Connect the insulated copper line set between the indoor and outdoor units. Ensure proper flaring and torque.
- Connect the communication cable and drainage extension.
- Evacuate the system using a vacuum pump to remove air and moisture from the refrigerant lines.
- Open the valves on the outdoor unit to release the pre-charged refrigerant into the system.
- Connect the unit to the dedicated electrical circuit.
- Perform a leak check and test run to ensure proper operation.

Figure 2: The complete OLMO Mini Split System.
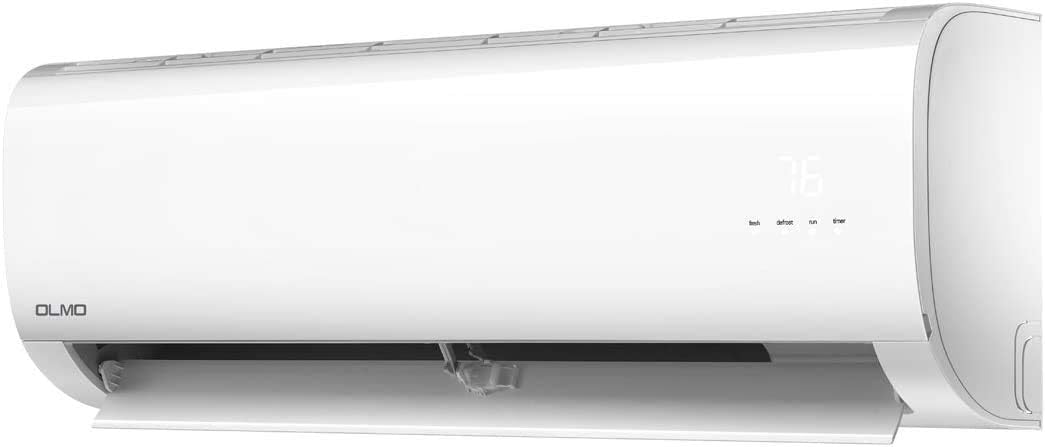
Figure 3: Indoor Unit of the OLMO Mini Split System.

Figure 4: Outdoor Condenser Unit of the OLMO Mini Split System.
Instrucións de funcionamento
Your OLMO Mini Split system offers various modes and features for optimal comfort. All functions are controlled via the included remote control.

Figure 5: Remote Control for the OLMO Mini Split System.
Operación básica:
- Encendido/apagado: Preme o ON/OFF botón para iniciar ou parar a unidade.
- Selección de modo: Preme o MODO botón para percorrer os modos dispoñibles:
- Cool: Para arrefriar a habitación.
- Calor: Para quentar a habitación (función de bomba de calor).
- Secar (deshumidificar): To reduce humidity.
- Fan: Fai circular o aire sen quentar nin arrefriar.
- Automático: Automatically selects mode based on room temperature.
- Axuste de temperatura: Usa o TEMP ▲/▼ para configurar a temperatura desexada.
- Velocidade do ventilador: Preme o FAN button to adjust fan speed (Auto, Low, Medium, High).
- Louver Auto Swing: Activates automatic vertical louver movement for even air distribution.
Características avanzadas:
- Comfortable Sleep Mode: Adjusts temperature automatically during sleep for energy efficiency and comfort.
- Función de temporizador: Configura a unidade para que se acenda ou apague automaticamente a unha hora especificada.
- Autodiagnóstico: The unit can perform self-diagnosis and display error codes on the LED display.
- Intelligent Pre-heating: In heating mode, the unit pre-heats before blowing air to prevent cold drafts.
- Auto Restart Function: A unidade reiníciase automaticamente coa configuración anterior despois dun corte de enerxíatage.
- Pantalla LED: Provides real-time temperature and status information.

Figure 6: The OLMO Mini Split System providing comfort in a living space.
Mantemento
Regular maintenance ensures optimal performance and longevity of your OLMO Mini Split system. Always disconnect power before performing maintenance.
Limpeza do filtro de aire:
- The indoor unit features washable filters.
- Abra o panel frontal da unidade interior.
- Retire os filtros de aire.
- Limpa os filtros cun aspirador ou lávaos con auga morna e un deterxente suave.
- Deixe que os filtros sequen completamente antes de volvelos colocar.
- Limpar os filtros cada dúas semanas ou con máis frecuencia dependendo do uso e da calidade do aire.
Mantemento da unidade exterior:
- Keep the area around the outdoor unit clear of debris, leaves, and snow.
- Limpe periodicamente a serpentina exterior cun cepillo suave ou un aspirador para eliminar a sucidade e o po.
- Ensure the drainage outlet is not blocked.
- For detailed cleaning and professional checks, it is recommended to schedule annual maintenance with a qualified technician.
Resolución de problemas
Before contacting technical support, please refer to the following common issues and solutions:
| Problema | Causa posible | Solución |
|---|---|---|
| A unidade non se acende. | No power supply; Remote control batteries dead. | Check circuit breaker; Replace remote control batteries. |
| Refrixeración/quecemento insuficiente. | Dirty air filters; Obstruction to airflow; Incorrect mode setting; Low refrigerant. | Clean air filters; Remove obstructions; Select correct mode; Contact professional for refrigerant check. |
| Ruído insólito. | Loose parts; Fan obstruction; Unit not level. | Check for loose parts; Clear fan area; Ensure unit is level. If noise persists, contact support. |
| Fuga de auga da unidade interior. | Tubaxe de drenaxe atascada; instalación incorrecta. | Clear drain pipe; Contact professional for inspection. |
Especificacións
Detailed technical specifications for the OLMO 9,000 BTU 230V Mini Split System:
| Característica | Detalle |
|---|---|
| Nome da marca | ELM |
| Información do modelo | Alpic |
| Número de modelo do artigo | OS-EL09ALP230V |
| Dimensións do produto | 48 x 40 x 40 polgadas (gastos de envío) |
| Capacidade de refrixeración | 9,000 BTU |
| Capacidade de calefacción | Heat Pump Functionality |
| Voltage | 230 voltios |
| Índice de eficiencia enerxética estacional (SEER) | 16.5 |
| Heating Seasonal Performance Factor (HSPF) | 9.4 |
| Tipo de instalación | Sistema dividido |
| Refrixerante | R 410A |
| Características especiais | LED Display, Defrost, Heating, Inverter Technology, Louver Auto Swing, Remote Included, Comfortable Sleep Mode, Multiple Fan Speeds, Timer, Self Diagnosis, Intelligent Pre-heating, Auto Restart Function |
| Cor | Branco |
| Fonte de enerxía | Eléctrico con cable |
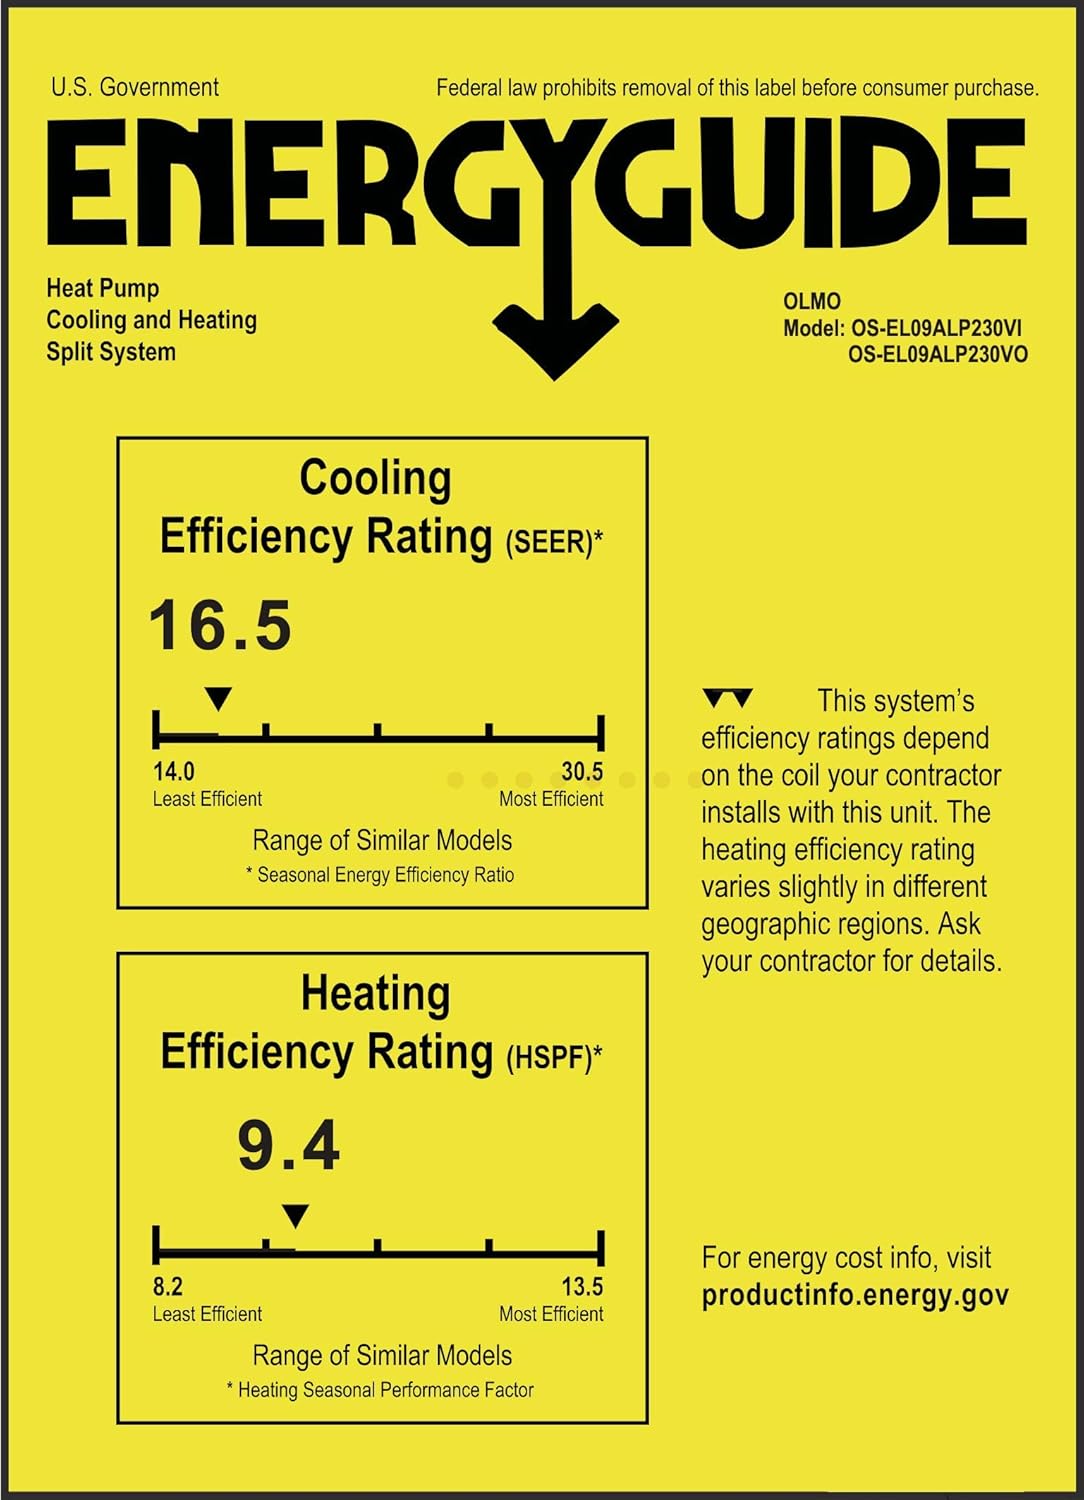
Figure 7: EnergyGuide Label for OLMO Mini Split System.

Figure 8: Comprehensive Technical Specifications Table for OLMO Mini Split Systems.
Garantía e Soporte
OLMO provides US-based technical support for your product. If you encounter any issues or require assistance with your mini split system, please contact our support team. Professional installation is required for warranty validity.
For support, please refer to the contact information provided with your purchase documentation or visit the official OLMO websitio.


