1. Introdución
The Watts BT-D03 RF is a wireless digital room thermostat designed for precise temperature control in various heating and cooling installations. It features a backlit LCD screen and operates via 868 MHz radio frequency communication. This manual provides comprehensive instructions for the proper installation, operation, and maintenance of your thermostat.

Figura 1: Fronte view of the Watts BT-D03 RF Thermostat, showing the display and control buttons.
2. Información de seguridade
- Lea atentamente todas as instrucións antes da instalación e operación.
- Installation should only be performed by a qualified electrician or heating engineer.
- Asegúrese de desconectar a fonte de alimentación antes de realizar calquera cableado ou mantemento.
- Non expoña o dispositivo a temperaturas extremas, humidade ou luz solar directa.
- Manteña o dispositivo lonxe dos nenos.
3. Contido do paquete
Verifica que todos os compoñentes estean presentes no paquete:
- Watts BT-D03 RF Wireless Digital Room Thermostat
- Soporte de mesa
- Parafusos de montaxe e tacos de parede
- Manual de usuario
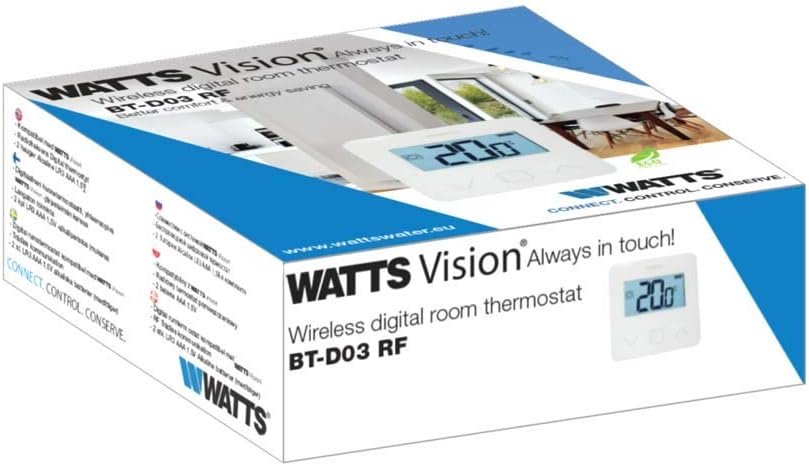
Figure 2: Product packaging of the Watts BT-D03 RF Thermostat.
4. Produto rematadoview
4.1 Compoñentes
- Pantalla LCD: Backlit screen showing temperature, battery level, and operating status.
- Botóns de control: Up, Down, and OK/Menu buttons for navigation and setting adjustments.
- Sensores internos: For detecting ambient room temperature.
- External Sensor Port: For optional NTC 10 kOhm external sensor (not included).
- Indicador LED: Shows active heating/cooling signal.
- Internal Reset Button: For quick RF pairing or system reset.
- Zumbador: Provides audible feedback for certain operations.

Figura 3: Fronte detallada view of the thermostat display.

Figura 4: Atrás view of the thermostat, showing battery compartment and mounting points.
4.2 Dimensións
The physical dimensions of the thermostat are provided below for installation planning.
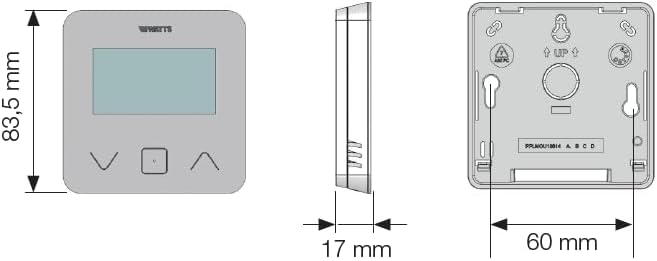
Figure 5: Dimensional drawing of the Watts BT-D03 RF Thermostat.
5. Configuración
5.1 Instalación da batería
- Remove the back cover of the thermostat.
- Insira dúas pilas AAA, asegurándose da polaridade correcta.
- Volva colocar a tapa traseira.
5.2 Opcións de montaxe
The thermostat can be installed in two ways:
- Montaxe na parede: Use the provided screws and wall plugs to secure the thermostat to a wall at an appropriate height (typically 1.5 meters from the floor).
- Colocación de mesa: Attach the included stand to the back of the thermostat for placement on a flat surface.

Figure 6: Thermostat with tabletop stand attached.
5.3 RF Pairing
To establish wireless communication with the receiver unit (sold separately), follow the pairing instructions provided with your receiver. The thermostat features an internal reset button for quick RF pairing, typically requiring a short press during the receiver's pairing mode.
6. Instrucións de funcionamento
6.1 Acendido/Apagado
The thermostat powers on automatically upon battery insertion. There is no dedicated on/off button for the thermostat unit itself; it remains active as long as batteries are present.
6.2 Axuste de temperatura
Use the Up and Down buttons to adjust the desired setpoint temperature. The LCD will display the current setpoint during adjustment.
6.3 Modos de visualización
You can choose to display either the detected ambient temperature or the currently set temperature on the LCD. Refer to the full installation parameters mode for configuration details.
6.4 Keypad Lock (PIN Code)
To prevent unauthorized changes, the keypad can be locked using a PIN code. This feature is particularly useful for installations in public areas. Consult the advanced settings menu for PIN code setup and activation.
6.5 Detección de ventá aberta
The thermostat includes an open window detection feature. When a sudden drop in temperature is detected, the thermostat can temporarily suspend heating/cooling to conserve energy. This function can be configured in the settings.
6.6 Proportional Band Setting (PWM)
The thermostat supports proportional band setting (PWM) or configurable institutions (0.2÷3) for precise control of heating/cooling systems. This advanced setting allows for fine-tuning the system's response to temperature changes.
7. Mantemento
7.1 Substitución da batería
When the battery charge level indicator on the LCD shows low power, replace the two AAA batteries promptly to ensure continuous operation. Follow the battery installation steps in Section 5.1.
7.2 Limpeza
Clean the thermostat's exterior with a soft, dry cloth. Do not use abrasive cleaners, solvents, or spray directly onto the device.
8 Solución de problemas
- Sen visualización: Comprobe a instalación e o nivel de carga das baterías. Substitúa as baterías se é necesario.
- No Communication with Receiver: Ensure the thermostat and receiver are within range. Re-perform the RF pairing procedure (Section 5.3).
- Lectura de temperatura incorrecta: Asegúrate de que o termostato non estea exposto á luz solar directa, a correntes de aire ou a fontes de calor.
- O teclado non responde: Check if the keypad lock (PIN Code) is active. Unlock the keypad as per instructions.
8.1 Función de reinicio
If the thermostat is not functioning as expected, an internal reset button can be used. Consult the full installation parameters mode for specific reset procedures, as this may clear custom settings.
9. Especificacións técnicas
| Marca | vatios |
| Número de modelo | BT-D03-RF-GT |
| Dimensións do produto (L x W x H) | 6.2 x 1.7 x 8.35 cm |
| Peso do elemento | 0.18 g |
| Voltage | 230 Volts (for connected system, thermostat is battery powered) |
| Fonte de enerxía | Alimentado por batería |
| Tipo de controlador | Control manual |
| Tipo de visualización | LCD |
| Retroiluminación | Si |
| Temperatura de funcionamento | 0 a 40 °C |
10. Información de conformidade
The Watts BT-D03 RF Wireless Digital Room Thermostat complies with the following directives:
- 2014/35/UE
- 2014/30/UE
- 2014/53/UE
- 2011/65/UE
- 2012/19/UE
- 2015/1188/UE


