1. Introdución
Thank you for choosing the ETA Delicca 2 Bread Maker. This appliance is designed to simplify your baking process, allowing you to effortlessly prepare a variety of breads, doughs, jams, and even yogurts. With its 12 pre-defined programs and user-friendly interface, you can enjoy fresh, homemade goods with minimal effort. Please read this manual carefully before first use to ensure safe and optimal operation of your new bread maker.
2. Instrucións de seguridade
- Always ensure the appliance is placed on a stable, flat, heat-resistant surface, away from water and heat sources.
- Do not immerse the bread maker's main unit, cord, or plug in water or any other liquid.
- Keep children and pets away from the appliance during operation, as surfaces can become very hot.
- Unplug the bread maker from the power outlet when not in use, before cleaning, or before adding/removing parts.
- Do not operate the appliance with a damaged cord or plug, or if it has malfunctioned or been damaged in any way.
- Use só accesorios recomendados polo fabricante.
- Never insert hands or utensils into the bread maker during operation.
- Asegúrese de que haxa unha ventilación axeitada arredor do aparello durante o seu uso.
3. Produto rematadoview
Familiarize yourself with the components of your ETA Delicca 2 Bread Maker:

Figura 3.1: The ETA Delicca 2 Bread Maker with its removable bread pan. The control panel is visible on the left, and the main unit features a sleek stainless steel finish.
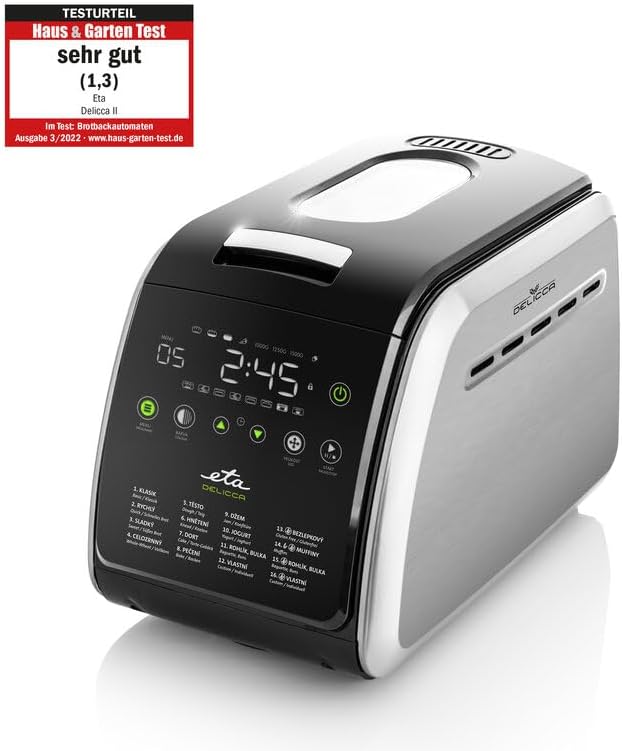
Figura 3.2: The bread maker shown with its essential accessories: two kneading paddles, a measuring cup, and a measuring spoon. These tools are crucial for accurate ingredient measurement and proper dough preparation.

Figura 3.3: Unha sobrecarga view of the bread maker with its lid open, revealing the interior cavity where the bread pan is placed. The heating elements and the mechanism for the kneading paddles are visible at the bottom.
Compoñentes:
- Unidade principal: Alberga o motor, a resistencia e o panel de control.
- Molde para pan: Bandexa antiadherente extraíble para hornear.
- Kneading Paddles: Two paddles for mixing and kneading ingredients.
- Copa medidora: For liquid ingredients.
- Culler medidora: For smaller quantities of ingredients (e.g., yeast, salt).
- Tapa: Cunha viewxanela de cocción para monitorizar o proceso de cocción.
4. Configuración
Primeiro uso:
- Unpack the bread maker and all its accessories. Remove any packaging materials.
- Wash the bread pan and kneading paddles with warm, soapy water. Rinse thoroughly and dry completely.
- Limpar o exterior da unidade principal con publicidadeamp pano. Non use produtos de limpeza abrasivos.
- Before first use, it is recommended to run the 'Bake' program (Program 12) for about 10 minutes without any ingredients to burn off any manufacturing residues. Ensure good ventilation during this process. Allow the unit to cool down completely afterwards.
Colocación:
Place the bread maker on a stable, level, and heat-resistant surface. Ensure there is adequate space around the appliance for ventilation, especially at the back and sides. Do not place it near curtains or flammable materials.
5. Instrucións de funcionamento
Basic Bread Making Steps:
- Insert Kneading Paddles: Place the kneading paddles onto the shafts at the bottom of the bread pan.
- Engadir ingredientes: Add ingredients to the bread pan in the order specified by your recipe (typically liquids first, then dry ingredients, with yeast last and separate from liquids/salt). Ensure accurate measurements using the provided cup and spoon.
- Colocar a bandexa de pan: Insert the bread pan into the main unit, pressing down firmly until it clicks into place. Close the lid.
- Conectar: Connect the power cord to a suitable electrical outlet. The display will light up.
- Seleccionar programa: Use the 'Menu' button to cycle through the 12 pre-defined programs until you reach your desired program.
- Select Loaf Size & Crust Color: Use the 'Loaf Size' and 'Crust Color' buttons to adjust settings according to your recipe and preference.
- Comezo: Press the 'Start/Stop' button to begin the program. The bread maker will automatically mix, knead, rise, and bake.
- Retirar o pan: Once the program is complete, the bread maker will beep. Unplug the appliance. Using oven mitts, carefully remove the bread pan from the unit. Invert the pan to release the bread onto a wire rack to cool. Remove the kneading paddles from the bread if they remain embedded.
Funcións especiais:
- Temporizador de demora: Allows you to delay the start of the baking process for up to 13 hours. Add ingredients, set program, then use the '+' and '-' buttons to set the delay time, and press 'Start/Stop'.
- Manter quente: After baking, the bread maker automatically enters a 60-minute 'Keep Warm' cycle to maintain bread temperature.
- Add Ingredients Signal: For some programs, the bread maker will beep during the kneading cycle to indicate when to add additional ingredients like fruits, nuts, or seeds.

Figura 5.1: The ETA Delicca 2 Bread Maker positioned in a modern kitchen, surrounded by a variety of freshly baked goods, including loaves of bread, cake, and jam, demonstrating its versatility.
6. Guía do programa
The ETA Delicca 2 offers 12 pre-set programs to cater to various baking needs:
| Programa No. | Nome do programa | Descrición |
|---|---|---|
| 1 | Básico | For white and mixed breads, mainly consisting of basic bread flour. |
| 2 | francés | For light breads made from fine flour. Typically results in a crispier crust. |
| 3 | Trigo Integral | For breads containing whole wheat flour, which requires a longer kneading and rising time. |
| 4 | Doce | For breads with high sugar, fats, and protein content. |
| 5 | Sen glute | For gluten-free recipes. These breads often require different kneading and rising conditions. |
| 6 | Cocción rápida | For quick baking of basic bread. Note: May result in a denser texture. |
| 7 | Masa | For preparing doughs for pizza, rolls, or pastries without baking. |
| 8 | Amasar | For kneading dough only, without rising or baking. |
| 9 | Bolo | For mixing and baking cakes and quick breads. |
| 10 | Jam | Para facer marmeladas e marmeladas caseiras. |
| 11 | Iogur | Para preparar iogur caseiro. |
| 12 | Ás | For baking only, without kneading or rising. Useful for additional baking time or pre-made dough. |
7. Mantemento e Limpeza
Unha limpeza regular garante a lonxevidade e o rendemento óptimo da súa panificadora.
Pasos de limpeza:
- Desconecta e refresca: Desconecte sempre a panificadora e déixea arrefriar completamente antes de limpala.
- Bread Pan and Paddles: Remove the bread pan and kneading paddles. Fill the pan with warm, soapy water and let it soak for 10-15 minutes to loosen any stuck-on dough. Use a soft sponge or cloth to clean. Do not use metal scouring pads or abrasive cleaners, as they can damage the non-stick coating. Rinse thoroughly and dry completely.
- Interior: Limpar o interior da cámara de cocción con anunciosamp cloth to remove any crumbs or residue. Do not use excessive water.
- Exterior: Clean the exterior of the bread maker with a soft, damp cloth. For stubborn stains, a mild detergent can be used. Dry thoroughly.
- Almacenamento: Store the bread maker in a clean, dry place once completely dry.
Nota: The bread pan and kneading paddles are not dishwasher safe, as this can damage the non-stick coating.
8 Solución de problemas
Se tes problemas coa túa panificadora, consulta os seguintes problemas e solucións comúns:
| Problema | Causa posible | Solución |
|---|---|---|
| O pan non leveda. | Expired or inactive yeast; incorrect water temperature; too much salt/sugar. | Check yeast expiry; use lukewarm water (38-43°C); ensure correct ingredient measurements. |
| O pan é demasiado denso/pesado | Too much flour; not enough liquid; insufficient kneading. | Measure ingredients precisely; ensure proper program selection for dough type. |
| O pan derrúbase durante a cocción | Demasiado líquido; demasiado fermento; alta humidade. | Reduce liquid slightly; ensure correct yeast amount; adjust recipe for humidity. |
| Kneading paddles stuck in bread | Ocorrencia común. | Carefully remove with a non-metallic utensil after bread cools. |
| A pantalla mostra o código de erro | Overheating; motor overload; sensor issue. | Unplug and let cool for 20-30 minutes. If problem persists, contact customer support. |
9. Especificacións
| Característica | Detalle |
|---|---|
| Marca | ETA |
| Número de modelo | ETA 714990030 |
| Cor | Aceiro inoxidable |
| Dimensións (L x W x H) | 30 x 12.5 x 20 cm |
| Capacidade | Up to 3 pounds (approx. 1.5 kg) |
| Poder | 850 vatios |
| Voltage | 230 voltios |
| Material | Aceiro inoxidable |
| Peso | 7 quilogramos |
| Número de programas | 12 |
10. Garantía e soporte
For warranty information, please refer to the documentation provided at the time of purchase. Keep your proof of purchase for any warranty claims.
If you require technical assistance, have questions about your product, or need to order spare parts, please contact ETA customer support. Contact details can typically be found on the manufacturer's websitio web ou na documentación da súa compra.
Note: Information regarding the availability of spare parts for this model is currently unavailable.


