1. Introdución
This manual provides essential instructions for the safe and effective use of the Yellow Jacket 63329 Crossbar Assembly. Please read this manual thoroughly before installation and operation to ensure proper function and to prevent damage or injury.
2. Información de seguridade
WARNING: Failure to follow these safety instructions may result in injury or damage to the equipment.
- Always wear appropriate personal protective equipment (PPE) such as safety glasses and gloves when handling tools and working with tubing.
- Ensure the crossbar assembly is correctly seated and secured before applying force.
- Do not modify the crossbar assembly. Use only genuine Yellow Jacket replacement parts if necessary.
- Manter os nenos e o persoal non autorizado lonxe da zona de traballo.
3. Produto rematadoview
The Yellow Jacket 63329 Crossbar Assembly is designed for use with specific flaring tools to create precise flares on 3/4" to 7/8" (19-22 mm) tubing. It features a robust construction for durability and reliable performance.
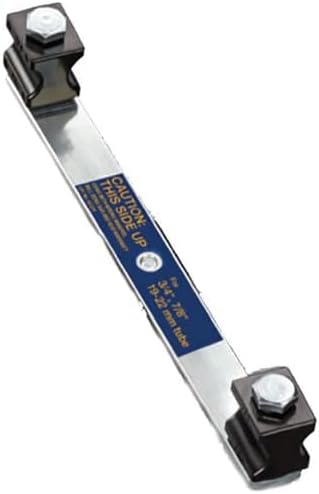
Figure 1: Yellow Jacket 63329 Crossbar Assembly. This image shows the metal crossbar with two black clamping mechanisms at each end, secured by hex bolts. A blue label on the bar indicates "CAUTION: THIS SIDE UP" and specifies tube sizes "3/4" - 7/8" (19-22 mm tube)".
4. Configuración e instalación
- Preparar a tubaxe: Ensure the end of the tubing to be flared is cut squarely and deburred. Clean any debris from the tubing.
- Select Correct Die Block: Identify the appropriate die block for the 3/4" or 7/8" tubing size (not included with crossbar assembly).
- Inserir tubo: Place the tubing into the selected opening of the die block, ensuring it extends slightly above the surface according to the flaring tool's instructions.
- Position Crossbar: Attach the Yellow Jacket 63329 Crossbar Assembly to the die block. Ensure the side labeled "CAUTION: THIS SIDE UP" is facing upwards. The clamping mechanisms on the crossbar should securely hold the die block.
- Montaxe segura: Tighten the bolts on the crossbar assembly to firmly clamp the die block and tubing in place. Do not overtighten, as this can damage the tubing or the tool.
5. Instrucións de funcionamento
Once the crossbar assembly and tubing are securely installed in the flaring tool:
- Align Flaring Cone: Position the flaring cone of your flaring tool directly over the end of the tubing.
- Comezar a ensanchar: Slowly turn the feed screw of the flaring tool, applying steady pressure to form the flare.
- Monitor Flare Formation: Continue turning until the flare is fully formed and makes contact with the flaring cone. Avoid excessive force, which can thin or crack the flare.
- Retract Cone: Reverse the feed screw to retract the flaring cone.
- Remove Tubing: Loosen the crossbar assembly bolts and carefully remove the flared tubing.
- Inspeccionar a bengala: Visually inspect the flare for uniformity, cracks, or imperfections. A properly formed flare is crucial for a leak-free connection.
6. Mantemento
- Limpeza: After each use, wipe down the crossbar assembly with a clean, dry cloth to remove any dirt or debris.
- Almacenamento: Store the crossbar assembly in a dry place, away from corrosive materials and extreme temperatures.
- Inspección: Periodically inspect the bolts and clamping mechanisms for wear or damage. Replace any worn or damaged components with genuine Yellow Jacket parts.
- Lubricación: Lightly lubricate the threads of the clamping bolts with a suitable lubricant if they become stiff.
7 Solución de problemas
| Problema | Causa posible | Solución |
|---|---|---|
| Desbordamento irregular ou rachado | Tubing not deburred; tubing not extending correctly; excessive force; worn flaring cone. | Ensure tubing is deburred and positioned correctly. Apply steady, even pressure. Inspect flaring cone for damage. |
| Tubing slips during flaring | Crossbar bolts not tightened sufficiently; incorrect die block size. | Ensure crossbar bolts are securely tightened. Verify correct die block for tubing size. |
| Difficulty tightening bolts | Dirty or corroded threads; overtightening in the past. | Clean threads and apply light lubricant. Do not overtighten. |
8. Especificacións
- Modelo: Yellow Jacket 63329
- Compatible Tube Sizes: 3/4" to 7/8" (19-22 mm)
- Material: Construción metálica duradeira
- Dimensións aproximadas do paquete: 1.3 x 1.1 x 0.7 polgadas
- Peso aproximado do paquete: 1 libra
9. Garantía e soporte
For warranty information or technical support regarding your Yellow Jacket 63329 Crossbar Assembly, please refer to the official Yellow Jacket websitio web ou póñase en contacto co seu departamento de atención ao cliente. Garde o recibo de compra para reclamacións de garantía.
Yellow Jacket Official Websitio: www.yellowjacket.com


