1. Instrucións de seguridade importantes
- Lea atentamente todas as instrucións antes de usar o aparello.
- Do not immerse the feeder base in water or any other liquid.
- Este aparello está destinado só para uso en interiores.
- Use only dry pet food with a kibble size between 2-15mm (0.08-0.6 inches). Do not use wet food.
- Keep the feeder out of reach of children and pets to prevent tampering.
- Desconecte sempre o alimentador antes de limpalo ou realizar mantemento.
- Ensure the power adapter and cable are not damaged. If damaged, contact customer support.
- Replace the desiccant bag every two weeks to maintain food freshness.
2. Produto rematadoview
The PETLIBRO Automatic Pet Food Dispenser (Model PLAF006) is designed to provide scheduled meals for up to two pets. It features a 5-liter capacity, an adjustable meal splitter, and a dual power supply for reliable operation.

Figura 2.1: Fronte view of the PETLIBRO Automatic Pet Food Dispenser with food in both bowls.
Características principais:
- Dual Pet Feeding: Equipped with an adjustable meal splitter and two stainless steel bowls to feed two pets simultaneously.
- Conservación da frescura: Features a secure twist-lock lid, sealing strip, and a desiccant bag compartment to keep food fresh and crunchy.
- Alimentación programable: Allows setting 1-6 meals daily with up to 50 portions per meal (20ml each portion).
- Chamada de comida personalizada: Record a 10-second voice message to call your pets, playable 0-5 times per meal.
- Fonte de alimentación dual: Operates via a 5V USB adapter with a battery backup system (3 x D batteries, not included) for uninterrupted feeding during power outages.
- Deseño antiatascos: Includes a patented rotor and an infrared sensor to prevent food blockages.
- Easy Monitoring & Cleaning: Transparent window for food level monitoring and detachable components for easy cleaning.
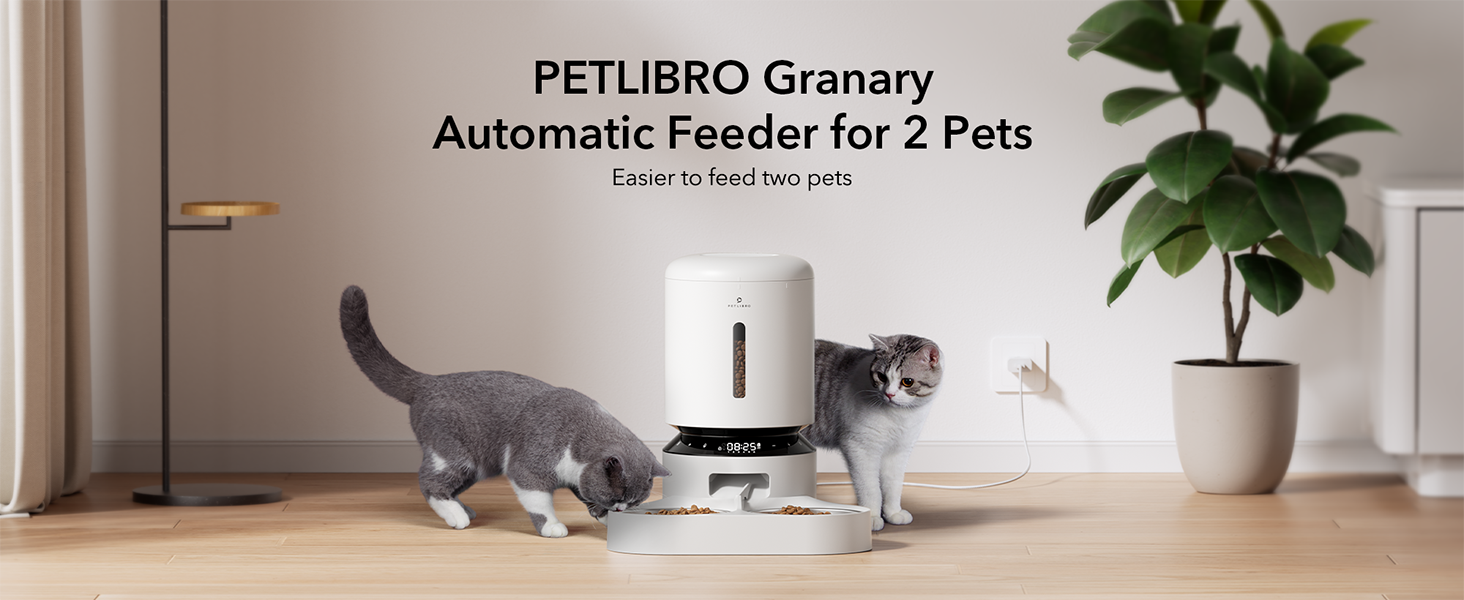
Figure 2.2: The PETLIBRO Granary Automatic Feeder designed for two pets.
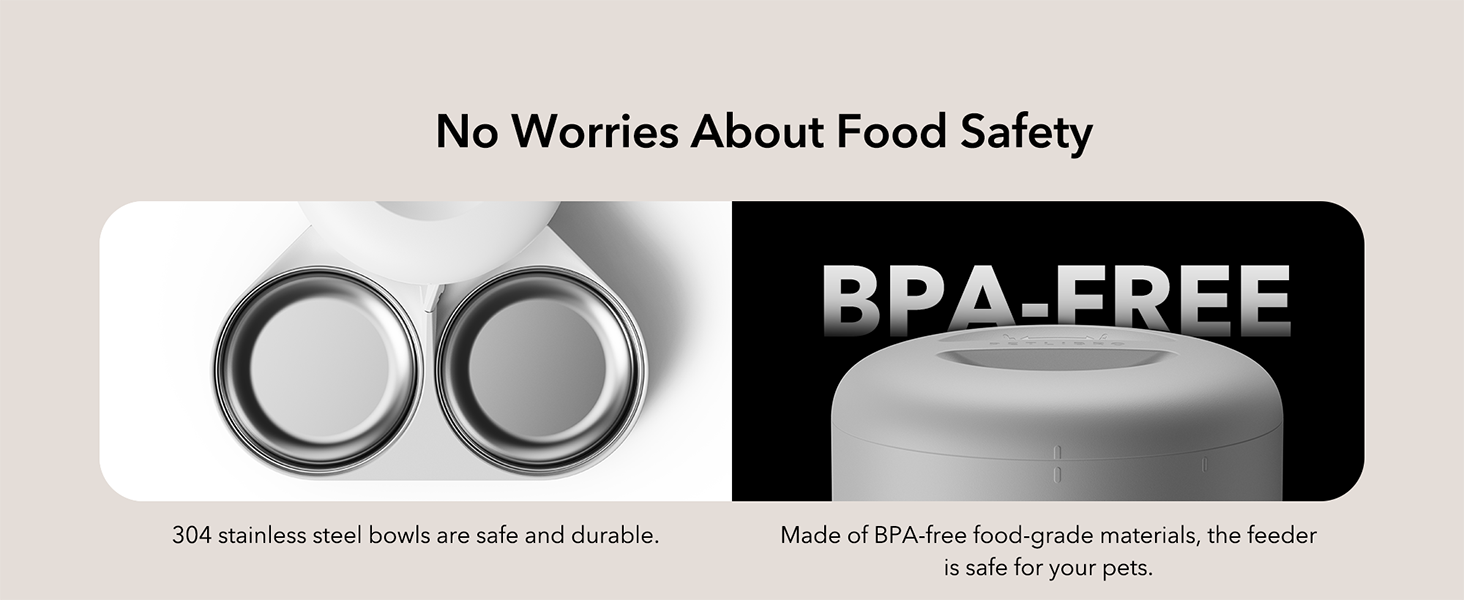
Figure 2.3: The feeder features 304 stainless steel bowls and BPA-free food-grade materials.
3. Guía de configuración
3.1 Desembalaxe e montaxe
- Retire todos os compoñentes da embalaxe.
- Place the feeder base on a flat, stable surface.
- Insert the stainless steel bowls into the ABS food tray.
- Attach the food tray to the main feeder unit.
- Open the lid and place a desiccant bag into the designated compartment to maintain food freshness.
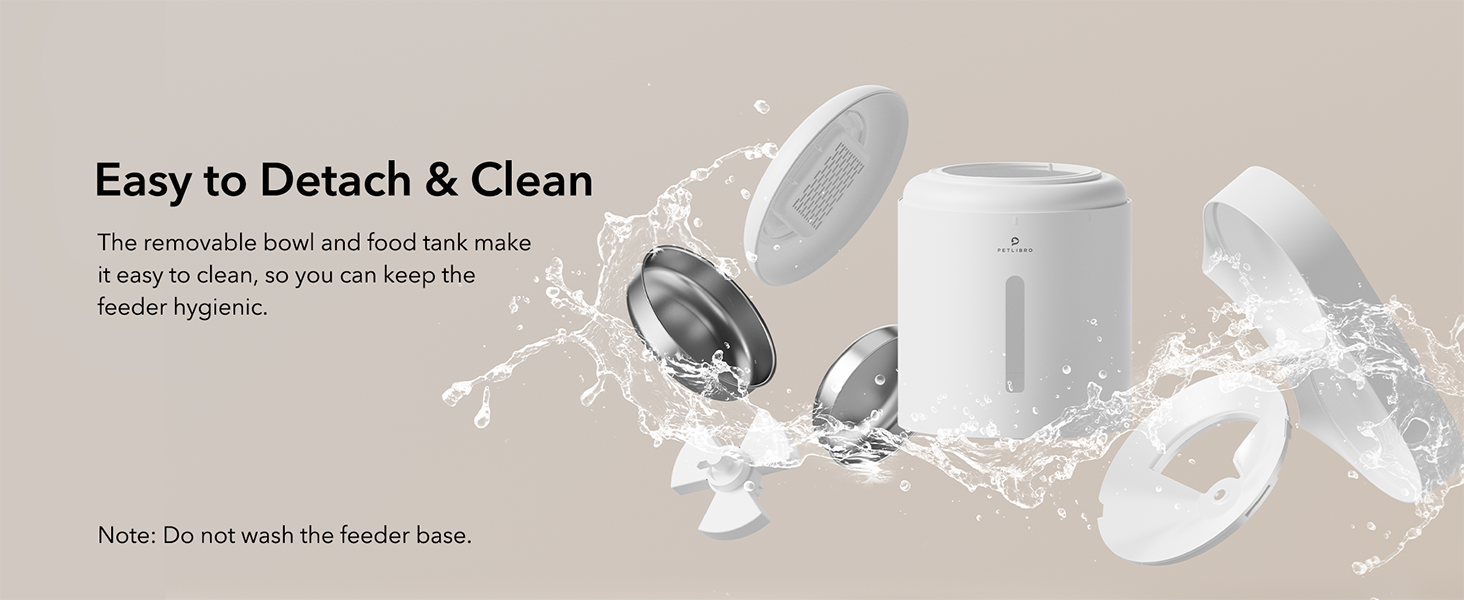
Figura 3.1: Compoñentes desmontables para facilitar a montaxe e a limpeza.
3.2 Fonte de alimentación
The feeder can be powered by the included USB-C adapter or by D-cell batteries for backup.
- Potencia primaria: Connect the USB-C adapter to the feeder and plug it into a wall outlet.
- Copia de seguridade da batería: Para poder outage protection, install 3 D-cell alkaline batteries (not included) into the battery compartment at the bottom of the feeder.
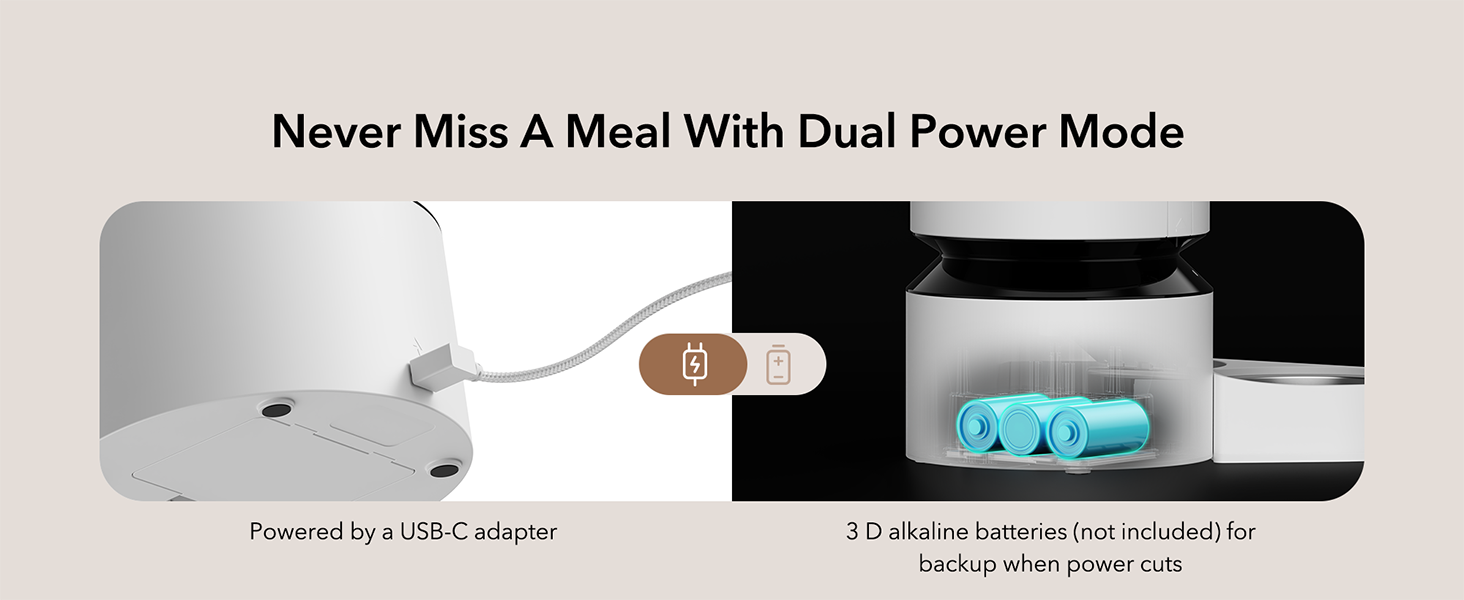
Figure 3.2: Dual power mode with USB-C adapter and D-battery backup.
3.3 Encher o depósito de comida
- Open the top lid by twisting it counter-clockwise.
- Pour dry pet food into the food tank. Ensure the kibble size is between 2-15mm (0.08-0.6 inches).
- Close the lid by twisting it clockwise until it locks securely.
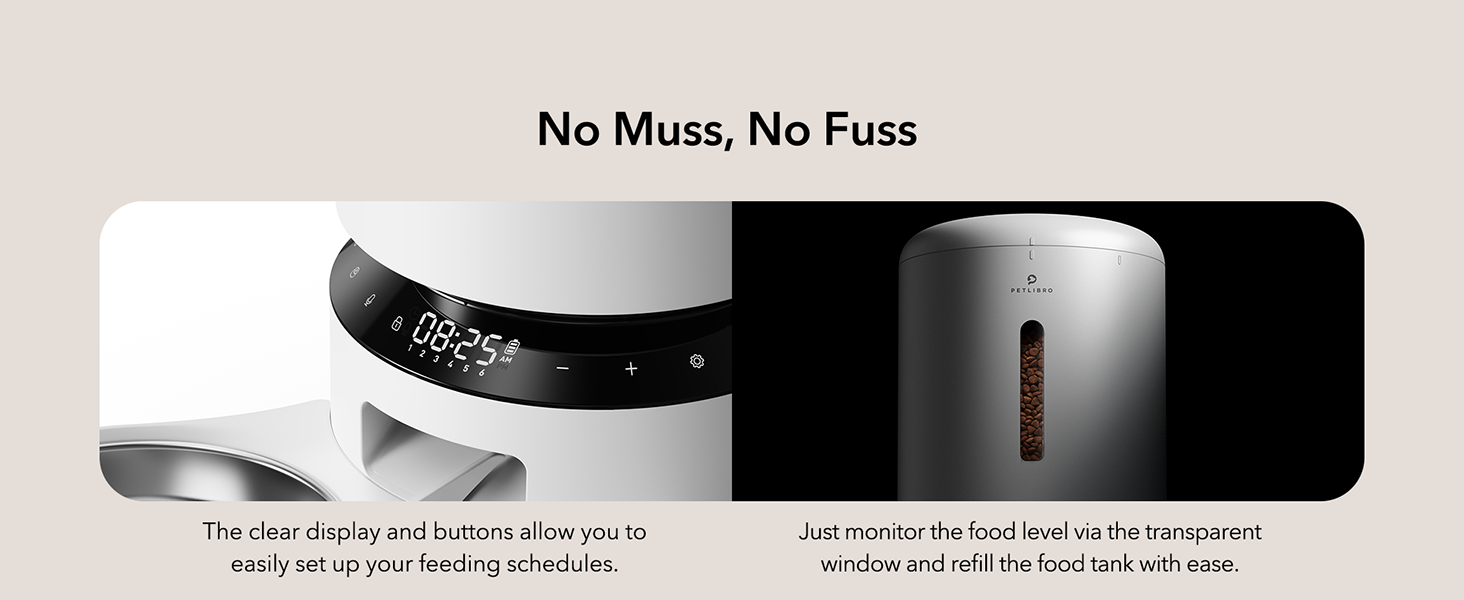
Figure 3.3: Transparent window allows easy monitoring of food level.
4. Instrucións de funcionamento
The feeder's functions are controlled via the intuitive LED panel.

Figure 4.1: The LED control panel for easy operation.
4.1 Setting Meal Times and Portions
- Prema o botón "Set" para entrar no modo de programación.
- Use the '+' and '-' buttons to adjust the current time. Press 'Set' to confirm.
- Proceed to set meal times (up to 6 meals per day) and the number of portions (1-50 portions, 20ml each) for each meal.
- Press 'Set' after each adjustment to confirm and move to the next setting.
- The feeder will automatically save settings after a period of inactivity or by pressing and holding the 'Set' button.
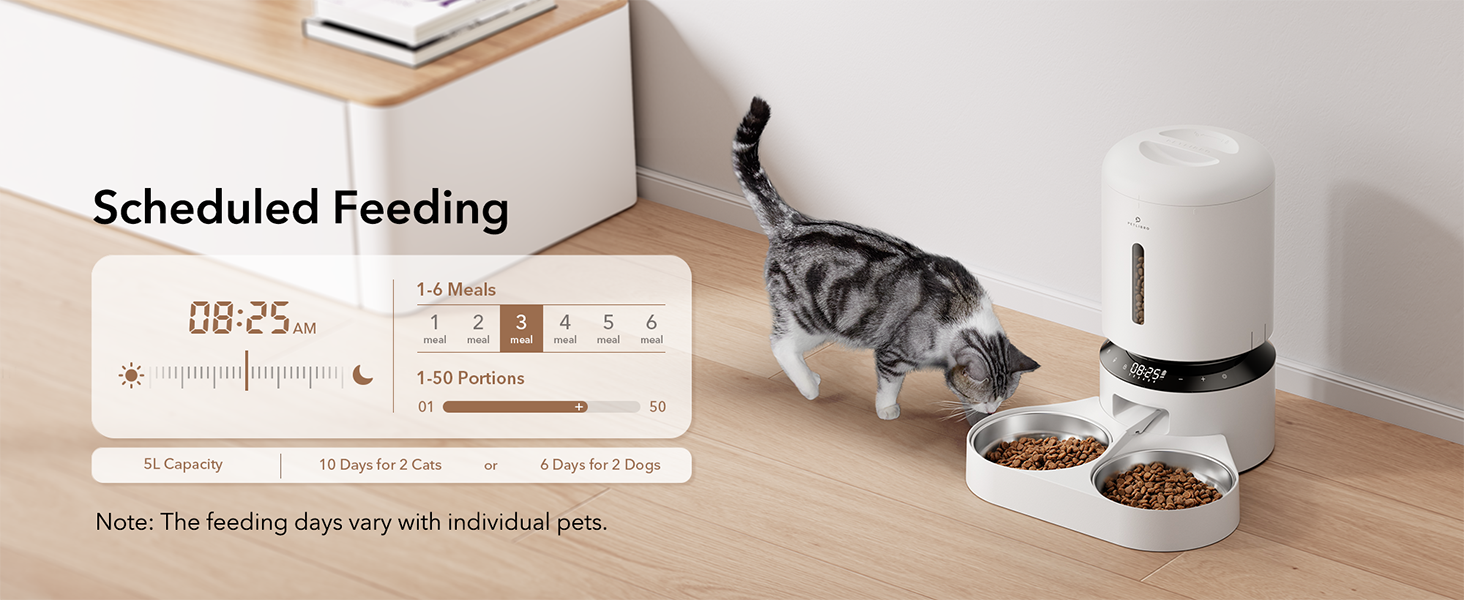
Figura 4.2: Example of scheduled feeding settings on the display.
4.2 Alimentación manual
To dispense food manually, press the manual feed button (often indicated by a paw print or similar icon) on the control panel. Each press typically dispenses one portion, up to a maximum of 5 portions.
4.3 Gravación dunha chamada de comida
- Press and hold the 'Record' button (microphone icon) until you hear a beep.
- Record your 10-second message. Release the button when finished.
- To adjust how many times the message plays (0-5 times) per meal, refer to the programming instructions in section 4.1.
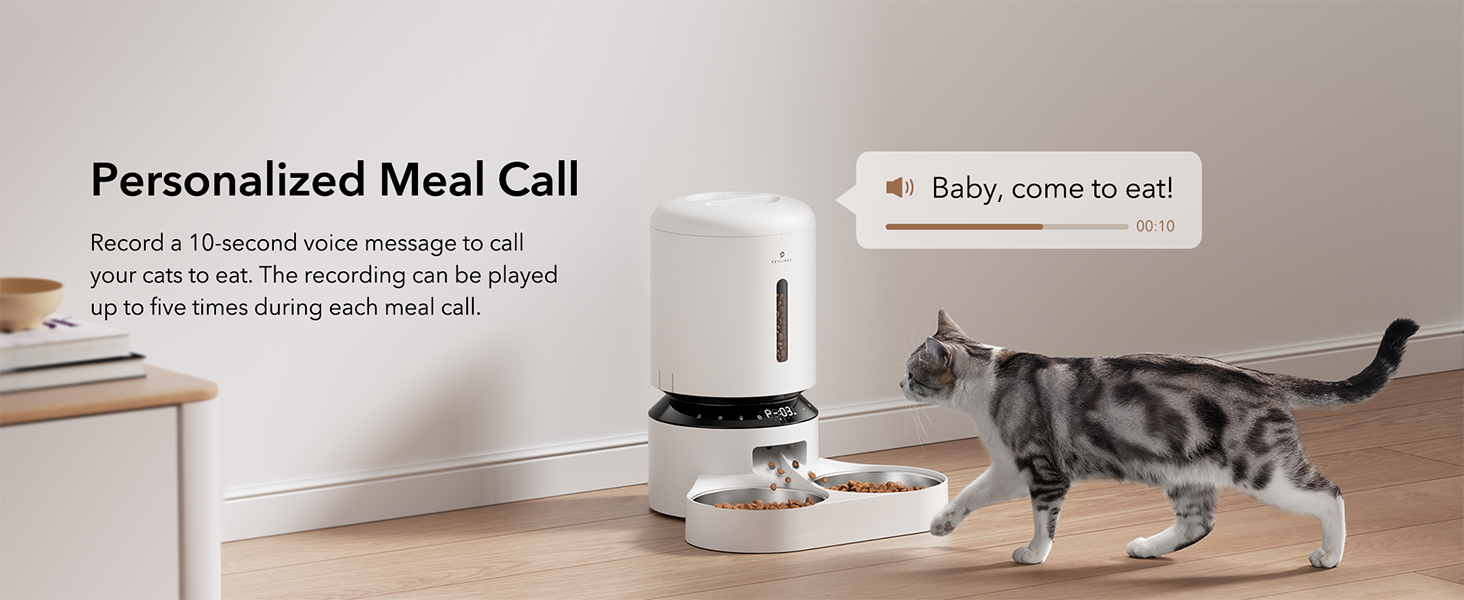
Figure 4.3: Personalized meal call feature to attract pets.
4.4 Adjusting the Meal Splitter
The unique movable meal splitter allows for even distribution or customized portions between the two bowls.
- Locate the meal splitter in the food outlet.
- Gently rotate the splitter to adjust the distribution.
- For even distribution, position the splitter centrally.
- To provide more food to one side, adjust the splitter towards the opposite side.
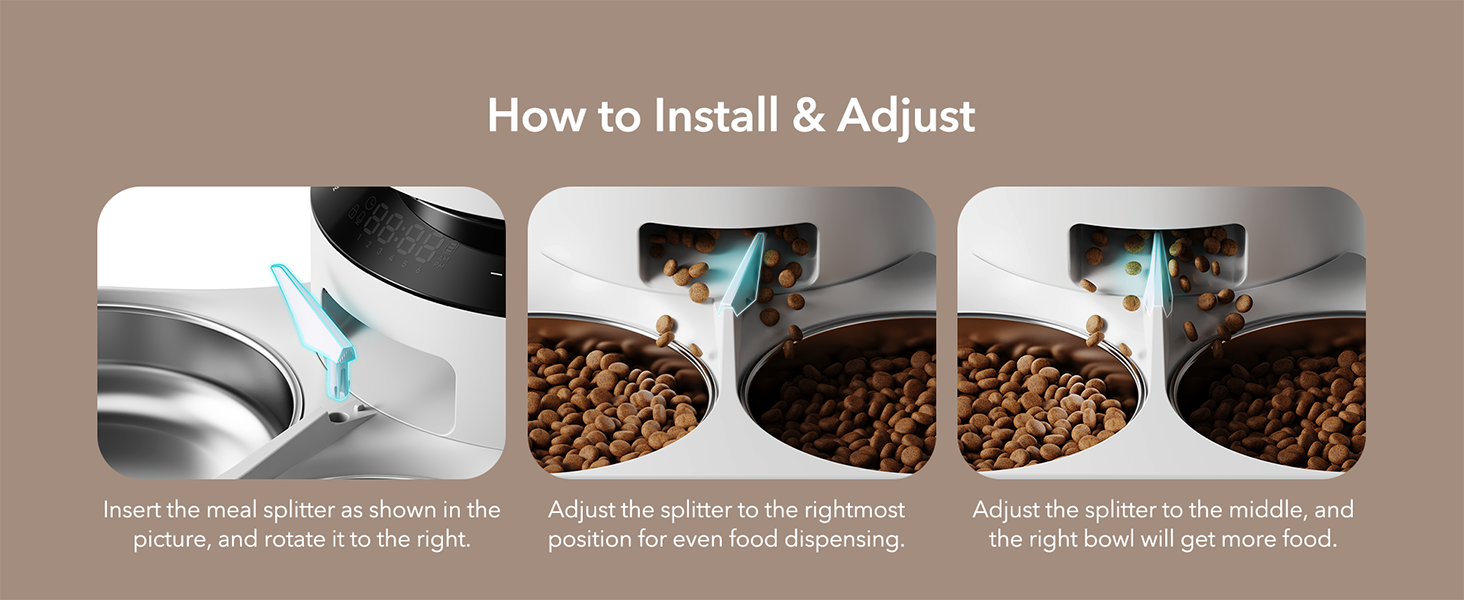
Figure 4.4: Visual guide for installing and adjusting the meal splitter.
5. Mantemento
5.1 Limpeza do alimentador
Unha limpeza regular garante a hixiene e o correcto funcionamento do alimentador.
- Desconecte o alimentador e retire calquera resto de comida.
- Detach the food tank, lid, food tray, and stainless steel bowls.
- Wash the food tank, lid, food tray, and stainless steel bowls with mild soap and water. These parts are dishwasher safe.
- Wipe the feeder base with a soft, damp pano. Do not wash the feeder base directly with water.
- Asegúrese de que todas as pezas estean completamente secas antes de volver a montar.

Figure 5.1: Detachable design allows for thorough cleaning of components.
5.2 Substitución da bolsa desecante
The desiccant bag helps absorb moisture and keep pet food fresh. It is recommended to replace it every two weeks.
- Abra a tapa superior do alimentador.
- Remove the old desiccant bag from its compartment.
- Insert a new desiccant bag.
- Pecha de forma segura a tapa.

Figure 5.2: Desiccant bag compartment for maintaining food freshness.
6 Solución de problemas
If you encounter issues with your PETLIBRO Automatic Pet Food Dispenser, refer to the following common problems and solutions:
| Problema | Causa posible | Solución |
|---|---|---|
| O alimentador non dispensa comida. | Food tank empty; Food outlet blocked; Incorrect settings; Power issue. | Refill food tank. Check for blockages in the food outlet and clear them. Verify meal schedule and portion settings. Ensure power adapter is connected or batteries are installed correctly. |
| Food jamming. | Kibble size too large; Food too moist; Rotor obstruction. | Use dry kibble within the recommended size (2-15mm). Ensure food is dry. Check the rotor for any foreign objects and clean if necessary. |
| O alimentador non se acende. | Power adapter disconnected; Batteries depleted or incorrectly installed. | Check if the power adapter is securely plugged in. Replace D batteries if depleted or ensure they are installed with correct polarity. |
| Meal call not playing. | No message recorded; Volume too low; Playback frequency set to 0. | Record a message (Section 4.3). Check volume settings. Adjust playback frequency in meal settings. |
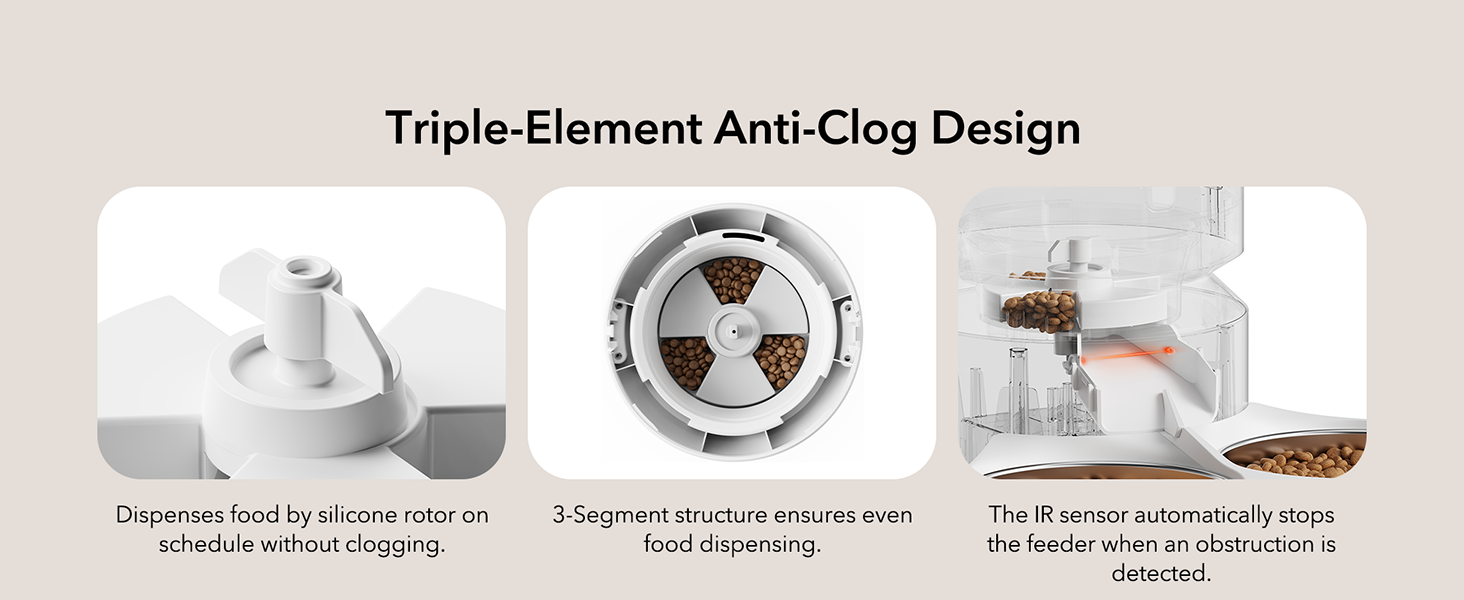
Figure 6.1: Triple-Element Anti-Clog Design helps prevent food jamming.
If the problem persists after trying these solutions, please contact PETLIBRO customer support.
7. Especificacións
| Característica | Especificación |
|---|---|
| Nome do modelo | Granary Feeder Dual Tray |
| Número de modelo | PLAF006 |
| Capacidade | 5 litros |
| Dimensións (LxWxH) | 14.17 x 10.16 x 7.72 polgadas |
| Peso do elemento | 5 libras |
| Material | Stainless Steel (bowls), BPA-free plastic |
| Fonte de alimentación | 5V USB Adapter (included), 3 x D Batteries (not included) |
| Tamaño da croqueta | 2-15mm (0.08-0.6 inches) dry food |
| Comidas por día | 1-6 comidas |
| Porcións por comida | 1-50 portions (approx. 20ml per portion) |
| Compoñentes incluídos | Adaptador USB |
| Especie obxectivo | Gatos, Cans, Pequenos Animais |

Figure 7.1: Recommended kibble size and food types for optimal performance.

Figure 7.2: Recommended daily feeding portions table.
8. Garantía e soporte
8.1 Información da garantía
This PETLIBRO product comes with a 24 meses de garantía desde a data de compra. Conserve o comprobante de compra para reclamacións de garantía.
8.2 Atención ao cliente
For any questions, technical assistance, or warranty claims, please contact PETLIBRO customer support through their official websitio web ou o vendedor onde se comprou o produto.
You can visit the official PETLIBRO store for more information: PETLIBRO Store
9. Recursos de vídeo
No relevant official product videos with creator type 'Seller' were found in the provided data to embed in this manual.


