1. Introdución
This manual provides essential information for the safe and efficient operation, maintenance, and troubleshooting of your Profile GE Automatic Espresso Machine + Milk Frother. Please read these instructions thoroughly before first use and retain for future reference.

Image 1.1: The Profile GE Automatic Espresso Machine with a prepared espresso and a latte.
2. Información de seguridade
Siga sempre as precaucións de seguridade básicas ao usar electrodomésticos para reducir o risco de incendio, descarga eléctrica e lesións ás persoas.
- Ensure the appliance is connected to a grounded outlet.
- Non mergullo a máquina, o cable ou o enchufe en auga ou outros líquidos.
- Desenchufe da toma cando non estea en uso e antes de limpalo.
- Non faga funcionar ningún aparello cun cable ou enchufe danados.
- Manteña as mans e os cables lonxe das superficies quentes.
- Empregue só os accesorios recomendados polo fabricante.
3. Produto rematadoview
O Profile GE Automatic Espresso Machine is designed for convenience and quality, featuring an integrated grinder, milk frother, and smart connectivity.
3.1 Compoñentes
- Panel de control: Touch-sensitive buttons for various drink selections and functions.
- Tolva de feixón: Stores whole coffee beans for grinding.
- Encoro de auga: Depósito extraíble para subministración de auga.
- Boca de café: Dispensa café preparado.
- Varilla de vapor: Para espumar leite.
- Bandexa de goteo: Collects excess liquids.
- Recipiente para posos: Recolle os posos de café usados.

Image 3.1: The top control panel with buttons for Espresso, Americano, My Brew, Steam, and Hot Water.

Image 3.2: The integrated bean hopper with whole coffee beans and grind size adjustment knob.

Image 3.3: The removable water reservoir being lifted from the machine.
4. Configuración
4.1 Desembalaxe e colocación inicial
- Retire con coidado todos os materiais de embalaxe.
- Place the machine on a stable, level surface away from heat sources and direct sunlight.
- Asegúrese de que haxa espazo suficiente arredor da máquina para a ventilación e o acceso aos compoñentes.
4.2 Limpeza inicial
Before first use, clean all removable parts with warm water and mild detergent. Rinse thoroughly and dry. Wipe the exterior of the machine with a damp pano.
4.3 Encher o depósito de auga
- Remove the water reservoir from the machine (refer to Image 3.3).
- Fill with fresh, cold drinking water up to the MAX line.
- Replace the reservoir securely into the machine.
4.4 Engadir grans de café
- Open the lid of the bean hopper (refer to Image 3.2).
- Pour whole coffee beans into the hopper. Do not overfill.
- Pecha a tapa de forma segura.
4.5 Powering On and Initial Rinse
- Enchufe o cable de alimentación a unha toma eléctrica conectada a terra.
- Press the power button on the control panel. The machine will perform an initial rinse cycle.
- Place a container under the coffee spout to collect the rinse water.
4.6 SmartHQ App Connection
For enhanced customization and software updates, connect your espresso machine to the SmartHQ app.
- Download the SmartHQ app from your device's app store.
- Follow the in-app instructions to pair your espresso machine.
- Customize drink preferences, volume, and strength through the app.

Image 4.1: Using the SmartHQ app to control and customize the espresso machine.
5. Instrucións de funcionamento
5.1 Preparación do café
The machine offers Espresso, Americano, Lungo, and Hot Water options. The 'My Cup' setting is pre-set to Ristretto and can be adjusted via the SmartHQ app.
- Ensure the water reservoir is filled and the bean hopper contains coffee beans.
- Coloque unha cunca debaixo do pico do café.
- Select your desired drink (Espresso, Americano, Lungo, My Cup) from the control panel.
- A máquina moerá os grans, preparará e dispensará o café automaticamente.

Image 5.1: The espresso machine dispensing a fresh shot of espresso.
5.2 Axustar o tamaño da moenda
The integrated conical burr grinder allows for 5 levels of grind size adjustment, from coarsest to finest, to optimize flavor extraction.
- Locate the grind size adjustment knob inside the bean hopper (refer to Image 3.2).
- Turn the knob to select your desired grind setting. Finer grinds are suitable for espresso, while coarser grinds are better for longer coffee types.
5.3 Using the Steam Frother
The steam frother creates various milk textures for cappuccinos, lattes, and more.
- Fill the included stainless steel frothing pitcher with cold milk.
- Position the steam wand into the milk.
- Prema o botón "Vapor" no panel de control.
- Move the pitcher to achieve desired foam texture.
- Once finished, press the 'Steam' button again to stop.
- Immediately clean the steam wand after each use to prevent milk residue buildup.
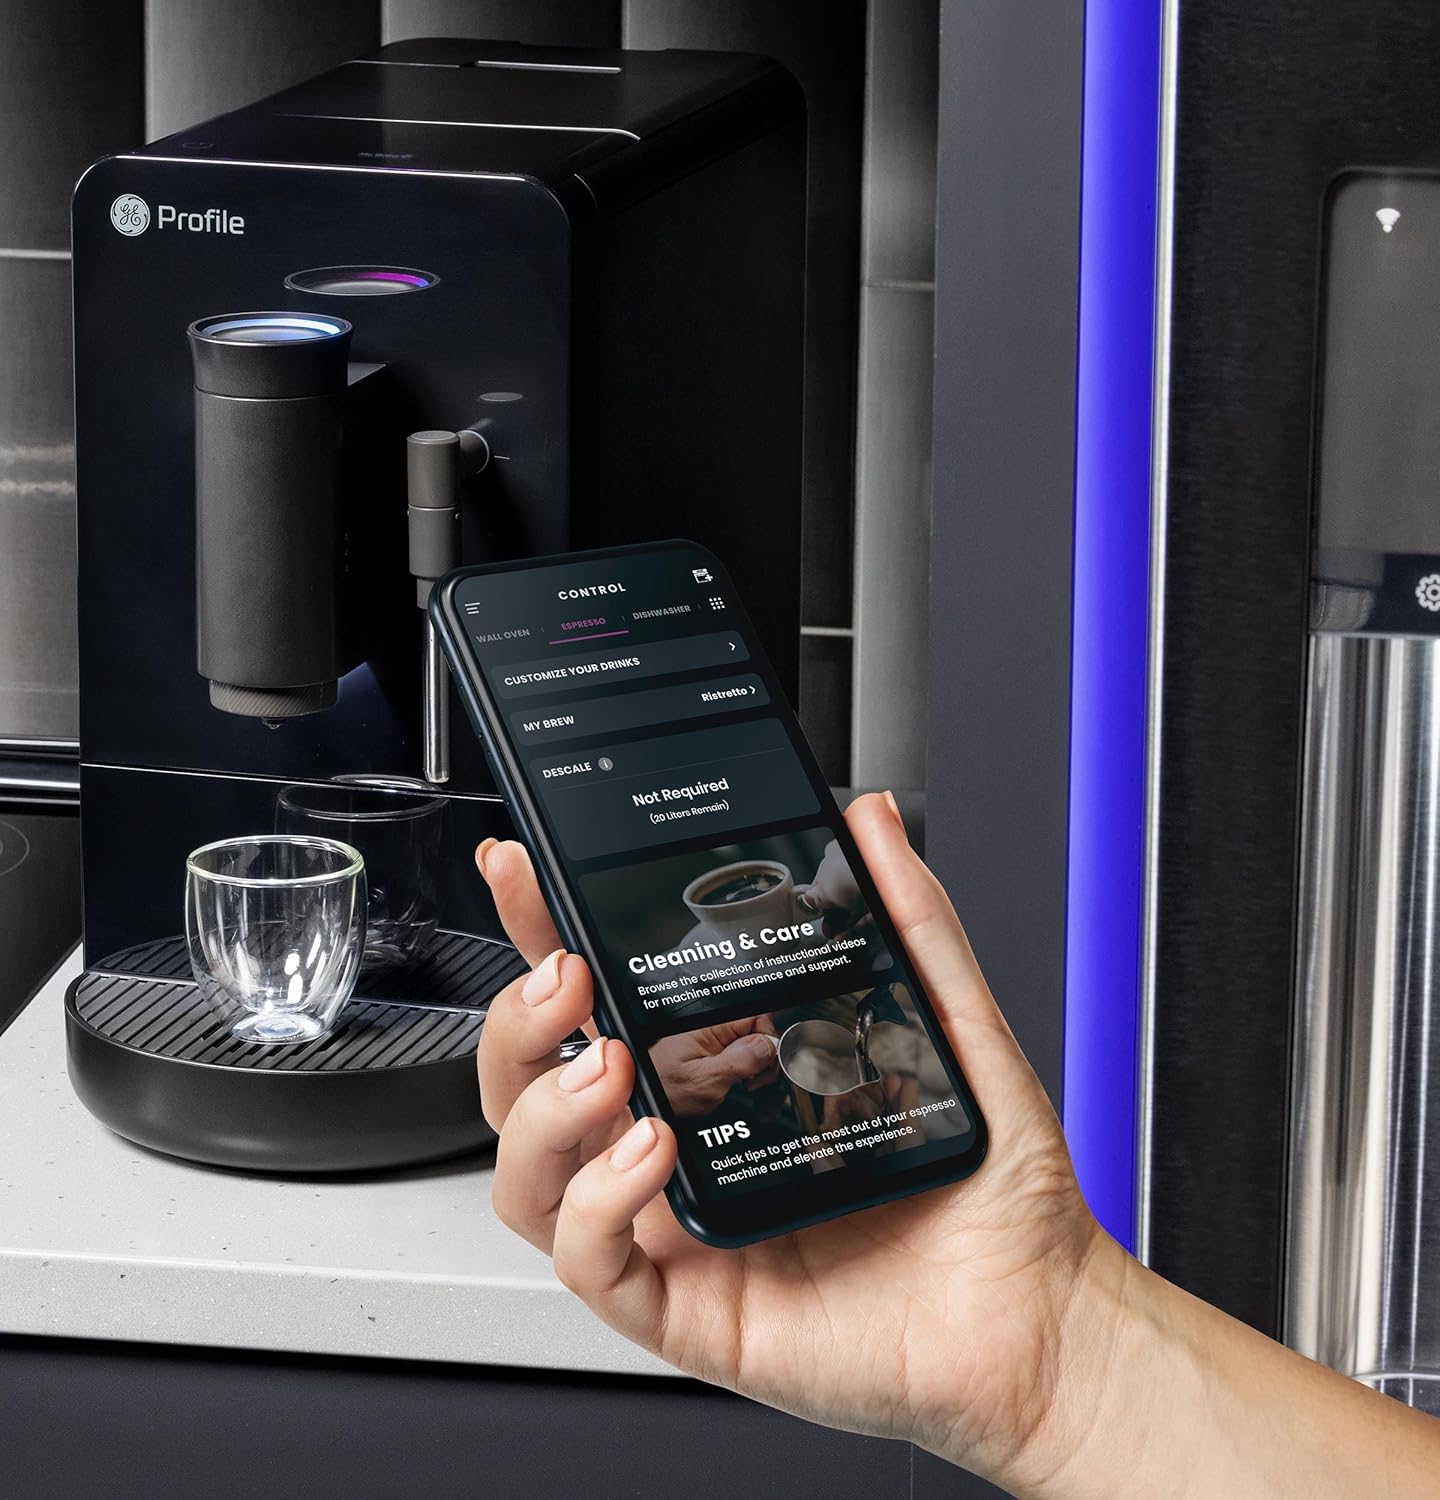
Image 5.2: A hand using the steam wand to froth milk in a stainless steel pitcher.
6. Mantemento
A limpeza e o mantemento regulares garanten un rendemento óptimo e unha maior duración da súa máquina de café expreso.
6.1 Limpeza diaria
- Varilla de vapor: Despois de cada uso, limpe a lanza de vapor cun adornoamp cloth. Purge steam briefly to clear any milk residue from the nozzle.
- Bandexa de goteo e recipiente para posos: Baleirar e enxaugar diariamente. A máquina indicará cando sexa necesario baleirar o recipiente de posos.
- Encoro de auga: Enxágüe diariamente e volva encher con auga fresca.
6.2 Limpeza semanal
- Unidade de elaboración: The brew unit is typically removable for rinsing under running water. Refer to the included cleaning kit instructions for detailed steps.
- Tolva de feixón: Periodically clean out any oil residue or old beans.
6.3 Descalcificación
The machine will prompt you when descaling is required. Use a descaling solution specifically designed for espresso machines and follow the instructions provided with the descaling agent or in the SmartHQ app.
7 Solución de problemas
Esta sección aborda problemas comúns que podes atopar coa túa máquina de café expreso.
| Problema | Causa posible | Solución |
|---|---|---|
| No coffee dispensed / "Add Beans" message | Bean hopper empty or beans not feeding correctly. | Refill bean hopper. Gently stir beans to ensure they feed into the grinder. |
| O café é demasiado feble ou aguado | Grind size too coarse, insufficient coffee dose, or descaling needed. | Adjust grind size to a finer setting. Check SmartHQ app for strength settings. Perform descaling if prompted. |
| O leite non espuma correctamente | Steam wand clogged, milk type unsuitable, or insufficient steam pressure. | Clean steam wand thoroughly. Use fresh, cold milk. Ensure machine is heated to steam temperature. |
| A máquina non se acende | Non conectado, apagadotage, or circuit breaker tripped. | Check power connection. Verify power outlet functionality. Reset circuit breaker if necessary. |
| SmartHQ app connectivity issues | Incorrect Wi-Fi password, network interference, or app bug. | Verify Wi-Fi credentials. Ensure machine is within Wi-Fi range. Restart app and machine. Check for app updates. |
8. Especificacións
- Marca: Profile
- Nome do modelo: GE Profile Automatic Espresso Machine + Frother
- Número de modelo do artigo: P7CEBBS6RBB
- Cor: Negro
- Dimensións do produto: 7" D x 16" W x 12.5" H
- Peso do artigo: 16 libras
- Voltage: 120 V
- Modo de operación: Totalmente automático
- Características especiais: Built-In Bean Hopper, Built-In Conical Burr Grinder & Adjustable Grind Size, Programmable My Brew Setting, Steam Frother & Frothing Pitcher, WiFi Connected
- Compoñentes incluídos: Cleaning Kit, Coffee Bean Container, Espresso Machine, Steam Wand, Milk Pitcher, Water Tank
- Tipo de entrada de café: Fabas enteiras
- Entrada da interface humana: Pantalla táctil

Image 8.1: Product dimensions of the espresso machine.
9. Garantía e soporte
This product is covered by a manufacturer's warranty. For specific warranty details, registration, or technical support, please refer to the warranty card included with your product or visit the official GE Profile website. You may also contact customer service through the SmartHQ app for assistance.


