1. Introdución
The Surfola SD310 Dual Dash Camera is designed to record video footage from both the front and rear of your vehicle, providing comprehensive coverage for your journeys. This manual provides detailed instructions for the proper installation, operation, and maintenance of your dash camera.
2. Contido do paquete
Comprobe o contido do paquete para asegurarse de que estean presentes todos os elementos:
- Surfola SD310 Front Camera
- Cámara traseira
- Cargador de coche
- Montaxe de succión
- Crowbar (for cable management)
- Manual de usuario
- Pin & USB Cable

Image: All components included in the Surfola SD310 Dual Dash Camera package, laid out on a grey surface.
3. Produto rematadoview
The Surfola SD310 features a compact design with a 3-inch IPS screen. It offers dual-channel recording with a 1440P front camera and 720P rear camera, providing a wide 170-degree view for the front camera. Key features include Super Night Vision, Wide Dynamic Range (WDR), Loop Recording, Parking Mode, and Emergency Lock.
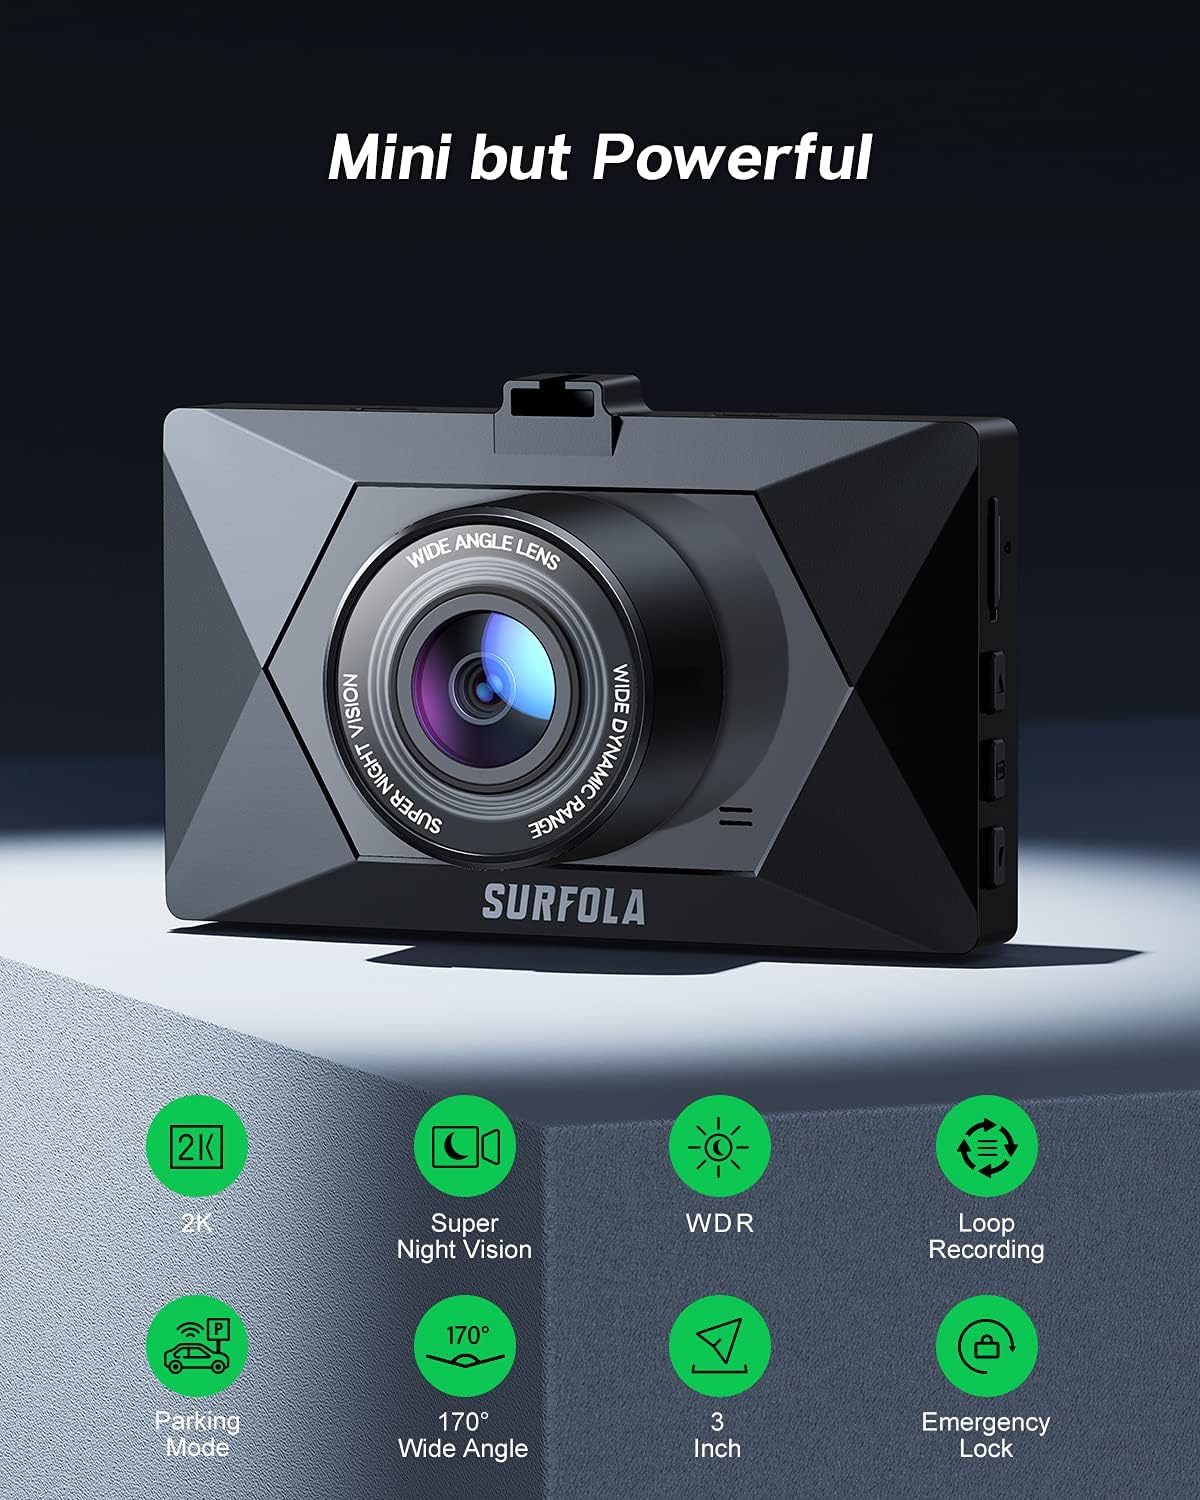
Imaxe: Fronte view of the Surfola SD310 dash camera, highlighting its compact size and various features such as 2K resolution, Super Night Vision, WDR, Loop Recording, Parking Mode, 170-degree Wide Angle, 3-inch screen, and Emergency Lock.
4. Configuración e instalación
Follow these steps for proper installation of your dash camera:
- Prepare a tarxeta Micro SD: Insert a high-speed Micro SD card (Class 10 or higher, up to 128GB, not included) into the dash camera's SD card slot. Ensure the card is formatted within the camera settings before first use.
- Montar a cámara frontal: Attach the suction mount to the front camera and then firmly press the suction cup onto a clean, dry area of your windshield, preferably behind the rearview mirror, to ensure it does not obstruct your view.
- Conectar enerxía: Plug the car charger into your vehicle's cigarette lighter socket and connect the other end to the dash camera's power input. Route the cable neatly along the windshield and dashboard using the provided crowbar to tuck it under trim panels.
- Instalar a cámara traseira (opcional): If using the rear camera, connect it to the main unit and mount it on the rear windshield. Route the cable carefully to avoid interference with vehicle operations.
- Axustar o ángulo da cámara: Power on the camera and adjust the lens angle to capture the desired view of the road ahead. Ensure the horizon is level and important details are visible.

Image: Visual guide demonstrating the easy installation of the dash camera, showing how to insert the SD card and attach the suction mount to the windshield.
5. Instrucións de funcionamento
The Surfola SD310 dash camera is designed for straightforward operation. Here are the basic functions:
- Encendido/apagado: The camera will automatically power on and begin recording when your vehicle starts (receiving power from the car charger). It will power off automatically when the vehicle is turned off. You can also manually power it on/off by pressing and holding the power button.
- Modos de gravación: The camera supports various recording modes, including continuous loop recording, parking monitoring, and emergency recording triggered by the G-sensor.
- Navegación do menú: Use the physical buttons on the side of the camera to navigate through the menu options displayed on the 3-inch IPS screen.
- Reprodución: Access recorded videos and photos through the playback menu on the device.
Video: A demonstration of the Surfola SD310's daytime video quality, showing clear footage from the front camera while driving on a road.
6. Características clave
6.1 Dual Recording
The SD310 offers simultaneous recording from both the front (1440P) and rear (720P) cameras, capturing a broader perspective of events around your vehicle.

Image: Illustration showing the dual recording capability of the dash camera, with a primary view of the road ahead and a smaller inset image representing the rear view.
6.2 Supervisión nocturna
Equipped with advanced sensors, the dash camera provides enhanced visibility and clear recordings even in low-light conditions, helping to capture details like license plates and road signs at night.
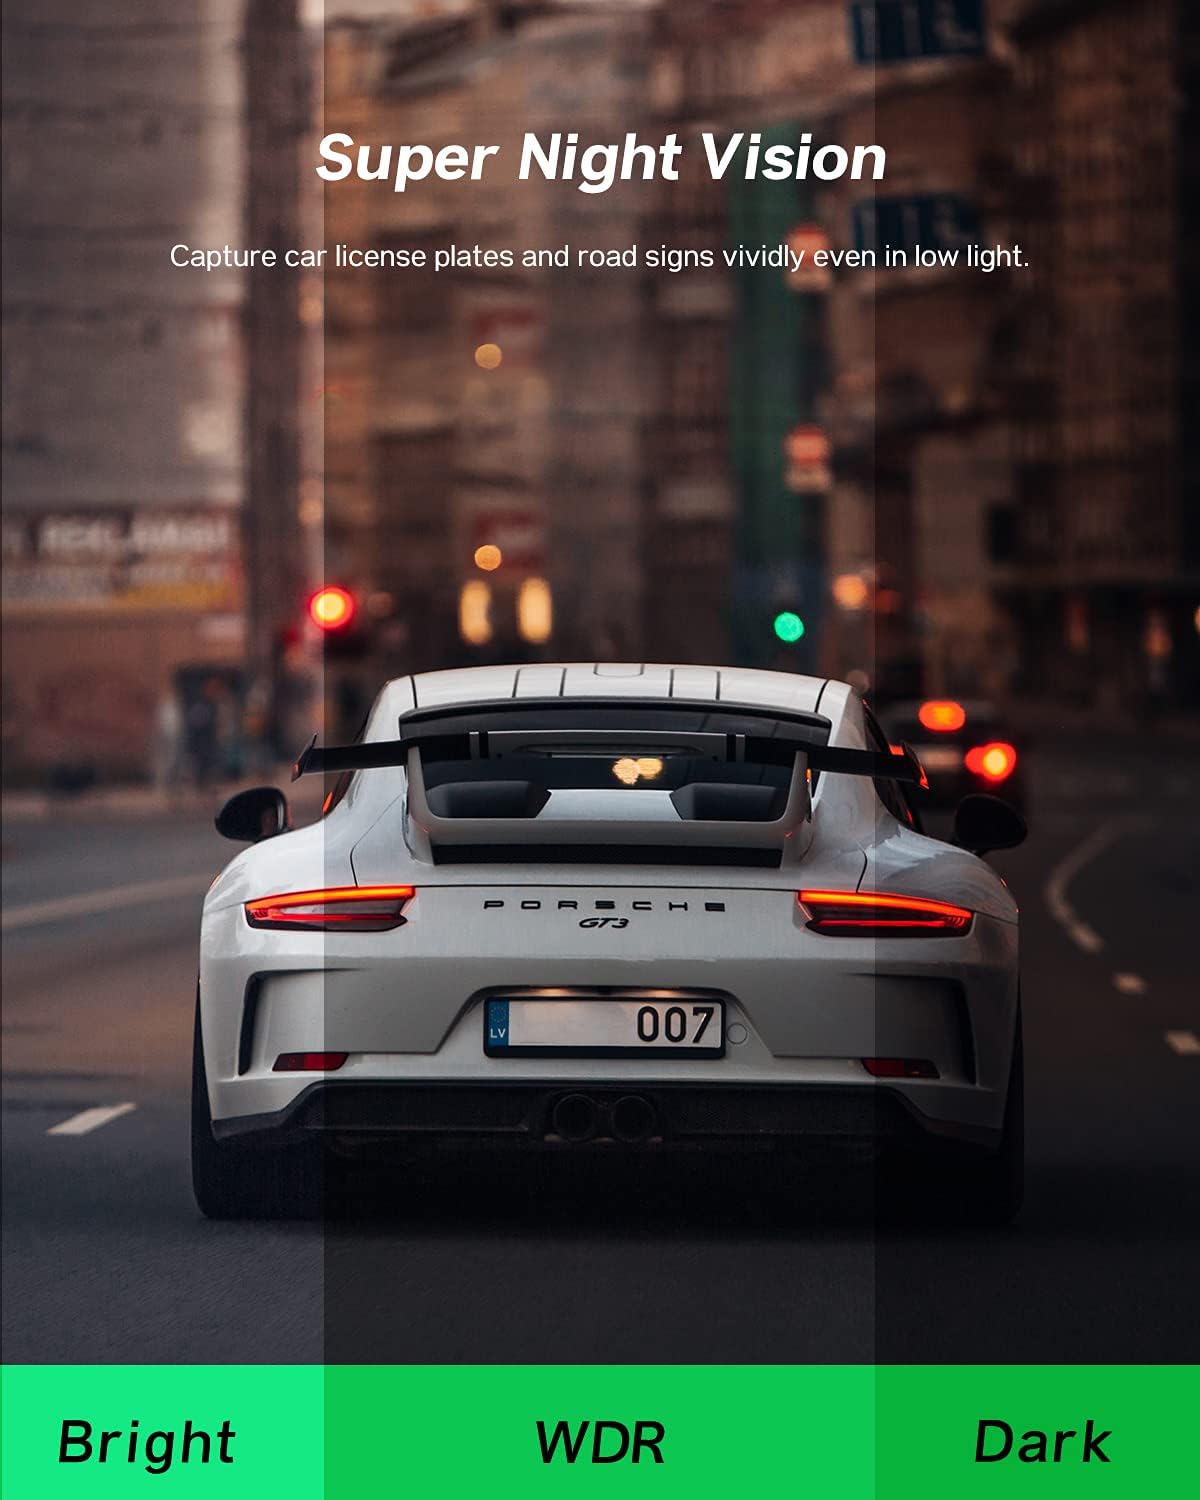
Image: A comparison showing the effectiveness of Super Night Vision, with sections labeled 'Bright', 'WDR', and 'Dark' to illustrate improved clarity in varying light conditions.
6.3 Modo de estacionamento as 24 horas
When enabled, the parking mode feature monitors your vehicle for impacts or motion even when parked. If an event is detected, the camera will automatically record and save the footage, providing security for your parked car.
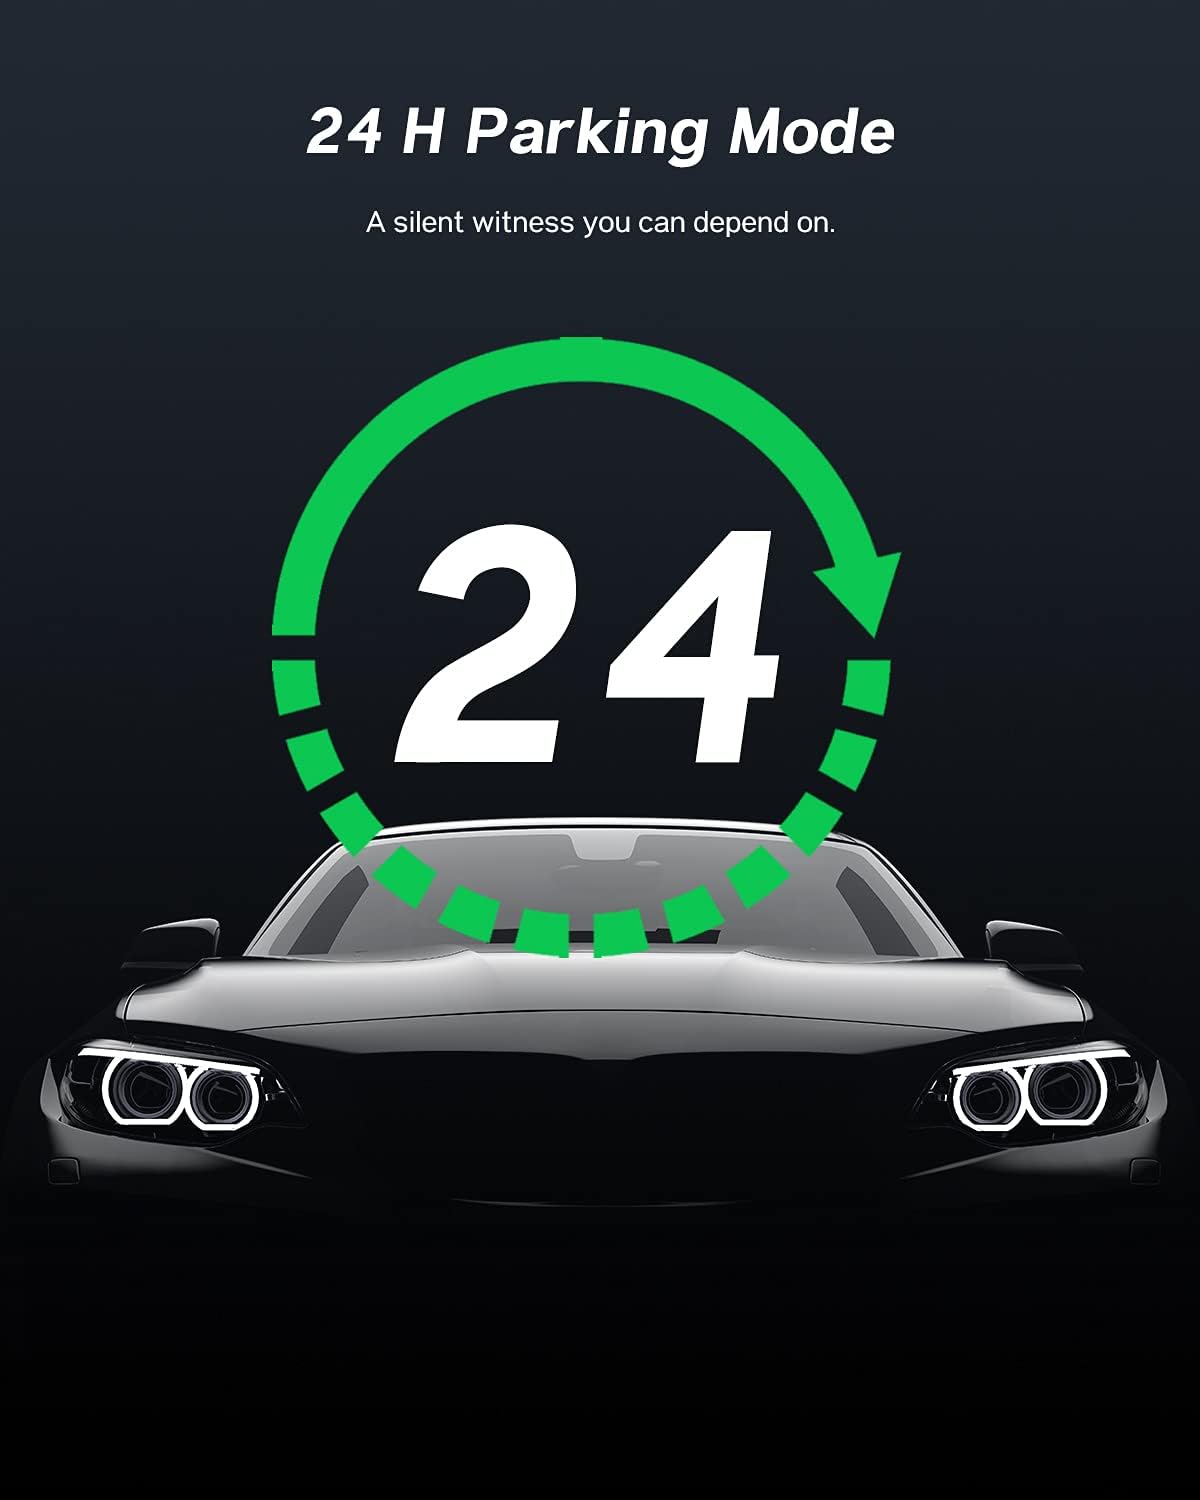
Image: Graphic illustrating the 24-hour parking mode feature, with a clock icon indicating continuous monitoring and a car silhouette.
6.4 Bloqueo de emerxencia (sensor G)
The built-in G-sensor detects sudden movements or collisions. In such an event, the current video segment is automatically locked and protected from being overwritten by loop recording, ensuring critical footage consérvase.
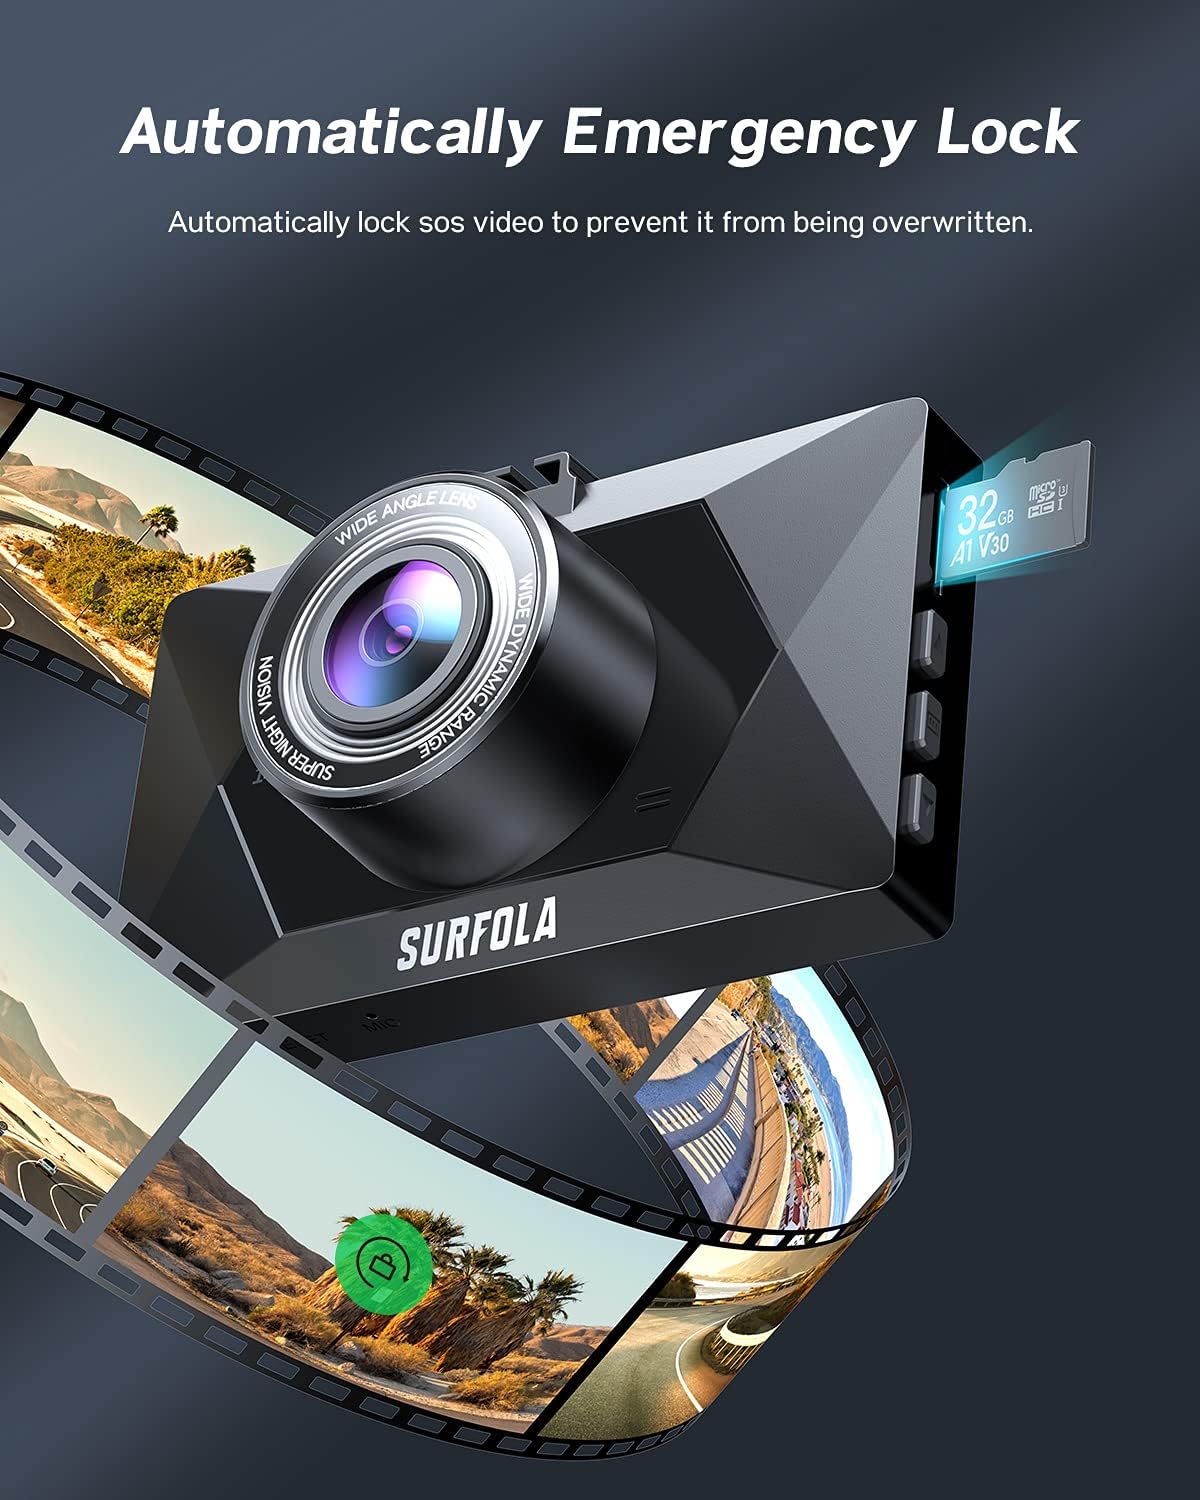
Image: The dash camera with a visual representation of video frames surrounding it, indicating the automatic locking of footage during an emergency event.
6.5 170° Wide Angle Lens
The front camera features a 170-degree ultra-wide-angle lens, capable of monitoring up to three lanes of traffic without significant distortion, providing a comprehensive view da estrada.
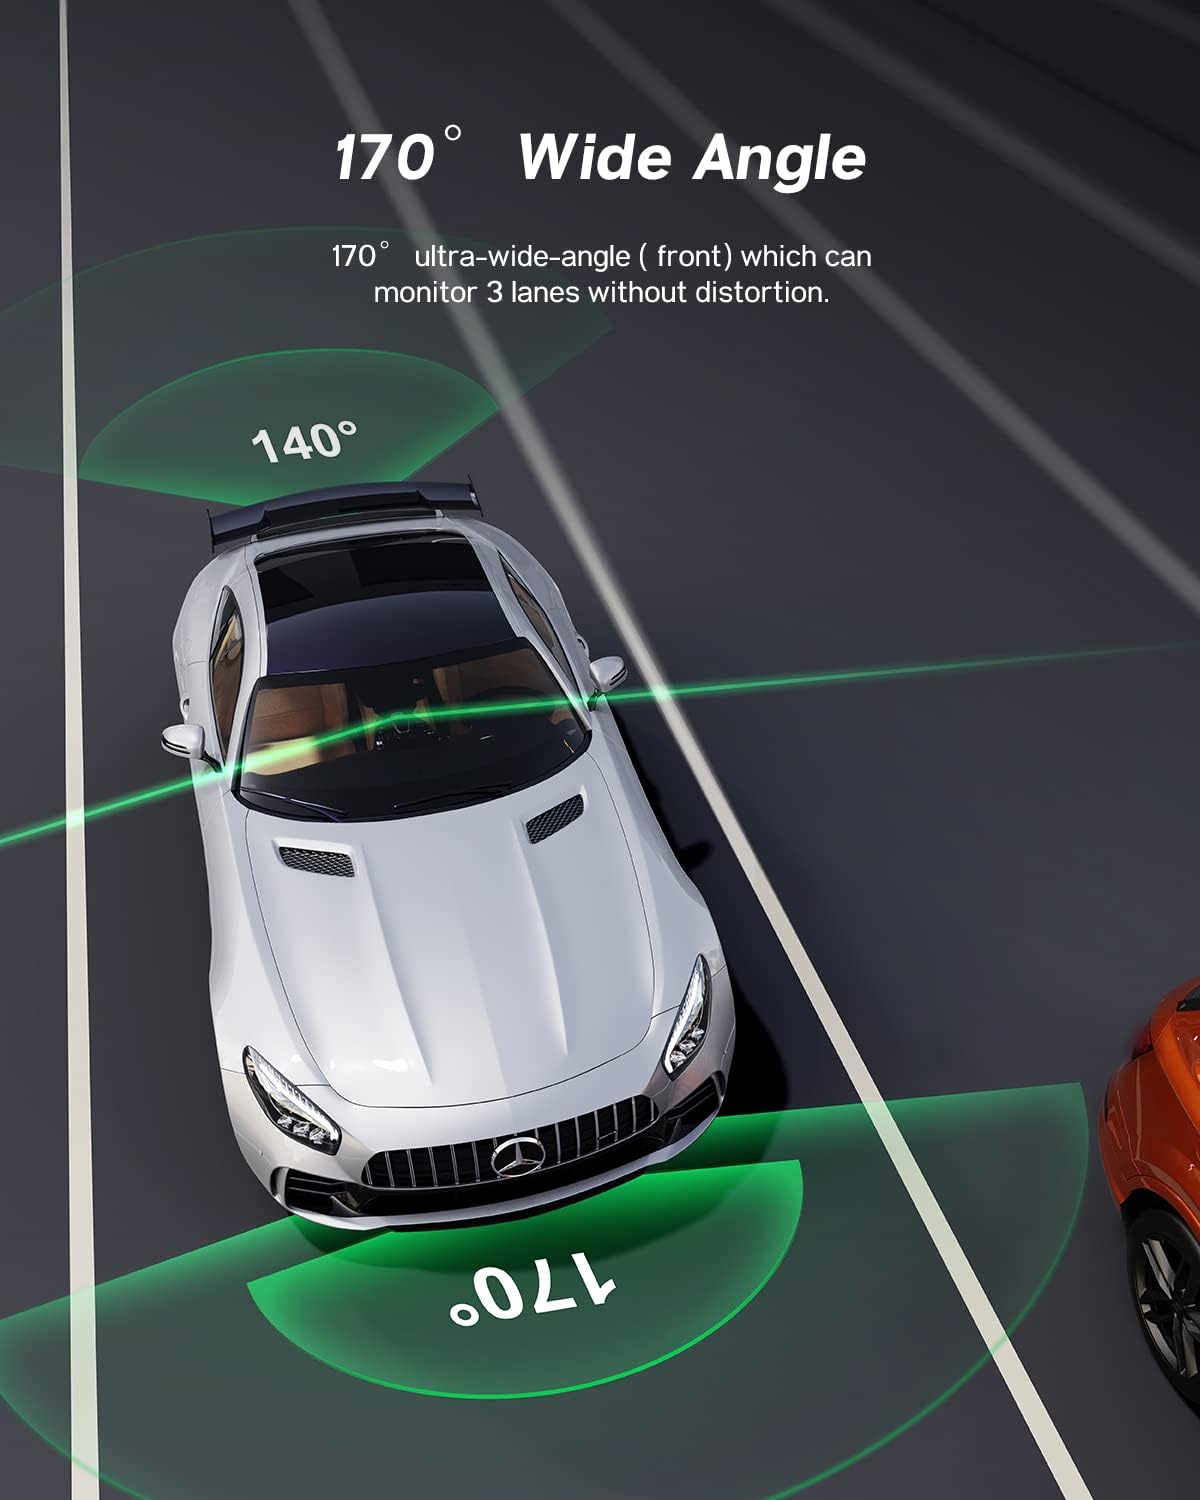
Imaxe: Unha vista superior view of a car on a multi-lane road, with green arcs illustrating the 170-degree and 140-degree wide-angle coverage provided by the dash camera.
7. Especificacións
| Característica | Especificación |
|---|---|
| Dimensións do produto | 3.5 x 2.17 x 1.16 polgadas |
| Peso do elemento | 15.8 onzas |
| Tecnoloxía de conectividade | USB |
| Resolución de captura de vídeo | Front: 1440P, Rear: 720P |
| Tipo de montaxe | Montaxe de succión |
| Método de control | Touch (IPS Screen) |
| Tamaño da pantalla | 3 polgadas |
| Tipo de memoria flash | SD (Micro SD, Class 10 or higher, up to 128GB) |
| Posición de pezas de automóbiles | Fronte |
8. Mantemento
To ensure optimal performance and longevity of your Surfola SD310 Dash Camera, follow these maintenance guidelines:
- Formato regular: Format the Micro SD card regularly (e.g., once a month) to prevent data corruption and ensure smooth recording. Back up any important files antes de formatar.
- Limpar a lente: Gently clean the camera lenses with a soft, lint-free cloth to remove dust or smudges that could affect video quality.
- Montaxe segura: Periodically check that the suction mount is securely attached to the windshield to prevent the camera from falling.
- Control de temperatura: Avoid exposing the camera to extreme temperatures for extended periods, as this can affect battery life and internal components.
- Xestión de cables Ensure all cables are properly routed and secured to prevent them from interfering with driving or becoming damaged.
9 Solución de problemas
If you encounter issues with your Surfola SD310 Dash Camera, refer to the following common troubleshooting steps:
- A cámara non se acende: Ensure the car charger is properly connected to both the camera and the vehicle's power outlet. Check if the vehicle's power outlet is functioning.
- Camera repeatedly asks to format the memory card: This often indicates an issue with the SD card. Try formatting the card within the camera's settings. If the issue persists, replace the SD card with a new, high-quality Class 10 (or higher) Micro SD card.
- Mala calidade de vídeo: Clean the camera lenses. Ensure the protective film has been removed from the lens. Check the video resolution settings in the camera menu.
- Camera falls from mounting cup: Ensure the windshield surface is clean and dry before attaching the suction cup. Press firmly to create a strong seal. If the suction cup is old or damaged, it may need replacement.
- Os botóns non responden: Try resetting the camera using the reset button (if available) or by disconnecting and reconnecting the power.
- Loop recording not working: Ensure loop recording is enabled in the settings and that there is sufficient space on the SD card. Locked files from emergency recordings will not be overwritten.
10. Garantía e soporte
For warranty information and customer support, please refer to the documentation included with your product or visit the official Surfola websitio. Garde o recibo da compra como xustificante de compra para reclamacións de garantía.